Posts with «raspberry pi» label
Interview with Pinoccio Co-Founder Eric Jennings
 Eric Weddington, marketing manager for open source and communities at Atmel, posted an in-depth interview with Pinoccio's Eric Jennings. Pinnoccio is a new, open source hardware company. Their first product is a microcontroller board aimed at creating “a complete ecosystem" for the internet of things. Pinoccio calls their board an "Arduino Mega with wings." It's Raspberry Pi-friendly, too.
Pair of musical hacks use sensor arrays as keyboards

This pair of musical keyboard hacks both use light to detect inputs. The pair of tips came in on the same day, which sparks talk of consipiracy theory here at Hackaday. Something in the weather must influence what types of projects people take on because we frequently see trends like this one. Video of both projects is embedded after the jump.
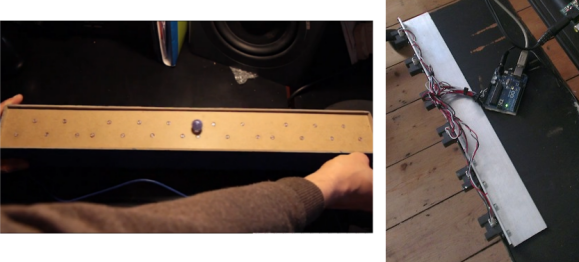
On the left is a light-sensitive keyboard which [Kaziem] is showing off. In this image he’s rolling a marble around on the surface. As it passes over the Cadmium Sulfide sensors (which are arranged in the pattern of white and black keys from a piano keyboard) the instrument plays pitches based on the changing light levels. [Thanks Michael via Make]
To the right is [Lex's] proximity sensor keyboard. It uses a half-dozen Infrared proximity sensor which pick up reflected light. He calls it a ‘quantised theremin’ and after seeing it in action we understand why. The overclocked Raspberry Pi playing the tones reacts differently based on distance from the keyboard itself, and hand alignment with the different sensors.
Filed under: musical hacks

Network Enabled ShapeOko CNC Uses Raspberry Pi and Alamode
 Kevin Osborn was tired of worrying about getting dust from his ShapeOko CNC mill into his computer. Using a Raspberry Pi and an AlaMode shield he can now send G-Code to the machine over his wireless network, leaving his computer clean and available for other tasks. According to Kevin, "this is of the simplest and most rewarding applications of AlaMode."
Harry Potter location clock spies on your smart phone

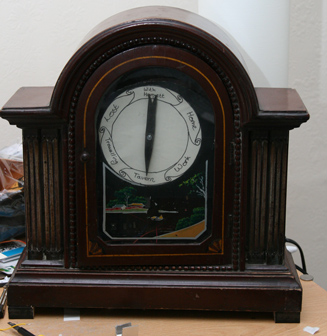
The location clock found in the Harry Potter books makes for a really fun hack. Of course there’s no magic involved, just a set of hardware to monitor your phone’s GPS and a clock face to display it.
[Alastair Barber] finished building the clock at the end of last year as a Christmas gift. The display seen above uses an old mantelpiece clock to give it a finished look. He replace the clock face with a print out of the various locations known to the system and added a servo motor to drive the single hand. His hardware choices were based on what he already had on hand and what could be acquired cheaply. The an all-in-one package combines a Raspberry Pi board with a USB broadband modem to ensure that it has a persistent network connection (we’ve seen this done using WiFi in the past). The RPi checks a cellphone’s GPS data, compares it to a list of common places, then pushes commands to the Arduino which controls the clock hand’s servo motor. It’s a roundabout way of doing things but we imagine everything will get reused when the novelty of the gift wears off.
Filed under: gps hacks

Maker Shed Microcontroller Quick Reference Chart
Replacement controllers for slot car racing

That blur on the right is a car racing into the frame. But look around the rest of the image and you’ll see the area is littered with extra hardware. [Matthew], [Doug], and [Barry] have been hard at work adding extra functionality and replacing the original controllers on this Scalextric slot car setup. So far it looks like their build log has not caught up with all the work they’ve done. We’re hoping to learn more details as they have time to write about them (this is coursework at University so we’re sure there’s a lot on their plates). But for now there are several videos and a gallery of images to drool over.
The cars are controlled by the voltage level in the track. The team replaced the stock controllers with a Raspberry Pi. It manages that voltage using Pulse-Width Modulation via MOSFETs. This allows the races to be automated but also makes it simple for a human operator to use just about any input device imaginable to control the cars. For good measure they also added a lap counter that uses an IR LED and detector to sense when a car passes the finish line.
After viewing several of their videos we think the goal of the project is to log the fasts times without sending the cars flying off the tracks during the turns.
Filed under: Raspberry Pi, toy hacks

RasPi and Arduino-Controlled Weather Station
Paperduino Pi

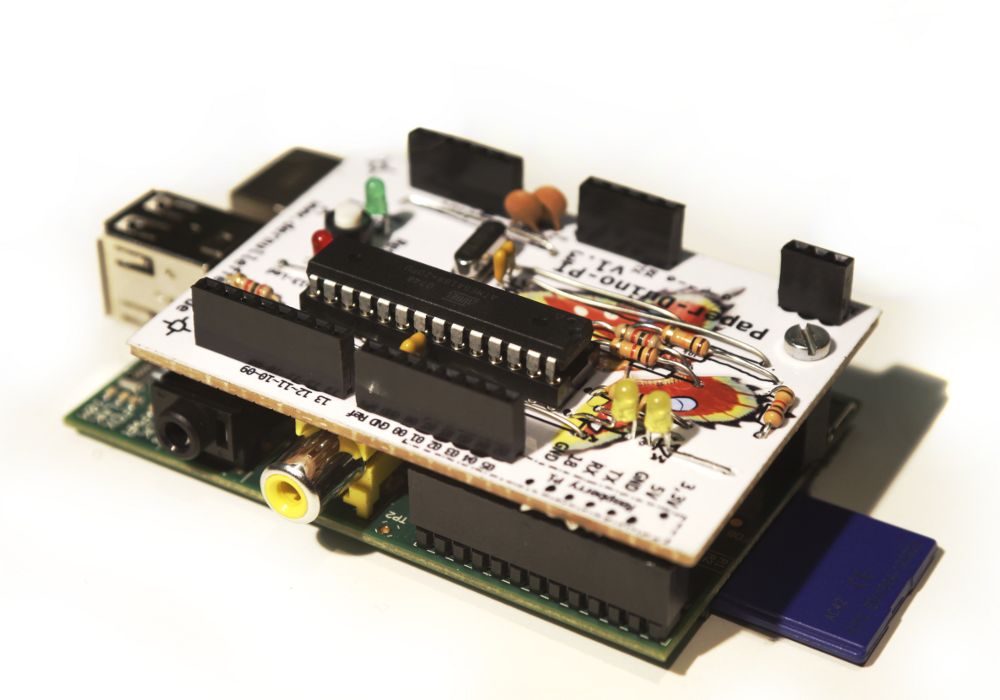
This is a project for people a little bit skilled in soldering and design PCB. The user [dernulleffekt] designed an homemade shield for Raspberry Pi that integrate an Arduino Board.
The Paper-Duino-Pi is an Arduino shield for the Raspberry Pi. Due to the fact that it is designed as Paper-PCB it is easy to create and one doesn’t need a printed circuit board. Some small modificaten in the OS and IDE and you have a perfect interface for the Raspberry Pi.
This [video] shows how one can use it with the Firmata and Pure Data. On the [website] there is a very well written tutorial to build your Raspberry/Arduino shield at home.


