Posts with «raspberry pi» label

Three lab handout drafts done

On Tuesdays, my son and I usually have our weekly physics class, but in deference to the national holiday on Dec 25th we canceled this week’s class. I spent the day preparing drafts of lab handouts for the first three labs in the circuits course. The handouts are taking longer to produce than I expected, and they are coming out longer than expected also.  I’ll post links to the lab pages once they are past the draft stage—I’m hoping to get feedback from my co-instructor by next week.

  1. The draft for the first (thermistor) lab is 10 pages, and still is missing pictures and a couple of paragraphs of text, particularly about using the data logger that my son is still writing for the students in the course to use.
  2. The draft for the second (microphone) lab is 5 pages, and still doesn’t explain how to use an oscilloscope. We have both analog and digital scopes in the lab, and the analog ones a pretty easy to learn to use, but the Tektronix digital scopes have a very confusing menu interface that takes a long time to become familiar with. I still have to check out whether the function generators in the lab can drive a loudspeaker, as I’m expecting the students to be able to play sine waves into the microphones.
  3. The draft for the third (electrodes) lab is also 5 pages, but it is looking fairly complete to me.

I’ve posted a tentative schedule for the 10 labs of the quarter, http://courses.soe.ucsc.edu/courses/bme194/Winter13/01/schedule:

  1. Thermistor lab
  2. Microphone lab
  3. Electrodes lab
  4. Sampling and aliasing lab
  5. Audio amplifier lab 1 (op amps)
  6. FET measurement lab, phototransistor measurement lab
  7. Audio amplifier lab 2 (power amp)
  8. Hysteresis lab (capacitive touch sensor, 1st soldering project)
  9. Pressure sensor lab (instrumentation amp, soldering)
  10. EKG lab

There is a little more measurement and less design content than I had wanted in the first half of the course—I’ve only come up with fairly trivial design exercises until we get to amplifiers, and then the designs get much harder.  I’m still trying to come up with a design lab for the phototransistors—right now I’m just looking a characterizing an LED and phototransistor pair for use as an optoisolator, with appropriate biasing for each to transfer analog signals (digital signals are too easy).  The students will have 3 LEDs (green, red, and infrared), so we could also look at the signal levels with each, to see whether the infrared emitter provides a better signal.

I don’t really know exactly what is in the sampling and aliasing lab, which my co-instructor created for a different course.  I’ll have to get his handouts for it, and type them up in the format I’m using for this course.  I’ll probably have to borrow a board from him also, to run through the lab myself.  It was probably designed as a 2-hour lab, not a 3-hour one, so I may want to add a bit to it.

The Digikey order for parts shipped today, the last on-line order I made, and it looks like the cost per student will be between $65 and $66 for tools and parts (see Parts orders for Applied Circuits W13 for more details on the pricing).  I still have to make a packing list for each kit, and put the kits together.  I hope that all the orders arrive by the middle of next week, so that we can distribute the parts kits on Wednesday 2013 Jan 9.

I also hope I’ll be able to package the kits in 1-gallon ZipLock bags—I’m beginning to think I might need to leave the loudspeakers separate, and that it will still be a tight fit. ZipLock does make bigger bags: 3 gallon, 10 gallon, and 20 gallon), but at $1.18 each for the 3-gallon bags, I’d rather not go there—even 40¢ each for the 2-gallon bags is a bit high.

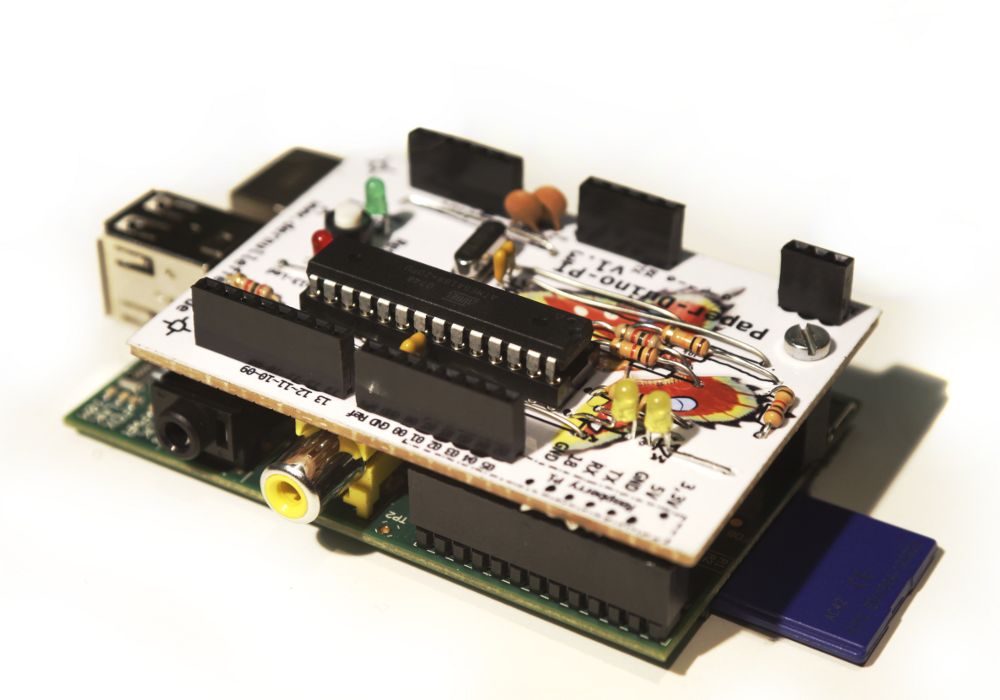
I’ve also been thinking of getting an Arduino Leonardo for testing my son’s DataLogger code, as the Leonardo has a different serial interface and a different number of analog and digital pins available: 20 I/O pins, of which 7 can be configured for PWM and 12 as analog inputs though 3 of those are also PWM pins, as opposed to the 20 I/O pins of the Uno, 6 of which can be configured for PWM and 6 as analog inputs.  There are several other incompatibilities (like where the TWI interface and that the Leonardo does not reset when the serial connection is first opened as on all previous Arduino boards).  Designing shields for Arduino boards has gotten much more complicated lately, as Arduino has proliferated a number of incompatible interfaces.  I think that this might hurt them in their main market.  I’m wondering it the Raspberry Pi is cheap enough, available enough, and easy enough to interface and program to edge out Arduino in the next few years.  I have some Raspberry Pi boards now, and when I get some time I’ll want to try playing with them.


Filed under: Circuits course, Raspberry Pi Tagged: Arduino, circuits, course design, lab exercises, Raspberry Pi

FireHero: Raspberry Pi Controlled Pyrotechnics


To put on a live pyrotechnic show at a music festival, [Chris] built the FireHero 3. The result is remotely controlled flames shooting up to 100 feet in the air.

The system is controlled by a Raspberry Pi and an Arduino. A server runs on the Pi and allows a remote computer to control the system. The Pi sends commands over serial to the Arduino, which switches solid state relays that actuate the valves.

There’s also some built in safety features: the system won’t boot unless you have the right key and RFID tag, and there are pressure transducers and temperature sensors to ensure the system is operating safely. A CO2 actuated valve can quickly stop fuel flow in an emergency.

Vaporized propane creates the fireballs. The vapor is created by heating the supply tank in a hot water bath. An accumulation tank stores the vapor and custom built manifolds distribute it to the various flame cannons. At each cannon, a silicon nitride hot surface igniter (HSI) is used to ignite the flames once the valve is opened.

After the break, watch a video the the FireHero making some flames.


Filed under: Raspberry Pi
Hack a Day 22 Dec 15:49

TFTweet – Displaying Tweets on an Arduino Shield with the Raspberry Pi

Drew Fustini recently got his hands on an AlaMode and used it display tweets from his Raspberry Pi to an 2.8" TFT LCD Touchscreen Shield. The AlaMode and shield are connected to the Raspberry Pi which runs the Arduino IDE and a bit of Python code to make it all happen.

Read the full article on MAKE

Twitter radio

This anthropomorphized wood bowl will read Tweets out loud. It was built by [William Lindmeier] as part of his graduate work in the Interactive Telecommunications Program (ITP) at New York University. View the clip after the break to see and hear a list from his Twitter feed read in rather pleasant text-to-speech voices.

The electronics involved are rather convoluted. Inside the upturned bowl you’ll find both an Arduino and a Raspberry Pi. But that’s not the only thing that goes into this. The best sounding text-to-speech program [William] could find was for OSX, so there is a remote computer involved as well. But we think what makes this special is the concept and execution, not the level of hardware inefficiency.

The knob to the left sets the volume and is also responsible for powering down the device. The knob of the right lets you select from various Twitter lists. Each turn of the knob is responded to with a different LED color in the nose and a spoken menu label. You can get a quick overview of the project from this summary post.


Filed under: arduino hacks, Raspberry Pi
Hack a Day 12 Dec 21:30

New Product: AlaMode Arduino-Compatible Shield for Raspberry Pi

For $35 you can get a lot of processing power with the Raspberry Pi, which for some people begs the question: why use Arduino or another microcontroller? It turns out the two platforms are good for different tasks, and they’re actually quite complementary. Kevin Osborn of the Wyolum open hardware [...]

Read the full article on MAKE

MAKE » Arduino 12 Dec 19:45

Arduino Beer Keyboard

Do you know what you get if you combine 44 beer cans with an Arduino board and a Raspberry PI ? I tell you : fantastic user engagement!

It happened at Webstock, event which took place in Bucharest this month. Staropramen, one of the sponsors of the event asked us for an innovative way to offer a trip to Prague to one of the event’s guests.

So, we came up with a keyboard made out of 44 Staropramen beer cans. Each beer can was a key, and whenever someone touched it, the corresponding letter appeared on a large plasma screen (just like any regular computer keyboard).

And the surprise was fantastic! The user experience and engagement overcame any expectation. Every single person who attended Webstock tried the keyboard and participated to the contest.

Behind the scene, the system is built around an Arduino board and a few capacitive controllers (just like the ones which are inside smartphones’ touch screens), connected to a Raspberry PI board which controls the plasma screen display.

Other hardware we used was the Sparkfun MPR121 Capacitive Touch Sensor Breakout Board (4 of them, each controlling 11 beer cans) and one Sparkfun MP3 Trigger Board which controls the sound effects.

A movie and some photos took during the event can be found on the [website]
(feel free to use them if you want, or download directly the photos as a zip archive).

[Webstock] is the biggest blogging and social media event in Romania.

[Robofun Create] is a Romanian company specialised in creating cool on-demand technology products.


Arduino Blog 19 Nov 19:07

Raspberry Pi driven Polargraph exhibits high precision drawing ability

This polar graph draws some amazing shapes on a dry erase board. Part of that is due to the mounting brackets used for the two stepper motors and the stylus. But credit is also due for the code which takes velocity into account in order to plan for the next set of movements.

The Go language is used to translate data into step commands for the two motors. This stream of commands is fed over a serial connection between the RPi board and an Arduino. The Arduino simply pushes the steps to the motor controllers. The inclusion of the RPi provides the horsepower needed to make such smooth designs. This is explained in the second half of [Brandon Green's] post. The technique uses constant acceleration, speed, and deceleration for most cases which prevents any kind of oscillation in the hanging stylus. But there are also contingencies used when there is not enough room to accelerate or decelerate smoothly.

You can catch a very short clip of the hardware drawing a tight spiral in the video embedded after the break.


Filed under: Raspberry Pi
Hack a Day 16 Nov 17:30

Next Projects: More and Less Power

Arduino is part of my life and has been for years now: I constantly use the homemade, Arduino-based appliances in my home the same way I use appliances other people made. But while I'm hooked on building out my world the way I like it, sometimes a project only needs a handful of pins, so I just ordered a few ATtiny85 and 2313's to try my hand at [gulp] proper AVR programming. It's too bad that Arduino is going toward the high end with the Due instead of toward the low end with smaller, simpler circuits and chips, but I'm happy to go elsewhere to learn. I could hot-wire the Arduino environment to program an ATtiny, but I'd like to try transitioning to a more fully-featured IDE for future development anyway, so programming an ATtiny will be a good sub-project.

Speaking of "the high end," the $25 Raspberry Pi has been on my radar for some simple camera-based installed projects, and I'm even more excited after hacking around with a $25 WiFi access point and OpenWrt... wow! Amazing how much power can be had for so cheap, and how many how-to's can help you along.

A Halloween Sound Trigger with Raspberry Pi and Arduino

People have been asking me about interesting applications for the Raspberry Pi, and whether Raspberry Pi is an Arduino killer of some sort. The answer to the second question is no; in fact it is an Arduino augmenter. This blog post answers the first question with another question: how about [...]

Hacking Beer Cans for Fun and Publicity

Although beer is generally a good way to get people to come to your trade show booth, [Robofun.ru] decided to put a new spin on things. Instead of (or possibly in addition to) giving out beer, they decided to turn 40 Staropramen beer cans into a keyboard.

This was done using an Arduino hooked up to four Sparkfun MPR121 Capacitive Touch Sensor Breakout Boards, allowing them to act as keys. These inputs are translated via the Arduino into a standard output (we assume USB) that can be plugged into any computer.  Additionally, a Sparkfun MP3 trigger board was used to control the sound effects.  Rounding out the build, a Raspberry Pi computer was used to run the human machine interface, a large plasma display.

Be sure to check out this keyboard in action after the break. If this isn’t enough alternative input fun, why not check our post about how to make a banana piano and giant NES controller.


Filed under: arduino hacks, beer hacks, Raspberry Pi