Posts with «radio» label

Rotary Phone Takes You Around The World And Through Time – With Music

Purposely choosing obsoleted technology combines all the joy of simpler times with the comfort of knowing you’re not actually stuck with outdated (and oftentimes inferior) technology. The rotary phone is a great example here, and while rarely anyone would want to go back to the lenghty, error-prone way of dialing a number on it on an everyday basis, it can definitely add a certain charm to a project. [Caroline Buttet] thought so as well, and turned her grandma’s old rotary phone into a time-traveling, globe-trotting web radio.

The main idea is fairly simple: a Raspberry Pi connects via browser to a web radio site that plays music throughout the decades from places all over the world. [Caroline]’s implementation has a few nice twists added though. First of all, the phone of course, which doesn’t only house the Raspberry Pi, but serves both as actual listening device via handset speaker, and as input device to select the decade with the rotary dial. For a headless setup, she wrote a Chromium extension that maps key events to virtual clicks on the corresponding DOM element of the web site — like the ones that change the decade — and a Python script that turns the rotary dial pulses into those key events.

However, the phone is only half the story here, and the country selection is just as fascinating — which involves an actual world map. An audio connector is attached to each selectable country and connected to an Arduino. If the matching jack is plugged into it, the Arduino informs the Raspberry Pi via serial line about the new selection, and the same Chromium extension then triggers the country change in the underlying web site. You can check all the code in the project’s GitHub repository, and watch a demo and brief explanation in the videos after the break.

Sure, listening radio through a telephone may not be the most convenient way — unless it’s the appropriate genre — but that clearly wasn’t the goal here anyway. It’s definitely an interesting concept, and we could easily see it transferred to some travel- or spy-themed escape room setting. And speaking of spying, if [Caroline]’s name sounds familiar to you, you may remember her virtual peephole from a few months back.


All Band Radio Uses Arduino and Si4730

It is getting harder and harder to tell homemade projects from commercial ones. A good case in point is [Mirko’s] all band radio which you can see in the video below the break. On the outside, it has a good looking case. On the inside, it uses a Si4730 radio which has excellent performance that would be hard to get with discrete components.

The chip contains two RF strips with AGC, built-in converters to go from analog to digital and back and also has a DSP onboard. The chip will do FM 64 to 108 MHz and can demodulate AM signals ranging from 153 kHz to 279 kHz, 520 kHz to 1.71 MHz, and 2.3 MHz to 26.1 MHz. It can even read RDS and RBDS for station information. The output can be digital (in several formats) or analog.

The radio takes serial (I2C) commands, and the Arduino converts the user interface so that you can control it. The chip comes in several flavors, each with slightly different features. For example, the Si4731 and Si4735 have the RDS/RBDS decoder, and the shortwave mode is available on Si4734 and Si4735. Confused? Page 2 of the programming guide should help. According to [Mirko], he used a 4730, but it still did shortwave with the 4735 library.

Breakout boards with the chip are just a few bucks. It appears the chip has the technical capability to receive single sideband, but it requires a poorly documented patch. It is in recent versions of this library, though.

We always smile when we think that AM is still alive and kicking. Perhaps this is the modern take on that first crystal radio project.

Hack a Day 13 Feb 03:00

Build your child a wooden MP3 player for $100

If your young child wants to listen to music, what better way than a beautiful wooden MP3 “radio,” with an array of buttons that select the album? After being inspired by a similar commercial product, Redditor “DerThes” decided to make such a device for a fraction of the cost using an Arduino Uno for control, along with a Music Maker Shield to play tunes off an SD card.

The toddler can select songs from a grid of 16 input buttons, which are sent to the Uno via a pair of shift registers. There’s also a “parent’s mode” with the ability to choose from up to 99 albums, and a volume knob for… adjusting the volume. 

Finally, the unt features a beautiful enclosure made out of oak and black walnut, with corners softened by dowels to reduce collateral damage “after the player has gone airborne.” More details can be seen on Imgur here and on GitHub.

This is an easy to use MP3 player for small children. I made this for my 2 year old for Christmas. Each of the top 9 buttons will play an album. The black buttons on the bottom are prev – play/pause – next. The player also supports an alternative playback mode that can be activated using a special key combination. That combination will turn the buttons into a 10 digit input matrix allowing playback of up to 99 albums. That way the player can be used by parents as well.

See GitHub for more details, the schematics for the button PCB and the firmware. https://github.com/MichaelThessel/arduino-stoerbert

This is heavily inspired by Hoerbert: https://en.hoerbert.com

When I first saw the Hoerbert at a friends place I wanted it for my child. After I heard of the $400 price tag I knew that I needed to spend 50 hrs and $100 to build my own.

Arduino Blog 30 Dec 16:49

Minecraft Sword Lights Up When Nearby Friends

With All Hallow’s Eve looming close, makers have the potential to create some amazing costumes we’ll remember for the rest of the year. If you’re a fan of the hugely addict-*cough* popular game Minecraft, perhaps you’ve considered cosplaying as your favorite character skin, but lacked the appropriate props. [Graham Kitteridge] and his friends have decided to pay homage to the game by making their own light-up Minecraft swords.

These swords use 3D-printed and laser-cut parts, designed so as to hide the electronics for the lights and range finder in the hilt. Range finder? Oh, yes, the sword uses an Arduino Uno-based board to support NewPixels LEDs and a 433Mhz radio transmitter and receiver for ranged detection of other nearby swords that — when they are detected — will trigger the sword to glow. Kind of like the sword Sting, but for friendlies.

All of the files for the parts are available on the project’s Thingverse page and the board setup can be purchased here. If you want to have some fun controlling the real world from inside Minecraft, check out how this fan uses it to turn on lamps in their home.


Filed under: 3d Printer hacks, Arduino Hacks, weapons hacks

Hackaday Links: July 19, 2015

Everybody needs an external USB drive at some time or another. If you’re looking for something with the nerd cred you so desperately need, build a 5 1/4″ half height external drive. That’s a mod to an old Quantum Bigfoot drive, and also serves as a pretty good teardown video for this piece of old tech.

The Woxun KG-UV2D and KG-UV3D are pretty good radios, but a lot of amateur radio operators have found these little handheld radios eventually wear out. The faulty part is always a 24C64 Flash chip, and [Shane] is here to show you the repair.

Last year there was a hackathon to build a breast pump that doesn’t suck in both the literal and figurative sense. The winner of the hackathon created a compression-based pump that is completely different from the traditional suction-based mechanism. Now they’re ready for clinical trials, and that means money. A lot of money. For that, they’re turning to Kickstarter.

What you really need is head mounted controls for Battlefield 4. According to [outgoingbot] it’s a hacked Dualshock 4 controller taped to a bike helmet. The helmet-mounted controller has a few leads going to another Dualshock 4 controller with analog sticks. This video starts off by showing the setup.

[Jan] built a modeling MIDI synth around a tiny 8-pin ARM microcontroller.  Despite the low part count, it sounds pretty good. Now he’s turned his attention to the Arduino. This is a much harder programming problem, but it’s still possible to build a good synth with no DAC or PWM.


Filed under: Hackaday Columns, Hackaday links

Converting Morse Code to Text with Arduino

Morse code used to be widely used around the globe. Before voice transmissions were possible over radio, Morse code was all the rage. Nowadays, it’s been replaced with more sophisticated technologies that allow us to transmit voice, or data much faster and more efficiently. You don’t even need to know Morse code to get an amateur radio license any more. That doesn’t mean that Morse code is dead, though. There are still plenty of hobbyists out there practicing for the fun of it.

[Dan] decided to take a shortcut and use some modern technology to make it easier to translate Morse code back into readable text. His project log is a good example of the natural progression we all make when we are learning something new. He started out with an Arduino and a simple microphone. He wrote a basic sketch to read the input from the microphone and output the perceived volume over a Serial monitor as a series of asterisks. The more asterisks, the louder the signal. He calibrated the system so that a quiet room would read zero.

He found that while this worked, the Arduino was so fast that it detected very short pulses that the human ear could not detect. This would throw off his readings and needed to be smoothed out. If you are familiar with button debouncing then you get the idea. He ended up just averaging a few samples at a time, which worked out nicely.

The next iteration of the software added the ability to detect each legitimate beep from the Morse code signal. He cleared away anything too short. The result was a series of long and short chains of asterisks, representing long or short beeps. The third iteration translated these chains into dots and dashes. This version could also detect longer pauses between words to make things more readable.

Finally, [Dan] added a sort of lookup table to translate the dots and dashes back into ASCII characters. Now he can rest easy while the Arduino does all of the hard work. If you’re wondering why anyone would want to learn Morse code these days, it’s still a very simple way for humans to communicate long distances without the aid of a computer.


Filed under: Arduino Hacks

Over-engineering Ding Dong Ditch

One day, [Samy]’s best friend [Matt] mentioned he had a wireless doorbell. Astonishing. Even more amazing is the fact that anyone can buy a software defined radio for $20, a small radio module from eBay for $4, and a GSM breakout board for $40. Connect these pieces together, and you have a device that can ring [Matt]’s doorbell from anywhere on the planet. Yes, it’s the ultimate over-engineered ding dong ditch, and a great example of how far you can take practical jokes if you know which end of a soldering iron to pick up.

Simply knowing [Matt] has a wireless doorbell is not enough; [Samy] needed to know the frequency, the modulation scheme, and what the doorbell was sending. Some of this information can be found by looking up the FCC ID, but [Samy] found a better way. When [Matt] was out of his house, [Samy] simply rang the doorbell a bunch of times while looking at the waterfall plot with an RTL-SDR TV tuner. There are a few common frequencies tiny, cheap remote controls will commonly use – 315 MHz, 433 MHz, and 900 MHz. Eventually, [Samy] found the frequency the doorbell was transmitting at – 433.8 MHz.

After capturing the radio signal from the doorbell, [Samy] looked at the audio waveform in Audacity. It looked like this doorbell used On-Off Keying, or just turning the radio on for a binary ‘1’ and off for a binary ‘0’. In Audacity, everything the doorbell transmits becomes crystal clear, and with a $4 434 MHz transmitter from SparkFun, [Samy] can replicate the output of the doorbell.

For the rest of the build, [Samy] is using a mini GSM cellular breakout board from Adafruit. This module listens for any text message containing the word ‘doorbell’ and sends a signal to an Arduino. The Arduino then sends out the doorbell code with the transmitter. It’s evil, and extraordinarily over-engineered.

Right now, the ding dong ditch project is set up somewhere across the street from [Matt]’s house. The device reportedly works great, and hopefully hasn’t been abused too much. Video below.


Filed under: Arduino Hacks, radio hacks
Hack a Day 11 Dec 21:00

Experimenting new interfaces for Radios with wood and fabric

An Interaction and Industrial Designer studying at Carnegie Mellon University in Pittsburgh tried to re-imagine the way we interact with radios to create a more meaningful relationship between the user and the artefact.

Radios have been around since the 1920s but the devices we have at home haven’t changed much even if they were designed nearly 100 years ago and share similar elements like switches, knobs, sliders.

Yaakov Lyubetsky worked on a prototype of The Experimental Form Radio using Arduino Uno:

When The Experimental Form Radio is laying on a tabletop, it is off. To turn the radio on, you pick it up and slot it onto a wall mount. The radio leverages the elastic qualities of fabric to control stations and volume. To change stations you press lightly and slide your finger along the fabric surface. To change the volume you press firmly into the fabric, and then slide your finger along the deeper cavity in the radio. The video below showcases the interaction.

Requiring the user to pick up and wall mount the radio to turn on creates a ritualistic experience with a very simple feedback mechanism. If the radio is hanging on the wall it’s on, if the radio is laying on a flat surface then it’s off. The visual and auditory feedback allows the user to have a clear understanding of the system state.

Even cooler than the video above is the next one, showing all the “Making of” process to build the wooden piece and the soft interface:

The project uses an Arduino Uno board with a custom circuit made with three independent layers of conductive fabric and conductive thread. Touching together two layers of conductive fabric completes one of twelve circuits that then either change the radio station or the volume.

Take a look at the additional documentation on his website.

Arduino Blog 14 Oct 21:31

Reverse Engineering a Wireless Studio Lighting Remote

If you want to take a photograph with a professional look, proper lighting is going to be critical. [Richard] has been using a commercial lighting solution in his studio. His Lencarta UltraPro 300 studio strobes provide adequate lighting and also have the ability to have various settings adjusted remotely. A single remote can control different lights setting each to its own parameters. [Richard] likes to automate as much as possible in his studio, so he thought that maybe he would be able to reverse engineer the remote control so he can more easily control his lighting.

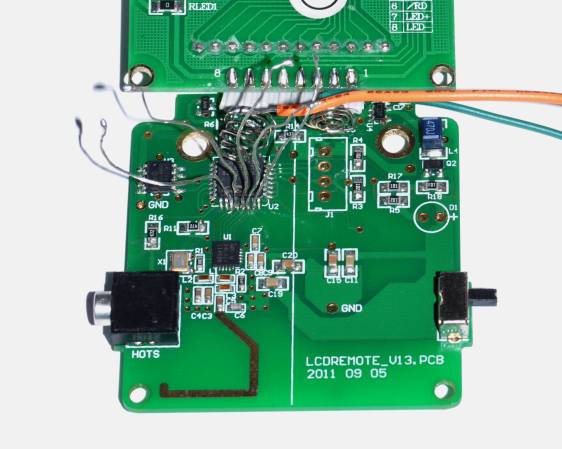
[Richard] started by opening up the remote and taking a look at the radio circuitry. He discovered the circuit uses a nRF24L01+ chip. He had previously picked up a couple of these on eBay, so his first thought was to just promiscuously snoop on the communications over the air. Unfortunately the chips can only listen in on up to six addresses at a time, and with a 40-bit address, this approach may have taken a while.

Not one to give up easily, [Richard] chose a new method of attack. First, he knew that the radio chip communicates to a master microcontroller via SPI. Second, he knew that the radio chip had no built-in memory. Therefore, the microcontroller must save the address in its own memory and then send it to the radio chip via the SPI bus. [Richard] figured if he could snoop on the SPI bus, he could find the address of the remote. With that information, he would be able to build another radio circuit to listen in over the air.

Using an Open Logic Sniffer, [Richard] was able to capture some of the SPI communications. Then, using the datasheet as a reference, he was able to isolate the communications that stored information int the radio chip’s address register. This same technique was used to decipher the radio channel. There was a bit more trial and error involved, as [Richard] later discovered that there were a few other important registers. He also discovered that the remote changed the address when actually transmitting data, so he had to update his receiver code to reflect this.

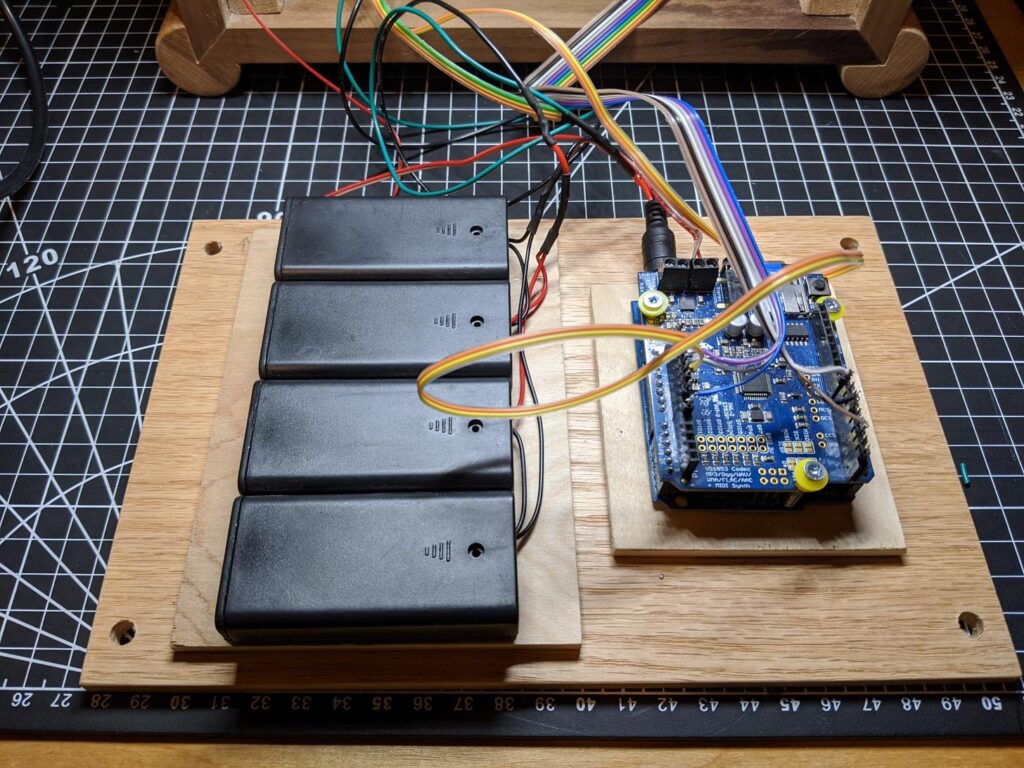
The receiver was built using another nRF24L01+ chip and an Arduino. Once the address and other registers were configured properly, [Richard's] custom radio was able to pick up the radio commands being sent from the lighting remote. All [Richard] had to do at this point was press each button and record the communications data which resulted. The Arduino code for the receiver is available on the project page.

[Richard] took it an extra step and wrote his own library to talk to the flashes. He has made his library available on github for anyone who is interested.


Filed under: Arduino Hacks, radio hacks

Generate Clocks with the SI5351 and an Arduino

If you’re dealing with RF, you’ll probably have the need to generate a variety of clock signals. Fortunately, [Jason] has applied his knowledge to build a SI5351 library for the Arduino and a breakout board for the chip.

The SI5351 is a programmable clock generator. It can output up to eight unique frequencies at 8 kHz to 133 MHz. This makes it a handy tool for building up RF projects. [Jason]‘s breakout board provides 3 isolated clock outputs on SMA connectors. A header connects to an Arduino, which provides power and control over I2C.

If you’re looking for an application, [Jason]‘s prototype single-sideband radio shows the chip in action. This radio uses two of the SI5351 clocks: one for the VFO and one for the BFO. This reduces the part count, and could make this design quite cheap.

The Arduino library is available on Github, and you can order a SI5351 breakout board from OSHPark.


Filed under: Arduino Hacks, radio hacks
Hack a Day 27 Jun 12:00