Posts with «projects» label

This Arduino Basic Kit has everything a newbie maker could ask for

It's easy to think about tinkering around with Arduino, but take more than 30 seconds to look at the platform, and suddenly it becomes daunting: not only do you need an Arduino itself, but to get started you need resisters, wires, LEDs, screens and a host of other components that are almost always sold separately. Have no fear, newbies: there's a new Arduino Basic Kit in town, and it has all the spare parts a beginner could want.

Filed under: Misc

Comments

Source: 123D Circuits

Engadget 29 Jul 04:31
arduino  build  diy  maker  misc  projects  

Building a giant Iron Man suit you can actually wear!

If you are a fan of cosplay, props and hand built creations you can’t miss the work of  James Bruton. Based in Uk he’s got a personal project YouTube channel with a new video every week describing his work in details. At the end of June he posted the 34th “episode” of the project started nearly a year ago about  building an Iron Man Hulkbuster giant suit you can actually wear!

In the video below you can follow how he’s sorting out the arm mechatronics for the elbow, hand and cuff weapon with some 3D printing with Lulzbot and controlling the interaction with  Arduino Uno (electronic part starting around minute 10):

Explore the playlist of the project for other cool videos.

Luz Electoral creates a lightshow from poll results!

Luz Electoral is an installation with the aim of showing the results of Spanish regional elections of May 24th 2015 without using a screen to display data (self-imposed requirement ;). This project, created by Neuronas Muertas,  shows the percentage of votes by lighting a strip of 33 Neopixels with the main color of each party for each region, scrolling the results in some kind of “electoral results mood light”. It basically transforms Spanish poll results into a lightshow running on Arduino, where each political party is represented by colors scrolling on a bar.

If you want to make it,  take a look at  the code available on Github and check the full story in spanish on Medium.

Arduino Blog 07 Jul 16:39

Smile! This plant wants to take a selfie with you

Selfie Plant is an interactive installation taking pictures of itself using Arduino Yún, Facebook Graph APIs and then uploads them to Facebook. It was developed by a group of students at the Copenhagen Institute of Interaction Design during “The secret life of objects” course held also by Arduino.cc team. The final prototype was placed in the exhibition of the school, to see the interaction of the audience with it and you can see the result on Facebook.

The Selfie Plant is an attempt to provoke some thoughts above genre of expression. The Selfie Plant expresses itself in the form of nice-looking selfies, which it clicks according to its mood, weather or occasion. It mimics human behaviour, by giving it’s best pose and adjusting the camera angle to take the perfect selfie.


In the documentation on Github you can find all the details of the project composed by an Arduino Yún, controlling 2 servo motors and adjusting the positions of the plant and the camera stick; a python script (facebook.py) which communicates with Facebook’s graph API to post the captured photos on plant’s Facebook profile. In addition you’ll need also a LED Matrix, a Bread Board and 5 Volt Battery.

Here’s a preview of the diagram:


Smile! This plant wants to take a selfie with you

The Selfie Plant is an interactive installation taking pictures of itself using Arduino Yún, Facebook Graph APIs and then uploads them to Facebook. It was developed by a group of students at the Copenhagen Institute of Interaction Design during “The secret life of objects” course held also by Arduino.cc team by Joshua Noble and Simone Rebaudengo. The final prototype was on display at the class exhibition, to observe the interaction of the audience with it, and the results are on Facebook.

The Selfie Plant is an attempt to provoke some thoughts above genre of expression. The Selfie Plant expresses itself in the form of nice-looking selfies, which it clicks according to its mood, weather or occasion. It mimics human behaviour, by giving it’s best pose and adjusting the camera angle to take the perfect selfie.

In the documentation on Github you can find all the details of the project composed by an Arduino Yún, controlling 2 servo motors and adjusting the positions of the plant and the camera stick; a python script (facebook.py) which communicates with Facebook’s graph API to post the captured photos on plant’s Facebook profile. In addition you’ll need also a LED Matrix, a Bread Board and 5 Volt Battery.

Here’s a preview of the diagram:


DJ sets get more interactive with Cubled and Arduino

Cubled is an interactive installation made of 27 luminous spheres arranged in space to create a cube 5 mt (16.4ft) per side floating on a stage.

The project created by Giuseppe Acito of Opificio Sonico  has a structure made of steel wires, RGB LED Strips and Ikea paper lanterns.

The system is MIDI-controlled, the notes generated by a sequencer are converted to electric signals using an Arduino UNO and a Mosfet:

No DMX device was used for this system which is 12V DC powered, with slim electric wires in order to give the lightness needed to this installation. In this clip, the performance is splitted in 2 parts: in the first a kit of electronic percussion is “played” live by a step sequencer named Sonic Fraction Beatdown (a Max\MSP device for Ableton Live), the combinations of 12 MIDI notes generated are linked to the spheres. In the second part the combinations of sounds and lights are pre-programmed patterns clip and performed live by a Tenori-on Yamaha and Ableton Live. The installation was mounted inside the Link Club (Bologna – Italy) in December 2013, which hosted some world-famous DJ set, during a month of permanence.


Arduino Blog 27 May 21:24

Keep your candies safe with Candy Locker and Intel Edison


Candy Locker is a mouth-watering tutorial based on  Intel® Edison and image recognition of objects.
You can keep your candies safe from greedy hands with this color recognition lock and a dispenser using a set of 5 distinct color images and setting up a pattern that will activate and dispense candies.

Follow the link and open the magic door of the video and picture recognition,  invent cool systems learning how to manage object recognition and OpenCv foundations.


Experience a creative internship with a BLE board game

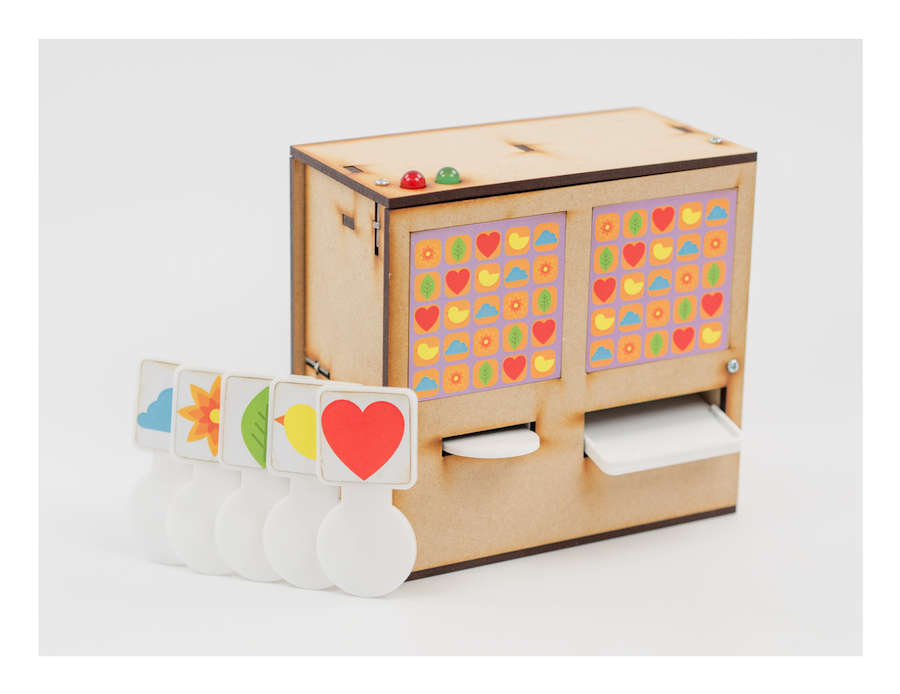
InternTrip is a board game prototyped by 2nd year Masters students at the École de Communication Visuelle Aquitaine (France) and running on Arduino at Heart Blend Micro.

Once again designers Guillaume Beinat and Alexandre Suné of Tazas Project directed a dozen students* into creating an  immersive game focusing on the experience of internship in a communication agency:

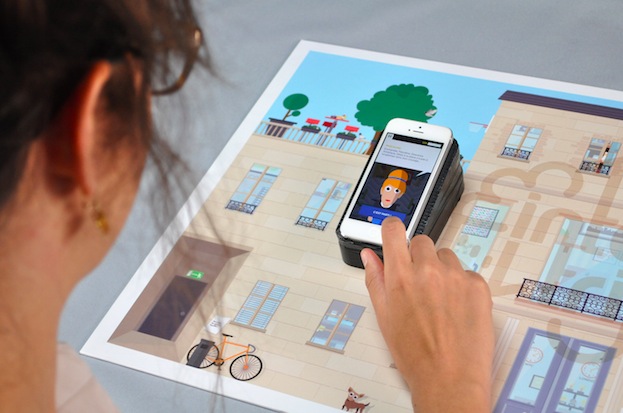
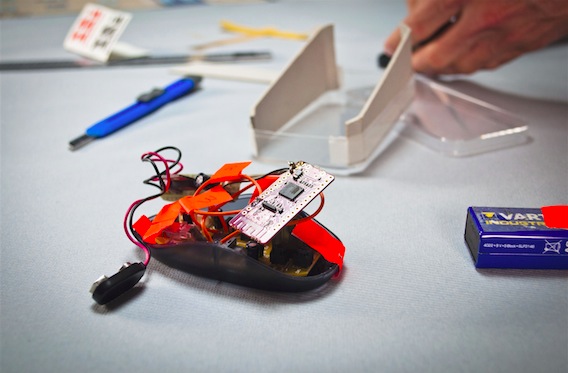
 The system they use relies on the use of an Arduino bluetooth card which calculates the player’s position on the board and simultaneously transmits this information to the smartphone. The coordinates received allow the player to discover the inside of the agency by moving their smartphone over the outer wall of the building, or in other words, the board. From table football to the terrasse, passing by the coffee machine or the photocopier, they invite us to visit the agency, to talk with the team and to compete with our colleagues in head to head questionnaires about the world of advertising. This is your time,  young,  exploited interns, to take your revenge and land that job!

* Manon Fauvel, Anna Borup, Benjamin Armel, Charlotte du Portal, Émilien Badoc, Guilhem Pacha, Isabelle Ducournau, Nicolas Pierre, Sandy Kauy, Sophie Cazes, Arnaud Bresson

One in a million

Just quietly - I am really happy that this blog has reached over 1 million page views !
I don't know what to say, but I feel like I should say something.

Thank you for visiting my blog.

Here are the blog posts that have received most attention to date:
1. Ultrasonic sensor
2. Simple Arduino Serial Communication
3. Bluetooth tutorial 1
4. Bluetooth Android Processing
5. Sound Sensor
6. 433 MHz RF Module with Arduino : this one is rising FAST !
7. Reading from a text file and sending to Arduino
8. Flex sensor and LEDs
9. PhotoCell - sensing light
10. Simple Arduino Serial Communication (Part 2)


For a list of all my projects - please visit my projects page:
ArduinoBasics Project Page

If that is not enough, then perhaps you should visit the Arduino Tutorials Community on Google+.
You are bound to find a project that sparks your interest, or perhaps you could even share your own !

Feel free to leave your thoughts, suggestions or messages in the comments.
Or if you wish to send a confidential message to me - then I would advise to use the form on my Feedback page.

Thanks again for visiting, and good luck with your project and/or Arduino journey !!
ScottC 24 Nov 17:19

Project Review – Silicon Chip Capacitance Substitution Box

Introduction

Every month Australian electronics magazine Silicon Chip publishes a variety of projects, and in some cases various (well … one of two) electronics retailers will pick up the project and offer it as a kit. However for an increasing number of new projects they don’t, which leaves the interested reader with one option – build the entire project from scratch.

But thankfully this is no longer the case – as the team from Silicon Chip now offer a range of project PCBs and matching front panels for sale directly from their website. Although buying these parts is not the cheapest option, it gives the busy person who likes making things a quick start – or the inexperienced more opportunities to complete a successful project.

So as a test of this new service, I bought the PCB and front panel for the Capacitance Substitution Box project described by Nicholas Vinen in the Juily 2012 issue of SC:

This is something I’ve meant to make for a while – but didn’t really have the inclination to make one from scratch, so it was neat to see a version published in the magazine. I believe the subjects in the magazine article are oftern prototypes, which explains the difference in colour for the front panel.

The parts arrived in a week after placing the order, and are of a high quality:

When complete, the capacitance substitution box PCB and panel will fit nicely into an Altronics H0151 enclosure, so you don’t need to do any drilling or filing. The next task was to organise the required parts. The rotary switches, terminal posts and the usual odds and ends can be found at Altronics, Jaycar or other suppliers. However the main components – the capacitors – offered two options.

The first option is to simply use capacitors from personal stock or the stores. However the tolerance of these parts can vary wildly, with up to twenty percent either way. This is ok for simple uses, however when values are combined – the tolerance of larger values can negate the lower values completely. So instead I’ve chosen the second option – which involves using brand-name low-tolerance capacitors.

Thus I turned to element14 who stock not only a huge range of not only regular but also the low-tolerance capacitors, and can also have them on my desk usually by the next working day. Finally, it’s nice to have all the parts arrive in little bags… neatly organised ready to go:

It’s easy to search for low-tolerance parts with element14, as the automatic filtering has tolerance as a parameter:

Furthermore you can also ensure you have the voltage rating of at least 50V DC as well. So after half an hour the capacitor order was completed and arrived when expected – using parts from Panasonic, Vishay, and Wima. The tolerances of our capacitors used varied between one and ten percent, which will help improve the accuracy of the substitution box.

Assembly

The PCB has the capacitor values labelled neatly on the silk-screen, so soldering in all the capacitors was a relatively simple but long operation. Having them arrive in separate packets made life a lot easier. During the soldering process it’s a good idea to have a  break or two, which helps you avoid fatigue and making any mistakes.

There may be a few capacitors that are a little too wide to fit with the others, so they can be mounted on the other side of the PCB:

However they all end up fitting well:

The next step was to configure the first rotary switch for six position use, then cut the plastic stopped from the side of each rotary switch. In the following image you have a before and after example:

Now the rotary switches can have their shafts trimmed and then be soldered onto the PCB:

However ensure you have the first rotary switch in the right way – that is the selections are selected across the top half, not the bottom. Remove the nuts from the rotary switches, and double-check all the capacitors are fitted, as once the next step is completed … going back will be difficult to say the least.

At this point the banana sockets can be fitted to the panel, and then soldered into place, and then you’re finished. Just place the panel/PCB combination inside the box and screw it down:

Using the Capacitance Substitution Box

Does it work? Yes – however you don’t get exact values, there will always be a tolerance due to the original tolerance of the capacitors used and the stray capacitance of the wires between the box and the circuit (or capacitance meter). Nevertheless our example was quite successful. You can see the box in action with our Altronics LC meter kit in this video.

Again, using the best tolerance capacitors you can afford will increase the accuracy of this project.

Conclusion

Over time this would be a useful piece of equipment to have – so if your experiments or projects require varying capacitor value, this project will serve the purpose nicely. Plus it helps with mental arithmetic and measures of capacitance! Please do not ask me for copies of the entire Silicon Chip article, refusal may offend. Instead – visit their website for a reprint or digital access.

And if you enjoyed this article, or want to introduce someone else to the interesting world of Arduino – check out my book (now in a third printing!) “Arduino Workshop”.

Have fun and keep checking into tronixstuff.com. Why not follow things on twitterGoogle+, subscribe  for email updates or RSS using the links on the right-hand column, or join our forum – dedicated to the projects and related items on this website. Sign up – it’s free, helpful to each other –  and we can all learn something.

The post Project Review – Silicon Chip Capacitance Substitution Box appeared first on tronixstuff.