Posts with «node.js» label

Gesture Controlled Filming Gear Works Super Intuitively

Shooting good video can be an arduous task if you’re working all by yourself. [Pave Workshop] developed a series of gesture-responsive tools to help out, with a focus on creating a simple intuitive interface.

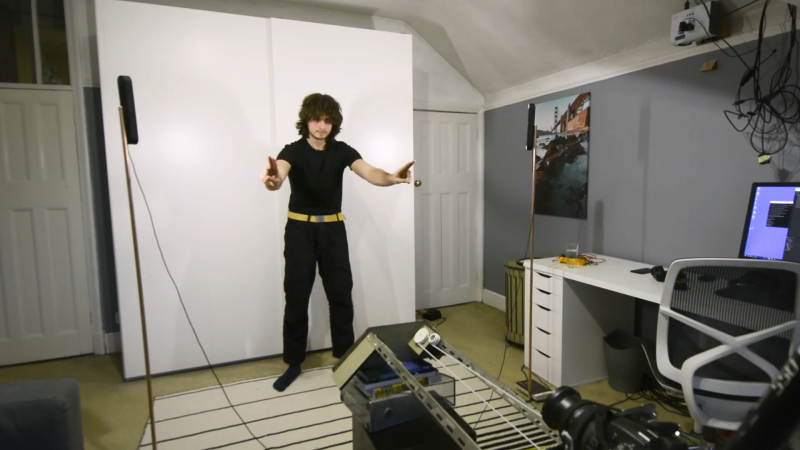
The system is based around using a Kinect V2 to perceive gestures made by the user, which can then control various objects in the scene. For instance, a beckoning motion can instruct a camera slider to dolly forward or backwards, and a halting gesture will tell it to stop. Bringing the two hands together or apart in special gestures indicate that the camera should zoom in or out. Lights can also be controlled by pulling a fist towards or away from them to change their brightness.

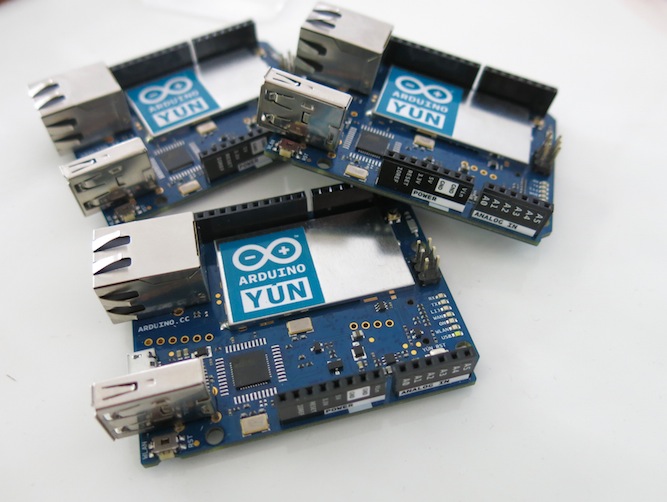
The devil is in the details with a project that works this smoothly. [Pave Workshop] lays out the details on how everything Node.JS was used to knit together everything from the custom camera slider to Philips Hue bulbs and other Arduino components.

The project looks really impressive in the demo video on YouTube. We’ve seen some other impressive automated filming rigs before, too.

Counter-Strike Gets the RGB LED Treatment

Inspired by the over-the-top stage lighting and pyrotechnics used during e-sport events, [Hans Peter] set out to develop a scaled-down version (minus the flames) for his personal Counter-Strike: Global Offensive sessions. It might seem like pulling something like this off would involve hacking the game engine, but as it turns out, Valve was kind enough to implement a game state API that made it relatively easy.

According to the documentation, the CS:GO client can be configured to send out state information to a HTTP server at regular intervals. It even provided example code for implementing a simple state server in Node.js, which [Hans] adapted for this project by adding some conditional statements that analyze the status of the current game.

These functions fire off serial commands to the attached Arduino, which in turn controls the WS2812B LEDs. The Arduino code takes the information provided by the HTTP server and breaks that down into various lighting routines for different conditions such as wins and losses. But things really kick into gear when a bomb is active.

[Hans] wanted to synchronize the flashing LEDs with the beeping sound the bomb makes in the game, but the API doesn’t provide granular enough data. So he recorded the audio of the bomb arming sequence, used Audacity to precisely time the beeps, and implemented the sequence in his Arduino code. In the video after the break you can see that the synchronization isn’t perfect, but it’s certainly close enough to get the point across in the heat of battle.

With the special place that Counter-Strike occupies in the hearts of hackers and gamers alike, it’s little surprise people are still finding unique ways to experience the game.

The Most Immersive Pinball Machine: Project Supernova

Over at [Truthlabs], a 30 year old pinball machine was diagnosed with a major flaw in its game design: It could only entertain one person at a time. [Dan] and his colleagues set out to change this, transforming the ol’ pinball legend “Firepower” into a spectacular, immersive gaming experience worthy of the 21st century.

A major limitation they wanted to overcome was screen size. A projector mounted to the ceiling should turn the entire wall behind the machine into a massive 15-foot playfield for anyone in the room to enjoy.


With so much space to fill, the team assembled a visual concept tailored to blend seamlessly with the original storyline of the arcade classic, studying the machine’s artwork and digging deep into the sci-fi archives. They then translated their ideas into 3D graphics utilizing Cinema4D and WebGL along with the usual designer’s toolbox. Lasers and explosions were added, ready to be triggered by game interactions on the machine.

To hook the augmentation into the pinball machine’s own game progress, they elaborated an elegant solution, incorporating OpenCV and OCR, to read all five of the machine’s 7 segment displays from a single webcam. An Arduino inside the machine taps into the numerous mechanical switches and indicator lamps, keeping a Node.js server updated about pressed buttons, hits, the “Lange Change” and plunged balls.

The result is the impressive demonstration of both passion and skill you can see in the video below. We really like the custom shader effects. How could we ever play pinball without them?


Filed under: classic hacks, video hacks

Combining Musical Hatred with Target Practice

Not everyone can agree on what good music is, but in some cases you’ll find that just about everyone can agree on what is awful. That’s what the people over at Neo-Pangea discovered when they were listening to Internet radio. When one of those terrible songs hits their collective eardrums, the group’s rage increases and they just need to skip the track.

This is how Engineers act if the song is super-awful

Rather than use a web app or simple push button to do the trick, they turned the “skip” button into a NERF target. They call their creation the Boom Box Blaster and made a fantastic demo film video about it which is found after the break.

Inspired by a painting in the office, the target takes the form of a small hot air balloon. The target obviously needed some kind of sensor that can detect when it is hit by a NERF dart. The group tried several different sensor types, but eventually settled on a medium vibration sensor. This sensor is connected to an Arduino, which then communicates with a Raspberry Pi over a Serial connection. The Pi uses a Python script to monitor the Arduino’s vibration sensor. The system also includes some orange LEDs to simulate flames and a servo attached to the string which suspends the balloon from the ceiling. Whenever a hit is registered, the flames light up and the balloon raises into the air to indicate that the shot was on target.

The Pi was required in order to interface with the group’s streaming music service of choice; Sonos. The Sonos API made it easy for the team to interface their target with the “skip track” function. They just wrote a Node.js script that runs on the Pi and sends the proper command as necessary. Now whenever the radio asks the group if they want to build a snowman, they can all answer with a resounding, “no!”. They just need to make sure they have enough ammo to spare. Be sure to check out the comical demonstration video on the project page.


Filed under: Android Hacks, musical hacks

Play with the Basketball Robot running on Intel Edison

After you had an introduction to Intel Edison  following the Getting Started guide, and our previous tutorial, the Intel Edison mini-breakout Getting Started Guide, it’s now time to work on something a bit more complex. You’ll be also able to play a bit with Node.js,  a programming platform that runs on javascript and a good choice for building a web-based application. It is supported by the Intel® Edison standard system image so you can run node.js scripts directly on it.

He shoots! He scores! The crowd goes wild! Let’s build a robot that plays basketball with you. This tutorial is a step-by-step guide for a simple and small differential-drive robot that uses the Intel Edison. You’ll get to know a few more tricks on how to use Mini Breakout Kit and set up a node.js server for the communication.

Go and follow the steps to build it

Node.js on the Arduino Yún

Tom Igoe some days ago wrote an interesting post about Arduino Yún on his blog.  We post it here as it could be useful to the Arduino Community.

————————–

Recently, Federico Fissore added node.js to the package repository for the Arduino Yún. Here’s how you get node to communicate with the Arduino processor on the Yún via the Bridge library.

To do this, you’ll need an Arduino Yún, a microSD card, a microUSB cable and a wifi connection. You should be familiar with the basics of the Arduino Yún and node.js in order to get the most out of this post.

All of the code for this post can be found on my GitHub repository.

First you’ll need to install node on the Yún. Make sure you’ve upgraded to the current Yún software image and have connected to the internet via wifi. Then ssh into your Yún, or connect to the command line interface using the the YunSerialTerminal sketch, and issue the following commands:


$ opkg update
$ opkg install node

That’s it. Now you have node.js onboard. You can check that it’s okay by checking the version:

$ node -v

You should get the version number in reply.

Once you’ve got that working, you’ll undoubtedly want to communicate with the Yún’s Arduino processor from node. You can do this using the Bridge library. On a microSD drive, make a directory for your node scripts. I called mine /arduino/node. Then insert it into your Yún. For reference, its path from the command line is /mnt/sda1/arduino/node.

Note: The Yún automatically treats the microSD card’s /arduino/www/ directory as a public web directory. Anything you put in there will be served out as static HTML. So you may not want to put your node scripts in this directory, so they’re not visible via the browser. That’s why I created a node directory at the same level as the www directory, but outside it.

Read the complete post at this link>>

Arduino Blog 07 Jul 18:20

Controlling lights and sensors with Arduino Yún, Node js server and firmata

Arduino user Cinezaster sent us a project using Node js server on the Arduino Yún to control the lights, heating and some other sensors in the office of Appsaloon, the company where he’s doing an internship.

They already use Node.js for a lot of things and some of them are pretty cool with it.
That’s how they did it:


First of all you need to expand your flash, because there is not enough flash (16 MB) on the Arduino Yún. Sounds reasonable right? Not when you got the Yún for the first time in your hands. Luckily someone wrote this tutorial.

To start with you need to be on the same network to reach the Arduino .
Open your terminal

ssh root@arduino.local

It will ask for a password, which will by default be: ‘arduino’:

Now you can install Node.js on the Yún type :

opkg update
opkg install node

When the install is finished verify it by :

 node -v

It should give you something like this v0.10.28 (it may vary in the future)

Next you have to install the node-serialport package. This is necessary because the Atheros AR9331 needs to communicate with the ATmega32u4.

opkg update
opkg install node-serialport

After this you will need firmata for Node.js. This will control the inputs and outputs of the ATmega32u4.

Normally you would install firmata like this:

npm install firmata

But because the Arduino Yún does not have enough RAM this is ‘not possible’.

Keep reading it on their blog and fork it on Github!

Arduino Blog 03 Jun 19:33

Time to Expand your Yún disk space and install Node.js

Following the new Yún image, we are happy to announce two new features of the Arduino Yún.

  • The first feature is a tutorial we’ve written that allows you to use a micro SD card as a replacement for the Yún’s internal flash memory. Using this, you can expand your Yún’s free disk space from the original 7 Megabytes to the Gigabytes of your SD card.

Having more disk space allows you to make more complex projects, like activating webcams and saving pictures taken with it. In addition, by using an external SD card you avoid using the internal flash memory, thus extending the life of your Yún.

To upgrade your Yún to gain these features, follow the steps of the tutorial and report back to the Arduino Yún forum if you have any issues or questions.

  • The second new feature is the availability of Node.js as an installable package. In order to install Node.js on your Yún, use the Arduino IDE to upload the YúnSerialTerminal example or access your Yún via SSH.

Be sure your Yún has access to the internet, then type the following commands:

opkg update
opkg install node

And voilà! You’ve got Node.js on your Yún.

Try it out with the following command: 

node -e “console.log(‘Hello Yún’)”

If you are a Node.js fan, you probably want to use your favourite modules. Unfortunately, not every Node.js module is “pure javascript”, so some modules won’t work on the Yún. We are solving this by preparing packages for the most common native Node.js modules: we have already prepared node-serialport (opkg install node-serialport) and noble is on the way. If you miss your favourite one and want it added to the list, please consider joining us in developing the Yún.

Arduino Blog 06 May 11:46

Robot can barely move with so much hardware strapped to it

We think that [Andrej Škraba] needs to start looking for a beefier motor platform. This little robot has so much hardware strapped to it the motors can barely keep up. But with a little help it can make its way around the house, and it takes a whole lot of connectivity and computing power along for the ride.

The white stick on the top is a single-board computer. The MK802 Mini sports an A10 processor and up to a gig of ram. Just below that is a USB hub which is sitting on top of a USB battery pack. This powers the computer and gives him the ability to plug in more than one USB device. The robot chassis is from Pololu. It uses an Arduino and a motor shield for locomotion, with commands pushed to it via USB.

This setup makes programming very easy. Here [Andrej] has a keyboard and HDMI monitor plugged in to do a little work. When not coding it can be disconnected and driven over the network. He makes this happen using an Apache server on the MK802 and node.js. See a demo of the system in the clip after the break.


Filed under: robots hacks
Hack a Day 24 Dec 20:01

Toorcamp: Nibble Node.js Widget

The hardware hacking village at Toorcamp provided space and tools to work on hardware. It was interesting to see what hardware hacks people had brought to work on. One example is [Owen]‘s Nibble Node.js Widget. The widget combines the popular node.js platform and custom hardware to create a node for the “internet of things.” The hardware consists of a Arduino Pro Micro, a bluetooth module, a LCD display, and a speaker in a laser cut box.

By using a custom package in node.js, the Nibble becomes an object which can be controlled by its methods. This allows for the developer to push messages to the display and control the device without worrying about the details of the hardware. Since node.js is designed for web applications, it’s simple to make the device controllable from the web.

[Owen] also wrote an emulator for the DCPU from the upcoming game, 0x10c. DCPU assembly is passed in from node.js, which compiles it and sends it to the Nibble. The device can then run the application using the DCPU emulation, which also allows for control of the display and the speaker.

There’s a lot of neat things that can be done with this minuscule cube, and [Owen] plans to release an NPM package for the node.js code.


Filed under: cons
Hack a Day 20 Aug 13:30
arduino  cons  node.js  toorcamp