Posts with «musical hacks» label

Meet the Marvelous Macro Music Maker

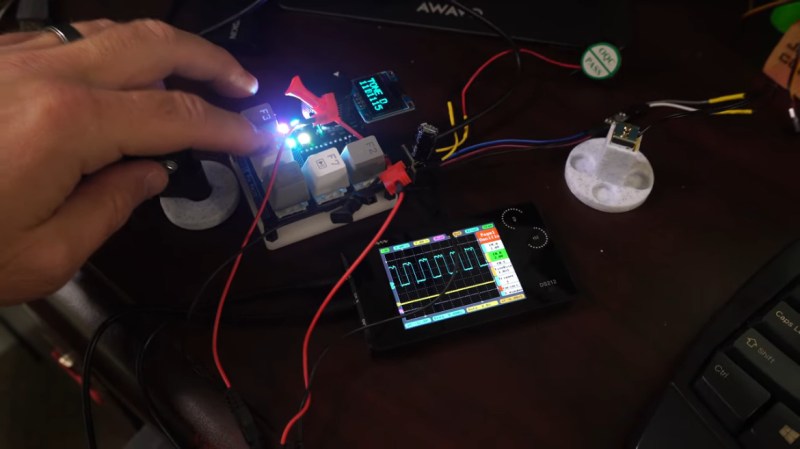
Do you kind of want a macropad, but aren’t sure that you would use it? Hackaday alum [Jeremy Cook] is now making and selling the JC Pro Macro on Tindie, which is exactly what it sounds like — a Pro Micro-based macro keypad with an OLED screen and a rotary encoder. In the video below, [Jeremy] shows how he made it into a music maker by adding a speaker and a small solenoid that does percussion, all while retaining the original macro pad functionality.

[Jeremy]’s original idea for a drum was to have a servo seesawing a chopstick back and forth on the table as one might nervously twiddle a pencil. That didn’t work out so well, so he switched to the solenoid and printed a thing to hold it upright, and we absolutely love it. The drum is controlled with the rotary encoder: push to turn the beat on or off and crank it to change the BPM.

To make it easier to connect up the solenoid and speaker, [Jeremy] had a little I²C helper board fabricated. There’s one SVG connection and another with power and ground swapped in the event it is needed. If you’re interested in the JC Pro Macro, you can pick it up in various forms over on Tindie. Of course, you might want to wait for version 2, which is coming to Kickstarter in October.

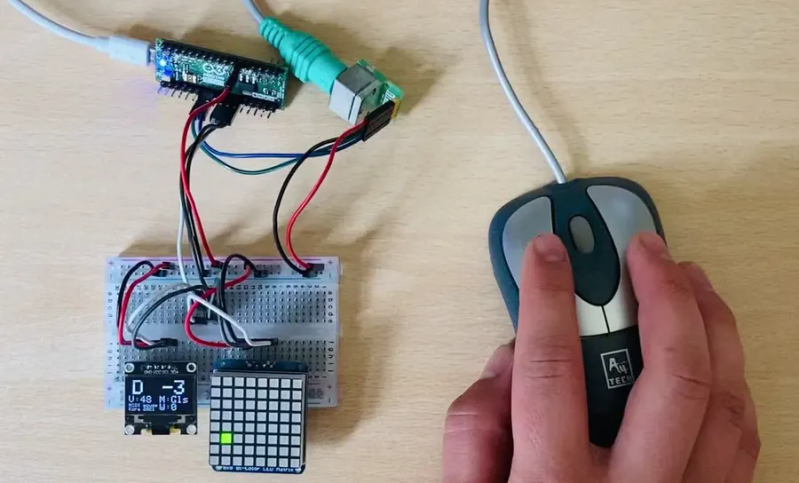
There are many ways to make a macro keyboard. Here’s one that also takes gesture input.

Harp Uses Frikin’ Lasers

We aren’t sure if you really need lasers to build [HoPE’s] laser harp. It is little more than some photocells and has an Arduino generate tones based on the signals. Still, you need to excite the photocells somehow, and lasers are cheap enough these days.

Mechanically, the device is a pretty large wooden structure. There are six lasers aligned to six light sensors. Each sensor is read by an analog input pin on an Arduino armed with a music-generation shield. We’ve seen plenty of these in the past, but the simplicity of this one is engaging.

We’ve used the copper tape writing trick ourselves and it is quite effective. The tape is often used for stained glass work and sticks to many surfaces. You can solder to it and solder overlaps where you need connections. The results are often as good as a simple single-sided PCB.

The code attached to the post is fairly straightforward and the MIDI shield does the bulk of the work. It should also make it easy to create some really impressive musical effects with a bit of extra coding.

If you want an artsy self-contained version, check out this previous Hackaday Prize entry. We’ve seen several of these at different levels of complexity.

Vektor Kollektor Inspector

With the world opening up again, [Niklas Roy] and [Kati Hyyppä] have been busy making a public and collaborative project. Meet the Vektor Kollektor, a portable drawing machine experience, complete with a chip-tune soundtrack. It’s great to see public art meet the maker community with zero pretension and a whole lot of fun!

The build started with an HP7475A pen plotter from the 80s, one that was DOA (or was fried during initial testing). [Niklas] and [Kati] kept the mechanism but rebuilt the controls allowing for easy integration with an Arduino Nano and to be powered with a motorcycle battery.

The magic seems to be less in the junk-bin build (which is great) and more in the way this team extended the project. Using a joystick with arcade buttons as an input, they carted Vektor Kollektor to public parks and streets where they invited others to make art. The Kollekted drawings are available on a gallery website in a very cool animated form, freely available for download, on t-shirts, 3D prints, and on coffee mugs because, why not?

Some select drawings are even spray-painted on walls using a large plotter, and we really hope [Niklas Roy] and [Kati Hyyppä] share details on that build soon. Of course this comes hot on the heels of the workshop window cyborg we saw from these two hardware artists.

MIDI Mouse Makes Marvelous Music

It’s an old misconception that digital musicians just use a mouse and keyboard for their art. This is often far from the truth, as many computer music artists have a wide variety of keyboards/synths, MIDI controllers, and “analog” instruments that all get used in their creative process. But what if one of those instruments was just a mouse?

Well, that must have been what was going through [kzra]’s mind when he turned an old ps/2 roller ball mouse into an electronic instrument. Born out of a love for music and a hate for waste, the mouse is a fully functional MIDI controller. Note pitch is mapped to the x-coordinate of the pointer, and volume (known as velocity, in MIDI-speak) is mapped to the y-coordinate. The scroll wheel can be used as a mod wheel, user-configurable but most often used to vary the note’s pitch. The mouse buttons are used to play notes, and can behave slightly differently depending on the mode the instrument is set to.

Not satisfied with simply outputting MIDI notes, [kzra] also designed an intuitive user interface to go along with the mouse. A nice little OLED displays the mode, volume, note, and mouse coordinates, and an 8×8 LED matrix also indicates the note and volume. It’s a fantastic and versatile little instrument, and you’ve gotta check out the video after the break to see it for yourself. We’ve seen some awesome retro-tech MIDI controllers before, and this fits right in.

Thanks to [midierror] for the tip!

Hack a Day 18 Jul 18:00

Turning GameCube & N64 Pads Into MIDI Controllers

It’s fair to say that the Nintendo 64 and GameCube both had the most unique controllers of their respective console generations. The latter’s gamepads are still in high demand today as the Smash Bros. community continues to favor its traditional control scheme. However, both controllers can easily be repurposed for musical means, thanks to work by [po8aster].

The project comes in two forms – the GC MIDI Controller and the N64 MIDI Controller, respectively. Each uses an Arduino Pro Micro to run the show, a logic level converter, and [NicoHood’s] Nintendo library to communicate with the controllers. From there, controller inputs are mapped to MIDI signals, and pumped out over traditional or USB MIDI.

Both versions come complete with a synth mode and drum mode, in order to allow the user to effectively play melodies or percussion. There’s also a special mapping for playing drums using the Donkey Konga Bongo controller with the GameCube version. For those eager to buy a working unit rather than building their own, they’re available for purchase on [po8aster’s] website.

It’s a fun repurposing of video game hardware to musical ends, and we’re sure there’s a few chiptune bands out there that would love to perform with such a setup. We’ve seen other great MIDI hacks on Nintendo hardware before, from the circuit-bent SNES visualizer to the MIDI synthesizer Game Boy Advance. Video after the break.

If you wanna be a cool nerd who uses video game controllers to play music, I’m doing a birthday sale, 20% off all the things!

Code/Link RTs appreciated pic.twitter.com/GqBpGUFWLe

— Po8aster (@Po8aster) April 30, 2021

[Thanks to Chris D for the tip!]

Cheap, Expandable Floor Piano Plays with Heart and Soul

Ever since we saw the movie Big, we’ve wanted a floor piano. Still do, actually. We sometimes wonder how many floor pianos that movie has sold. It’s definitely launched some builds, too, but perhaps none as robust as this acrylic and wooden beauty by [FredTSL]. If you want more technical detail, check out the project on IO.

The best part is that this piano is modular and easily expands from 1 to 8 octaves. Each octave runs on an Arduino Mega, with the first octave set up as a primary and the others as secondaries. When [FredTSL] turns it on, the primary octave sends a message to find out how many octaves are out there, and then it assigns each one a number. Whenever a note is played via conductive fabric and sensor, the program fetches the key number and octave number and sends the message back to the primary Mega, which plays the note through a MIDI music shield.

We think this looks fantastic and super fun to dance around on. Be sure to check out the build log in photos, and stick around after the break, because you’d better believe they busted out some Heart and Soul on this baby. After all, it’s pretty much mandatory at this point.

Wish you could build a floor piano but don’t have the space or woodworking skills? Here’s a smaller, wireless version that was built in 24 hours.

12-Arduino Orchestra Plays Star Wars Fanfare

Back in the early days of the musical synthesizer, some designers who wished for polyphony in their instruments would simply build multiple tone-generators for as many notes as they wished to play. [Kevin] took that same approach with his Arduino orchestra, and set about having it play the closing number from Star Wars: A New Hope.

The build consists of twelve Arduino Nanos, each wired up to power, a speaker, and the same MIDI cable. The MIDI cable carries note data for each Arduino on a separate MIDI channel, allowing each to play its own role in the orchestra. [Kevin] then set about arranging the Star Wars music into a MIDI file suitable for the Arduinos, roughly setting six voices to high parts and six voices low. The Arduinos play the notes received using the simple tone() function. The result is a very chiptune rendition of the end of the fourth episode of the world’s most famous space opera.

It may not be neat, tidy, or efficient, but it certainly is fun. Twelve Arduinos bleeping away with their flashing LEDs and cute little speakers makes quite the conversation piece. It’s a similar approach to the Floppotron, which plays more notes by adding more floppy drives. We’ve also seen the same thing done with SEGA sound chips. Video after the break.

Hack a Day 11 Jun 16:00

Making Minty Fresh Music With Markov Chains: The After Eight Step Sequencer

Step sequencers are fantastic instruments, but they can be a little, well, repetitive. At it’s core, the step sequencer is a pretty simple device: it loops through a series of notes or phrases that are, well, sequentially ordered into steps. The operator can change the steps while the sequencer is looping, but it generally has a repetitive feel, as the musician isn’t likely to erase all of the steps and enter in an entirely new set between phrases.

Enter our old friend machine learning. If we introduce a certain variability on each step of the loop, the instrument can help the musician out a bit here, making the final product a bit more interesting. Such an instrument is exactly what [Charis Cat] set out to make when she created the After Eight Step Sequencer.

The After Eight is an eight-step sequencer that allows the artist to set each note with a series of potentiometers (which are, of course, housed in an After Eight mint tin). The potentiometers are read by an Arduino, which passes MIDI information to a computer running the popular music-oriented visual programming language Max MSP. The software uses a series of Markov Chains to augment the musician’s inputted series of notes, effectively working with the artist to create music. The result is a fantastic piece of music that’s different every time it’s performed. Make sure to check out the video at the end for a fantastic overview of the project (and to hear the After Eight in action, of course)!

[Charis Cat]’s wonderful creation reminds us of some the work [Sara Adkins] has done, blending human performance with complex algorithms. It’s exactly the kind of thing we love to see at Hackaday- the fusion of a musician’s artistic intent with the stochastic unpredictability of a machine learning system to produce something unique.

Thanks to [Chris] for the tip!

Auto Strummer Can Plectrum the Whole Flat-Strumming Spectrum

Playing the guitar requires speed, strength, and dexterity in both hands. Depending on your mobility level, rocking out with your axe might be impossible unless you could somehow hold down the strings and have a robot do the strumming for you.

[Jacob Stambaugh]’s Auto Strummer uses six lighted buttons to tell the hidden internal pick which string(s) to strum, which it does with the help of an Arduino Pro Mini and a stepper motor. If two or more buttons are pressed, all the strings between the outermost pair selected will be strummed. That little golden knob near the top is a pot that controls the strumming tempo.

[Jacob]’s impressive 3D-printed enclosure attaches to the guitar with a pair of spring-loaded clamps that grasp the edge of the sound hole. But don’t fret — there’s plenty of foam padding under every point that touches the soundboard.

We were worried that the enclosure would block or muffle the sound, even though it sits about an inch above the hole. But as you can hear in the video after the break, that doesn’t seem to be the case — it sounds fantastic.

Never touched a real guitar, but love to play Guitar Hero? There’s a robot for that, too.

Homebrew Grain Synth Has A Rad Step Sequencer

In the world of homebrew synthesizers, there are plenty of noiseboxes and grooveboxes that make all kinds of wacky and wild noises. However, common projects like the Auduino and Atari Punk Console are often limited in that they can’t readily be programmed to play multiple notes or any sort of discernable rhythm. [Nick Poole] changes this with his Auduino step sequencer build.

The build takes the Auduino grain synthesizer, and modifies it by adding a step sequencer. This is possible as the Auduino code, which runs on the old-school ATMEGA-based Arduinos, is incredibly fast, leaving plenty of processing time for extra features to be added. [Nick] adds eight LEDs and eight buttons to the build, allowing the user to select one of eight steps to modify. Then, the sound parameters for the step can be altered with the standard Auduino controls. This lets the user quickly and easily build up 8-step melodies, something that was previously impossible with the Auduino.

It’s a fun build, and one that makes a great intro into the world of DIY synth builds. The techniques learned here will serve any aspiring maker well if they dive further into the world of modular synthesis and associated arcana. Video after the break.


Auduino software synth

Hack a Day 19 Mar 19:30