No matter what they’re flying, good pilots have a “feel” for their aircraft. They know instantly when something is wrong, whether by hearing a strange sound or a feeling a telltale vibration. Developing this sixth sense is sometimes critical to the goal of keeping the number of takeoff equal to the number of landings.
The same thing goes for non-traditional aircraft, like paragliders, where the penalty for failure is just as high. Staying out of trouble aloft is the idea behind this paraglider line tension monitor designed by pilot [Andre Bandarra]. Paragliders, along with their powered cousins paramotors, look somewhat like parachutes but are actually best described as an inflatable wing. The wing maintains its shape by being pressurized by air coming through openings in the leading edge. If the pilot doesn’t maintain the correct angle of attack, the wing can depressurize and collapse, with sometimes dire results.
Luckily, most pilots eventually develop a feel for collapse, sensed through changes in the tension of the lines connecting the wing to his or her harness. [Andre]’s “Tensy” — with the obligatory “McTenseface” surname — that’s featured in the video below uses an array of strain gauges to watch to the telltale release of tension in the lines for the leading edge of the wing, sounding an audible alarm. As a bonus, Tensy captures line tension data from across the wing, which can be used to monitor the performance of both the aircraft and the pilot.
There are a lot of great design elements here, but for our money, we found the lightweight homebrew strain gauges to be the real gem of this design. This isn’t the first time [Andre] has flown onto these pages, either — his giant RC paraglider was a big hit back in January.
Traditionally, the useless machine is a simple one that invites passersby to switch it on. When they do, the machine somehow, some way, turns itself off; usually with a finger or finger-like object that comes out from the box in what feels like an annoyed fashion. Honestly, that’s probably part of what drives people to turn them on over and over again.
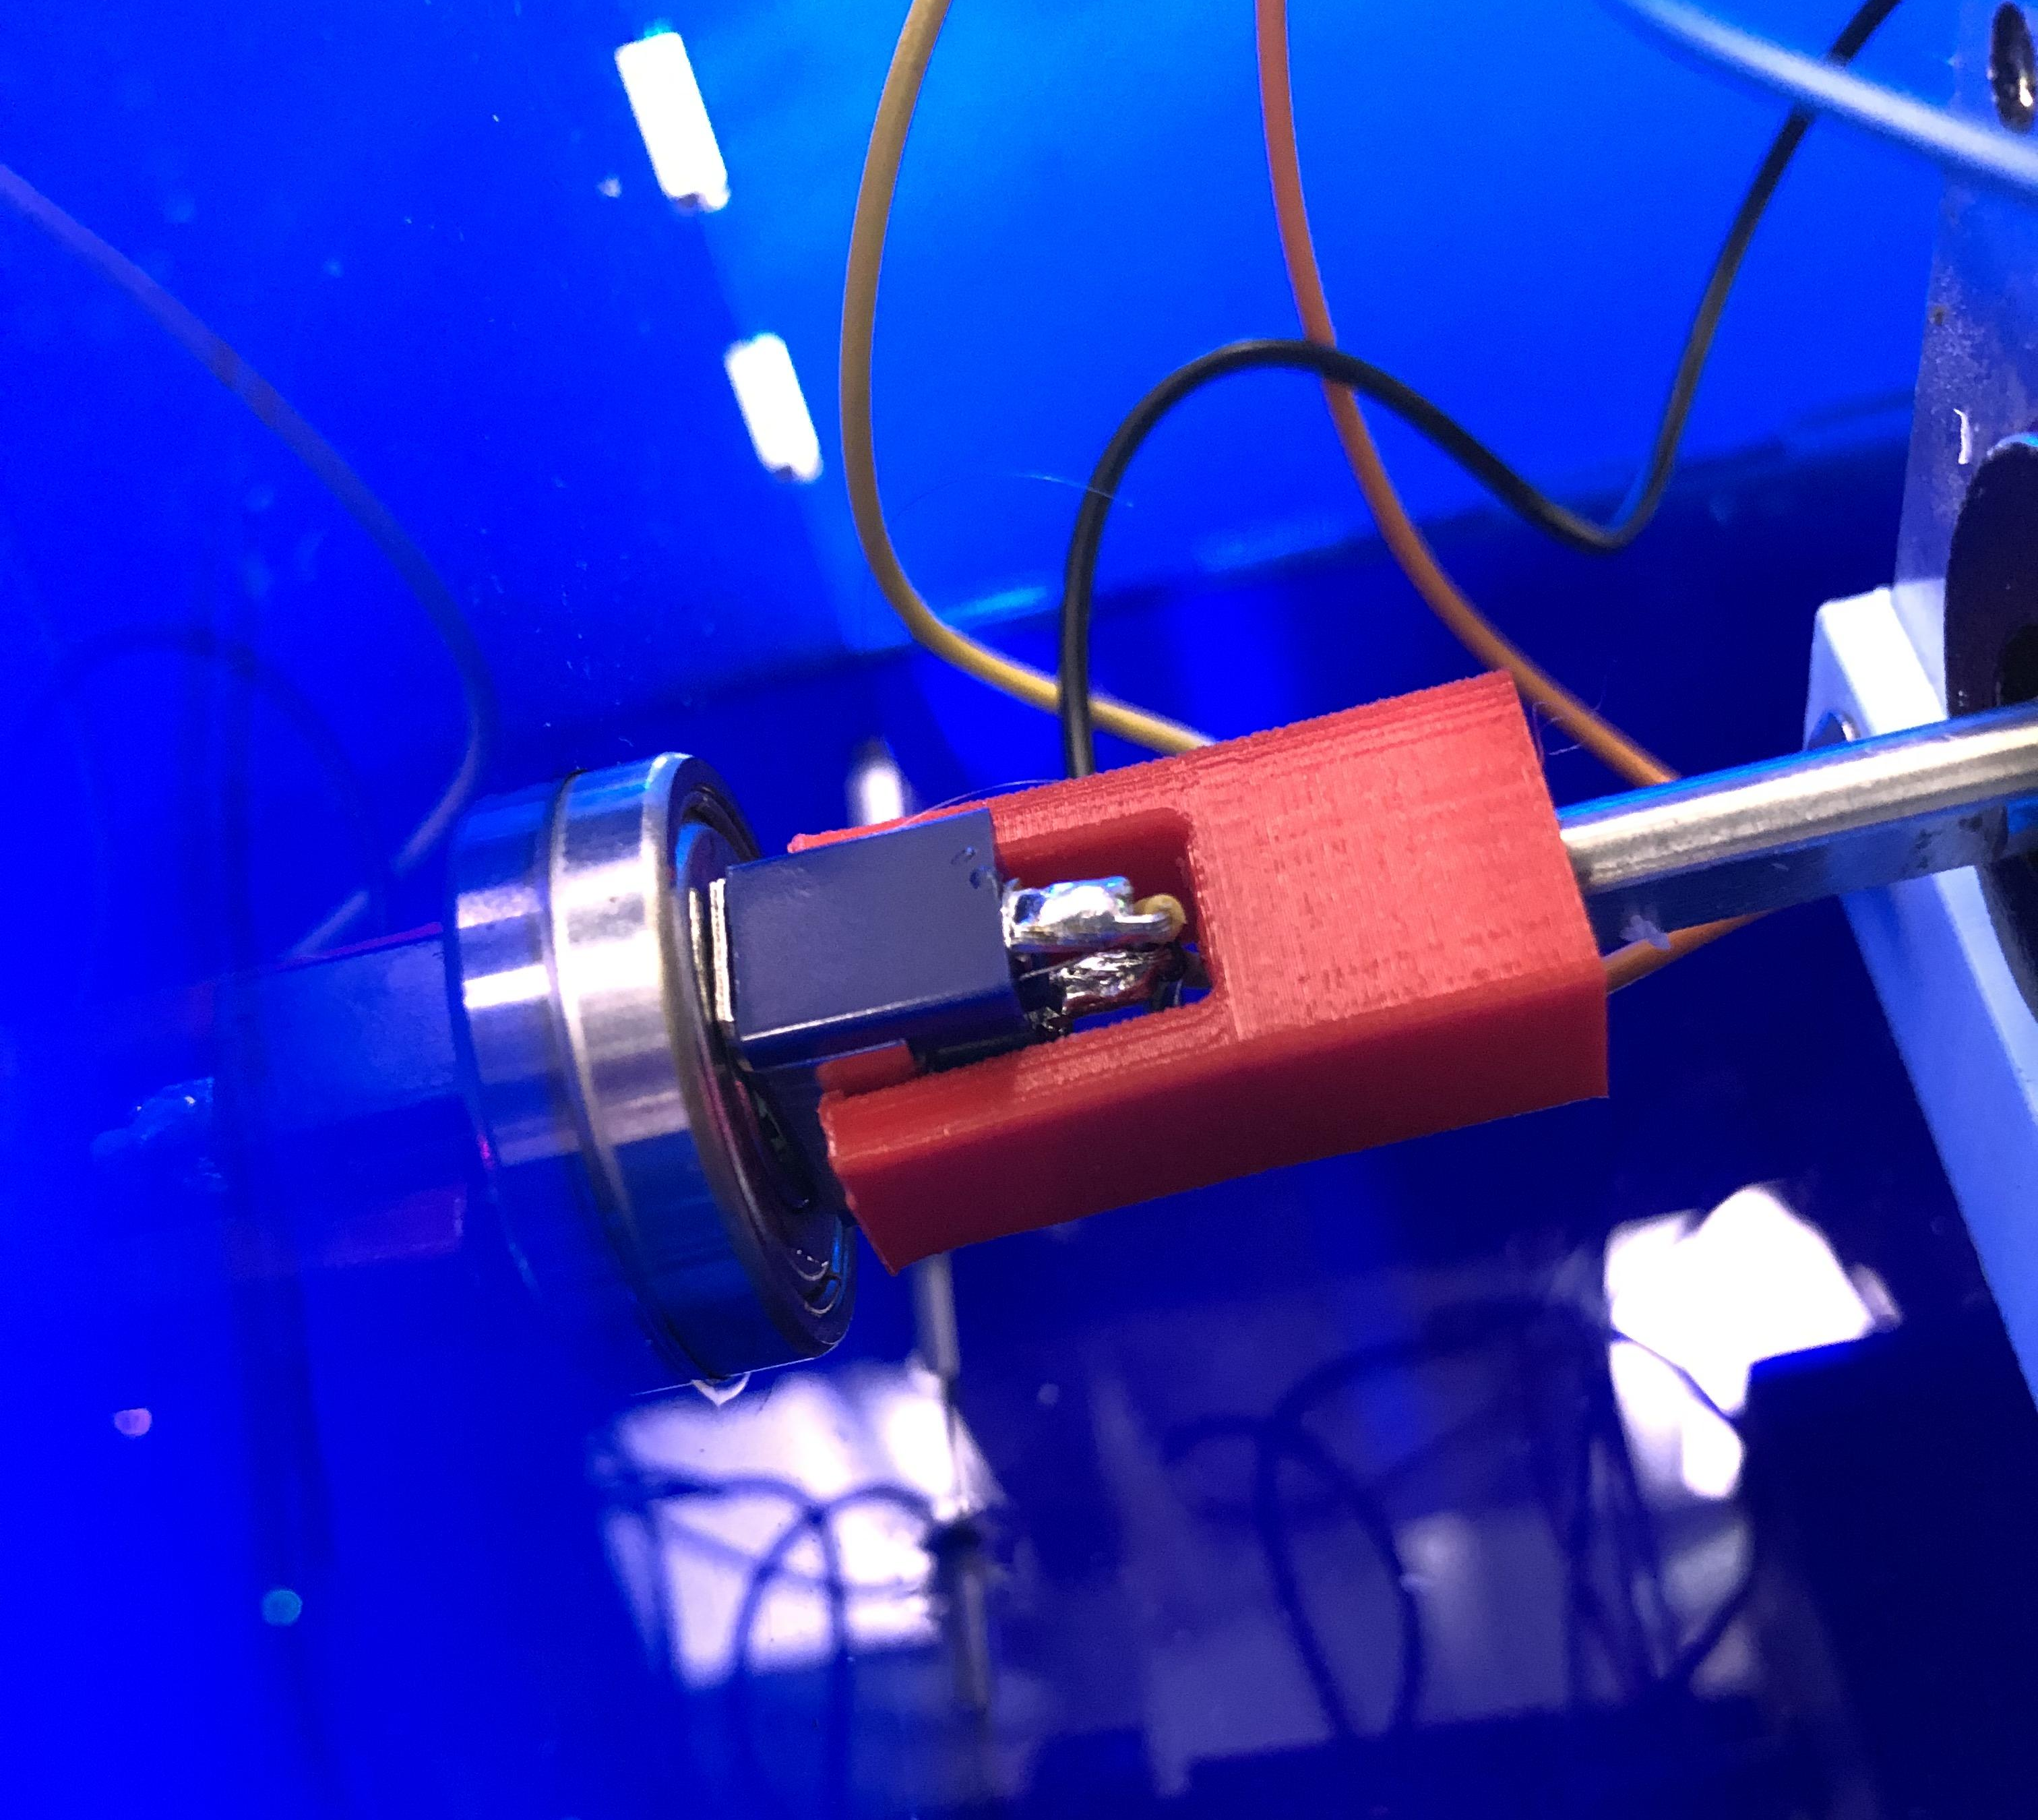
What’s really happening is that an Arduino is getting a signal from the toggle switch, and is then rotating it on a ball bearing with a stepper motor driven through an H-bridge.
It shouldn’t be too hard to make one of these yourself, given that [Bart] has provided the schematic and STLs. If we weren’t living in such touchy times, we might suggest building one of these into your Halloween candy distribution scheme somehow. Sell the switch as one that turns on a candy dispenser, and then actually dispense it after three or five tries.
[Dave] found an affordable 4-channel R/C controller in the Bezos Barn and did just that. It took some modifications to make it work, like making a daughter board to turn the thumb grip input from a toggle button to a momentary and figuring out what to do with the three-way slider switch, but it looks like a blast to use.
The controller comes in a 6-channel version with two pots on the top. Both versions have the same enclosure and PCB, so [Dave] already had the placement molded out for him when he decided to install a pair of momentary buttons up there. These change roles based on the three-way slider position, which switches between race mode, menu mode, and extras mode.
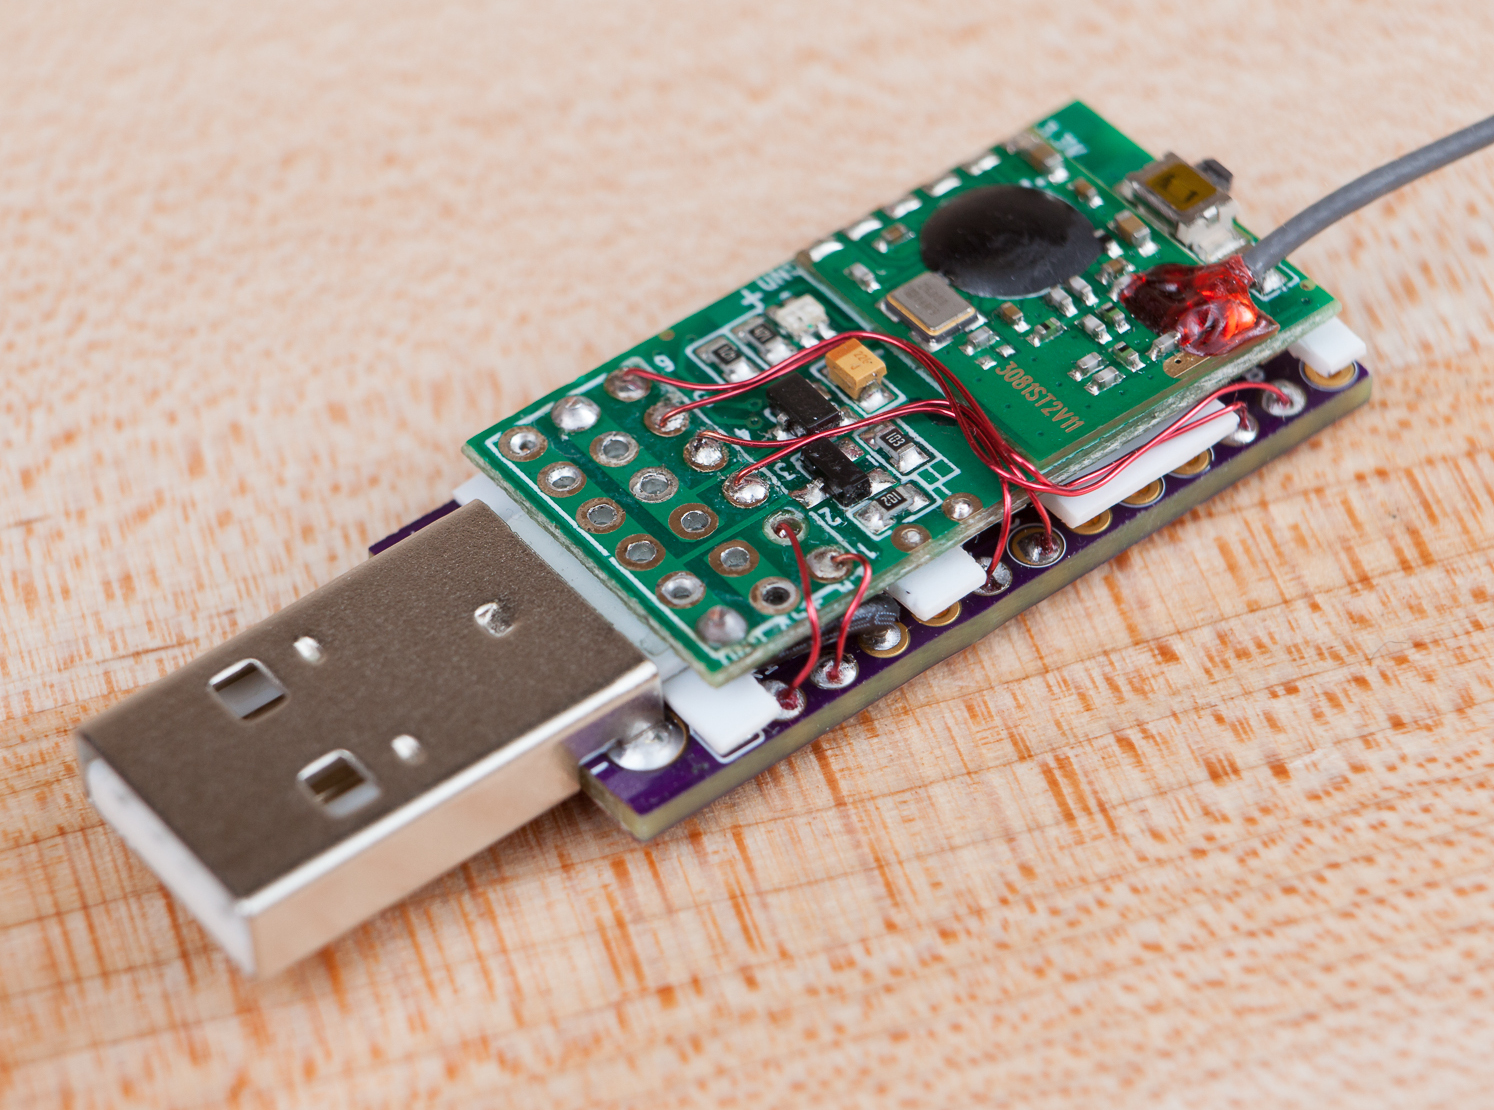
We love the way [Dave] turned the original receiver into a USB dongle that emulates an Xbox 360 controller — he made a DIY Arduino Pro Micro with a male USB-A, stripped down the receiver board, and wired them together. There’s an entire separate blog post about that, and everything else you’d need to make your own R/C controller is on GitHub. Check out the demo and overview of the controls after the break.
If you’re planning to get into circuit sculpture one of these days, it would probably be best to start with something small and simple, instead of trying to make a crazy light-up spaceship or something with a lot of curves on the first go. A small form factor doesn’t necessarily mean it can’t also be useful. Why not start by making a small automatic night light?
The circuit itself is quite simple, especially because it uses an Arduino. You could accomplish the same thing with a 555, but that’s going to complicate the circuit sculpture part of things a bit. As long as the ambient light level coming in from the light-dependent resistor is low enough, then the two LEDs will be lit.
We love the frosted acrylic panels that [akshar1101] connected together with what looks like right angle header pins. If you wanted to expose the electronics, localize the light diffusion with a little acrylic cover that slips over the LEDs. Check it out in the demo after the break.
When it comes to computers, it seems like the only thing that matters is speed. The more the better, in general, and the same applies to peripherals. We want the fastest network adapters, the fastest video card, and the fastest printer. So why in the world would anyone intentionally build a really slow inkjet printer? For art, of course.
At least that’s the story [HomoFaciens] tells us in the video below. His efforts are in support of a friend’s art project, which seeks to print slowly but continuously on a roll of paper. [HomoFaciens]’s printer is based on an H-P C6602 inkjet cartridge, one of those high-priced consumables that make buying a new printer more attractive than replacing them once depleted. After figuring out how to drive the printhead — 5 to 6 μs pulses of 18 volts through a ULN2803 Darlington array driver chip seemed to do the trick — he mounted everything to the gantry of an old 3D printer. It’s interesting to watch the images slowly being built up — something that printers usually hide from prying eyes — and to see how the DPI count of the printer can be increased by interlacing each printed line.
We live in a strange time indeed. People who once eschewed direct interactions with fellow humans now crave it, but to limited avail. Almost every cashier at the few stores deigned essential enough to maintain operations are sealed away behind plastic shields, with the implication that the less time one spends lingering, the better. It’s enough to turn an introvert into an extrovert, at least until the barriers are gone.
We get the idea that the need to reach out and touch someone is behind [Niklas Roy]’s “Please Leave a Message”, an interactive art installation he set up in the front window of his Berlin shop. Conveniently located on a downtown street, his shop is perfectly positioned to attract foot traffic, and his display is designed to catch the eye and perhaps crack a smile. The device consists of a large wooden easel holding the guts from an old X-Y pen plotter, an Arduino and an ESP-8266, and a couple of drivers for the plotter’s steppers. Passers-by are encouraged to scan a QR code that accesses a web page served up by the ESP-8266, where they can type in a brief message. The plotter dutifully spells it out on a scroll of paper for all to see, using a very nice font that [Niklas] designed to be both readable and easily plotted. The video below shows it in action with real people; it seems to be a crowd-pleaser.
Of the 43 muscles that comprise the human face, only a few are actually important to speaking. And yet replicating the movements of the mouth by mechanical means always seems to end up only partly convincing. Servos and linkages can only approximate the complex motions the lips, cheeks, jaw, and tongue are capable of. Still, there are animatronics out there that make a good go at the job, of which this somewhat creepy mechanical mouth is a fine example.
Why exactly [Will Cogley] felt the need to build a mechanical maw with terrifying and fairly realistic fangs is anyone’s guess. Recalling his lifelike disembodied animatronic heart build, it just seems like he pursues these builds for the challenge of it all. But if you thought the linkages of the heart were complex, wait till you see what’s needed to make this mouth move realistically. [Will] has stuffed this pie hole with nine servos, all working together to move the jaw up and down, push and pull the corners of the mouth, raise and lower the lips, and bounce the tongue around.
It all seems very complex, but [Will] explains that he actually simplified the mechanical design to concentrate more on the software side, which is a text-to-speech movement translator. Text input is translated to phonemes, each of which corresponds to a mouth shape that the servos can create. It’s pretty realistic although somewhat disturbing, especially when the mouth is placed in an otherwise cuddly stuffed bear that serenades you from the nightstand; check out the second video below for that.
[Will] has been doing a bang-up job on animatronics lately, from 3D-printed eyeballs to dexterous mechatronic hands. We’re looking forward to whatever he comes up with next — we think.
When we last saw [isaac879]’s levitating RGB time fountain, it was made of wood which meant that it would absorb water and didn’t really show off the effect very well. His new version solves this problem with an acrylic case, new PCB and an updated circuit.
Like the original, this project drops water past strobing RGB LEDs creating an illusion of levitating, undulating colored water droplets. The pump at the top creates the droplets, but the timing has a tendency to drift over time. He thus implemented a PID controller to manage the pump’s drip rate, which was done by having the droplets pass by an infrared diode connected to an ATTiny85. The ’85 used the diode and PWM to control the pump motor speed and communicated to the Arduino over I2C.
The video shown below shows the whole process of designing and building the new time fountain. Everything from circuit and PCB design to 3D printing to assembly is shown along with narration describing what’s going on in case you want to build one yourself. If you do, all the files and components required are listed in the info section of the video.
There’s more that [isaac879] wants to do to improve the time fountain, but V2 looks great. It’s sleeker and smaller than the original and solves some of the design issues of the first. For more inspiration, check out some of the other levitating water fountain projects that have been posted over the years.
LoRa is the go-to tech for low power, long range wireless sensor networks. Designing with off-the-shelf modules can be a boon or a bane depending on the documentation and support. Luckily, [Renzo] has prepared a set of tutorials to get you started.
In his seven part series of write-ups, [Renzo] starts by connecting the E32 module from AliExpress to an Arduino as well as an ESP8266 to demonstrate essential communications. Then he discusses the configuration options and the library he created to make like a bit easier. Following that is a series of posts discussing transmission types as well as power saving methods including sleep modes and wake-on-radio.
The information will be extremely handy for someone starting off with the SX1276/SX1278 Wireless Modules which are relatively inexpensive as opposed to more standardized development kits. We love the abundance of fritzing diagrams, arduino code and helper library and hope someone will build on it. You can get the library from Github for your tinkering pleasure.
It’s surprisingly easy to misjudge tips that come into the Hackaday tip line. After filtering out the omnipresent spam, a quick scan of tip titles will often form a quick impression that turns out to be completely wrong. Such was the case with a recent tip that seemed from the subject line to be a flight simulator cockpit. The mental picture I had was of a model cockpit hooked to Flight Simulator or some other off-the-shelf flying game, many of which we’ve seen over the years.
I couldn’t have been more wrong about the project that Grant Hobbs undertook. His cockpit simulator turned out to be so much more than what I thought, and after trading a few emails with him to get all the details, I felt like I had to share the series of hacks that led to the short video below and the story about how he somehow managed to build the set despite having no previous experience with the usual tools of the trade.
A Novel and a Film
Grant has been making short films for a while, mainly in collaboration with John Dwyer, an author of historical novels. Grant’s shorts are used as promos for John’s books, and nicely capture the period and settings of John’s novels. Most of these films required little in the way of special sets, relying instead on stock footage and vintage costumes to achieve their look and feel. John’s latest novel would change all that.
Called Mustang, the novel centers on a hotshot fighter pilot in WWII. Grant’s vision for the short to promote the book was inspired by the recent Christopher Nolan film Dunkirk, which featured intricate sequences filmed in the cockpit of a Spitfire. Granted wanted a similar look, and began arranging to use a real P-51 Mustang for filming. That presented immediate problems. First, there aren’t that many of the vintage aircraft left, and those that are still flying usually have anachronistic instruments in the cockpit, like GPS. Also, Grant wanted the instruments to respond as if the plane were airborne, and to have the shadows cast by the canopy into the cockpit suggest aerial maneuvers. Such an effect would be difficult to achieve with a plane stuck on a runway.
That’s when Grant realized that a gimballed cockpit simulator was needed. It could have a period-accurate dashboard, be positioned outdoors to take advantage of natural daylight and real backgrounds rather than CGI, and could be pitched, rolled and yawed to simulate flight. It would be perfect, and it would save the project. There was just one problem: he had no idea how to build it.
Helping Hands
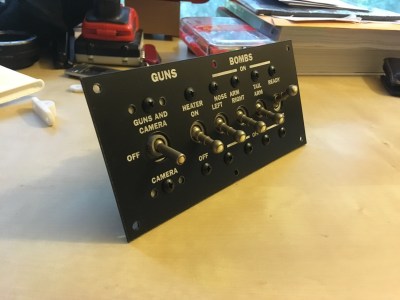
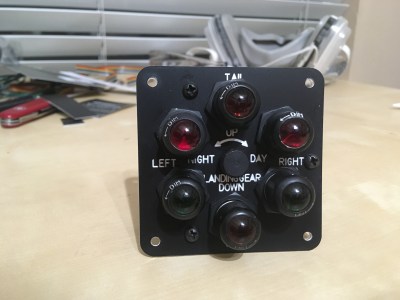
Wisely, Grant turned to his local hackerspace, Dallas Maker Space, for help. There he found not only the tools he lacked, but kindred spirits with the necessary skills and the willingness to share them. They started working on the cockpit instrument panel, which ended up including a combination of actual flight hardware and mocked-up instruments. The fake instruments used steppers and an Arduino to drive the needles, which were controlled by a custom iPad app that was used to animate them live during filming. The real instruments, like the artificial horizon and turn-and-slip indicator, were powered by a vacuum pump and responded to the movements of the simulator on its gimbals.
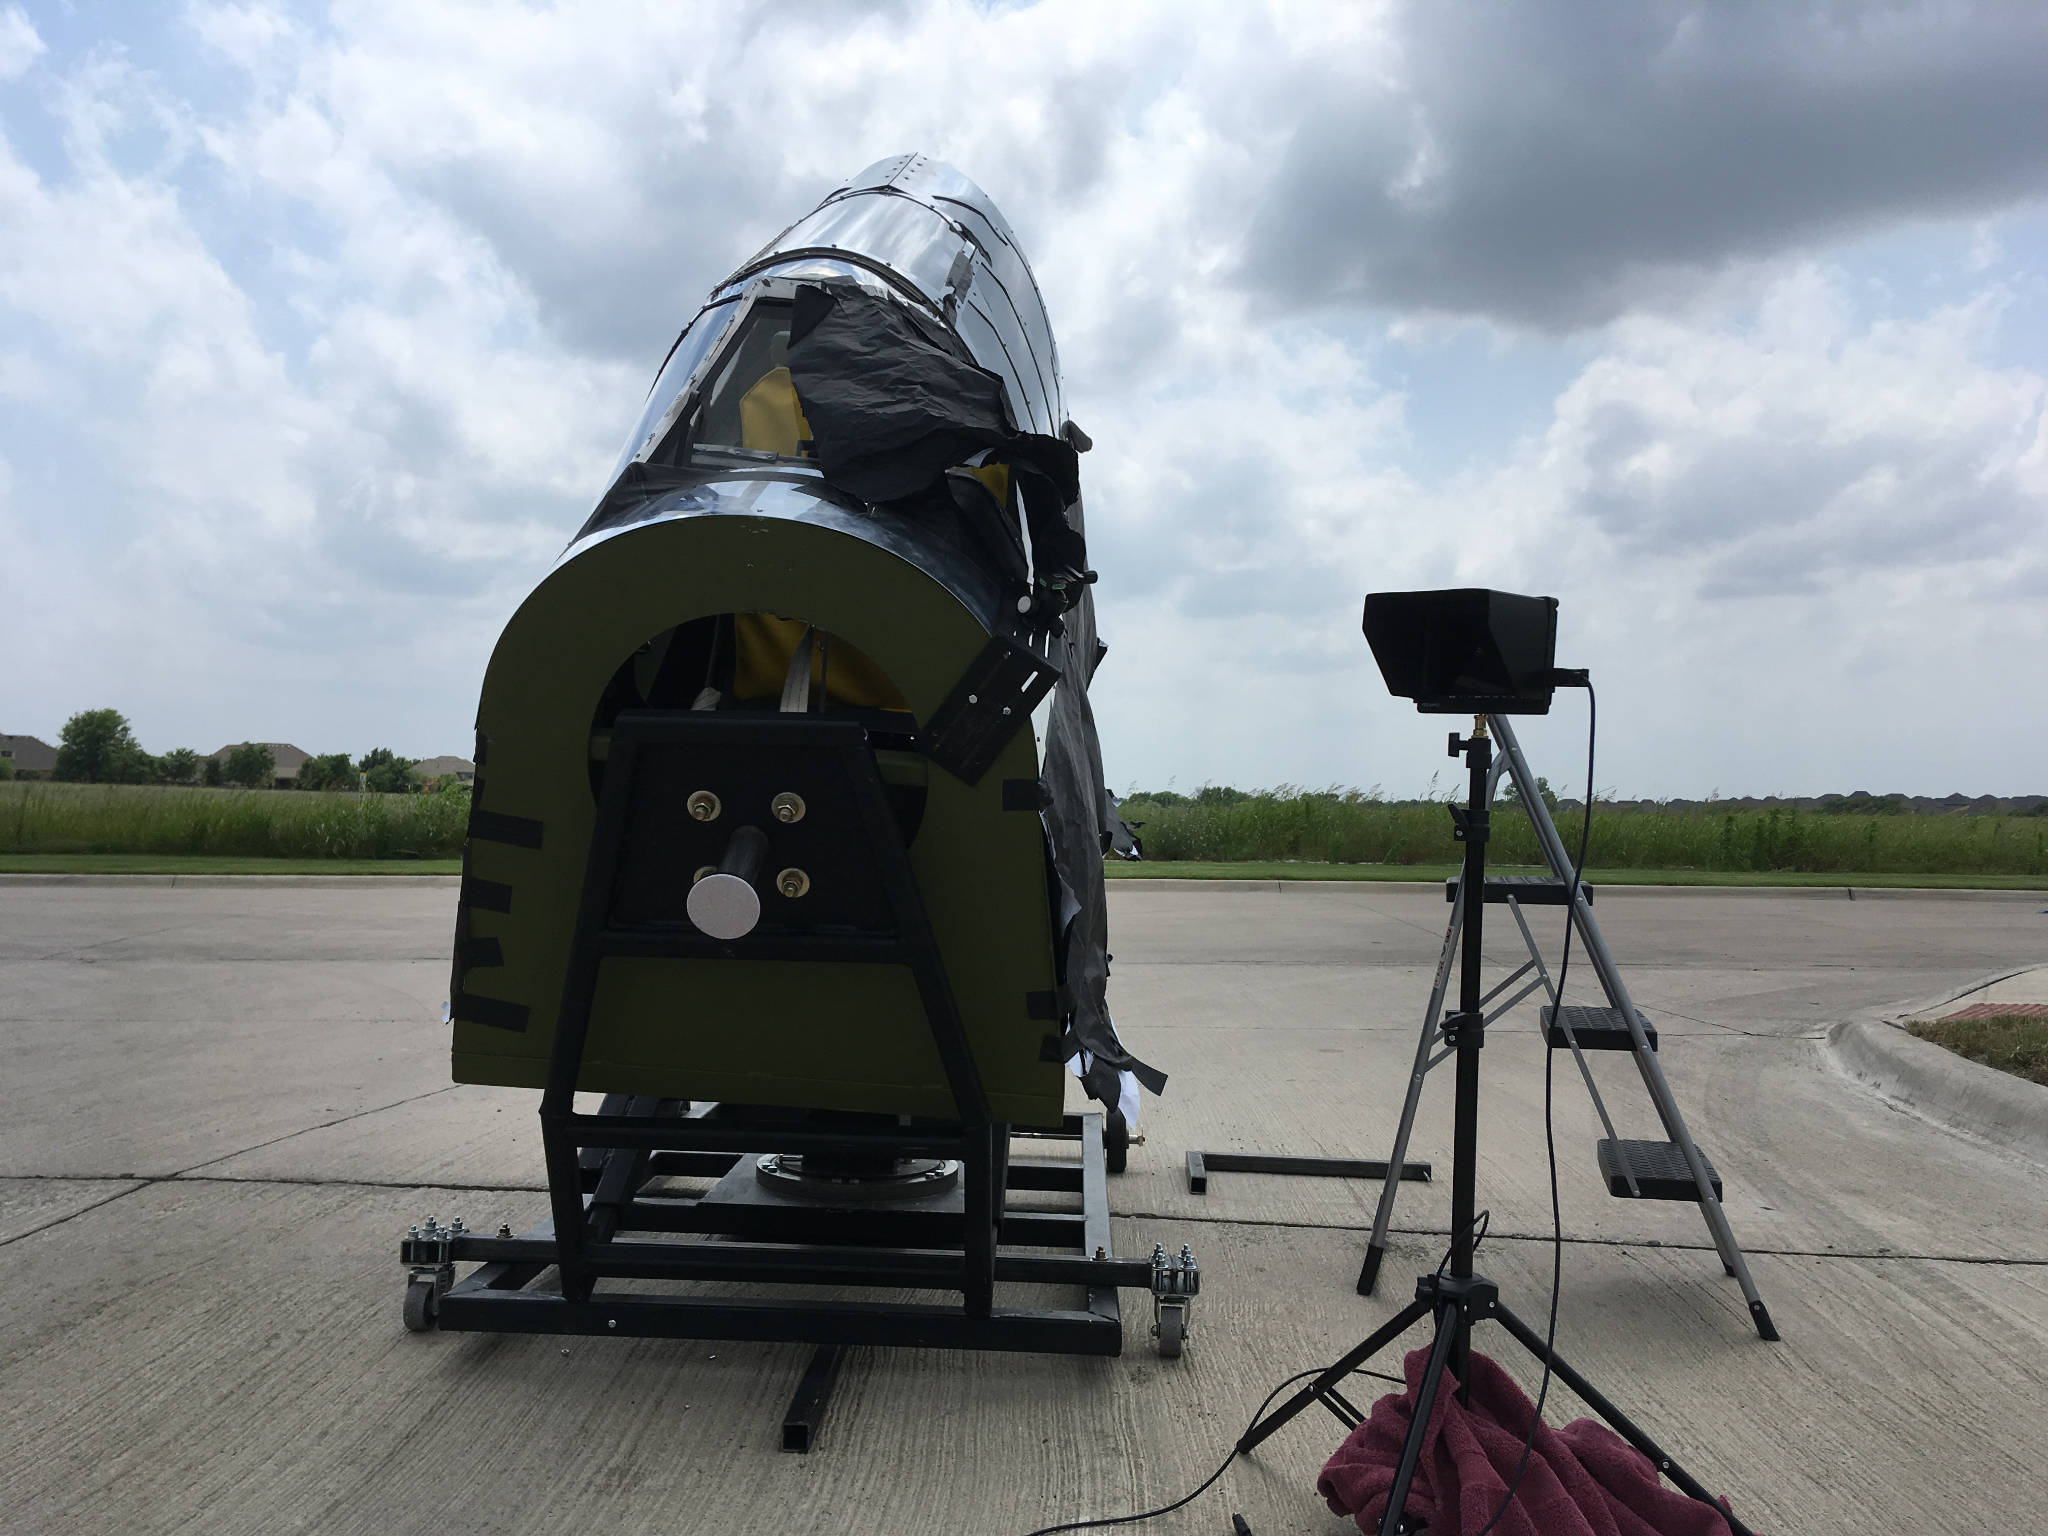
The gimballed cockpit set for exterior shots. The wide horizon and natural lighting combined with the 3-DOF gimbal make for a very realistic effect.
Mounting this convincing panel into something was an entirely different undertaking. Grant relied heavily on the experience of DMS members to design a structure strong enough to support the actor and allow for the motion needed to create a convincing effect. The cockpit mockup, made from plasma-cut sheet metal and plywood, is mounted to a heavy-duty three-axis gimbal, including a massive bearing from a pallet jack for the yaw axis.
Set and talent, ready for action.
Grant had originally planned to place the mockup on a mountaintop for shooting, much as the Spitfire mockup from Dunkirk was placed on the edge of a cliff to give an unobstructed horizon to simulate flying over the English Channel. When that proved logistically challenging, he set up on an airport runway and used clever camera blocking to avoid shooting the horizon. Grips manually moved the simulator while Grant manipulated the fake instruments and filmed the results, which I think speak for themselves. If only the budget – and on-set safety – would have supported simulating the massive four-blade Mustang propeller, the illusion would have been complete.
I really enjoyed digging into this project and all the hacks that it entailed. Movie magic is as much about hacking as anything else, at least behind the cameras, and it’s good to see what’s possible with a limited budget. We recently featured a low-budget but high-style sci-fi movie set build, and we’ve gone in-depth with a playback designer for the Netflix series Lost in Space, both in these pages and as a Hack Chat.