Posts with «midi» label

Make Your Own MIDI Controller With An Arduino

Engineers create something out of nothing, and no where is this more apparent than in the creation of customized computer hardware. To make a simple MIDI controller, you need knowledge of firmware design and computer architecture, you need knowledge of mechanical design, and you need to know electronic design. And then you need the actual working knowledge and experience to wield a tool, be it a hammer, laser cutter, or an IDE. [Mega Das] brought together all of these skill to build a MIDI controller. Sure, it’s for bleeps and bloops coming out of a speaker, but take a step back and realize just how awesome it is that any one person could imagine, then implement such a device.

The electronics for this build include a printed circuit board that serves to break out the connections on an Arduino nano to a dozen arcade push buttons, four slide pots, two rotary pots, and a handful of screw terminals to connect everything together. Mechanically, this is a laser-cut box engraved with some fancy graphics and sized perfectly to put everything inside.

Yes, we’ve seen a lot of MIDI controllers built around the Arduino over the years, but this one is in a class by itself. This is taking off-the-shelf parts and customizing them to exactly what you want, and a prodigious example of what is possible with DIY hardware creation. You can check out the build video below.

Add visual effects to your MIDI input pad with NeoPixels

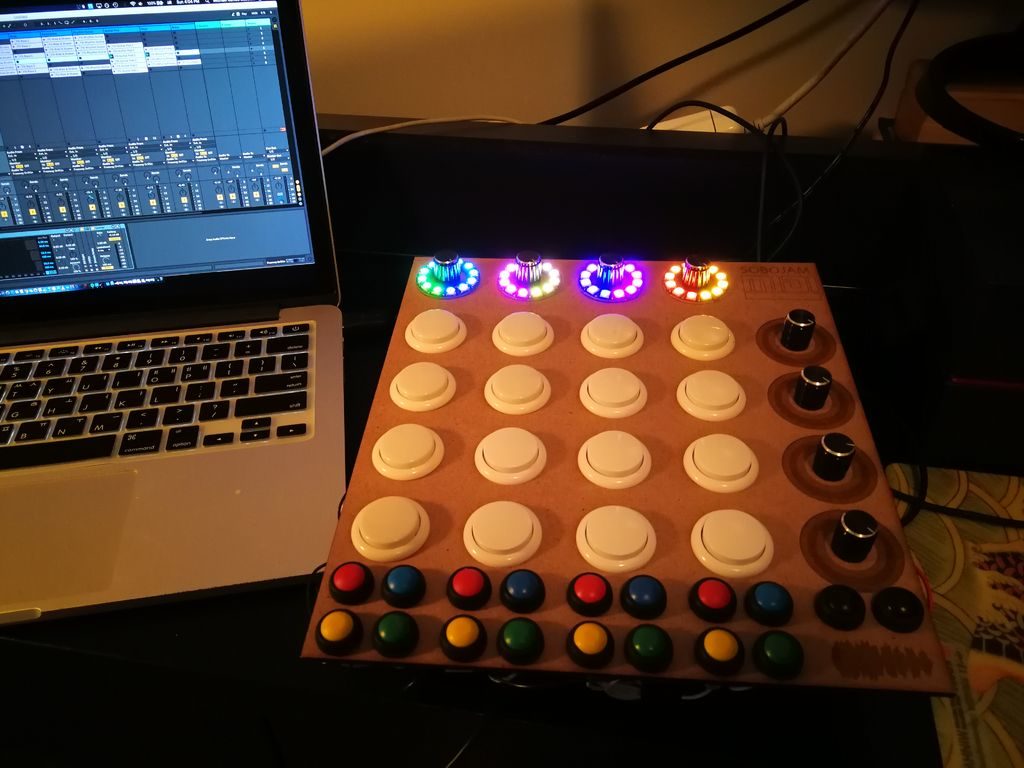
Michael Sobolak was inspired by the hardware dedicated to Ableton digital audio software, along with the DIY MIDI Fighter pads that others have constructed, to make his own light-up version

His device is cut out of ¼-inch MDF, housing a 4×4 array of main buttons, 18 smaller buttons on the bottom and eight potentiometers, four of which are surrounded by NeoPixel rings.

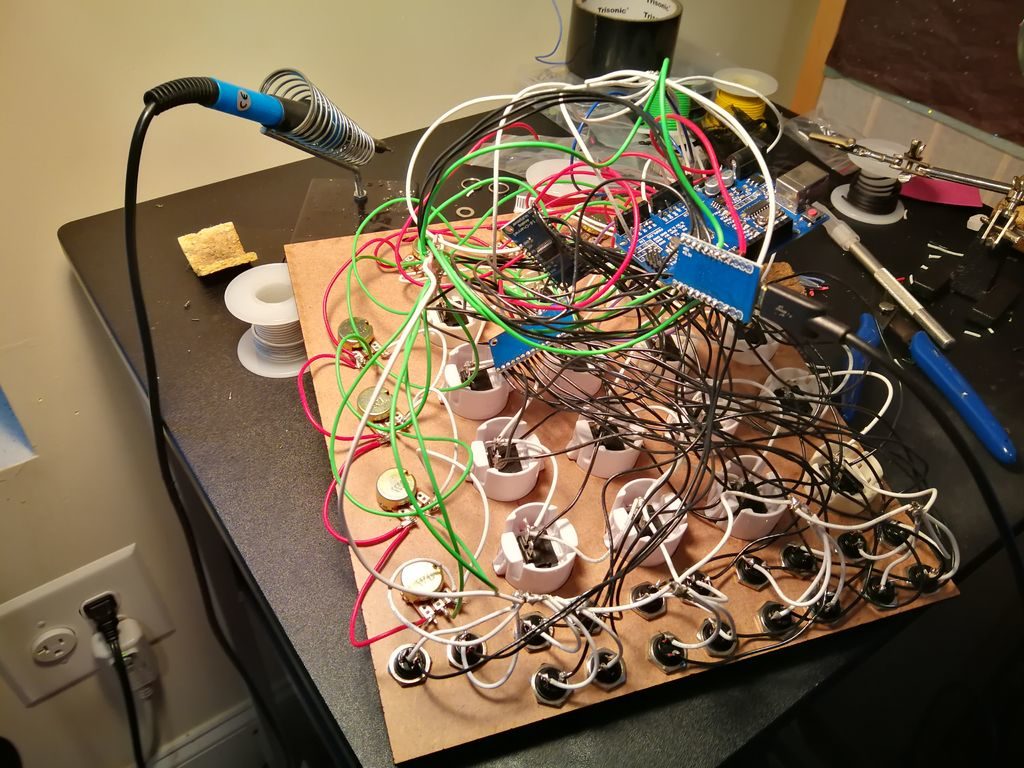
To handle this massive array of inputs, he turned to the use of multiplexers, creating a spaghetti-like—though functional—wiring arrangement hidden underneath. The pad uses an Arduino Uno to control the NeoPixels, while a separate board is tasked with the MIDI interface. 

You can see Sobolak’s project crank out music in the video below, with LEDs that react to potentiometer input settings.

Make your own MIDI keyboard matrix (or just buy one?)

If you’ve ever seen a MIDI pad with dozens of light-up buttons producing electronic music, you may have considered building one using an Arduino. As shown in GreatScott!’s latest write-up, you can indeed create your own Novation Launchpad-like device using a Nano for control, but the real question is should you?

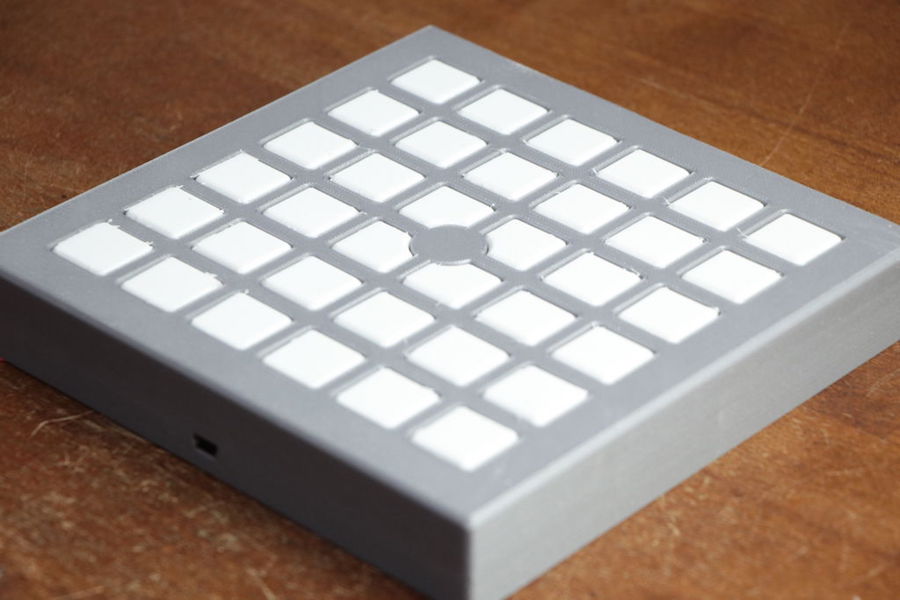
In the video below, GreatScott! shares how made a 6×6 pad, using a 3D-printed body and buttons arranged in a matrix to save I/O, along with WS2812B LEDs. He also goes over the MIDI protocol, which he was able to implement using loopMIDI and Hairless MIDI to serial bridge for Arduino interface. 

While the DIY option may or may not be right for you, the concepts presented could be applied to a wide range of electronic musical interface projects.

In this episode of DIY or Buy I will be showing you how I created my own Launchpad. That means I will show you how I combined a design idea with 3D prints, WS2812 LEDs, tactile switches and an Arduino to create a proper MIDI instrument. While building I will also tell you a bit about a keyboard matrix and in the end determine what advantages the DIY Launchpad offers. 

“Rare Candy” played on even more rare electronic instrument

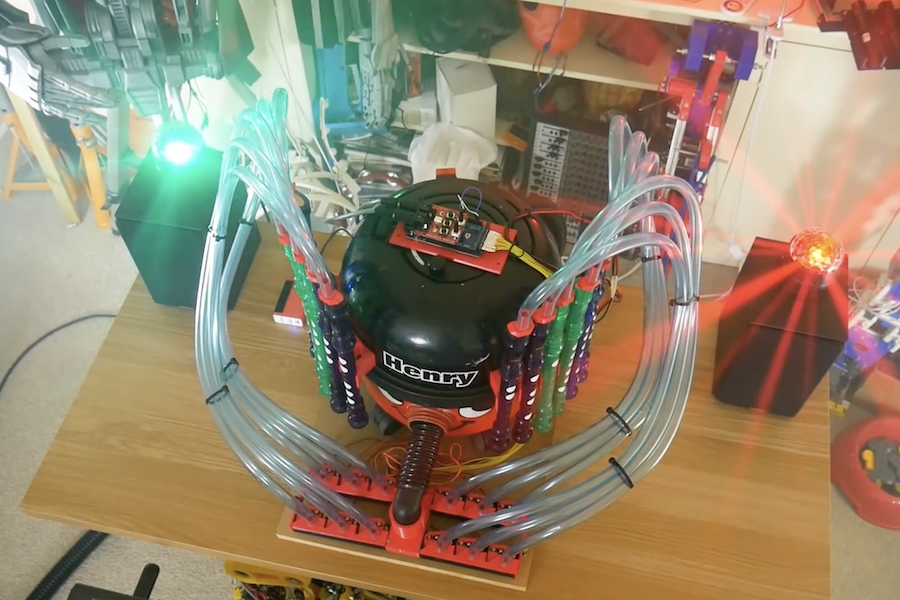
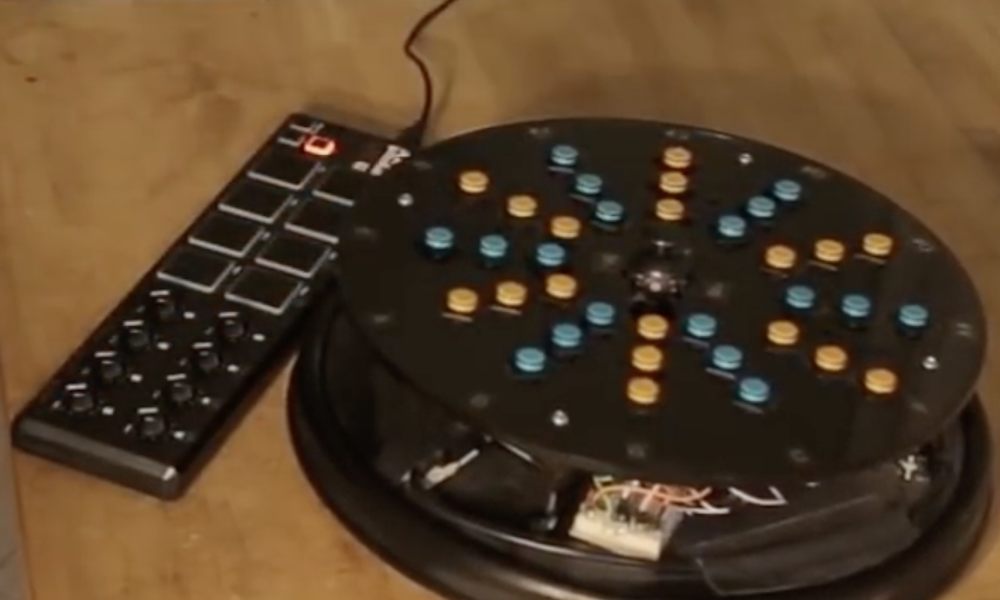
According to musician/maker Ruben Dax, “Few things make him happier than being able to create things that create things.” As seen in the video below, what he’s created is a very strange cylindrical instrument with an array of buttons and what appears to be an auxiliary loop controller. 

What he creates with it is music that starts off as simple “plink-plonk” sounds, but builds up into something of an orchestral arrangement.

The DIY device utilizes an Arduino Mega for control, with a bunch of pushbuttons and a dual-axis joystick for inputs. Button info is then sent to his computer over Bluetooth, which takes care of actual MIDI generation. 

As cool as this is, a new gadget is in the works, which uses a Leonardo and other hardware for plug-and-play functionality. Whether this will interfere with the instrument’s unique rotating action remains to be seen!

Salvaged Arduino powers animated House Party

What can you do with items that are destined for the dump? As seen here, if you’re Neil Mendoza, you transform furniture, an old TV, art, and even an Arduino Zero that somehow ended up in the trash into a musical installation.

His resulting “House Party” features decorations and control components that according to the project’s write-up are entirely salvaged. A MIDI interface, software written in openFrameworks, and a JSON file are used to coordinate sound and movements, which include spinning picture frames and flowers, tapping shoes, and a television that loops through a rather dreary weather report snippet. 

House Party is a musical installation that explores prized possessions in their native habitat. All the materials used to create this artwork, from the furniture to the computers, were scavenged from the discarded trash. The music is a mix of mechanical and synthesized sounds. The piece was created while an artist in residence at Recology SF.

The actuators in the installation are controlled by an Arduino Zero (also found in the trash) and each screen is connected to a computer running custom software written in openFrameworks (OF). Composition was done in Logic where a MIDI environment was set up to send MIDI data to the Arduino and an OF control program. The control program then sent the data to the other computers over ethernet as OSC. For the final installation, the control program read the data from a JSON file, triggered the screens and Arduino and played the synthesized parts of the music.

Be sure to see all the zany action in the video below!

Racing the Beam and Dropping Some Beats

The heart of the Atari 2600 wasn’t the 6502 (or the 6507 for the pedants), it was the TIA chip. This is the chip responsible for drawing graphics on the display, racing the beam, and extremely limited support for sound generation. We haven’t seen many attempts of using the Atari 2600 for chiptunes, but that doesn’t mean it can’t be done. [John Sutley]’s Syndrum, a take on an Atari 2600 drum machine is nearly a work of art. It’s a custom cartridge for the wood-paneled Atari, and an impressive input device that turns this classic console into a beat machine

Did the Atari 2600 ever come with a drum machine cartridge? Maybe. Probably not. [John] originally built this project to experiment with the TIA chip, but found it was less tonal than a kazoo. That struck ‘Atari synthesizer’ off the list and replaced it with an ‘Atari drum machine’. There are two key parts of the build here, the first being a repurposed Asteroids cartridge that had the PROM replaced with a ZIF socket. This allows [John] to easily burn new code to an EEPROM, stuff it in the socket, and run it on the Atari. All the code was developed with batari Basic, a BASIC-inspired language that spits out .bin files for the Atari.

But running code on the Atari is just one half of this build. To do a drum machine, you somehow need to tell the Atari when to play each sound. Given the lack of expansion capabilities for the Atari, [John] turned to the controller port. The Syndrum uses Arduino Nano to bridge the DE9 controller connector to a MIDI port. Yes, it’s real MIDI, on a machine that could probably never do MIDI natively (although we’d love to see someone try).

Need a video of this mind-blowing hack in action? Here you go:

The Precise Science Of Whacking A Wine Glass

It’s common knowledge that tapping a wine glass produces a pitch which can be altered by adjusting the level of the tipple of choice inside. By filling twelve glasses with different amounts of liquid and tuning them to the twelve notes of the scale, it’s possible to make a one-octave instrument – though the speed and polyphony are bottle-necked by the human operator. If you think it sounds like a ripe project for automation, you’re correct: [Bitluni’s lab] has done what needed to be done, and created a MIDI instrument which plays the glasses using mallets.

Electronically it’s a simple build – some 12 V solenoids driven by MOSFETs, with an Arduino in charge. For the mechanical build, a 3D printer proved very useful, as each mallet could be made identical, ensuring a consistent tone across all glasses. Rubber covers printed in flexible filament were fitted to reduce the overtones and produce a clearer sound. [Bitluni] also utilised different types of glasses for the low and high pitches, which also helped to improve the clarity of the tone.

MIDI is of course the perfect protocol for this application; simple, lightweight and incredibly widely used, it’s the hacker’s delight for projects like this. The instrument can perform pre-programmed sequences, or be played live with a MIDI controller. Both of these are shown in the video after the break – stick around for a unique rendition of Flight Of The Bumblebee. For a more compact wine glass based music creation solution, we recommend this nifty project, which alters pitch using a water balloon raised and lowered into the glass by a servo. 

Hack a Day 31 Jul 16:00

Tracktorino Shields You From Poor Interfaces

On-screen controls in a digital audio workstation expand the power of a DJ or musician, but they are not intuitive for everyone. The tactility of buttons, knobs, sliders and real-world controls feels nothing like using a mouse, trackpad, or even a touchscreen. Unfortunately, devices meant to put control into a DJs hands can be unavailable due to location or cost. [Gustavo Silveira] took charge of the situation so he could help other DJs and musicians take control of their workstations with a customized MIDI interface for Traktor DJ software.

MIDI is a widely used serial protocol which has evolved from a DIN connector to USB, and now it is also wireless. This means that the Traktorino is not locked to Traktor despite the namesake. On the Hackaday.io page, there’s even a list of other workstations it will work with, but since many workstations, all the good ones anyway, accept MIDI hardware like this, the real list is a lot longer.

The custom circuit board is actually a shield. Using an Arduino UNO, the current poster child of the Arduino world, opens up the accessibility for many people who don’t know specialized software. A vector drawing for a lasercut enclosure is also included. This means that even the labeling on the buttons are not locked into English language.

Here’s another project which combined laser cutting and MIDI to make some very clever buttons or turn your DIN MIDI connector into USB.

There’s More To MIDI Than Music – How About A Light Show?

MIDI instruments and controllers are fun devices if you want to combine your interest in music and electronics in a single project. Breaking music down into standardized, digital signals can technically turn anything with a button or a sensor into a musical instrument or effect pedal. On the other hand, the receiving end of the MIDI signal is mostly overlooked.

[FuseBerry], a music connoisseur with a background in electronics and computer science, always wanted to build a custom MIDI device, but instead of an instrument, he ended up with a MIDI controlled light show in the shape of an exploded truncated icosahedron ([FuseBerry]’s effort to look up that name shouldn’t go unnoticed). He designed and 3D-printed all the individual geometric shapes, and painstakingly equipped them with LEDs from a WS2818B strip. An Arduino Uno controls those LEDS, and receives the MIDI signals through a regular 5-pin DIN MIDI connector that is attached to the Arduino’s UART interface.

The LEDs are mapped to pre-defined MIDI notes, so whenever one of them is played, and their NoteOn message is received, the LEDs light up accordingly. [FuseBerry] uses his go-to DAW to create the light patterns, but any software / device that can send MIDI messages should do the trick. In the project’s current state, the light pattern needs to be created manually, but with some adjustments to the Arduino code, that could be more automated, something along the lines of this MIDI controlled Christmas light show.

Control lights and sounds with the Arduino-powered LED Eclipse

If you need a MIDI device that can be programmed as your own unique light and sound controller, then Jon Bumstead’s LED Eclipse may be just what you’re looking for.

The circular device, roughly the diameter of a large plate, is constructed out of 30 layers of MDF, and boasts 10 capacitive sensors made with copper strips, as well as 10 corresponding programmable LEDs.

An Arduino Uno powers the assembly, which can be seen being played like a multi-player electronic piano towards the end of the video below. It can also be used as a Simon-style game, and even a light display—though you could program it for any other application you desire!