Posts with «midi» label

DIY MIDI Looper Controller Looks Fantastic!

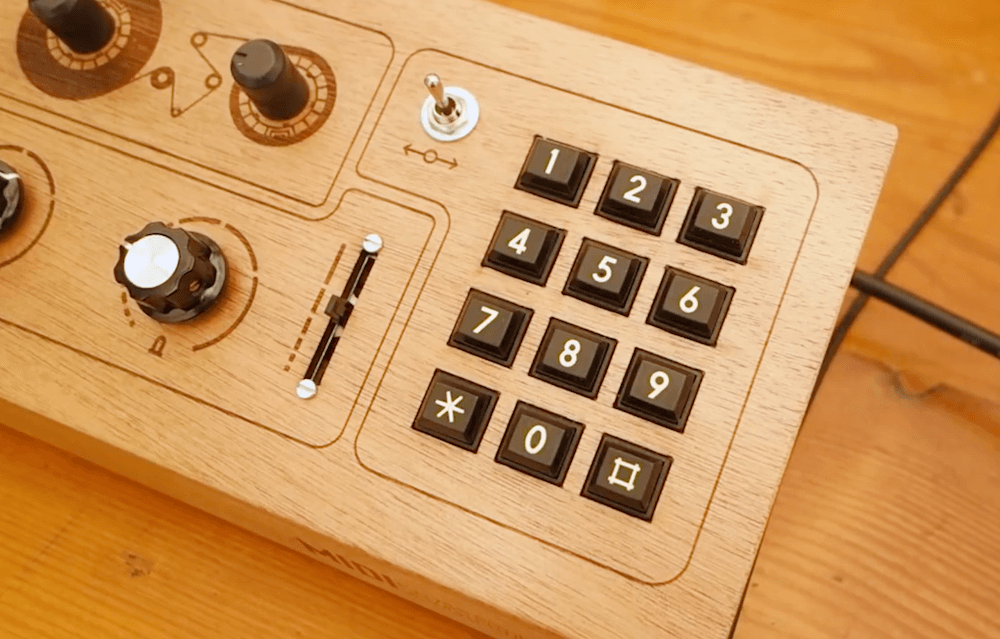
Due to pedalboard size, complicated guitar pedals sometimes reduce the number of buttons to the bare minimum. Many of these pedals are capable of being controlled with an external MIDI controller, however, and necessity being the mother of invention and all, this is a great opportunity to build something and learn some new skills at the same time. In need of a MIDI controller, Reddit user [Earthwin] built an Arduino powered one to control his Boss DD500 Looper pedal and the result is great looking.

Five 16×2 LCD screens, one for each button, show the functionality that that button currently has. They are attached (through some neat wiring) to a custom-built PCB which holds the Arduino that controls everything. The screens are mounted to an acrylic backplate which holds the screens in place while the laser-cut acrylic covers are mounted to the same plate through the chassis. The chassis is a standard Hammond aluminum box that was sanded down, primed and then filler was used to make the corners nice and smooth. Flat-top LEDs and custom 3D printed washers finish off the project.

[Earthwin] admits that this build might be overkill for the looper that he’s using, but he had fun building the controller and learning to use an Arduino. He’s already well on his way to building another, using the lessons learned in this build. If you want to build your own MIDI controller, this article should help you out. And then you’re ready to build your controller into a guitar if you want to.

[Via Reddit]

Upgrading a MIDI Controller with an FPGA

While the “M” in MIDI stands for “musical”, it’s possible to use this standard for other things as well. [s-ol] has been working on a VJ setup (mixing video instead of music) using various potentiometer-based hardware and MIDI to interface everything together. After becoming frustrated with drift in the potentiometers, he set out to outfit the entire rig with custom-built encoders.

[s-ol] designed the rotary-encoder based boards around an FPGA. It monitors the encoder for changes, controls eight RGB LEDs per knob, and even does capacitive touch sensing on the aluminum knob itself. The FPGA communicates via SPI with an Arduino master controller which communicates to a PC using a serial interface. This is [s-ol]’s first time diving into an FPGA project and it looks like he hit it out of the park!.

Even if you’re not mixing video or music, these encoders might be useful to any project where a standard analog potentiometer isn’t accurate or precise enough, or if you just need something that can dial into a specific value quickly. Potentiometers fall short in many different ways, but if you don’t want to replace them you might modify potentiometers to suit your purposes.

Zany MIDI guitar made from barcode scanner and Arduino

You’ve seen barcode scanners register the price for your groceries, and likely in many other applications, but did you ever consider if one could be made into an instrument? Well we now know the answer, thanks to this MIDI guitar by James Bruton.

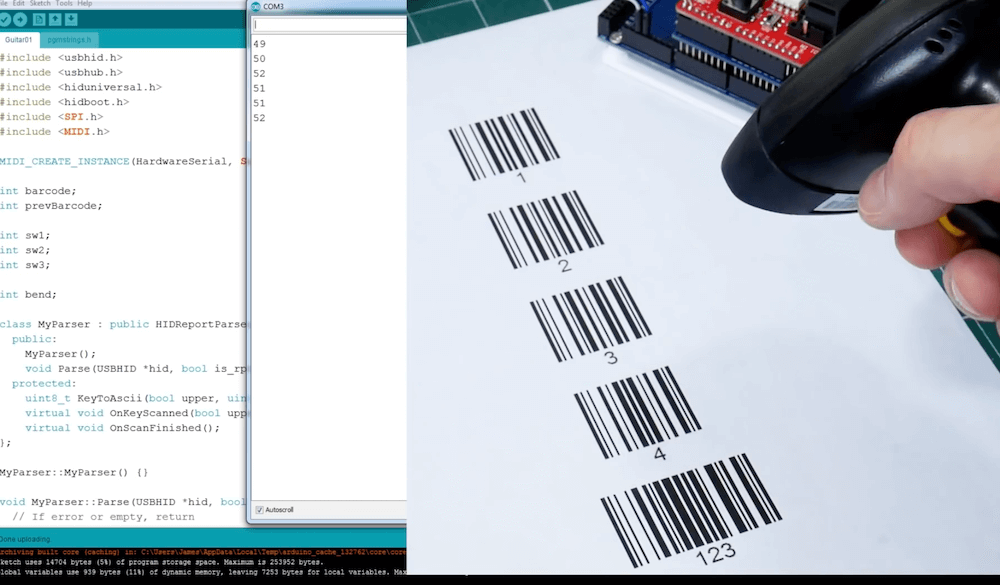
Bruton’s amazing device presents a matrix of barcodes arranged on the instrument’s four necks, allowing him to select the note to be played with a scanner gun.

The scanned code then triggers a note that’s piped to an output device via an Arduino Mega and MIDI shield. A joystick, spinner, and arcade buttons are also available for functions such as note cutoff, changing the octave, and pitch bends.

Horizontal laser harp is like none you’ve ever seen before

Apparently not content with a traditional laser harp, Jonathan Bumstead set out to take things in a different direction. What he came up with is a device whose laser strings are arranged horizontally, and loop though its boxy structure for an amazing audiovisual effect. 

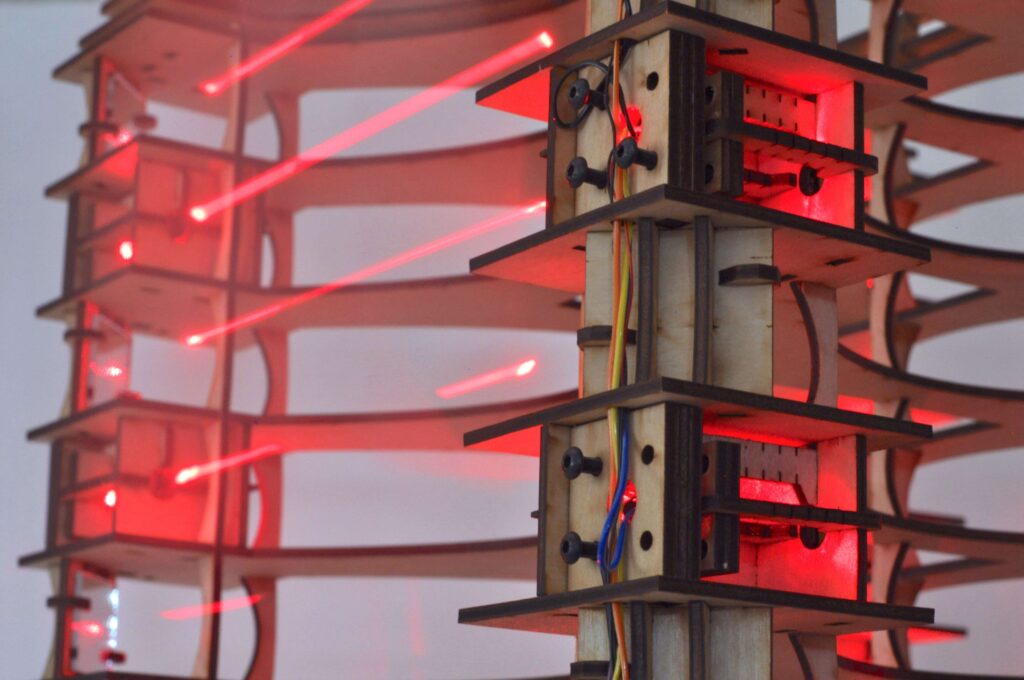
The aptly named Upright Laser Harp is divided up into six rows, which each contain two laser/photoresistor pairs for an instrument total of 12 notes. Each laser is reflected once before hitting its photoresistor to wrap the entire structure in light, and values are sensed by an Arduino Mega as note inputs. Sounds are then generated by an Adafruit Music Maker Shield, and different MIDI instruments are selected with a rotary switch and a stepper-based electromechanical display system. 

Laser harps are musical devices with laser beam “strings.” When the beam is blocked, a note is played by the instrument. Usually laser harps have the beams travel vertically in the shape of a fan or vertical lines. 

In this project, I built a laser harp with stacked laser beams that propagate horizontally. The beams reflect off mirrors to form square shaped beam paths. Instead of a MIDI output like my previous laser harp, this device has built-in MIDI player so the output is an audio signal. This means the device does not have to be connected to a computer or MIDI player (e.g. keyboard) to play sound. Both built-in speakers and audio output jack are available for playing music.

Be sure to check out the mini-concert and build details in the video below!

Toy piano converted into a self-playing instrument

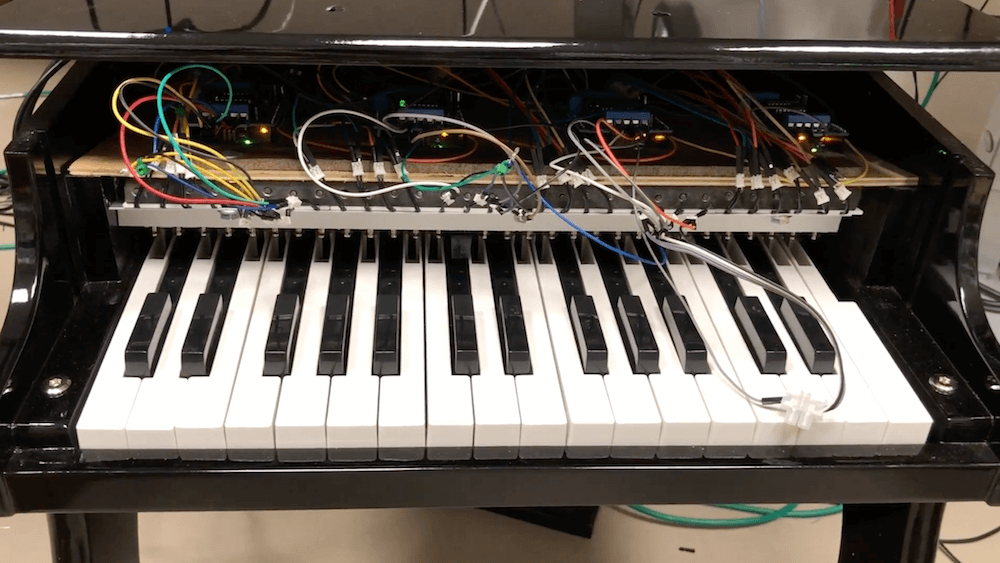
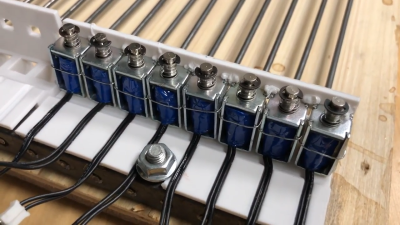
Upon obtaining a small toy piano, Måns Jonasson went to work “Arduinoizing” it with 30 solenoids to hammer out tunes. 

A MIDI shield is used to pipe commands from a computer to the Arduino Mega that’s used for control, and after experimenting with discreet wiring and electronics for each of the solenoids, he switched to motor shields as outlined here to simplify the setup. This, along with a new version of the solenoid holders he designed, cleaned up the build nicely, allowing it to play a plinky version of the Super Mario Bros. theme song.

Be sure to check out the Mario themed auto-concert in the video below, plus a video outline of its construction, below. 

Itty Bitty MIDI Piano Sings With Solenoids

Toy pianos are fun to plink around on for a minute, but their small keyboards and even smaller sound make them musically uninteresting pretty quickly. [Måns Jonasson] found a way to jazz up a two-octave toy piano almost beyond recognition. All it took was thirty solenoids, a few Arduinos, a MIDI shield, and a lot of time and patience.

This particular piano’s keys use lever action to strike thin steel tines. These tines are spaced just wide enough for tiny 5V solenoids to fit over them. Once [Måns] got a single solenoid striking away via MIDI input, he began designing 3D printed holders to affix them to the soundboard.

Everything worked with all thirty solenoids in place, but the wiring was a bird’s nest of spaghetti until he upgraded to motor driver shields. Then he designed a new bracket to hold eight solenoids at once, with a channel for each pair of wires. Every eight solenoids, there’s an Arduino and a motor shield.

The resulting junior player piano sounds like someone playing wind chimes like a xylophone, or a tiny Caribbean steel drum. Check out the build video after the break.

Hate the sound of toy pianos, but dig the convenient form factor? Turn one into a synth.

Hack a Day 14 Aug 00:00

Weather Station Can Rock You Like A Hurricane

People love to talk about the weather. It’s the perfect small talk, whether you’re trying to start a conversation or keep one going by avoiding an awkward silence. In the same fashion, weather stations are an ideal starting point for any sort of sensor-related project ideas. You get to familiarizing yourself with communication buses, ADCs, general data acquisition, and you learn a lot in figuring out how to visualize it all.

What if your weather station didn’t visualize anything? [OttoNL] is answering that question with a MIDI-generating Weather Station that uses the mood of the music to convey the condition of the elements outside.

Using an ESP8266 programmed via the Arduino IDE, [OttoNL] hooked up a light dependent resistor, a rain sensor, and the all-round workhorse BME280 for temperature, barometric pressure, and humidity to it. Reading the sensors, the ESP will generate MIDI notes that are sent to a connected synthesizer, with each sensor influencing a different aspect of the generated MIDI signals. A sadder, slow tune will play during rain and a fast upbeat one during sunshine. While it doesn’t use the ESP’s WiFi functionality at all at this point, a future version could easily retrieve some weather forecast data from the internet and add it into the mix as well.

Connect this to your alarm clock, and you can start your day off in the appropriate mood. You can even customize your breakfast toast to really immerse your morning routine in abstract weather cues.

A 3D-printed, Arduino Due-based MIDI jammer keyboard

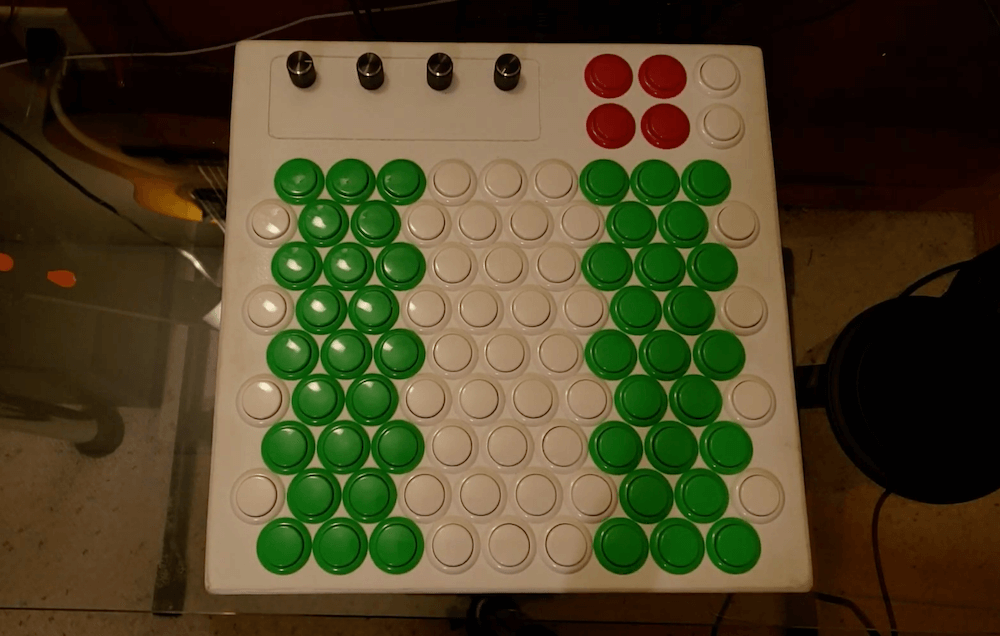
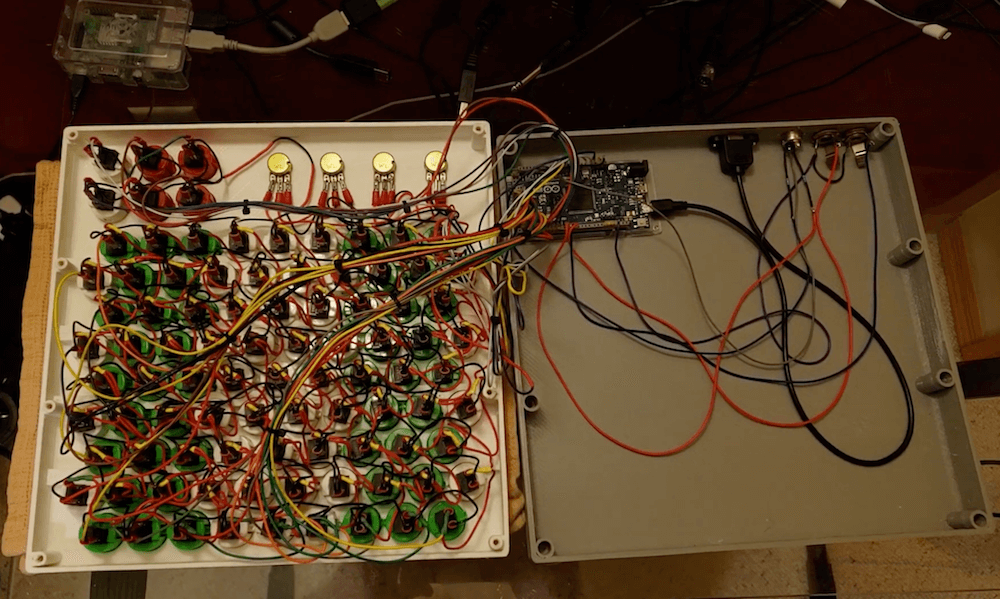
Michael Koopman wanted to learn piano. However, after finding this pursuit frustrating, he instead decided to assemble his own 3D-printed MIDI jammer keyboard, inspired by the AXiS-49 interface pad. 

His instrument is controlled via an Arduino Due, with 85 buttons arranged in a diagonal pattern. This allows for whole steps on the horizontal axis, fourths on one diagonal, fifths on the other diagonal, and octaves on the vertical axis. 

This configuration enables the device to be used in a variety of ways, and features an additional six buttons and four potentiometers to vary playing style, along with ¼ inch jacks for auxiliary inputs. 

As seen in the video below, while Koopman had a hard time with the piano, apparently that wasn’t case with his MIDI keyboard, as he’s able to play it beautifully—even using two at a time around 8:15!

The Blade is a dual Game Boy chiptune keytar

Keytars may have had their moment of popularity in the 1980s, but instruments of the day can’t hold a candle to “The Blade” by makers Sam Wray, Siddharth Vadgama, and Greig Stewart. 

The musical device feeds signals from a pair of Guitar Hero necks, along with a stripped down keytar from Rock Band, into an Arduino Mega. This data is then sent to a Raspberry Pi running PD Extended, and is used to control a pair of Game Boys to produce distinct 8-bit sounds. Audio output can be further modified with a Leap Motion sensor embedded in one of the two necks. 

What makes up The Blade?

– 3D-printed housing

We custom modeled and printed a housing for the instrument to ensure it would be ergonomic to wield, hold together with all the components, and also look badass.

– Two Guitar Hero necks

The necks, hacked off a couple of old Guitar Hero controllers, were totally rewired to output the button presses to jumper cables.

– Arduino Mega

All the wiring from the Guitar Hero necks fed into the Mega, which then registered the button presses and output appropriate MIDI signals over USB serial into the Raspberry Pi.

– Rock Band keytar

We stripped this down to the bare keyboard and had the MIDI also going into the Pi.

Raspberry Pi

Taking in all the MIDI, and running PD Extended we got this to manage and re-map all the button presses we needed. This then output to a MIDI thru box.

– Arduino Boy

This fed the MIDI signals from the thru box into the Game Boy.

Game Boy

These were heart. With MIDI fed in from a multitude of sources, the Game Boy, running mGB, was the synthesizing the signals into sound, output via a standard 3.5mm jack. 

Leap Motion
The Leap Motion was used for further sound modulation.

Arduino Blog 16 Apr 19:47
arduino  keytar  mega  midi  music  

Vacuum cleaner turned into unique MIDI instrument

When you see a vacuum cleaner, most people see a useful implement to keep their carpets clean. James Bruton, however, envisioned another use—as a musical instrument. His new project, which made its appearance this year on April Fools’ Day, sucks air through 12 recorders, allowing it to play a full octave and the melody and lead from “Africa” by Toto… or so he’d have you believe!

In reality, power for his instrument comes from a separate Henry Hoover in another room, blowing air through the normally-suction tube of the broken device on the screen. An Arduino Mega, along with a MIDI shield, enables it to open and close air lines to each of the 12 recorders as needed. 

Check out how it was made in the first video below and the original fake in the second.


Arduino Blog 09 Apr 19:15