Posts with «micro» label

NS1 Nanosynth the hackable analog synthesizer is back!

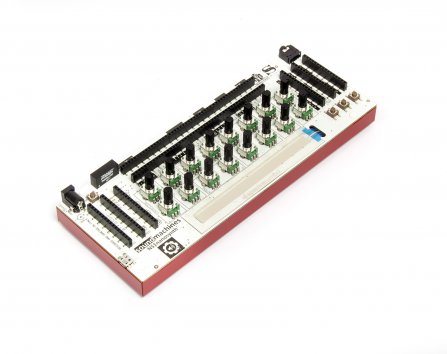
We’ve been playing with NS1 Nanosynth in the last few weeks, when it first appeared under our radars on the Christmas’ Gift Guides (while going sold out in few days, after Synthopia blessed it with this interesting review).  It’s a hackable and customizable analog synthesizer coupled with an Arduino Micro platform.

Personally, it was one of my first steps into modular synthesizers. Nice sounds, easy approach. Peter Kirn is perfectly picturing this amazing compromise here!

Synths: they’re fun to tweak and play. Modulars: they’re fun to patch. Arduinos: they’re fun to hack. Small things: they’re fun to carry around.

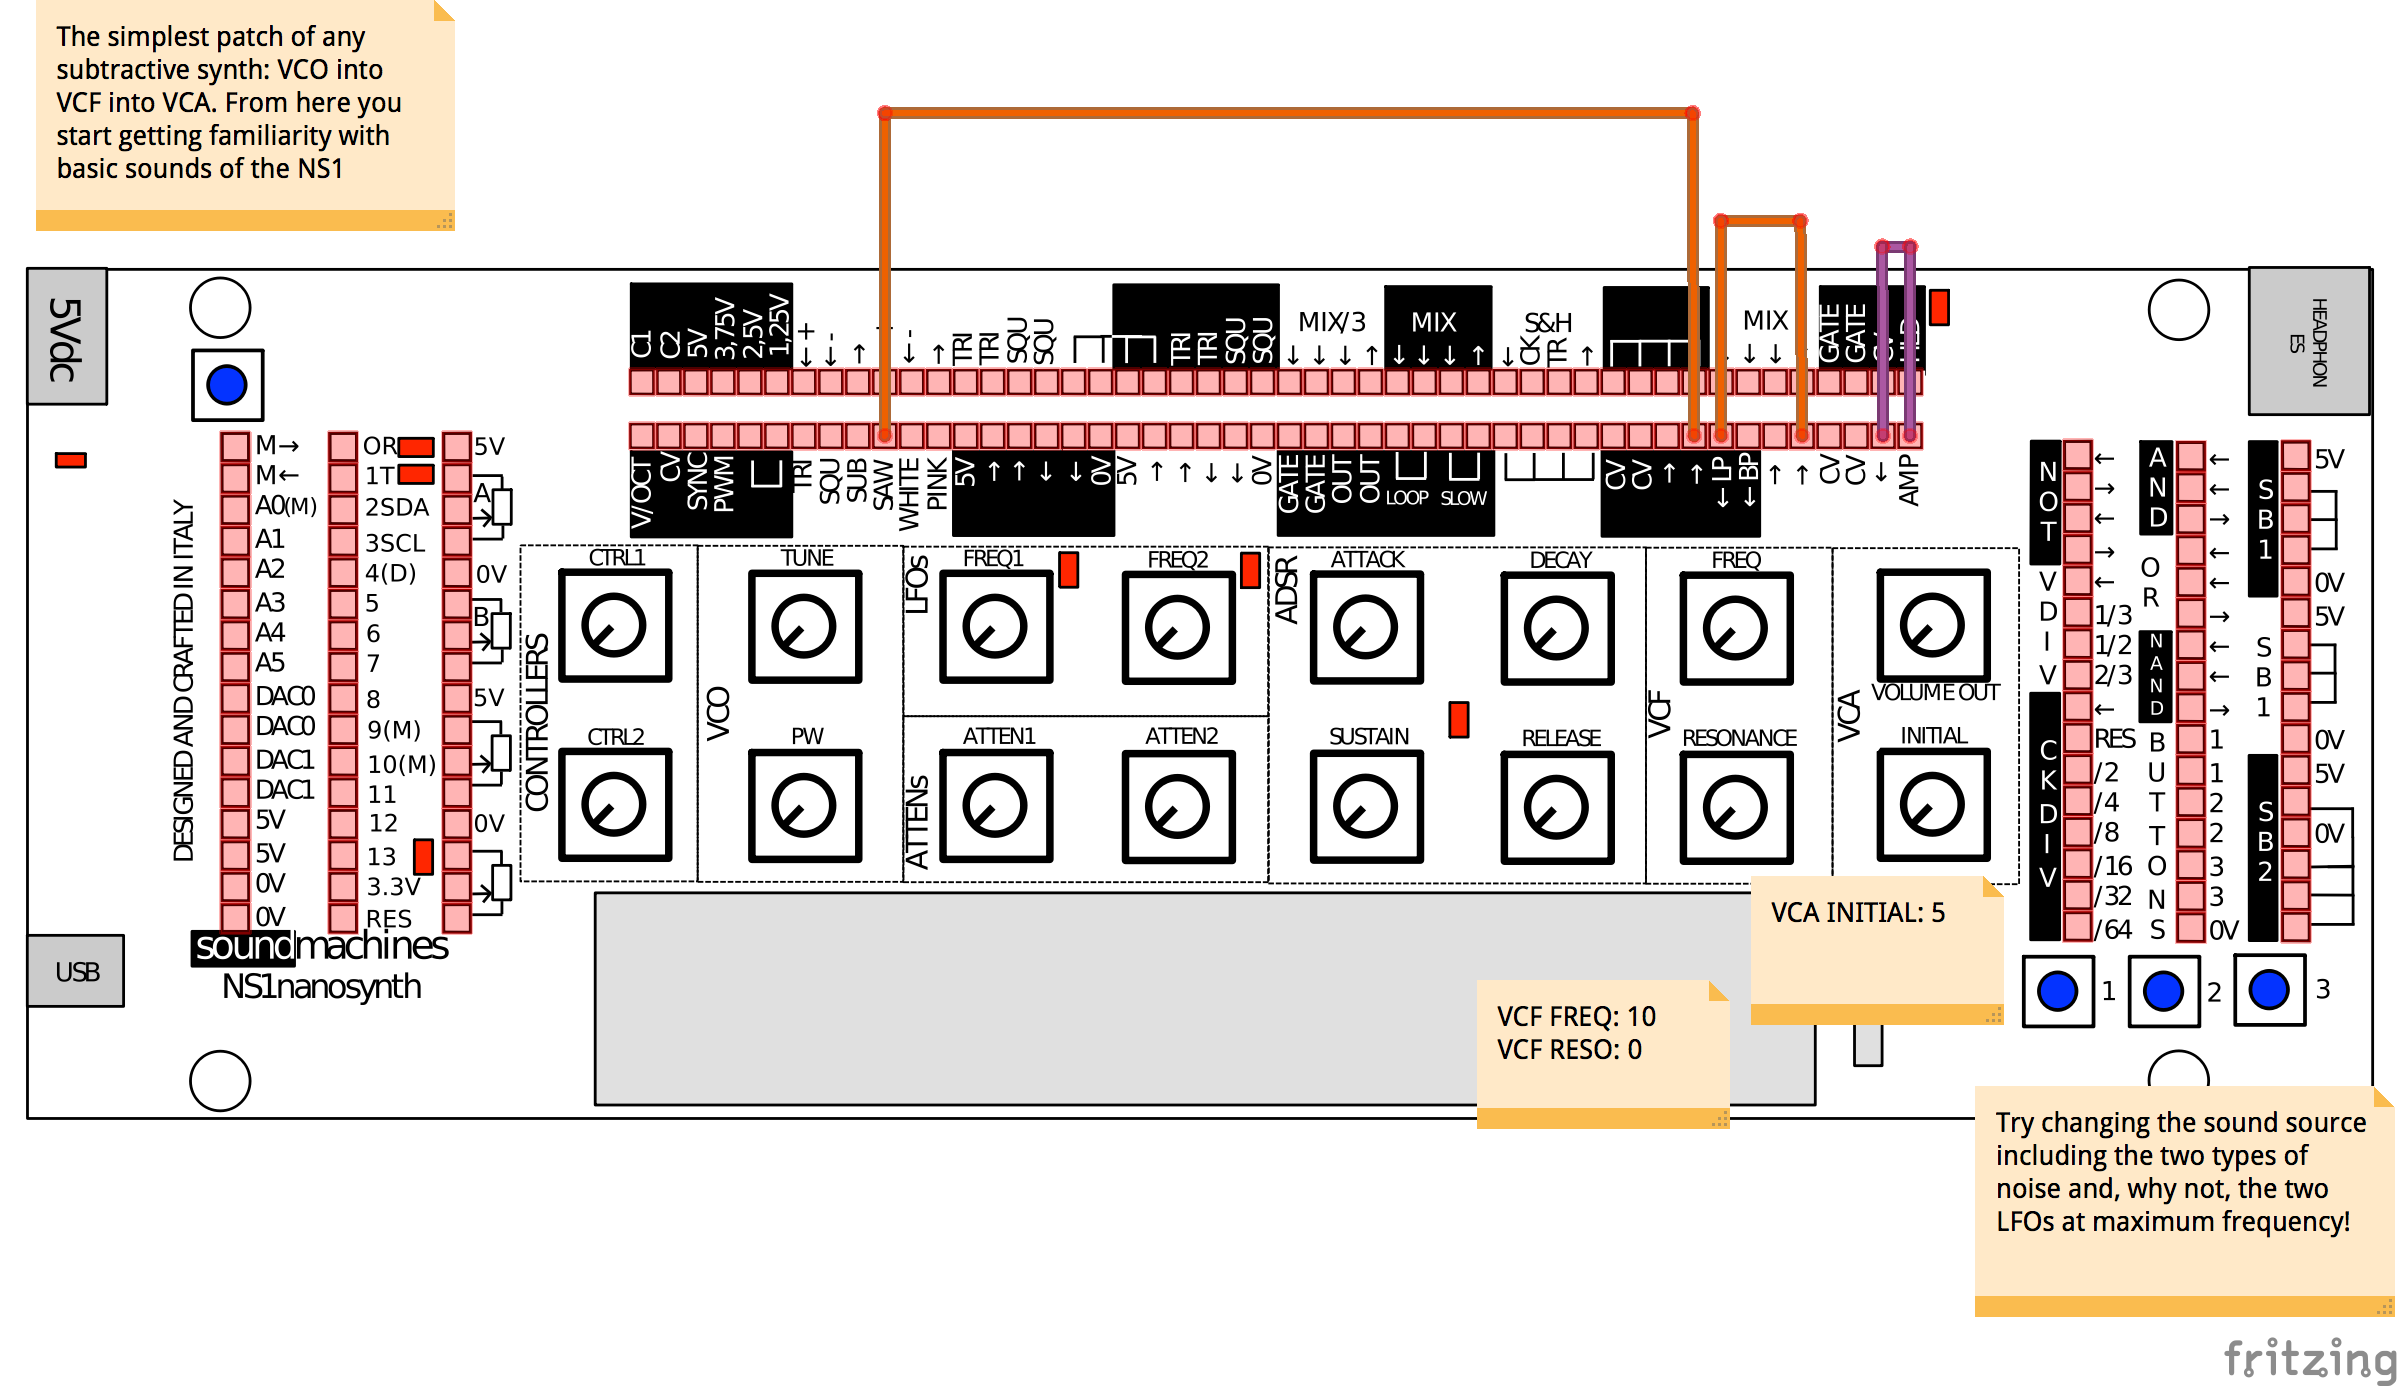
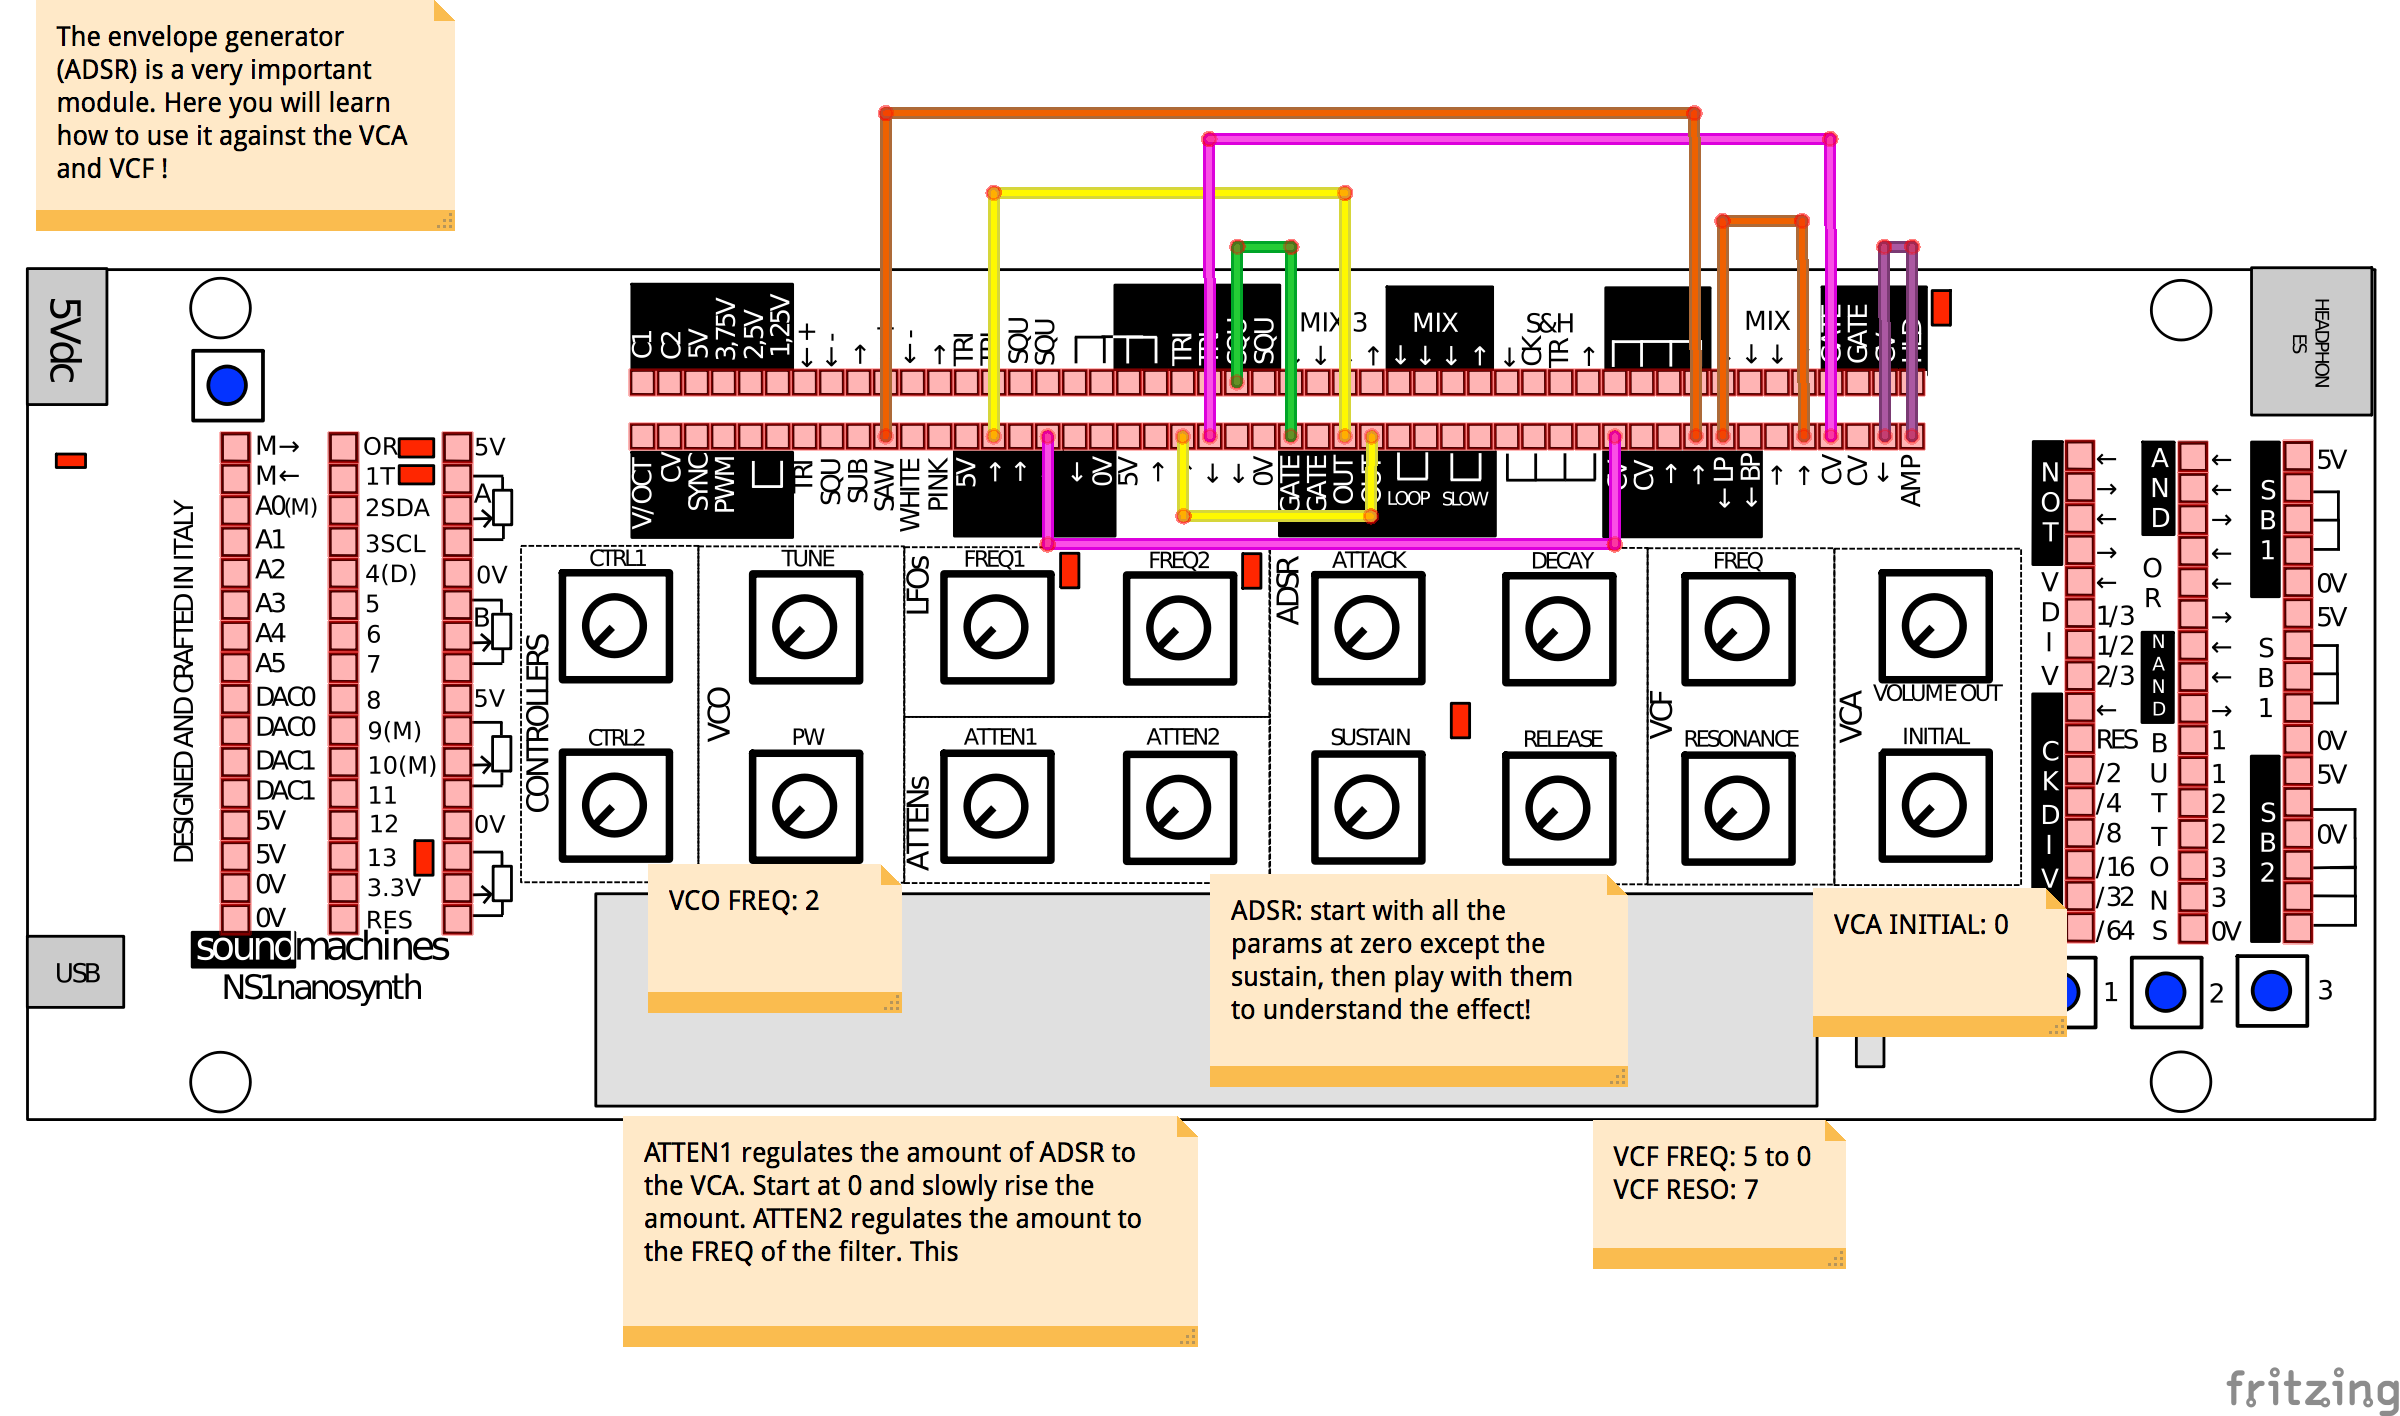
But how to track patches? How to share sounds with friends? I was playing mainly with my son, and managed to print out a paper sketch depicting all the different pinout of the synth. I wasn’t satisfied with that, I needed more!

I started writing Sound Machines, about new patches, more sounds. It turned out I made a Fritzing part out of the Nanonsynth, and we started sharing each other patches. This repository holds them, and this is a short review of the best. Enjoy!


Here you can listen to the envelope Generator (ADSR) in action:


Want to add your very own sounds? You can either add it to their repository or comment here!

The Biggest Super Hexagon Fan

For those who haven’t addicted themselves to Super Hexagon yet, it’s pretty… addicting, to say the least. Normally this 80’s arcade-style game would run in a browser but some of the people at Club de Jaqueo in Buenos Aires decided to cram all of that into an Arduino. They didn’t stop there, though, and thought that it would work best with a POV display.

To navigate the intricate maze of blending a POV display with a fast-paced game like this, the group turned to the trusty Arduino Micro. After some frustration in the original idea, they realized that the game is perfectly suited for a POV display since it’s almost circular. The POV shouldn’t take up too much of the processing power of the Arduino, so most of the clock cycles can be used for playing the game. They couldn’t keep the original name anymore due to the lack of hexagon shape (and presumably copyrights and other legal hurdles), but the style of the original is well-preserved.

The group demonstrated their setup this past weekend, and the results are impressive judging by the video below. They’ve also released their source code and schematics as well, in case you have an old fan (or maybe even a bicycle?) lying around that is just begging to be turned into a mini-arcade game.


Filed under: Arduino Hacks
Hack a Day 02 Dec 06:00

A low-cost approach to Intrinsic optical signal

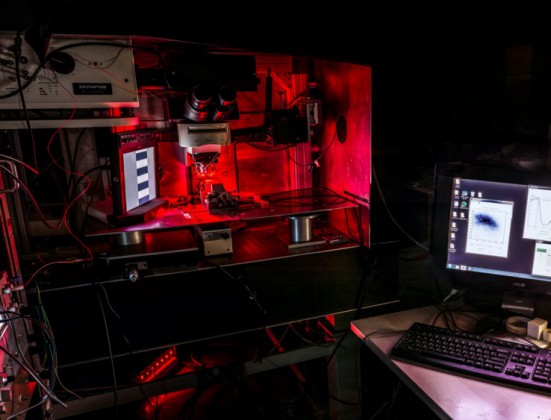
Leonardo Lupori and Raffaele Mazziotti are active in the field of neuroscience at Tommaso Pizzorusso’s lab at Neuroscience Institute CNR of Pisa respectively as molecular biologist and experimental psychologist. They created an Arduino-based and MATLAB-controlled tool called IOSIC (Intrinsic Optical Signal Imaging Chamber), powered by an Arduino Micro and focused on intrinsic optical signal (IOS) imaging apparatus to run experiments on the plasticity of the brain.

Intrinsic optical signal (IOS) imaging is a functional imaging technique that has revolutionized our understanding of cortical functional organization and plasticity since it was first implemented, around 30 years ago. IOS is produced by the brain when processing information and is similar to the information recorded with the plethysmograph (the instrument to measure heart rate from a finger) and it is useful to investigate how the brain works. The researchers are especially interested to investigate how the brain is able to adapt to the environment to store information but also acquire new skills and these studies are really useful to understand what happens to the brain when is in good health or during a disease.

Even if their lab has a long-standing expertise in electrophysiological studies, they decided to  developed a fully functional apparatus for IOS with tools already available and low-cost:

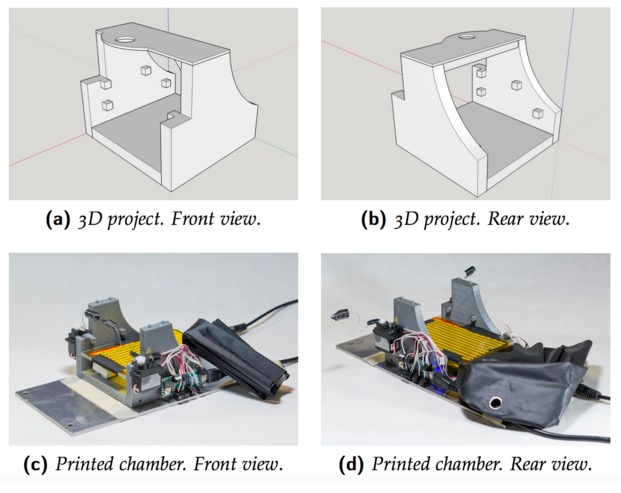
To set up the entire system we used a mix of components commercially available and custom-made. The most expensive tool we used is an imaging camera from Hamamatsu (it is necessary because we need to analyze data quantitatively), but you can also use a cheaper camera (at least with a CCD chip 12-bit depth is recommended). The rest is stuff collected from old tools of the lab. For example, the microscope, that in our case is an old Olympus confocal microscope, but any transmitted light microscope or macroscope should be ok, was already in the lab and is currently used also for other purposes. For light illumination, we used a custom made crown-shaped LED holder that can be attached to the objective and provide a really stable light source. Afterwards, we wrote a MATLAB script to control the camera and then we built an imaging chamber to analyze the animal preparation. The imaging chamber is essential to keep the animal stable during the imaging session (about 7 minutes) and also to maintain its physiological temperature during the time course of anesthesia. An additional feature added to the chamber is the possibility to change the animal’s visual field automatically allowing us to measure rapidly, efficiently and repeatedly a very important parameter of plasticity called ocular dominance. The chamber is composed by a 3D printed structure on which an Arduino MICRO, two servo motors, a heating pad, an IR thermometer and a magnetic ring have been installed. Currently we are using this system with success and we hope to discover something really relevant.

You can download IOSIC code for the Arduino MICRO here. The code uses third-party libraries : TMP006 and Servo. MATLAB code to control shutters is available here.

Now it’s time for Genuino Zero and Micro, get them now!

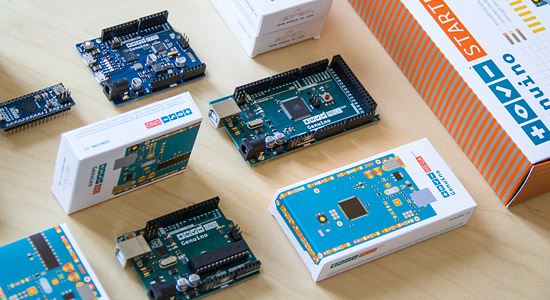
As we promised last week, you can find on the Arduino Store a variety of Genuino products available for purchase. After Genuino Uno, Genuino Starter Kit (in Italian and English) and Genuino Mega, today we have 2 new entries: Genuino Micro (18.00€ + tax) and Genuino Zero (42.90€ + tax).

Genuino is Arduino.cc’s sister-brand created by Arduino co-founders Massimo Banzi, David Cuartielles, Tom Igoe, and David Mellis, the Arduino.cc team and community. While Arduino branded product are sold in the US only for now, Genuino brand is used for boards and products sold everywhere else in the world. Genuino and Arduino boards share the same components, characteristics and quality of manufacturing. They are actually the same boards under a different name, and you can purchase them depending on the area of the world where you live in.

Arduino ZERO (USA only) & Genuino ZERO (outside USA) are a simple and powerful 32-bit extension of the platform established by the UNO. They provide a platform for innovative projects in smart IoT devices, wearable technology, high-tech automation, crazy robotics, and much more.

Arduino Micro (coming next in the USA) & Genuino Micro (already available outside USA) are the smallest of the family, easy to integrate in everyday objects to make them interactive. The Micro is based on the ATmega32U4 microcontroller featuring a built-in USB which makes the Micro recognisable as a mouse or keyboard. Looking for ideas on your next project with the Micro? Get inspired looking at these projects on the blog.

Automating a bubble blaster with Arduino Micro


Thomas Renck is a coder and a maker. He went to Disneyland, saw a bunch of little kids having fun with bubble guns and realized that a bubble blaster is a sure way to measurably improve joy and happiness in life.

Back home, it took only two hours to create and add-on to automate the bubble blaster using a 3d printer, Arduino Micro and a servo:

On his blog you can find the tutorial, the sketch and the 3d files to make one yourself and bring more happiness in your life too!

A DIY Seizure Alarm based on Arduino Micro

Chad Herbert’s son Daniel was diagnosed with Benign Rolandic Epilepsy in 2014. It’s a type of epilepsy the Epilepsy Foundation says accounts for about 15 percent of all Epilepsies in children and the good news is that most children grow out of it.

The bad news is that Daniel’s most affected by his condition at night or early morning while he sleeps. That’s why Chad invested in a sleep monitor/alarm for his bed that detects when he’s having a full tonic-clonic seizure.

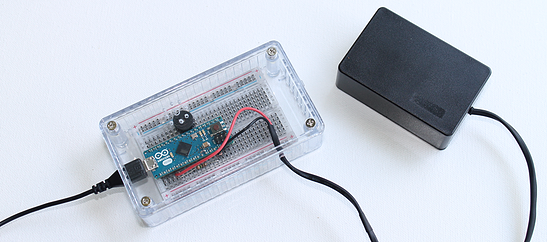
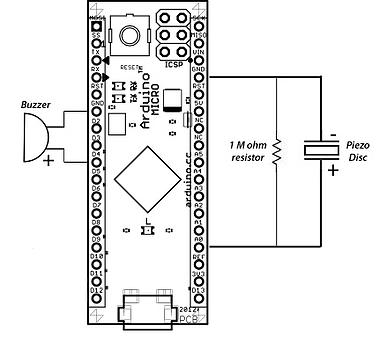
At the same time though, he decided to work on a DIY version of a seizure alarm  running on Arduino Micro. The starting point was Arduino’s “Knock” example project with the sketch code originally created in 2007 by David Cuartielles and modified by Tom Igoe in 2011:

While shopping around for the exact type of monitor/alarm my wife and I wanted, I found out a few things:

  • They are hard to find. I believe the one we ended up with was manufactured by a company in Great Britain.
  • They are expensive. The one we ended up getting cost in the $400-$500 range.
  • The one we have isn’t totally cumbersome, but it’s not easy to pack up and take with you somewhere.

Figuring these things out, I decided to search for a way to build a simple seizure alam that’s both relatively inexpensive and easy to transport. I’m sure there are people out there who have children that suffer from seizures that simply cannot afford equipment such as this even though they truly need it. Thanks to the folks in the Arduino community, I was able to accomplish both things I was setting out to do.

Discover how it was made on his blog.


An open hardware quartz crystal microbalance for ultra high mass sensitivity

Marco Mauro is a physicist currently employed as Scientific Coordinator at Novaetech, the first Spin-off Company of the National Institute for Astrophysics (INAF) in Italy. He shared with us all the info about a project he’s been working on  and based on Arduino Micro.

OpenQCM is a fully open source scientific microbalance capable of weighing mass deposition down to 1 billionth of gram:

The sensing core of the microbalance is a piezoelectric quartz crystal oscillator. The deposition of a very tiny mass on the surface causes the variation in the quartz frequency. openQCM belongs to a new generation of innovative smart sensor which boast high resolution and ultra high mass sensitivity. The open source strategy made the creation of openQCM available at low cost which represents a bit fraction of the cost of similar scientific products.

openQCM was built keeping in mind the emergent principles of the open source hardware movement. The open source hardware gives people the freedom to control their technology through the open exchange of all the project features, 3D design, electronics and software. The open hardware potentiality is even greater when it comes to hardware for scientific applications.

openQCM is exactly something like that, the first open hardware quartz crystal microbalance with applications in a wide range of scientific fields, such as chemical and biological sensing, material science.

openQCM has an Arduino Micro board inside at heart. By hacking the timer counter of the AtMega32U4 Arduino microcontroller, it is possible to measure the quartz crystal frequency variations using the 16 Mhz microprocessor clock. openQCM team has designed an Arduino Micro shield with an embedded quartz crystal oscillator driver circuit and a temperature sensor. The output of the quartz crystal oscillator driver is fed to the Arduino Micro timer counter and the analog value of the temperature sensor is fed to the analog pin of the board. This configuration allow you measure the quartz crystal frequency with a resolution of 1 Hz, which roughly corresponds to a mass resolution of 700 pg over the entire quartz surface in air.

One of the major challenge of an open hardware project is that such devices require funding to prototype and manufacture. That’s why the openQCM team have selected the 3d printing technology to keep high quality and low cost. Using 3d printing to print out the prototypes via the SLS process from OS Formiga P100, P110, P395, and P730, the openQCM team created the device’s parts, which required a precision down to 60 µm.

The open source concept made openQCM publicly available so that anyone (scientists, technology enthusiast, makers, hobbyist …) can study, modify, and develop the hardware based on the original design. openQCM is now working and ready to win the heart of the scientific community and more.

Go and make one yourself!
Make a 3D printed LEGO-compatible Arduino Micro casing

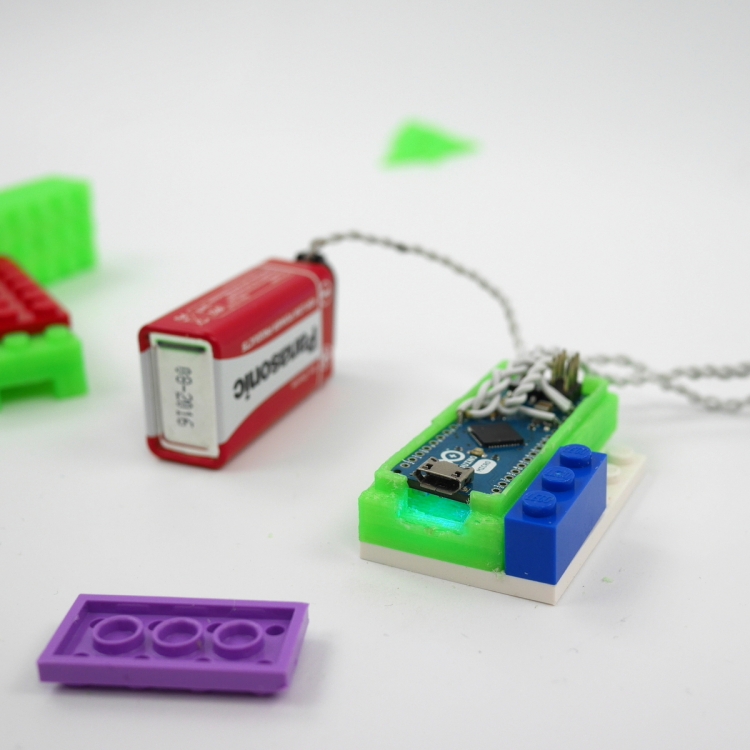
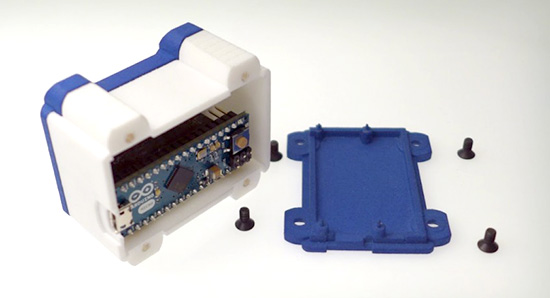
Here we are after winter break with a new tutorial on 3d printing with Arduino Materia 101. The 5-step tutorial allows you to design a Lego-compatible case for the Arduino Micro to be used together with the power function IR-receiver mentioned in this other Tutorial.

During the lesson you’ll learn also how to make the Lego-compatible pieces accurately and easily with FreeCAD without taking all the measurements!

Follow the steps and print yours >>

Check the previous tutorials on 3d printing with Material 101

Interested in getting in touch and showing your experiments? Join Kristoffer on the Arduino forum dedicated to Materia 101 and give us your feedback.

Recently Arduino user Botberg implemented an auto-levelling bed sensor  to be  sure that the placement of the first extrusion layer is placed well and increasing the printer successes!

Programmable 3d-printed decorations for your Xmas

We can’t miss the chance to play with some LEDs now that holidays are coming and mix some electronics with 3d printing on Materia 101.

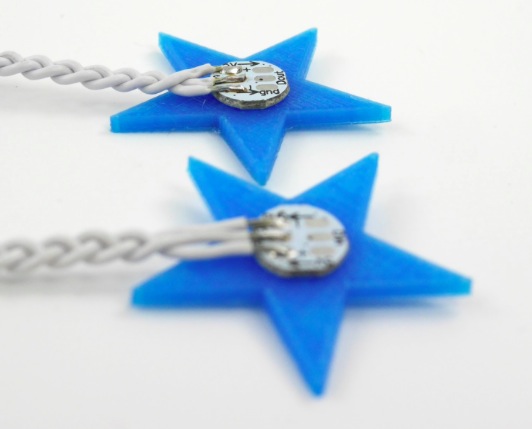
In the tutorial of this Kristoffer is experimenting on Xmas decorations, Arduino Micro and some code to play around with.

The result is what you see in the picture below!

Do you want to make it too? Follow the steps on Scuola >>
Check the previous tutorials on 3d printing with Material 101

Interested in getting in touch and showing your experiments? Join Kristoffer on the Arduino forum dedicated to Materia 101 and give us your feedback.

7 brushless pumps for a fountain controlled by Arduino Micro


Using Arduino Micro to control a fountain is the project shared by Michael Diesing on Twitter:

May I introduce my second ARDUINO-project with own pcb. With the pcb I am able to drive seven brushless pumps(with integrated electronics). The “problem” with such kind of pumps is that they don’t accept unfiltered pwm-signals as supply voltage. So I created a circuit where the pwm-signals of an ARDUINO-micro are level-shifted to 12V with a darlington array and afterwards filtered with a 1 uF ceramic capacitor and a 730 Ohm resistor (low pass filter). The signals are then led into the adjust-pins of seven “lm317″s. To work properly I needed to connect the adjust-pins also with 2500 Ohm resistors to gnd, but I found out that with two l293d instead of the used TDP62783 (darlington array) these resistors are not needed, but different resistor and capacitor values for adequate filtering!
The pums also have tacho signals which I connected via schottky-diodes to the ARDUINO (inputs with pullup). With the tacho-signals I am able to find out if pumps are stuck, are sucking air or are not connected.
Additionally I added one ACS712-05B current sensor (which measures the entire current of the circuit) that could be used to find out if pumps that don’t have tacho-signals are working properly. At the moment it is not used.
Besides that I integrated a lm386 audio-amp used to amplify the signal of an electret-mic to a level that is suitable for the ATEMGA’s ADC.

As the first project for the pcb I created a fountain consisting of a shortened wine barrel, seven brushless pumps, a pushbutton with led and pebbles (s. video).
There are seven animation-modes which can be selected via the pushbutton (the selected mode is stored in eeprom).
The speed of the pumps is checked permanently during operation.
The average power consumption is ~20W and max. consumption is 30W.

Discover the different modes to control it reading the description on youtube video.

Arduino Blog 16 Dec 21:43