Posts with «mega» label

These high school students built their own vending machine

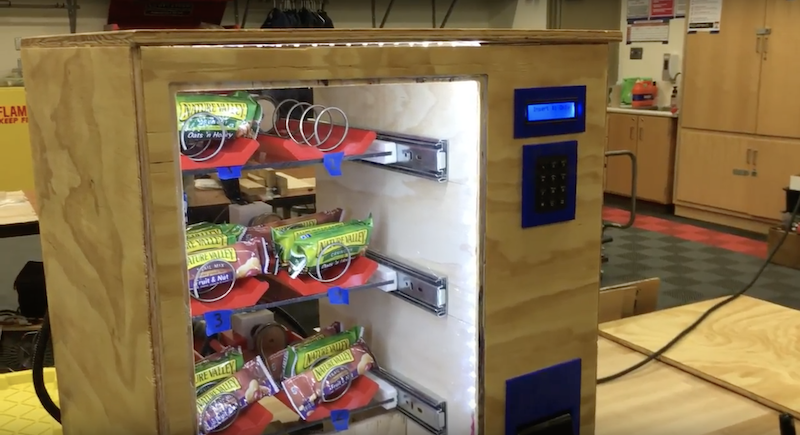
If you’re a high school student and would appreciate a vending machine in class, what’s to be done? Most of the time the answer is “not much,” but Tustin High T-Tech students were able to get one—by building it themselves!

In fact, this excellent device functioned both as a class project and as a fundraiser for their engineering program. It can be seen working in the video below, and uses an Arduino Mega for control, along with motor drivers and steppers to actuate six snack pusher coils. 

Customers simply insert a dollar into the bill acceptor, punch in the correct number in the keypad, and snacks drop out. Arduino code is published here, and Solidworks design files are also available for your DIY vending edification.

DIY submersible ROV flies through the water

If you’d like to check out your pool or a lake without getting wet, this underwater ROV looks like a great solution. 

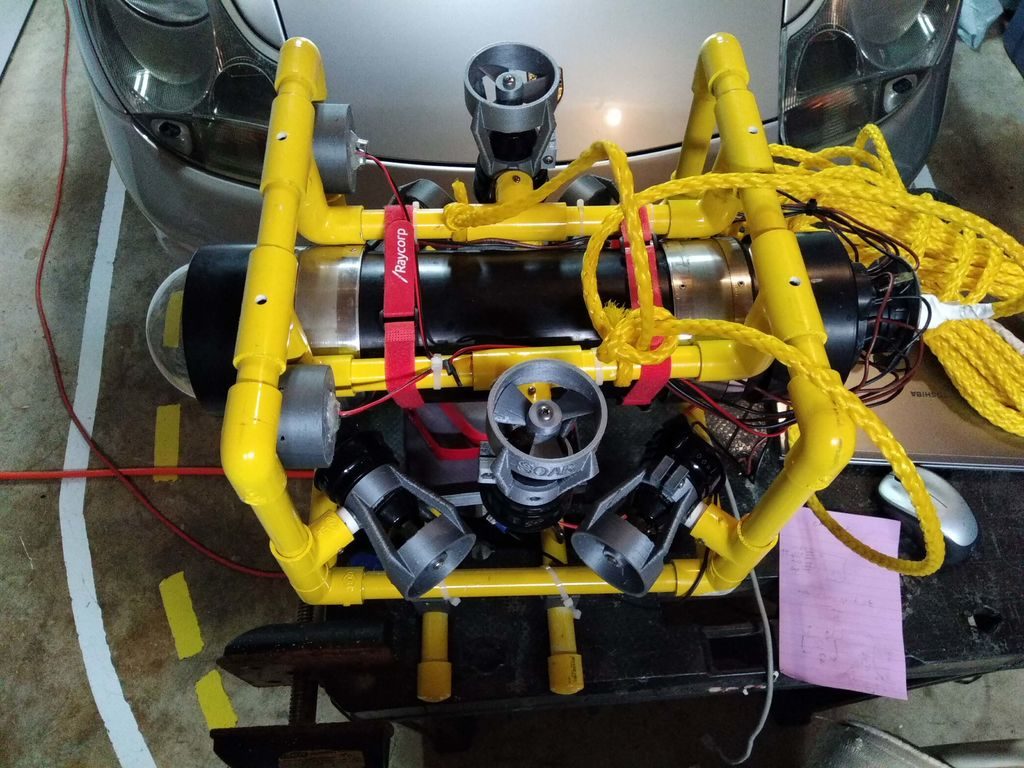
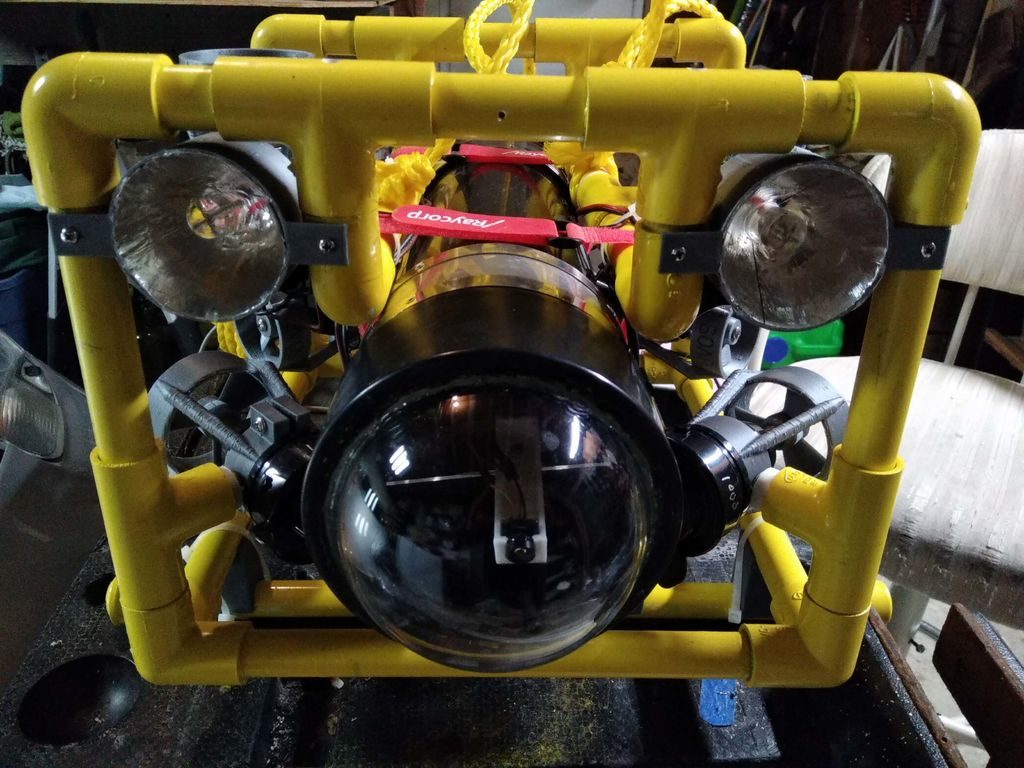
The DIY device features a sturdy PVC frame with six thrusters that allow it to move through water like a drone through the air (complete with depth and heading hold), and uses the same kind of controller configuration as its airborne cousin.

Onboard control is handled by an Arduino Mega along with an FPV camera, which transmit signals back to a base station via an Ethernet cable stuffed inside of a length of polypropylene rope. The driver can then see what the ROV sees on a small display, supplemented with data from the base station’s Arduino Uno and an onscreen display (OSD) shield.

Arduino Blog 31 May 15:07

Wake up to an Arduino-based overhead alarm clock

Tired of wondering what time it is at night, only to have to roll over to look at your alarm clock? If you’d like to avoid this nighttime inconvenience, then Kurt Andros has a great solution with his Arduino Mega-based Overhead Alarm Clock. 

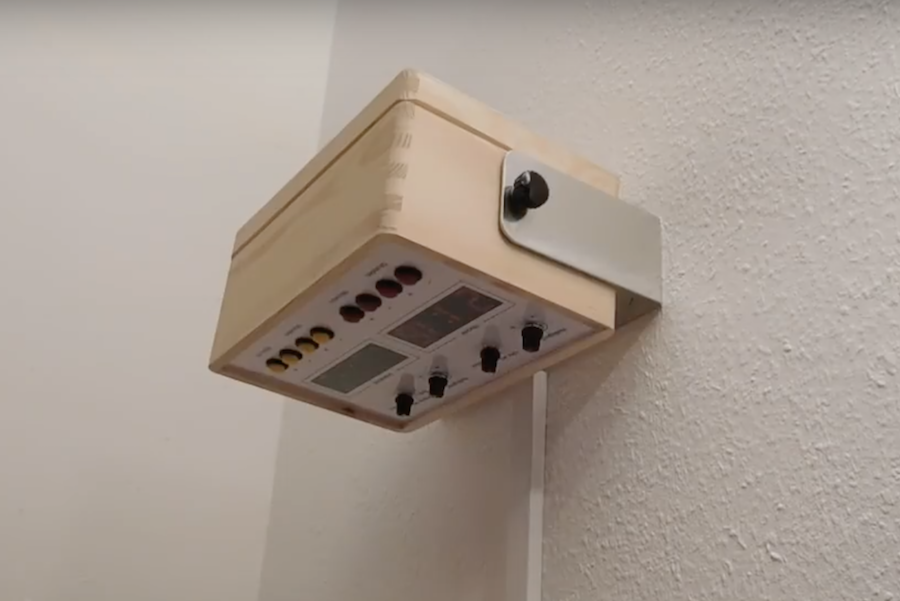
The device consists of a nice wooden housing that gets mounted to a wall above where you sleep, and has separate displays for the alarm time and current time.

Instead of a menu system that you must navigate through to tune settings, the clock features buttons to change both current time and alarm time, as well as potentiometer knobs to modify brightness and alarm volume. The result is a simple interface that requires little thought to set up, and no snooze button since you can simply reprogram the wake-up time with a single button.

The overhead alarm clock offers the following features: 

• Time and alarm time can be read effortlessly and glare-free even in the dark; without glasses, without pressing buttons, without having to leave the right or left side position.

• The alarm clock can also be operated in the dark and with only one hand.

• The alarm clock can be used by a first-time user by looking at the control panel. Reading any operating instructions is not necessary.

• It wakes you up with a pleasant, volume adjustable sound (MP3 song).

• It also functions reliably in the event of a power failure.

• It is very accurate and independent of the reception of a radio signal, the power line frequency and the ambient temperature.

• It does not occupy space on the nightstand.

Sound like something you’d like in your bedroom? You can find Andros’ full project write-up here.
Arduino Mega + former nuclear indicator = coolest Nixie clock ever?

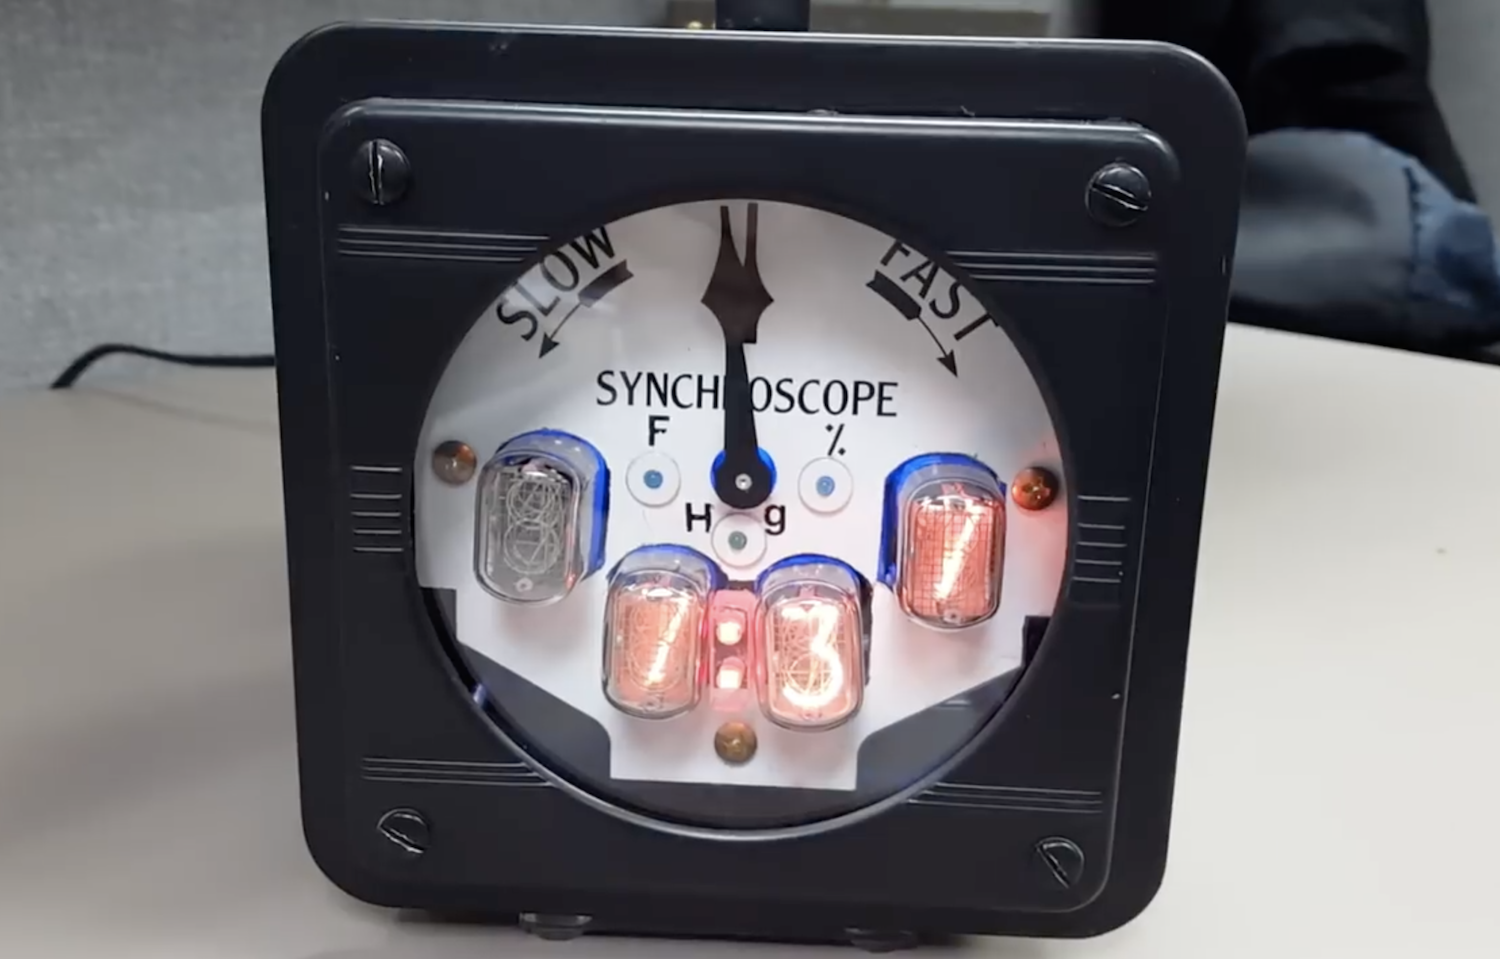
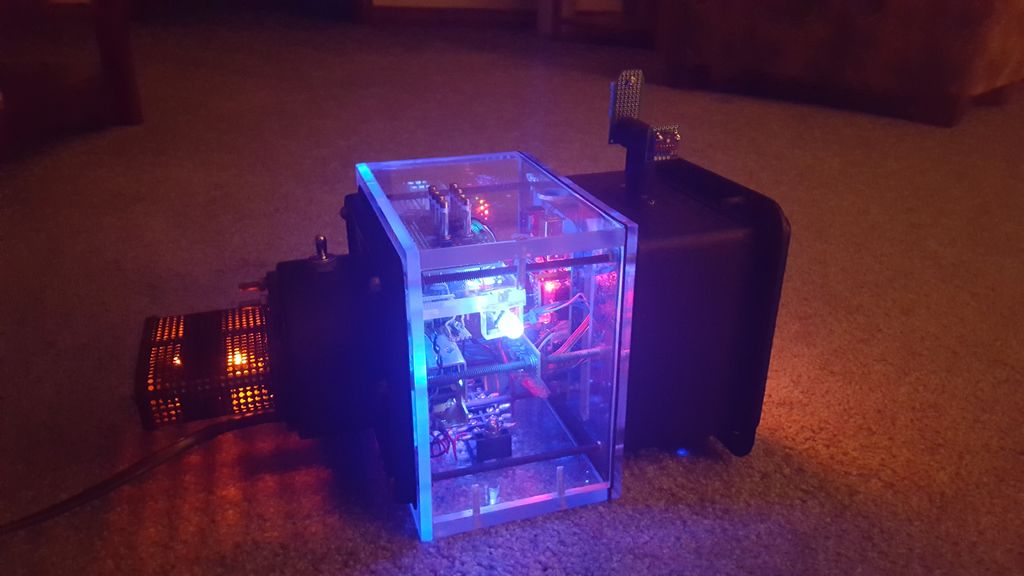
There have been countless clocks made using Arduino boards, but you’ve likely never seen anything quite like this display. It features four Nixie tubes that alternate between the time, temperature, pressure, and relative humidity, in addition to a clock-like hand as a secondary indication of atmospheric pressure. That is interesting in itself, but to top it off, the synchroscope display housing used is actually recycled from a nuclear power plant!

An Arduino Mega coordinates data from the sensors and an RTC module to control the Nixie tubes via driver ICs, along with a micro servo to move the pressure indicator. Power for the electronics is provided by three separate transformers in order to accommodate the tubes. 

The clock displays the time from the top of the minute to 15 sec in, and then displays the temperature (F), then back to time until the bottom of the minute (30 sec.), then it displays atmospheric pressure (mm Hg), then back to time until 45 sec into the minute and displays relative humidity. Upon reaching 60 sec. it increments the time and repeats the cycle. The BMP280 has a very poor temperature sensing capability and is not nearly as accurate as a DS18B20 waterproof temperature sensor that I used in another project of mine. I may just swap this out. Also I had a nice mesh cage around the sensors to protect them from damage and this too led to inaccurate results so I modified that as well. The indicator arrow is scaled for the low and highest pressures found in my state. the indicator arrow does a good job of showing changes in the pressure when a storm or clear skies are developing.

A full write-up on the build can be found here and the Arduino code in this repository.

This Arduino-controlled machine draws on textile with wax

Batik is a fabric decoration technique where wax is applied by hand to cloth that is then died, leaving behind beautiful patterns. While interesting, doing this manually is time-consuming and requires quite a bit of skill to properly execute. In a new take on this traditional technique, makers Olivia De Gouveia and Eugenia Morpurgo decided to make a machine to create wax patterns automatically.

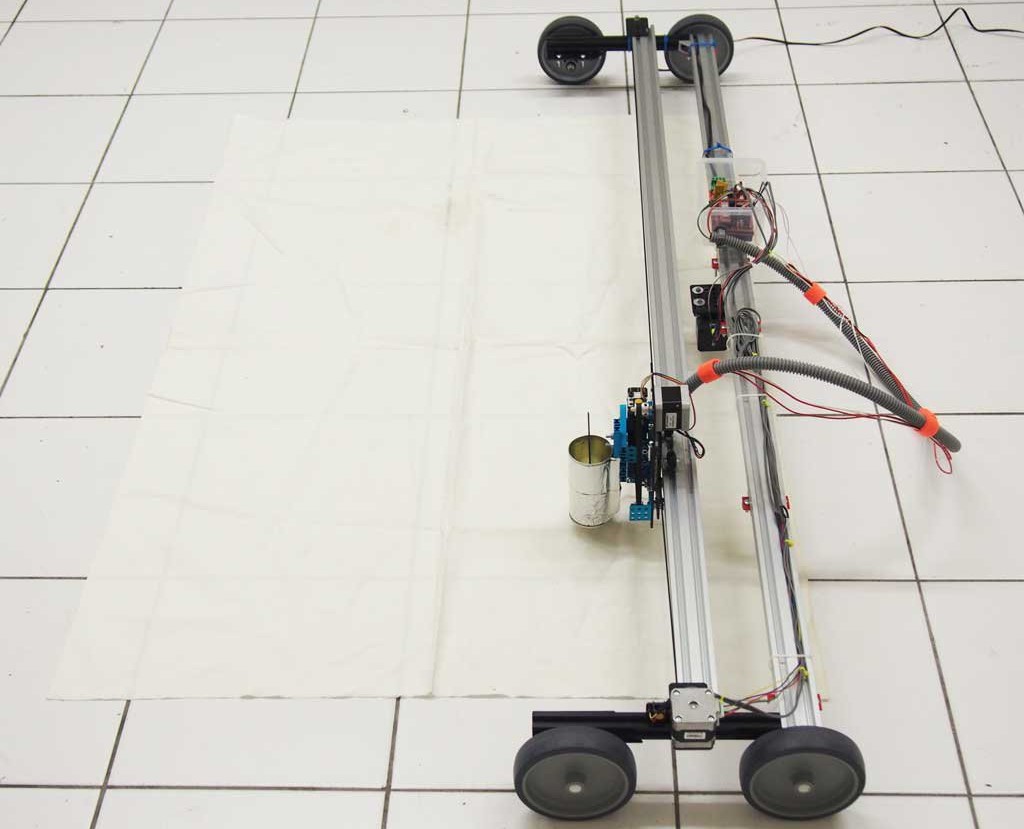
What they came up with is a gantry-style robot that moves molten wax over a surface using a tempeature-controlled pen, with the help of an Arduino Mega with a RAMPS 1.4 shield. In theory, the device allows for an infinite printing area, and can be used to draw decorative patterns or even cutting paths for clothing. 

More information is available on GitHub and on the Digital Wax Print website!

Stomping On Microcontrollers: Arduino Mega Guitar Effects Pedal

Effects pedals: for some an object of overwhelming addiction, but for many, an opportunity to hack. Anyone who plays guitar (or buys presents for someone who does) knows of the infinite choice of pedals available. There are so many pedals because nailing the tone you hear in your head is an addictive quest, an itch that must be scratched. Rising to meet this challenge are a generation of programmable pedals that can tweak effects in clever ways.

With this in mind, [ElectroSmash] are back at it with another open source offering: the pedalSHIELD MEGA. Aimed at musicians and hackers who want to learn more about audio, DSP and programming, this is an open-hardware/open-software shield for the Arduino MEGA which transforms it into an effects pedal.

The hardware consists of an analog input stage which amplifies and filters the incoming signal before passing it to the Arduino, as well as an output stage which does the DAC-ing from the Arduino’s PWM outputs, and some more filtering/amplifying. Two 8-bit PWM outputs are used simultaneously to make pseudo 16-bit resolution — a technique you can read more about in their handy forum guide.

The list of effects currently implemented covers all the basics you’d expect, and provides a good starting point for writing custom effects. Perhaps a library for some of the commonly used config/operations would be useful? Naturally, there are some computational constraints when using an Arduino for DSP, though it’s up to you whether this is a frustrating fact, or an opportunity to write some nicely optimised code.

[ElectroSmash] don’t just do pedals either: here’s their open source guitar amp.

Find astronomical objects in the night sky with this Arduino telescope assistant

No matter how good your telescope is, if you don’t know where to point it, it’s little more than a curiosity. Motorized GoTo telescopes are available at a very high price, but maker “DentDentArthurDent” has come up with an automated star-finder, showing you where your telescope needs to be aimed.

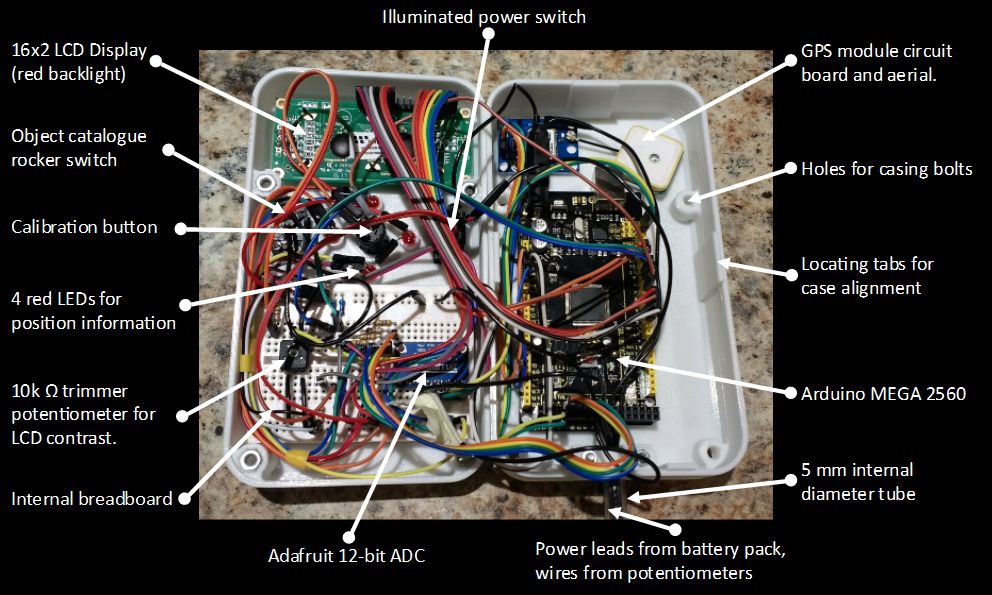
The system takes the form of a 3D-printed telescope pendant, allowing you choose from a database of objects displayed on a red LCD screen. A GPS module enables the device to know where it is, and potentiometers, initially calibrated using the North Star, tell where the telescope is pointed. Four LEDs then guide your telescope to the proper heading and elevation, so you can observe your selected object in no time!

Ready to explore galaxies, nebulae, and clusters? Check out the project’s write-up here!

Hot Ninja messages other devices using WiFi SSIDs

When you need to access the Internet via WiFi, it’s not too hard to find a hotspot if you’re in the right location, and the SSID usually gives you some clue as to who is providing it. What if you instead generated network names in order to communicate with people attempting to log on?

That’s the idea behind Hot Ninja, made by Moscow-based artist Dmitry Morozov, better known as “::vtol::.” His device uses a trio of ESP8266 modules to form and name three different networks, giving him 96 characters with which to message the surrounding area. If other gadgets do log on, Hot Ninja can also create a registration page with more information and even the ability to message back and forth. An Arduino Mega serves as the brains of this portable device, and a keyboard and OLED screen form its user interface–shown in the video below. 

Multifunctional network device for autonomous activity in the city environment. Its main function is communication and propaganda through the WiFi wireless standard. This is the hacktivism DIY response to attempts by the authorities in different countries to control the Internet. The project serves as an example of the possible opposition and decentralisation of networks to ensure communications and provide notifications irrespective of whether there is access to the global internet or certain restrictions are applied.

YouTuber makes his own Overwatch laser turrets

If you ever wanted to to see what Symmetra’s sentry turrets from Overwatch would look like in real life, now you can thanks to Mr. Volt. The YouTuber has produced a pair of them powered by a LiPo battery and controlled with an Arduino Mega, utilizing a relay shield to provide enough power to each laser.

In theory, the turrets can each be aimed with a servo motor and sense objects with an infrared range finder. The main control feature, however, is an arcade button that controls firing, along with a big red e-stop switch to cut things off as needed. 

After a couple weeks of tinkering, my first iteration of Symmetra’s turrets are alive! They may be 3D-printed instead of hard light constructs, but I still think they’re pretty cool. Each turret holds a 2W 445nm laser and RGB (Dotstar) LEDs. They’re controlled by an Arduino Mega and some relays.

You can see it demonstrated popping balloons at just after the 8:30 mark in the video below. Also, please be sure to use the necessary precautions when working with lasers. For his part, Mr. Volt decided to build his own FPV rig out of a welding helmet!

Give new life to an old electron microscope with Arduino

As seen here, although you might consider your oscilloscope and other test equipment to be pretty neat, you most likely don’t have anything nearly as cool as the scanning electron microscope that was dragged out of a shed at Benjamin Blundell’s local hackerspace.

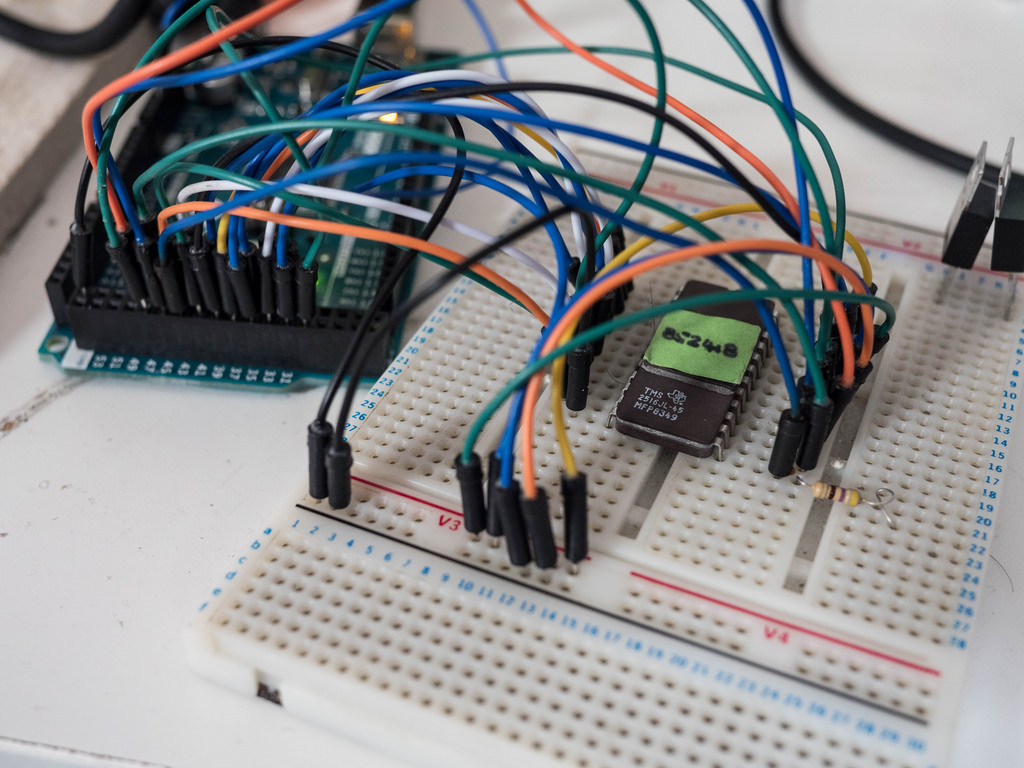
The small detail is that it doesn’t currently work. They’ve been able to track down the machine’s schematics, and Blundell was asked to get the contents off each of its ROM chips. Whereas this might have been difficult 20 years ago, he was able to hook chips up to an Arduino Mega and extract the contents of each one using code provided via his write-up.

Some of you might have watched the TV series, Halt and Catch Fire? If not, don’t worry, I won’t spoil it much. Basically, a couple of the lead characters decide to read the bios out of the latest IBM machine. It’s quite a dramatic moment, but the reality is perhaps somewhat more sober. Anyway, the process they had was quite involved, as it was the eighties after-all. Nowadays, we have things like the Arduino Mega that has enough digital input pins to read a ROM with ease.

While he still needs to figure out what’s going on with this information, they have a place to start and will hopefully have a very exotic tool running in the near(ish) future!