Posts with «hardware» label

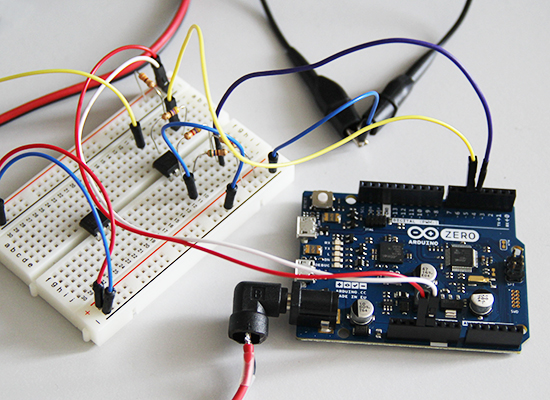
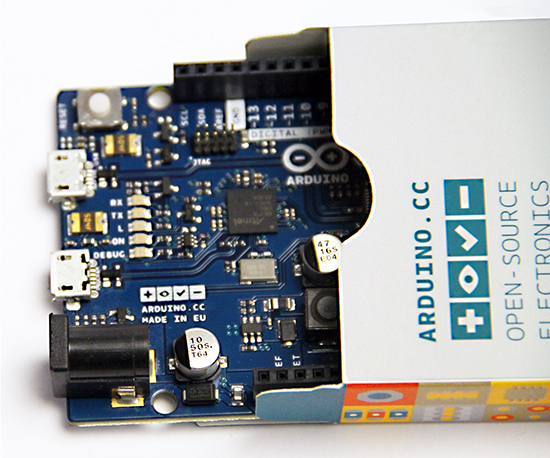
Arduino Zero now available for purchase!

One year ago Arduino and Atmel unveiled the new Arduino Zero. Today, after some months of beta-testing, we are happy to have the board finally available for purchase on the US Store.

Arduino Zero is a simple and powerful 32-bit extension of the well-known Arduino UNO. It allows creative individuals to realize truly innovative ideas especially in areas like smart IoT devices, wearable technology, high-tech automation, and robotics. Arduino Zero acts also as a great educational tool for learning 32-bit application development.

Powered by Atmel SAMD21 MCU, Arduino Zero features a 32-bit ARM Cortex® M0+ core. One of its “most wanted” features is the Atmel Embedded Debugger (EDBG), which provides a full debug interface without the need for additional hardware.

Arduino Zero’s silk has an additional graphic element: the Genuino logo. Genuino is the Arduino sister brand from the Arduino founders (M. Banzi, D. Cuartielles, T. Igoe, D. Mellis), team and community. We added the Genuino logo to the Arduino Zero to stress its authenticity, and to make it easier for the Arduino community to spot original boards. We are going to include this logo to all genuine Arduino boards from now on.

To start using the board you need to download the latest version of the IDE (1.6.5), which comes with a set of great improvements:

  • a new modern editor (thanks @ricardojlrufino)
  • serial monitor stays open while you upload a new sketch (thanks @avishorp and @Wackerbarth)
  • File > Open Recent menu shows the last 5 opened sketches
  • Tons of fixes and improvements: the list is available here. They are 470 issues closed since previous version, 1.6.4: massive!

Learn more about the Arduino Zero and get started with it at the following links:

Updated Arduino Zero product page

Getting Started Page

Github repository

Interact in the Arduino Forum

And if you are one of the lucky ones and have Arduino Zero in your hands, start practicing its features with the following tutorials:

- Arduino Zero Low Power Overview

It shows the low power characteristics of the Arduino Zero thanks to a low power microcontroller using the 32 bit ARM Cortex M0+ architecture.

Simple Audio Feature

It shows how to experiment with sound starting to play a wave file stored on the SD card.


Two New Dev Boards That Won’t Make Your Wallet Hurt-So-Good

If you’ve been keeping up with the hobbyist FPGA community, you’ll recognize the DE0 Nano as “that small form-factor FPGA” with a deep history of projects from Oldland cpu cores to synthesizable Parallax Propeller processors. After more than four years in the field though, it’s about time for a reboot.

Its successor, the DE0 Nano SoC, is a complete redesign from multiples perspectives while doing it’s best to preserve the bite-size form factor and price that made the first model so appealing. First, the dev board boasts a Cyclone V with 40,000 logical elements (up from the DE0’s 22K) and an integrated dual-core Arm Cortex A9 Processor. The PCB layout also brings us  3.3V Arduino shield compatibility via female headers, 1 Gig of external DDR3 SDRAM and gigabit ethernet support via two onboard ASICs to handle the protocol. The folks at Terasic also seem to be tipping their hats towards the “Duino-Pi” hobbyist community, given that they’ve kindly provided both Linux and Arduino images to get you started a few steps above your classic finite-state machines and everyday combinational logic.

And while the new SoC model sports a slightly larger form factor at 68.59mm x 96mm (as opposed to the original’s 49mm x 75.2mm), we’d say it’s a small price to pay in footprint for a whirlwind of new possibilities on the logic level. The board hits online shelves now at a respectable $100.

Next, as a heads-up, the aforementioned Arduino Zero finally makes it’s release on June 15. If you’ve ever considered taking the leap from an 8-bit to a 32-bit processor without having to hassle through the setup of an ARM toolchain, now might be a great time to get started.

via [the Arduino Blog]


Filed under: hardware, Microcontrollers

Open Hardware Summit 2015: call for speakers and attendees

The Open Hardware Summit 2015 will be held September 19th in Philadelphia, PA (USA). This event brings together the open hardware community for a day of talks on all aspects of open-source hardware. It’s an inspiring event and a great chance to connect with other open hardware practitioners. The summit is organized by the Open Source Hardware Association.

If you’d like to speak at the Summit, check out the call for submissions. You have until July 2nd to submit your proposal. Decisions on the schedule will be made by July 31st.

You can get your tickets for the Summit. Past years have sold out, so you may want to get them early.

If you’d like to sponsor the Summit, see the sponsorship details.

Arduino Blog 09 Jun 18:00

Casa Jasmina: we’re open! Visit us on June 6th

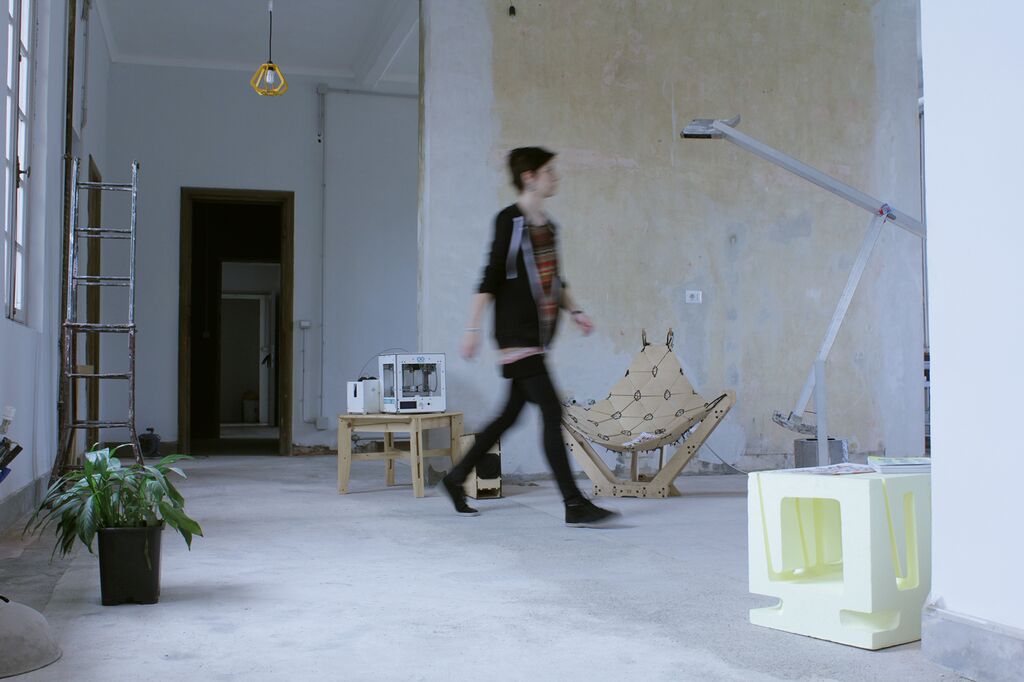
Casa Jasmina, Torino’s Open-Source Connected Apartment, opens its doors on Saturday during Mini Maker Faire in Torino. The unique example of connected apartment with open-source ideals, promoted by Arduino and curated by the futurist and science fiction writer Bruce Sterling, is hosted by Toolbox Coworking in a old industrial building already shared by Officine Arduino (the Italian Arduino headquarter), and Fablab Torino.

During the opening, Casa Jasmina will be available publicly for the first time, hosting some local Maker furnitures, an Italian selection of Valcucine kitchen appliances, household works by International Open Source designers (OpenDesk, Jesse Howard, Aker, Open Structure), and a small display of various connected objects and artifacts from the Energy@Home consortium, Torino Share Festival, and designs and prototypes from the first Casa Jasmina “Call for Projects”.

In the forthcoming months, Casa Jasmina will host residency programs, workshops and talks. This “house of the future” is not restricted to technicians but is meant for people interested in everyday life under near-future conditions and will be available on AirBnB for futurist weekends in Torino.

During the day at the Faire from 10am to 7pm,  you can explore over 50  makers’ projects, listen to many talks and  to the presentation of Casa Jasmina project by Bruce Sterling, enjoy a kids’ area with activities and a lab for the little ones.

Casa Jasmina  guided tours are starting from 11.30 am. Check the program.

OK Google, Open Sesame

There are a myriad of modern ways to lock and unlock doors. Keypads, Fingerprint scanners, smart card readers, to name just a few. Quite often, adding any of these methods to an old door may require replacing the existing locking mechanism. Donning his Bollé sunglasses allowed [Dheera] to come up with a slightly novel idea to unlock doors without having to change his door latch. Using simple, off the shelf hardware, a Smartwatch, some code crunching and a Google Now app, he was able to yell “OK Google, Open Sesame” at his Android Wear smartwatch to get his apartment  door to open up.

The hardware, in his own words, is trivial. An Arduino, an HC-05 bluetooth module and a servo. The servo is attached to his door latch using simple hardware that looks sourced from the closest hardware store. The code is split in to two parts. The HC-05 listens for a trigger signal, and informs the Arduino over serial. The Arduino in turn activates the servo to open the door. The other part is the Google Now app. Do note that the code, as he clearly points out, is “barebones”. If you really want to implement this technique, it would be wise to add in authentication to prevent all and sundry from opening up your apartment door and stealing your precious funky Sunglasses. Watch a video of how he put it all together after the break. And if you’re interested, here are a few other door lock hacks we’ve featured in the past.


Filed under: Android Hacks, hardware

A “cool” project based in the most southern location ever!

At the end of last year we received an email on our support center from an unusual location. It was sent by Giovanni Bianchini an italian physicist researching at Concordia Station, located in East Antarctica (see the red dot in the map below!) where the hottest temperature is around -25C?/-13F. He was working on a project based on Arduino and yes, this is the Arduino project based in the most southern location ever! When we realized that we thought of getting in touch with him and discover the details.

Giovanni was very happy to start a conversation with us, shared  some pictures and explained  why and how he is using Arduino in Antartica.

 Tell us a bit more about Concordia Station and what you are doing there…

 Concordia Station is a scientific research base placed more or less in the middle of the plateau region, East Antarctica. This site is peculiar for the fact of being surrounded of at least 1000 km of ice plain in every direction, a condition that provides relatively stable and unperturbed weather conditions and a dry and very transparent atmosphere, that is the reason for which it has been chosen for astronomic and atmospheric observations.

The downside is isolation: the nearest emplacement is the russian Vostok base, at a mere 700 km, while the italian and french bases on the coast, that are the intermediate stops for the researcher coming to Concordia, are both at more than 1000 km. Usually coming to Concordia involves a 7-8 hours flight from Christchurch (NZ) to the italian “Mario Zucchelli” or the US “Mc Murdo” bases and a second 5 hours flight to Concordia. In alternative it’s possible to reach the french Dumont D’Urville base from Hobarth (AU) with a 7 days (more or less, much more than less…) cruise on the “L’Astrolabe” ship, and fly to Concordia. Since every stop in a base usually involves one or more days of stop, depending on the weather conditions, reaching Concordia is somewhat an adventure itself…

What is your job at the station?

Most of the instrumentation operating in Concordia is installed in some “shelters” placed some hundreds of meters upwind from the base, in order to sample unperturbed air. The shelters are put on elevated platforms to prevent snow accumulation, and are heated and connected to the base LAN, so the instrumentation can be remotely operated.

Specifically I work on atmospheric physics, and in the past two year I am responsible of a scientific project (Concordia Multi-Process Atmospheric Studies) that involve several instruments performing vertical remote sensing of atmospheric properties. The setup include two LIDARs, one SODAR, and an infrared spectroradiometer (Radiation Explorer in the Far-Infrared – REFIR).

All this instrumentation is installed in the Physics shelter, and operates continuously, even during the winter period, in which the base is completely isolated for almost 9 months and is crewed by only 12 persons. This implies that the instruments operating during winter should require the least attendance possible from the reduced crew, and possibly should be remotely accessed from Italy for checking and maintenance.

How are you using Arduino at the base?

While the shelters are quite a comfortable workplace for researchers and technicians, they present a critical (and maybe unexpected) problem for the instrumentation: overheating. The small volume, good thermal insulation, high density of powered devices, united with the low heat transfer capacity of the very dry air inside, makes heat dissipation a difficult task.

 For this reason, the first application I found for an Arduino board in Antarctica has been a cooling system for the REFIR spectroradiometer.

This optical instrument features tens of optical components with critical alignment requirements, so in the past years every time the instrument was subject to a strong thermal cycle, it needed to be realigned.

The original design provided just a simple heater with an analog proportional control loop (go figure you had to heat things at the south pole). Luckily, providing cooling power was as simple as getting air from outside and sending it to the instrument box through a tube. A valve and a fan regulate the cool air flow according to the instrument temperature.

The old heaters, the flow valve (servo controlled) and the cooling fan all are controlled by an Arduino Uno board, with a simple proportional loop that allows a thermal stability of a few tenths of degree.

Using an Ethernet Shield, all the system parameters (temperature, setpoint, cooling and heating gain, valve position) can be monitored through a simple web interface that gives this kind of output:

REFIR-PAD
thermal control
(commands: T, R, H, F, G, V, M, Z)
setpoint = 20.00
averages = 128
threshold = 0.10
fan_gain = 300
htr_gain = 200
valve_full = 0
valve_mid = 0
valve_zero = 38
temperature = 20.49
fan_drv = 118
htr_drv = 0
val_pos = 0

Parameters can also be set sending commands to the web server on the arduino board, for example, the command:

http://192.168.14.3:81/&T210

changes the setpoint temperature to 21.0 C

How does it work?
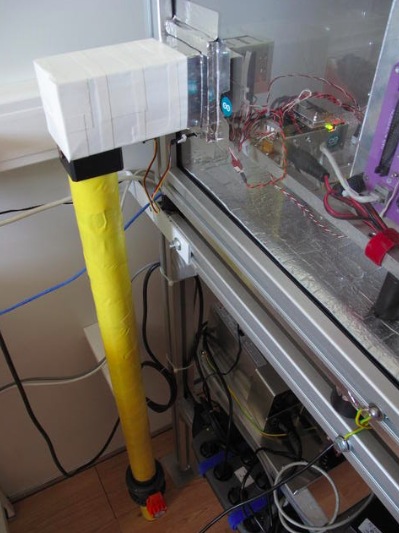
(see picture above) The yellow pipe  goes through the floor to get cool air from the outside, with a manual emergency valve and the servocontrolled flow control valve (the black block below the white box).

The white box connects the pipe to a standard 8cm computer fan that blows the air inside the instrument enclosure. the control system is also inside the instrument box, the green led indicates cooling in progress.
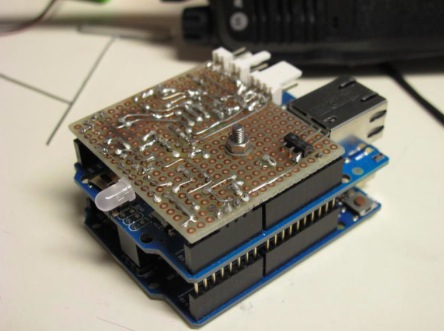
The custom shield (see pic above) is used to interface the Arduino with the various system components. The big transistor (2N3904) drives the cooling fan, the two smaller ones (2N2222) control the green/red led that signals cooling or heating. The voltage regulator provides the ~8v needed by the arduino board (could work without, but at 12v it overheats a lot…)

The heater is made by three transistors in series mounted on heat sinks with a small fan each, and is driven directly by a digital output pin on the arduino, the servo on the flow valve is also driven directly by a pwm output.

Download the Arduino Sketch here.


Arduino Blog 12 Jan 17:25

Reverse-Engineering a Superior Chinese Product

It makes an Arduino look like a 555.  A 364 Mhz, 32 bit processor. 8 MB RAM. GSM. Bluetooth. LCD controller. PWM. USB and dozens more. Smaller than a Zippo and thinner than corrugated cardboard. And here is the kicker: $3. So why isn’t everyone using it? They can’t.

Adoption would mandate tier after tier of hacks just to figure out what exact hardware is there. Try to buy one and find that suppliers close their doors to foreigners. Try to use one, and only hints of incomplete documentation will be found. Is the problem patents? No, not really.

[Bunnie] has dubbed the phenomenon “Gongkai”, a type of institutionalized, collaborative, infringementesque knowledge-exchange that occupies an IP equivalent of bartering. Not quite open source, not quite proprietary. Legally, this sharing is only grey-market on paper, but widespread and quasi-accepted in practice – even among the rights holders. [Bunnie] figures it is just the way business is done in the East and it is a way that is encouraging innovation by knocking down barriers to entry. Chinese startups can churn out gimmicky trash almost on whim, using hardware most of us could only dream about for a serious project.

He contrasts this with the West where only the big players like Apple and Google can step up to the plate. Everyone else is forced to use the embarrassingly obsolete hardware we are all familiar with. But [Bunnie] wants to get his foot in the door. “Can we find a way to still get ahead, yet still play nice?” he asks.

Part of his solution is reverse engineering so that hardware can simply be used – something the EFF has helped legally ensure under fair use. The other half is to make it Open Source. His philosophy is rooted in making a stand on things that matter. It is far from a solid legal foundation, but [Bunnie] and his lawyers are gambling that if it heads to a court, the courts will favor his side.

The particular board targeted is the one described above – the MT6260. Even spurred by the shreds of documentation he could gather, his company is a 2-man team and cannot hope to reverse engineer the whole board. Their goal is to approach the low-hanging fruit so that after a year, the MT6260 at least enters the conversation with ATMega. Give up trying to use it as a phone; just try to use like the Spark Core for now.

He is already much of the way there. After telling you what is on board and why we would all want to use it, [Bunnie] shows how far he has gone to reverse engineering and describes his plans for the rest. From establishing an electronic “beachhead” base of operations to further probe the device, to X-rays, photos, diagrams and the beginnings of an OS. If this type of thing interests you at all, the meticulous approach and easy-reading of this tech teardown will surely impress and inspire you. Every step of progress requires a new hack, a new solution, a new ingenious way to pry information out.

We’ve featured some awe-inspiring reverse engineering attempts in the past, but this is something that is still new and relevant. Rather than only exploit his discoveries for himself, [Bunnie] has documented and published everything he has learned. Everyone wins.

Thanks [David] for the tip.


Filed under: Cellphone Hacks, hardware, slider, teardown

Bluetooth Thingies at Maker Faire

In case you haven’t noticed, one of the more popular themes for new dev boards is Bluetooth. Slap a Bluetooth 4.0 module on a board, and you really have something: just about every phone out there has it, and the Low Energy label is great for battery-powered Internets of Things.

Most of these boards fall a little short. It’s one thing to throw a Bluetooth module on a board, but building the software to interact with this board is another matter entirely. Revealing Hour Creations is bucking that trend with their Tah board. Basically, it’s your standard Arduino compatible board with a btle module. What they’ve done is add the software for iOS and Android that makes building stuff easy.

Putting Bluetooth on a single board is one thing, but how about putting Bluetooth on everything. SAM Labs showed off their system of things at Maker Faire with LEDs, buttons, fans, motors, sensors, and just about every electrical component you can imagine.

All of these little boards come with a Bluetooth module and a battery. The software for the system is a graphical interface that allows you to draw virtual wires between everything. Connect a button to a LED in the software, and the LED will light up when the button is pressed. Move your mouse around the computer, and the button will turn on a motor when it’s pressed.

There are a few APIs that also come packaged into the programming environment – at the booth, you could open a fridge (filled with cool drinks that didn’t cost five dollars, a surprise for the faire) and it would post a tweet.


Filed under: hardware
Hack a Day 23 Sep 21:00

A Proof of Concept Project for the ESP8266

It’s hardly been a month since we first heard of the impossibly cheap WiFi adapter for micros, the ESP8266. Since then orders have slowly been flowing out of ports in China and onto the workbenches of tinkerers around the world. Finally, we have a working project using this module. It might only be a display to show the current weather conditions, but it’s a start, and only a hint of what this module can do.

Since the ESP8266 found its way into the storefronts of the usual distributors, a lot of effort has gone into translating the datasheets both on hackaday.io and the nurdspace wiki. The module does respond to simple AT commands, and with the right bit of code it’s possible to pull a few bits of data off of the Internet.

The code requests data from openweathermap.org and displays the current temperature, pressure, and humidity on a small TFT display. The entire thing is powered by just an Arduino, so for anyone wanting a cheap way to put an Arduino project on the Internet, there ‘ya go.


Filed under: Arduino Hacks, hardware
Hack a Day 18 Sep 03:00

From Open Making to Open Manufacturing at Open Hardware Summit in Rome

The fifth edition of the Open Hardware Summit, for the first time happening outside the USA, is taking place on the 30th of September 2014  in Rome (you can now book your free tickets here).The event launches the Rome Innovation Week, culminating with the second edition of Maker Faire Rome (3-5 October). 

The topic of this edition of the Summit wants to reflect on how production models are shifting from one to one, to one to many structure and the latest schedule features several outstanding speakers of the open hardware scene such as Adrian Bowyer (father of RepRap), Tomas Diez (Fab Lab Barcelona Director), Yasmin Elayat (GOOD fellow), Becky Stern (Director of Wearable Electronics, Adafruit Industries), Eric Pan (Founder, Seeed Studio, Forbes China’s 30 under 30), David Lang (OpenROV Founder, Author of Zero to Maker), Gawin Dapper (CTO, Phonebloks), Nick Ierodiaconou (Co-Founder Open Desk), Phoenix Perry (Founder, Code Liberation) and many more.

Check the Summit’s blog for features and updates about speakers.