Posts with «hardware» label

Vertical Plotter Prototype

Nice Grasshopper-to-Arduino plotter hack from FablabTorino maker Pietro Leoni, a collabotator at Carlo Ratti Associati studio in Turin. We’d love to see code & sketches online soon, as much as a second edition of the plotter.


Wearable Fabric on the Arduino Store

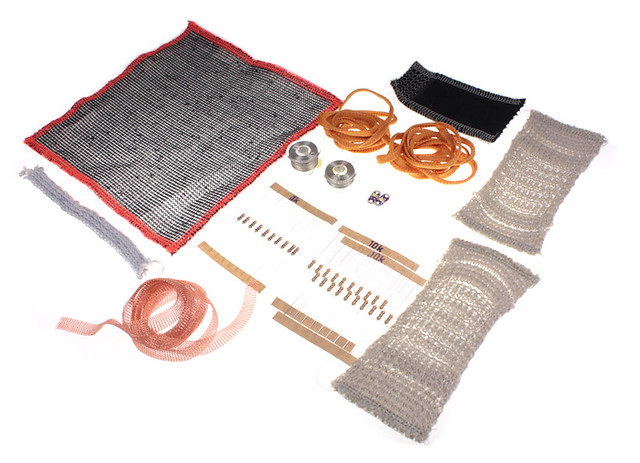
We are happy to announce the first wearable kit on the Arduino Store . This kit has been made by Plug’n'Wear specifically for us. All fabrics in this kit are produced in Italy, and strongly related to a textile family business. If you want to get deeper into the story of this product have a look at Riccardo Marchesi presentation (still in Italian, soon to be traslated!) at World Wide Rome 2012.

Read over for Kit’s features

This kit features:

  1. 1x Circular Stretch Sensor Designed by Hannah Perner-Wilson, this circular knit stretch sensor works perfect when you need to detect tension in many projects.
  2. 2x Textile push button to make easy digital inputs in cloth, scarfs o bags.
  3. 2x Spools of Conductive thread, ready to be hooked over a sewing machine
  4. 2x Soft potentiometer kit will let you import analog data into your wearable project: this kit includes 1 meter of knitted conductive tape and a metal ring. Watch it in action (see video)
  5. 10x 1k ohm resistor
  6. 10x 10k ohm resistor
  7. 1x Textile perfboard is going to change the way you think of wearable circuits. You can sew or even solder components (SMD & through-hole) on this . It can be easily cut or sewn with a standard sewing machine. Washable. Size: 15 cm x 15 cm (6″ x 6″) / Pitch: 2.54 mm (0.1″)
  8. 1x Knitted Coated Copper Tape. Small conductive tape made of coated copper fine wire (112 micron). Flexible, easy to cut, sewable with a standard sewing machine, It can be easily welded ( The coating will melt and tape will be soldered). The surface of this tape has a good insulation thrughout its lenght. Resistance: 107 Ohm/m. Width: 9 mm (0.35″)
  9. 1x Analog Textile Press Button, working with a resistive principle (resistance goes down when you press it). It works as a bend sensor as well. By connecting more sensors together it is possible to make a matrix analog switch. Sensitive area 40mm x 40mm (1.57″x1.57″)
  10. 2x LilyPad LED Bright White A simple, very bright, 250mcd, white LED LilyPad

source: [arduino store]

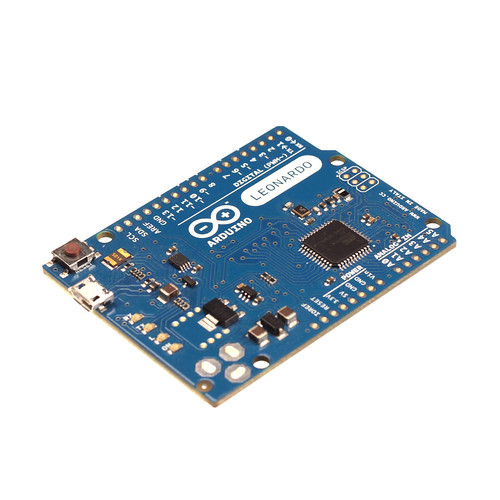
Massimo Introduces Arduino Leonardo

In this video Massimo explains the Arduino Leonardo, talking about its differences with Arduino UNO and playing around with its mouse & keyboard features.

If you want to have a closer look to the latest arrival in the Arduino Family click here, if you want to follow Massimo’s project click here. Arduino Leonardo comes in two different flavours: with headers and without headers.

Arduino Barcamp ZgZ 2012 – Fotografías

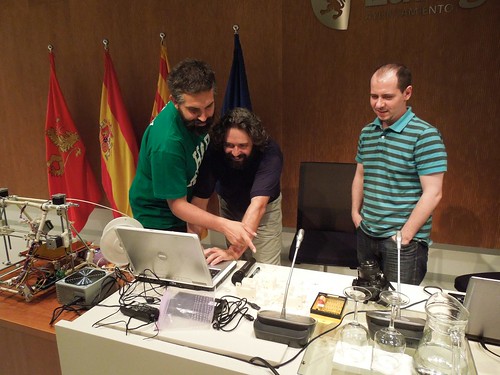
El pasado fin de semana Arduteka, en colaboración con Cooking Hacks y el proyecto Milla Digital del ayuntamiento de Zaragoza, celebraron la Arduino Barcamp más multitudinaria realizada hasta la fecha en España.

Ponencias de todo tipo, desde impresoras 3D hasta las novedades que acontecen al mundo Arduino de la mano de David Cuartielles, pasando por algo de software libre como Plasma Active, un entorno KDE para dispositivos móviles, hicieron las delicias de todos los asistentes al evento.

Via | Arduteka

Arduino and the LTC2440 24bit ADC

Have you ever wondered how to improve the resolution of analog readings of your Arduino board? If yes, this is for you.

John Beale, discussing on the Dangerous Prototypes’ forum, quickly describes how to connect a Linear’s LTC2440 ADC to an Arduino board, which will provide you with an amazing 24 bit resolution.

The ADC, which is available in a SSOP package, can be connected to the Arduino via the SPI bus. Here John provides a brief sketch and some very useful comments to make it working properly.

[Via: Dangerous Prototypes]

Arduino Blog 11 Jul 14:56
24 bit  adc  hardware  ic  ltc2440  tutorials  

Cheap as chips Arduino Ethernet shield

It’s no secret that Ethernet shields for the Arduino are a little expensive. With the official Ethernet shield selling for about $50 and other options not much cheaper, there’s a lot of room for improvement for Arduinofied Ethernet. [Boris] over at Open Electronics has a solution to this problem: his Ethercard powered by a $3 Ethernet controller.

The Ethercard uses the Microchip ENC28J60, a through-hole Ethernet controller. There isn’t much else on the board apart from an RJ45 jack, caps, resistors, and a cheap buffer chip. This board was designed to be easily produced, and we’re thinking it might be possible to etch this board at home.

There are a few drawbacks to this ENC28J60 Ethernet shield – the official Arduino Ethernet shield has a 10/100 Mbps connection where the Microchip-powered shield is limited to 10 Mbps. Given the reduced cost, ease of assembly, and the fact that it’s pretty hard to saturate a 100Mbps connection with an Arduino this flaw can be easily ignored.

Pretty neat, especially considering how much you can do with an Ethernet connection on your Arduino. Files and code available in the git.


Filed under: arduino hacks, hardware
Hack a Day 10 Jul 23:02

Arduino based Milling Machine

This is a working model of an Arduino based Milling Machine created using FischerTechnik. For those of you who are unaware of FischerTechnik, it is similar to the LEGOTM Building Blocks.
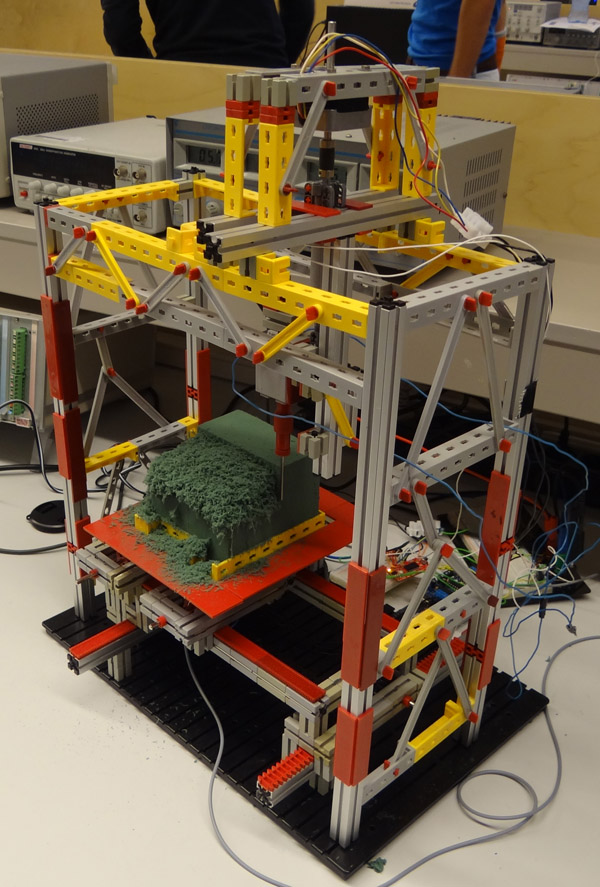
A group of four Mechanical Engineering students at the Delft University of Technology (Netherlands) created this project as part of their Mechatronics class in their Second year of Bachelor of Sciences (B.Sc.) Program.

Laurens Valk, one of the creators, explains the essence of Arduino in the project:

“The system uses the Adafruit motor shield to run two stepper motors, and the Sparkfun EasyDriver for the third stepper motor. The Arduino runs code that listens to Matlab commands over USB. We expanded that code a little to make it possible to add the third stepper motor and some other commands. Most of the actual code was programmed in Matlab, with the Arduino as the interface between computer and motors/sensors.”

We had a little chat with Laurens. Here is the excerpt:


When did you first hear about Arduino, and when did you first start using it?
I’ve seen a lot of Arduino projects over the years, but this was the first time we used it in a project. Personally, I usually build robots with MINDSTORMS NXT, but this felt like a good opportunity to combine mechanical work (the printer hardware) with real electronics (Arduino).
How did you end up making a Milling Machine/ 3D Printer for your project?

We chose to come up with our own design challenge and decided not to do the standard exercise. Initially we thought about making a (2D) plotter or scanner. Then quickly we started thinking about the same things, except in 3D. One of the projects that inspired us was the LEGO Milling Machine by Arthur Sacek. Both a scanner and printer would still be doable in 3D, but the time was limited, so we settled with the printer idea.

All construction had to be done in one workweek for logistical reasons. To make sure we were able to finish in time, we prepared much of the electronics and software outside the lab. We finished just in time, but unfortunately we could do only one complete print before we had to take it apart. Not surprisingly, it was very exciting to wait for the result of the one and only complete test run. We couldn’t see the result until we used the vacuum cleaner to remove the dust.

Here is a video showing the working of this machine. [And the Vacuum Cleaner Laurens is talking about]:

This gives an Insight into the many feats that an Arduino can accomplish.


Space experiments for everyone: the ArduSat project

ArduSat, which stands for “Arduino satellite”, is a recently kickstarted project that aims at developing an open platform usable to emulate space scientists:

Once launched, the ArduSat will be the first open platform allowing the general public to design and run their own space-based applications, games and experiments, steer the onboard cameras to take pictures on-demand, and even broadcast personalized messages back to Earth.

ArduSat will be equipped with several sensors (such as cameras, gyros, accelerometers, GPS and more) packed inside a small cube (the side will be approximately 10 cm long) that can be accessed through a set of Arduinos.

Once in orbit, the ArduSat will be accessible from the ground to flash the required firmware for the experiments and for getting back all the collected information. People interested in performing space experiments will have access to a ground replica of ArduSat explotable to test and debug their code before the actual deployment.

The project is very ambitious, and it is expected that such an open accessible space platform will have a considerable impact on how simple space experiments will be carried out in the forthcoming years, in the case of fundraising success.

You may find the Kickstarter page of the project here.

[Via: Hack A Day and Kickstarter]

ArduSat puts Arduino experiments in space

CubeSats are nothing new – hundreds have been launched into Earth orbit by schools and universities over the past decade. Like anything cool, an Arduino eventually gets thrown into the mix. That’s what the folks behind ArduSat are doing: they’re launching an Arduino-laden satellite into orbit with a bunch of sensors to enable anyone to become a citizen space scientist.

On board the ArduSat is a suite of sensors including a spectrometer, Geiger counter, IR light sensor, electromagnetic wave sensor, a temperature sensor, gyroscope, accelerometer, magnetometer, GPS unit, CO2 sensor, and of course a few cameras. The rewards for this Kickstarter are fairly interesting: backers who pledge $500 are able to buy a week’s worth of time using the ArduSat sensors for your own personal experiment.

As for how this Arduino-powered satellite is getting a ride up to Low Earth Orbit, the team plans to send an application into NASA for the CubeSat Launch Initiative ride-along program. If NASA selects the ArduSat, it’ll get a ride into space along with other CubeSats on a larger commercial launch. If the ArduSat isn’t selected by NASA, the team behind this satellite has secured funding to piggyback on a commercial launch.

Tip ‘o the hat to [HackTheGibson] for sending this in.


Filed under: arduino hacks, hardware, kickstarter

Arduino Barcamp Zaragoza 2012


Arduteka en colaboración con Cooking Hacks y Milla Digital del ayuntamiento de Zaragoza han preparado un evento con capacidad para más de 400 personas en uno de los edificios más emblemáticos de la ciudad, el Antiguo Seminario Metropolitano de Zaragoza transformando en una moderna Ciudad Administrativa Municipal y que amablemente han cedido para organizar el evento.


Desde charlas sobre arte interactivo con Arduino como interface, pasando por talleres sobre impresión 3D hasta demostración de integración de Arduino con Asterisk será solo una parte de lo que vamos a poder disfrutar, ya que estarán habilitados diferentes Stands como el de Parrot, en que podremos probar el nuevo Ar-Drone 2.0, el de Cooking Hacks que nos amenizarán con micro talleres Arduino e incluso el de nuestros amigos de Ultra-Lab que seguro hará las delicias de los asistentes.


Por si esto fuera poco.. Contaremos con la presencia y colaboración de David Cuartielles, el cual nos ofrecerá una charla sobre los últimos productos Arduino que se está aconteciendo…


Accede ahora a toda la información en la nueva web de Arduteka AQUÍ e inscríbete!!

Te lo vas a perder??


Via | Arduteka