Posts with «featured» label
Workshop and talk with Massimo Banzi in London #ArduinoTour
It’s going to be a great weekend in London in mid January. Massimo Banzi, Arduino co-founder will be at the Somerset House in London for three days. The program starts with a talk followed by a Q&A, on Friday January 16th in the Screening Room, South Wing at Somerset House. (book your ticket here)
On Saturday 17th, and Sunday January 18th you can take part to two 8 hours sessions that will be held at Makerversity, in the New Wing of Somerset House. The workshop is suitable for beginners, designers, teachers, artists, hackers, and everyone interested in Arduino (no prerequisites needed). At the end of the two sessions each participant will be able to prototype autonomously a simple project with Arduino. The participation is available for a max of 20 people: you can check details and book your ticket here. The presentation taking place on Friday is free for workshop participants.
Programmable 3d-printed decorations for your Xmas
We can’t miss the chance to play with some LEDs now that holidays are coming and mix some electronics with 3d printing on Materia 101.
In the tutorial of this Kristoffer is experimenting on Xmas decorations, Arduino Micro and some code to play around with.
The result is what you see in the picture below!
Do you want to make it too? Follow the steps on Scuola >>
Check the previous tutorials on 3d printing with Material 101
Interested in getting in touch and showing your experiments? Join Kristoffer on the Arduino forum dedicated to Materia 101 and give us your feedback.
7 brushless pumps for a fountain controlled by Arduino Micro
Using Arduino Micro to control a fountain is the project shared by Michael Diesing on Twitter:
May I introduce my second ARDUINO-project with own pcb. With the pcb I am able to drive seven brushless pumps(with integrated electronics). The “problem” with such kind of pumps is that they don’t accept unfiltered pwm-signals as supply voltage. So I created a circuit where the pwm-signals of an ARDUINO-micro are level-shifted to 12V with a darlington array and afterwards filtered with a 1 uF ceramic capacitor and a 730 Ohm resistor (low pass filter). The signals are then led into the adjust-pins of seven “lm317″s. To work properly I needed to connect the adjust-pins also with 2500 Ohm resistors to gnd, but I found out that with two l293d instead of the used TDP62783 (darlington array) these resistors are not needed, but different resistor and capacitor values for adequate filtering!
The pums also have tacho signals which I connected via schottky-diodes to the ARDUINO (inputs with pullup). With the tacho-signals I am able to find out if pumps are stuck, are sucking air or are not connected.
Additionally I added one ACS712-05B current sensor (which measures the entire current of the circuit) that could be used to find out if pumps that don’t have tacho-signals are working properly. At the moment it is not used.
Besides that I integrated a lm386 audio-amp used to amplify the signal of an electret-mic to a level that is suitable for the ATEMGA’s ADC.As the first project for the pcb I created a fountain consisting of a shortened wine barrel, seven brushless pumps, a pushbutton with led and pebbles (s. video).
There are seven animation-modes which can be selected via the pushbutton (the selected mode is stored in eeprom).
The speed of the pumps is checked permanently during operation.
The average power consumption is ~20W and max. consumption is 30W.
Discover the different modes to control it reading the description on youtube video.
Handy Arduino makes it on french television
Last saturday, Arte tvl aired a short documentary in french language about Arduino. The video was created by FUTURE magazine and featuring Massimo Banzi, David Cuartielles and Arduino users: children and young electronics enthusiasts:
Tinkering in a garage on a drone, playing with a set of lights with LEDs or even build a robotic arm worthy of a science fiction movie … Today, even when one is a novice in electronics all this is possible through Arduino, a real flexible technology.
They also created two nice short info-animations to explain what is Arduino and the idea of open source:
Arduino TRE Developer Edition, 2nd round of beta-testing
30 Arduino TRE Developer Edition boards (the last ones!) are available online today on our store. Whoever purchases them will be added to our Beta-testing Program, joining the about hundred betatesters already contributing to the development of the hardware and software of the board. You can learn about the program and the board on this post.
These boards have the latest Web IDE pre-installed and ready to go, we are now at a stable IDE release with everything fully functional. We will write a specific post about the new Web IDE next week, so stay tuned!
The first round of the program focused mostly on hardware and software testing, and we have just rewarded the betatesters who contributed the most. We really would like this second round to revolve around contents creation. For all Arduino boards, examples and projects are really crucial to get beginners started with a new environment. This is even more relevant for the Arduino TRE, that thanks to the onboard Linux system, has so much more power and potential than classic Arduinos.
For instance you could use the Arduino TRE as a personal cloud, keeping all your data available to your connected devices without having to rely on third party services; you could create a system to stream music wirelessly to your speakers with a tangible user interface; build a DIGI software that allows ZigBee porting; make an interactive whiteboard for schools, and so on.
We have a reward system in place for completed projects: two coupons of the same value of the Arduino TRE Developer Edition purchased, a dedicated post on our blog, Arduino TRE limited edition T-shirts, 10% off coupons for the Arduino Store. We look forward to hear about your projects!
When is the Arduino TRE going to be finally on the market? The board is ready, but we don’t have a final release date yet because we are still figuring out some manufacturing matters. We’ll keep you posted!
Image above
Arduino TRE Photobooth, Xun Yung and Tien Pham, Maker Faire Rome 2014.
A 3D anaglyph photobooth uses two cameras to capture a 3D picture. Each picture is processed using the Arduino TRE board. It separates the red channel from one camera and the cyan channel from the other, and overlays them together. The result is then printed out on a large photostrip.
Arduino Gift Guides that fit anyone’s piggy bank
Last week we published our gift guides presenting you a list of products available on the Arduino Store and divided by topic for Kids and people interested in IoT, Home Lab and Fashion Tech.
Now we’d like to give you some suggestions for gift ideas fitting anyone’s piggy bank:
Gifts Under 15€
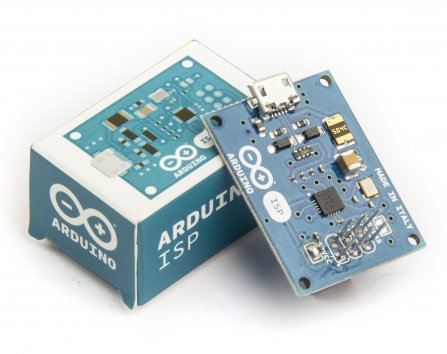
It’s a tiny AVR-ISP (in-system programmer) based on David Mellis’ project FabISPand useful to anyone needing more space on the Arduino board
Flashing Card Set – Merry Resistivities by Bare Conductive
The Merry Resistivities Set contains all the materials you need to make three flashing greeting cards using Electric Paint. This fun activity is great for makers of all ages.
A simple POV toy for beginners who are looking to learn how to solder, how to program microcontrollers, or make LED blinky toys. Because the programmer is built into the kit, one does not need a special “microcontroller programmer”.
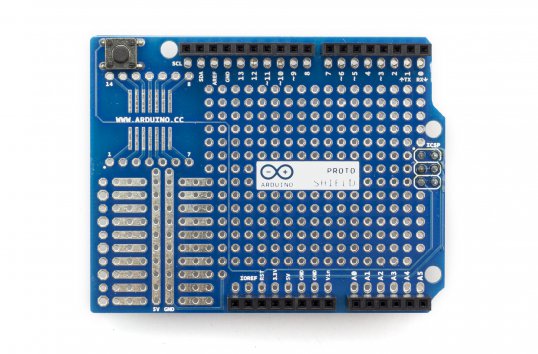
The Arduino Prototyping Shield makes it easy for you to design custom circuits for your next Arduino project. You can solder parts to the prototyping area to create your project with extra connections for all of the Arduino I/O pins.
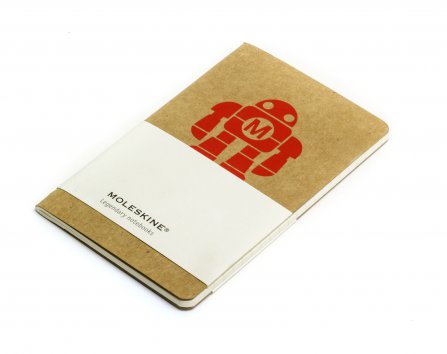
Pocket Moleskine Notebook – Fresh from the Maker Faire comes our exclusive mini-Moleskine (5.5″x3.5″, 30 pages) notebook, available with Robot logos.
Gifts Under 30€
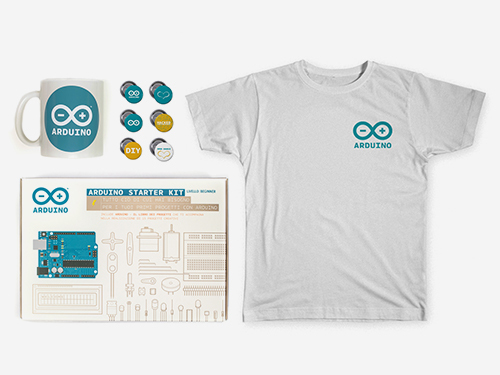
Getting Started with Arduino – 2nd Edition
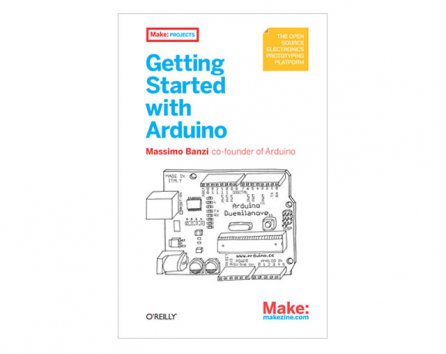
This classic book to start tinkering with Arduino gives you lots of ideas for projects and helps you work with them right away. From getting organized to putting the final touches on your prototype, all the information you need is here!
Arduino Case + Breadboard Wires Kit
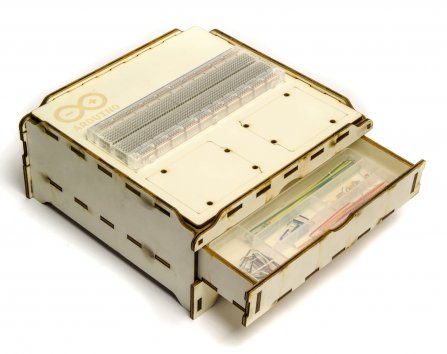
This lasercut (in Officine Arduino), wooden case is perfect to host your project and store electronic parts. It features two drawers, a confortable surface for a standard breadboard and the space for two Arduinos to be hooked up. It’s stackable, perfect for teaching material or group work.
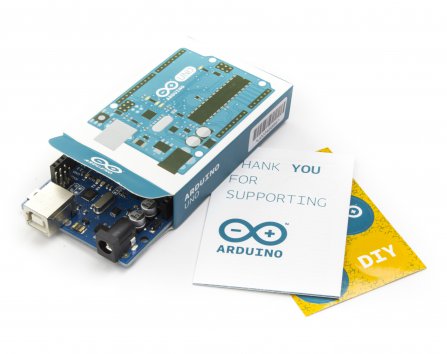
If you want to make any beginner happy, this is the perfect gift. “Uno” means “One” in Italian and is named to mark the upcoming release of Arduino 1.0. The Uno and version 1.0 will be the reference versions of Arduino, moving forward. The Uno is the latest in a series of USB Arduino boards, and the reference model for the Arduino platform.
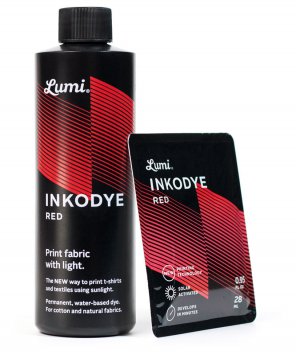
Lumi is a new DIY alternative to screen printing.The process works on cotton, linen, silk, rayon, canvas, and any other natural & absorbent fiber. Once finished, your print is permanent and can be machine washed without fading.
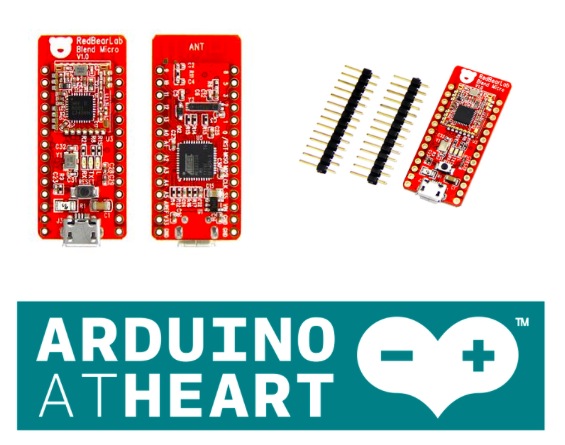
Arduino At Heart Blend Micro is RedBearLab first integrated developement board, they have “blend”ed Arduino with Bluetooth 4.0 Low Energy (aka BLE or Bluetooth Smart) into a single board. It is targeted for makers to develop low power Internet-Of-Things (IoT) projects quickly and easily.
Gifts Under 60€
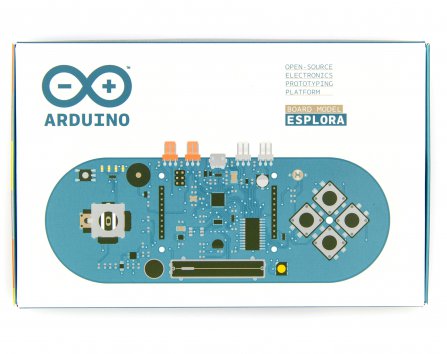
The Arduino Esplora is a ready-to-use, easy-to-hold controller that lets you explore the infinitive possibilities you have in the world of sensor and actuators, without having to deal with breadboards, soldering or cable. There is no limits to the sensors applications! Adding a LCD module you can make your personal videogame!
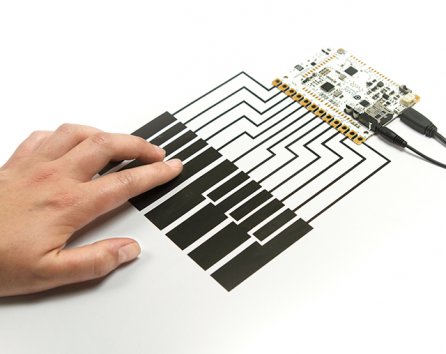
Touch Board can turn almost any material or surface into a sensor by connecting it to one of its 12 electrodes, using conductive paint or anything conductive. It’s designed as an easy-to-use platform for a huge range of projects, whether it’s painting a lightswitch on your wall, making a paper piano or something nobody’s thought of yet.
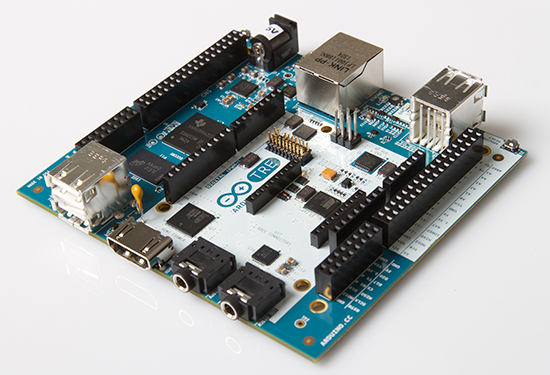
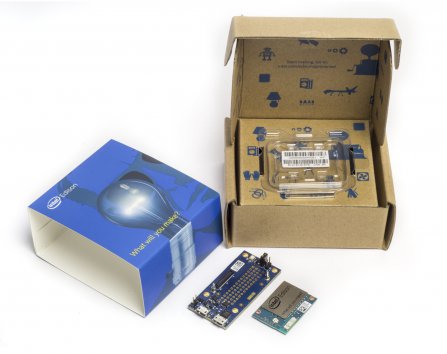
The Intel Edison is an ultra small computing platform that will change the way you look at embedded electronics. This kit also includes a Arduino Breakout, which essentially gives your Edison the ability to interface with Arduino shields or any board with the Arduino footprint.
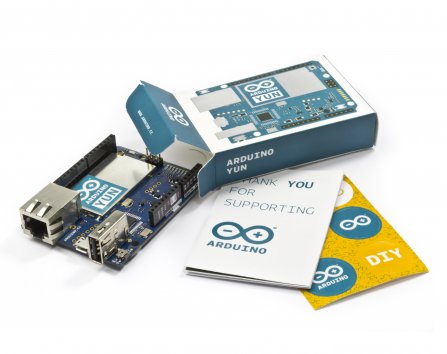
Arduino with onboard Wi-Fi connectivity and a Linux computer. Great for IoT projects. The Arduino YÚN is the combination of a classic Arduino Leonardo (based on the Atmega32U4 processor) with a WiFi system-on-chip running OpenWrt-Yun.
Remember
FREE SHIPPING to European Union for all orders over €100 (below 3Kg overall weight). Should you need delivery by Dec 24th, we strongly advise you to place the order before Dec 15th. FREE SHIPPING is available from Dec. 2nd 2014 until Jan 6th 2015. Read more about the shipping policy.
Discover Arduino Xmas Pack, free shipping for US and EU!
This holiday season we have a special package for you. Arduino Xmas Pack contains all you need to make the perfect gift for anybody willing to get into the Arduino world and put their hands on official gadgets and the widely appreciated Arduino Starter Kit.
The Starter Kit walks you through the basics of Arduino and electronics in a hands-on way through 15 projects to build, hack and share something great every day.
Xmas Pack includes (see pic above):
- Arduino Starter Kit in Italian or English
- Arduino T-Shirt (you can choose your size)
- Arduino Mug
- 6 Pins
Arduino Xmas Pack is sold only on the Arduino Store at 100€/124 $ and ships for FREE in US and Europe.
If you want to be sure to receive it for Christmas, check the timing to place orders on this page.
Make it yours for Christmas >> English edition or Italian Edition
How to print a Pirate Hook with your Materia 101
Using a 3d printer means playing with some hardware but especially some softwares. In the tutorial of this week, the fourth tutorial of our series , Kris is going to introduce you how to work with Slic3r, a G-Code generator for 3d printers and basically a tool you need to convert a digital 3D model into printing instructions for your 3D printer. Slic3r is an open source software able to cut the model into horizontal slices (layers), generates toolpaths to fill them and calculates the amount of material to be extruded so that you can reach good results.
The object you’ll be able to print with your Materia 101 is a pirate hook !
Follow the 12 steps on Scuola and print yours >>
Check the previous tutorials on 3d printing with Material 101
Interested in getting in touch and showing your experiments? Join Kristoffer on the Arduino forum dedicated to Materia 101 and give us your feedback.