Posts with «featured» label

Arduino IDE 1.6 is released! Download it now


After almost two years “in the making” we’re thrilled to announce the availability of the Arduino IDE 1.6.0. The latest version of the development environment used by millions of people across the globe brings about a lot of improvements.

Since the day we started developing the first 1.5 version we have received a lot of feedback, suggestions and contributions from our vibrant community and we would like to thank you all for your passion and good will: thank you everyone, you rock!

We are glad to say that 1.6.0 includes a lot of new features. Here is a not so brief list of them:

  • Support for multiple platforms
  • Boards are detected and listed on “ports list” menu together with the serial port
  • Drivers and IDE are now signed for Windows and MacOSX
  • Improved speed of build process
  • Autosave when compiling/uploading sketch
  • A lot of improvements of the serial monitor (faster, backed by modern JSSC serial library instead of old RXTX)
  • Find/replace over multiple tabs
  • Improved lots of Arduino API libraries (String, Serial, Print, etc.)
  • Tools & toolchains upgrades (avr-gcc, arm-gcc, avrdude, bossac)
  • Command line interface
  • IDE reports both sketch size and static RAM usage
  • Editor shows line numbers
  • Scrollable menus when many entries are listed
  • Upload via network (Yún)
  • HardwareSerial has been improved
  • USB has got some stability and performance improvements
  • SPI library now supports “transactions” for better interoperability when using multiple SPI devices at the same time
  • Better support to 3rd party hardware vendors with configuration files (platform.txt and boards.txt)
  • Submenus with board configuration can now be defined
  • Fix for upload problems on Leonardo, Micro and Yún.
  • Libraries bundled with Arduino have been improved and bugfixed, in particular: Bridge, TFT, Ethernet, Robot_Control, SoftwareSerial, GSM
  • A lot of minor bugs of the user interface have been fixed

There is still lots of room for improvement, of course. Don’t forget to report any issue you find, either on Github or on the Arduino forum: your help is very much appreciated. It doesn’t matter if you are not a tech specialist: every feedback adds value.

We are already working on release 1.6.1, with some very cool features we will announce in the coming weeks.

The IDE is available from the newly redesigned Download page.


Arduino Blog 09 Feb 11:44

Time to explore Linux on Intel® Galileo Gen 2 – Tutorial

The new tutorial we want to present you today is more like a guide giving you some basic information about the benefit of accessing Linux shell in Intel® Galileo Gen 2. It also shows you in which way the Intel® Galileo Gen 2 is not only an advanced, more powerful version of Arduino Uno that happens to be layered on top of a Linux system. There is definitely much more that can be done with it and the Linux shell: this tutorial is an entry point to explore it and learn how to:

– preparing a system image;
– accessing the shell in 4 different ways;
– examining the workflow of copying a python script into Intel® Galileo Gen 2 through scp (or pscp);
– running an Arduino sketch;
-retrieving files from Intel® Galileo Gen 2.


The Intel® Galileo Gen 2 includes much of the Arduino Uno’s functionality. Similar to an Uno, it can create a wide variety interactive objects that use input sensors and various outputs. After exploring the many possibilities of using the “Arduino part” of the  Intel® Galileo Gen 2 this way, one might start to wonder: what is the next step?

Perhaps you want to write more complex programs using your favorite scripting language like python or javascript. Maybe you’re interested in computer vision or want to have full control over the board and find out more about the inner workings. By accessing to the Linux core, all these will be possible to achieve.

This tutorial will cover the basics of working with Linux by making a simple program that logs button presses. While the example is not very useful, it will help familiarize you with Linux as applied to the Intel® Galileo Gen 2.

Follow the link and explore all the steps

Casa Jasmina Project is about to roll, with style

The location of the Casa Jasmina apartment will officially be inaugurated here in Torino (Italy) on the 20th of February, together with the celebration of  the 3rd birthday of local Officine Arduino and Fablab Torino.

The two following days (21-22 of February) we’re going to start producing the first connected things for the apartment in a workshop with the support of Jesse Howard, a designer focusing on new systems of making.

He’ll fly in from Amsterdam and run a 2-day session together with Lorenzo Romagnoli (Casa Jasmina Project Manager) and Stefano Paradiso (Fablab Torino Coordinator) with the goal of designing and manufacturing an Open Source Connected Lamp (OSCOLA).

The workshop is suitable for designers, artists, hackers, and everyone interested in Arduino and open source design and in order to stress the idea of open design, participants will be asked to reinterpret, modify and redesign an open source lamp proposed by Jesse Howard.
A minimum familiarity with of CAD drawings, digital fabrication techniques and Arduino are recommended but not strictly necessary.

By changing materials, shape, use cases, mechanics, and interaction, we are going to create a family of open source lamps.
Arduino Yún will be used to make the lamp interactive, enabling the user to turn it on or off remotely; change the light color; use the light to visualize data etc, or connect one lamp to an other.

The OSCOLA workshop (book your participation!)  consists of 16 hours of class taking place at Fablab Torino and a ticket is valid for two people.  At the end of the workshop, each couple of participants will bring home their IoT open-source lamp and a copy will be reproduced to stay at Casa Jasmina!

Now you can 3d print lego- compatible LED bricks

The 3d printing tutorial Kristoffer, our 3d specialist, prepared this week is not part of the ongoing LEGO power functions compatible series but makes you still play around modding the famous bricks to add some cool light effects.

If you follow the 8 easy steps you’ll be able to print bricks with Arduino Materia 101 that can include addressable LED’s in your models. As in the previous tutorials, he modelled it using FreeCAD, but the way he did it should be applicable to just about any CAD-software or 3d modelling software.

Notice that in the last step of the tutorial you can also download the perfect settings to obtain good prints out of small pieces!

Check the previous tutorials on 3d printing with Material 101

Interested in getting in touch and showing your experiments? Join Kristoffer on the Arduino forum dedicated to Materia 101 and give us your feedback.

Circular Knitic and the power of doers in open source

Circular Knitic is an open hardware project created for DOERS, an exhibition curated by Arduino co-founder David Cuartielles, which takes place at Etopia Center for Art & Technology in Zaragoza, Spain.

It consists of an exhibition and a series of presentations, workshops and seminars focusing on the world of open creation, invention and personal fabrication. It aims to unveil a variety of extraordinary creations, ideas that are transforming the world, but mostly show visitors a group of people: “the DOERS, constantly looking for new projects that surprise us”.

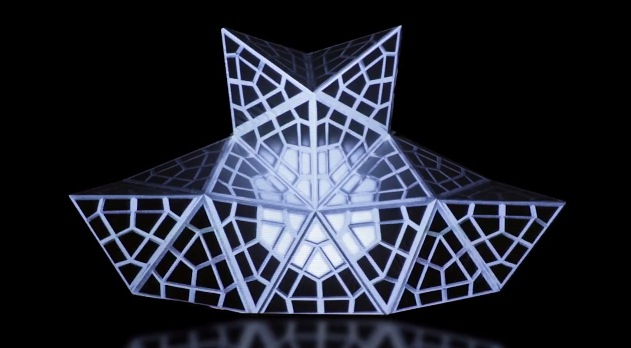
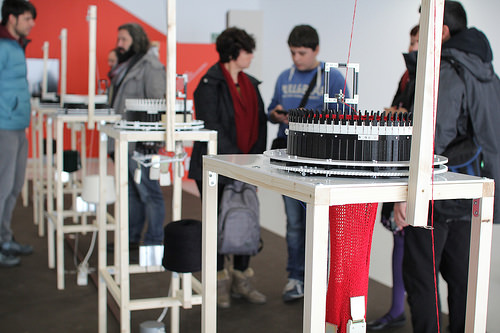
During a period of eight months, 5 knitting machines will be knitting slowly and produce enough tubulars so that the ceiling of the art centre will be covered with knitted scarves.

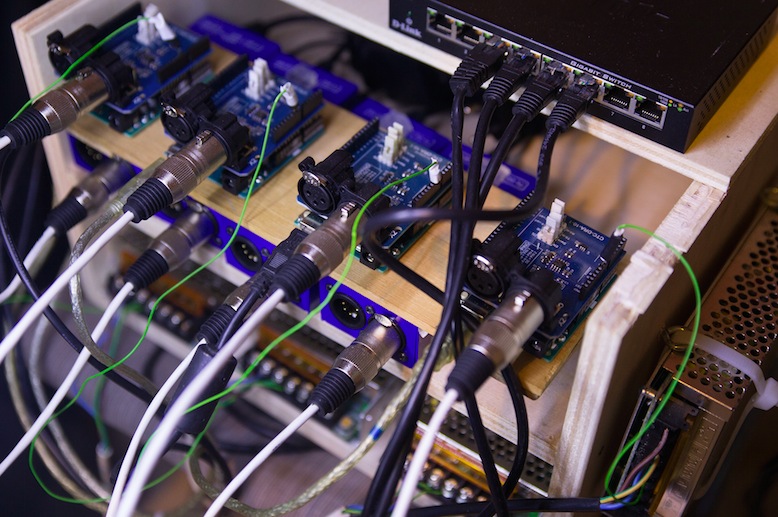
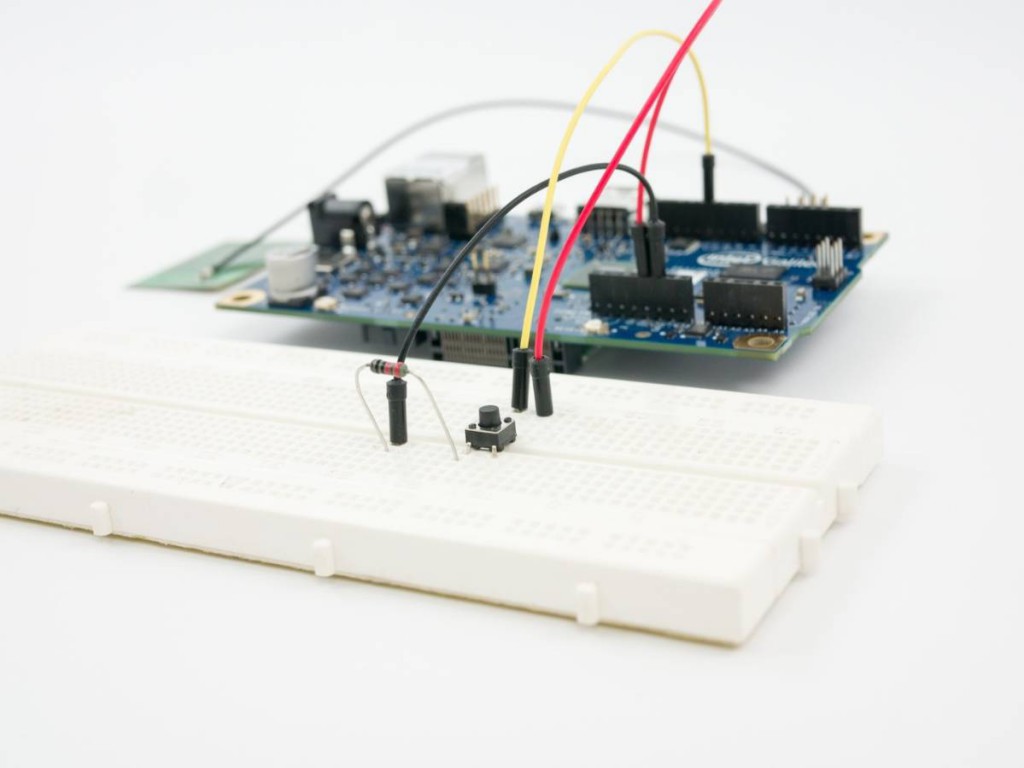
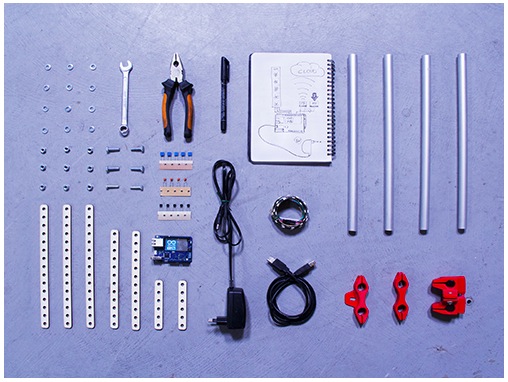
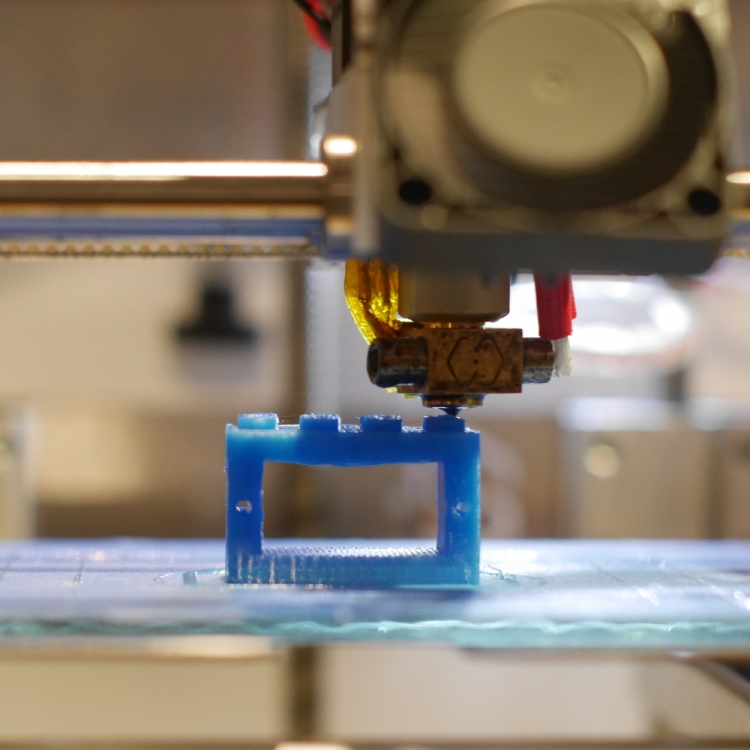
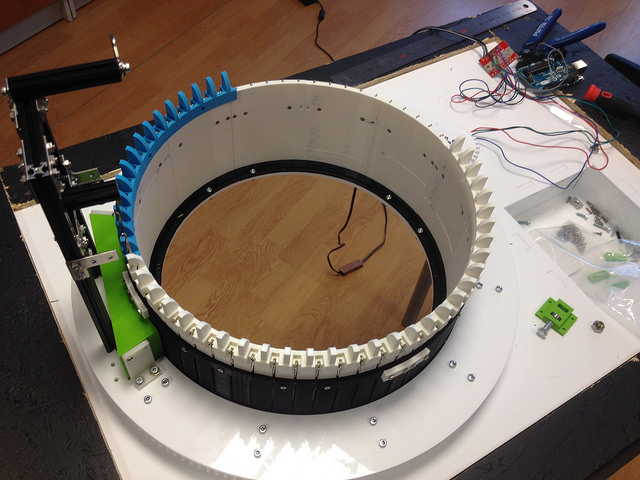
Using digital fabrication and maker tools like 3D printing, laser cutting, makerbeam, and Arduino Uno— Knitic duo designed a replicable circular knitting machine. It’s not the first time they experiment on knitting techniques. A couple of years ago I interviewed them on this blog for their previous project focused on giving a new brain to old knitting machines using Arduino Due.

Various designers are experimenting with 3D printing in fashion but this doesn’t mean  to 3d print garments directly. Knitic approach shows how digital fabrication could have greater impact on the way clothes are prototyped and produced, especially on producing new concepts of machines:

In maker culture, production of textiles is often overlooked. Circular Knitic demonstrates that beautiful textiles can be produced with digital fabrication tools.

Most of Circular Knitic parts are made with  RepRap 3D printers, some others are made of plexiglass that can be easily lasercut in a fablab. Instructions and all the stl files for the components are available for download on the project’s GitHub page.

The videos below shows the building of the machines and when they are in action.


What have you built with Arduino? Interview 14&15 #MFRome14

Maker Faire Rome video interviews – “What have you built with Arduino?” – A couple of new protagonists for our short series:

  • Bee Uno – Arduino-controlled DJ midi controller, interview with the makers


  • ITIS-LS – F. Giordani students’ quad ambient controller

Explore playlist on Youtube >>

Design a LEGO-compatible servo holder and print it with Materia 101

This week we are presenting you a new tutorial on 3d printing of Lego-compatible pieces with Materia 101. Kristoffer designed a brick with the parametric 3d modeler FreeCAD that can hold a small servo. Following the 10-step instructions  you can easily add wheels to robots built in LEGO and  use specific servos with different sizes.


Check the previous tutorials on 3d printing with Material 101

Interested in getting in touch and showing your experiments? Join Kristoffer on the Arduino forum dedicated to Materia 101 and give us your feedback.

Fifty speakers for an interactive sound sculpture

Hive (2.0) is the second iteration of an interactive sound sculpture consisting of fifty speakers and seven audio channels. The sensors detect the proximity of people and Arduino manipulates audio according to it.

It was created by Hopkins Duffield, a Toronto-based collaborative duo exploring ways to combine both new and familiar mediums with artistically technological practices. In this work they used Arduino Uno together with Max 6 / Max For Live.
Check the video to listen to the sculpture:

What have you built with Arduino? Interview 12&13 #MFRome14


Maker Faire Rome video interviews – “What have you built with Arduino?” – A couple of new protagonists for our short series:

  • Soluppgång (Lampada Solare) – Interactive Sunlight Lamp, university project


  • Fablab Torino – Interview with Fabrizio Garda, the latest projects created at Fablab Torino

Explore playlist on Youtube >>

Workshop and talk with Massimo Banzi in Paris #ArduinoTour

At the beginning of February Massimo Banzi, Arduino co-founder will be in Paris at  ENSCI Les Ateliers for a presentation and a workshop. The Arduino Tour in Paris starts on the 6th of February with a talk followed by a Q&A. (book your ticket here)

On Saturday 7th, and Sunday 8th you can take part to two 8-hour sessions of workshop totally dedicated to the basic steps to undertake with Arduino. The workshop is suitable for beginners, designers, teachers, artists, hackers, and everyone interested in Arduino (no prerequisites needed).

The participation is available for a max of 20 people: you can check details and book your ticket here