Posts with «featured» label

Testing riders’ clothing with Arduino

Worse for Wear is a clothing company  for women who ride motorcycles. The fascinating clothing they produce is very fashionable, comfortable, and needs to protect riders from impact and abrasion if they have an accident. Jackets and trousers have knee and hip pads  included to protect the rider when sliding many meters across asphalt. That’s why the fabric must be strong and abrasion resistant because if the fabric wears away too quickly, the rider’s skin will be exposed and injured.

To choose the perfect fabric, Scott and Laura, co-founders of the company, created an Impact Abrasion Resistance Testing Machine running on Arduino Uno to perform tests on different materials like knit fabrics, woven fabrics, and leather, to see how long it takes before the material is sanded completely through. I interviewed them to learn more about it!
- What is the impact abrasion resistance testing machine and how does it work?

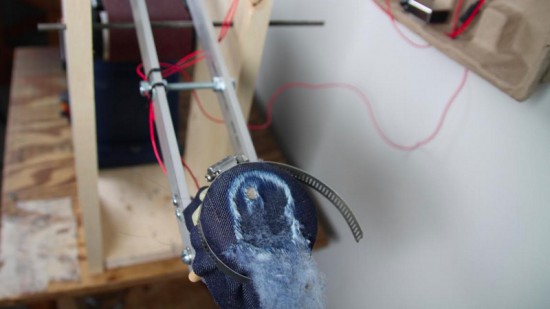
When selecting fabric to use in our clothes, we have to make sure that it is strong and abrasion resistant. We use the impact abrasion resistance test machine to determine which fabrics will withstand abrasion (scraping and sliding) the best. It is important to us to test the fabrics ourselves and not rely solely on the claims of fabric manufacturers.
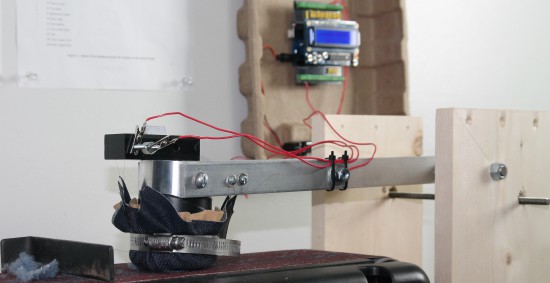
The machine has a weighted arm, like a hammer, suspended above an abrasive belt sander. A sample of the fabric that we want to test is wrapped around the head of the hammer and then dropped onto the moving sanding belt. An Arduino Uno is used to record the amount of time it takes to sand through the fabric sample.

Check the video below to see how it works:

- Why did you decide to use Arduino?

We have used Lilypad Arduino and Arduino Uno before to prototype some e-textile projects, so it was easy for us to get started on this one with our previous experience. The large number of accessory boards available made it simple to add an informational display and user interface to the machine. In just a few hours, we were able to very quickly create a machine to compare the abrasion resistance of a variety of fabric samples. The simplicity of working with Arduino was a very good choice for us, because our real business is creating clothing, not building test machines!

- What does Arduino control in the machine? 

An Arduino Uno is used to record the amount of time it takes to sand through the fabric sample. The method we use is based on European Union standards for motorcycle safety gear testing. To measure the fabric’s abrasion time, we use two thin copper wires (magnet wire). One wire is placed inside and another outside of the fabric sample before everything is wrapped around the head of the hammer. Each wire is then connected to ground on one end and an to input pin on the Arduino on the other end. The pins are in INPUT_PULLUP mode so a current runs through them. The LCD display on the Arduino tells us when both wires are connected properly.

Then, we start the belt sander and drop the hammer onto the spinning sanding belt. The outer wire breaks very quickly, breaking the connection to that pin [ digitalRead(outerWireIn) == HIGH ]. At this point, the Arduino records the start time. When the fabric wears through – usually within a couple of seconds – the inner wire is exposed to the sanding belt and quickly breaks. That marks the end time, which the Arduino records and displays on the LCD shield. A single type of fabric must be tested at least five times in order to make sure our recorded times are accurate.

Explore the details and download the code on Worse for Wear blog.

1Sheeld Turns your iPhone into a platform of Arduino shields

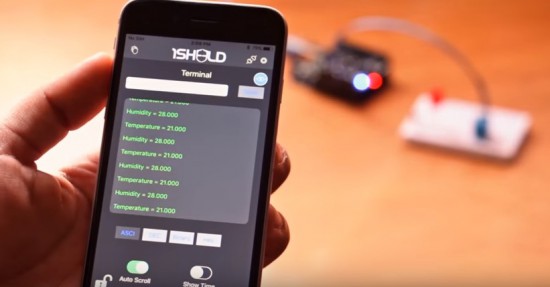
Have you ever thought of turning your iPhone and iPad into a platform of more than 40 Arduino shields? Now it’s possible!

The team of 1Sheeld have officially released the new 1Sheeld for iOS and it’s available for pre-orders for $39 instead of it’s original price $55 (shipping on May 2016).

You can  control robots, actuators, display sensors’ data and much more.  Take a look at the demo video:

Meet BricoGeek: a new Genuino reseller in Spain

Some weeks ago we started introducing to the community our list of resellers and the updated page where you can find resellers of Genuino and Arduino products around the world.

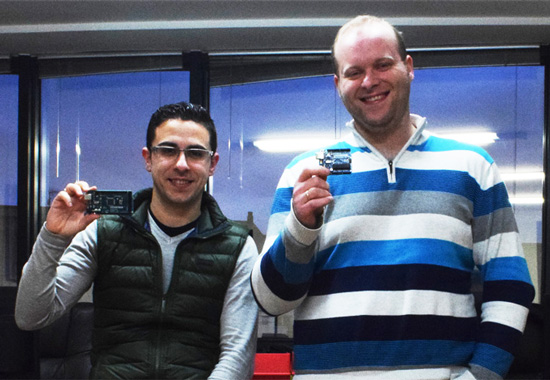
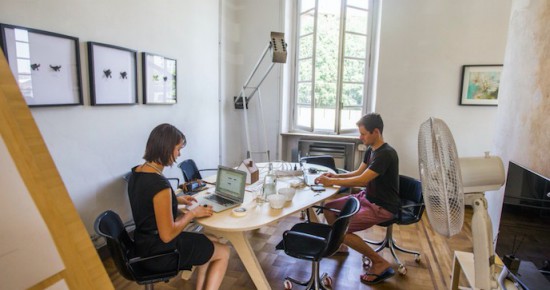
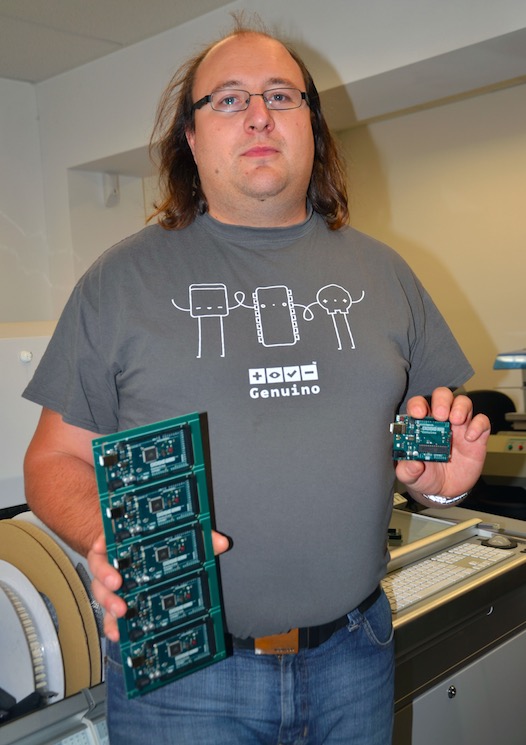
We started with Watterott from Germany and now, in the picture below,  you can see Diego and Oscar from BricoGeek  based in Spain and ready to ship  Genuino Uno and Genuino Mega  boards!

Let’s get to know them better:

- Tell us a bit more about BricoGeek

We started our company in 2005 and later in 2007 we became one of the first Arduino official distributors for Spain and Portugal. After winning a board in a contest organized by uchobby.com I had so much fun with my new board, I continued to make more projects which I posted in our blog and realised that this little board was really easy to understand and I could make  great things with it. Many of our viewers also enjoyed our projects and started making too. And here we are, 10 years later, sharing projects and growing our community of fellow makers!

- What’s your company’s super power?

We aim to be honest and don’t fool our customers. We try to make BricoGeek a good place to share knowledge and ideas and it seems our customers love that as much as we do.

- What’s your favorite Arduino or Genuino project?

[Oscar] There are so many projects I like and it’s hard to keep track of all of them but I recently discovered a really cool project called “Cubetto” which is a game with a little robot to help kids understand and learn programming. And from the same guys another one called “Toot” also for kids and based on the Montessori learning system. Im working on very similar projects that hopefully I will release them in a few weeks (but shhh it’s a surprise for my daughter! ;D). I really enjoy when I make a project that helps young people learn new technical skills, you will be surprised how smart kids can be when they really enjoy learning.

Contacts

BricoGeek Store Website  – FacebookTwitterYoutube - InstagramGoogle+


Visualizing “data visualization” with Leds and bubbles

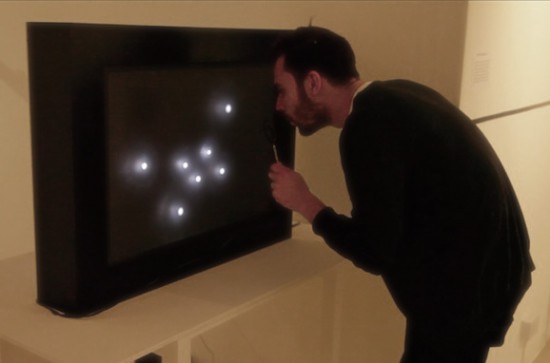
“Data transparency” is a project by Jiayu Liu, a designer and media artist, interested in physical data visualisation and interactive code. The installation runs on Arduino Mega: when the microphone senses a person’s blow, it transforms it in a Led animation and then activates the bubble machine for 8 seconds. The project is not aiming to visualize any specific data but “data visualization” itself:

In my point of view, data is not dissimilar to a conclusion of our past, and we need it for our future. When we see a data from a computer, it is something that has already happened. We use intelligent methods of computing science to analyze the data so that to predict the future. We are living in a world of data, and data is like a language objectively describing our past. In this work, I take more attention on rethinking and recalibrating the role of data in our lives, and the relationship between the virtual world we build as a main method of data storing, analyzing and visualization and ourselves.

Also, I am thinking of that it is better to make sense of the role of data visualization before really visualizing it. Finally, I found a good perspective to see how data connects with our lives, which is Time.
Therefore, the project is not aiming to visualize any specific data but what I am trying to visualize is the “data visualization” itself. I would like to bring a new experience to the viewer in different space. So I want to create a interesting play space and bubble game to the viewer . Let them have a really funny and relaxing experience.

Take a look at the “making of” video below to see it in action:

Massimo Banzi hangout at Fabacademy

Fab Academy is a distributed educational model directed by Neil Gershenfeld from MIT’s Center for Bits and Atoms. Students view and participate in global lectures broadcasted every week and on February 1st Massimo Banzi was invited to give a lecture to an audience of  students from all over the world. You can watch the 50-minute recorded lesson in the video below:

Casa Jasmina Best IoT Open Source Project

The Academy Awards night is coming and it’s a perfect moment to be nominated and  win a prize.  Casa Jasmina project won its prize yesterday: the Internet of Things Awards, showcasing excellence in all areas across the Internet of Things since 2011, in the category of best IoT open source project – Editors Choice Winner.

The Open Source award “honors projects that bring those values to the Internet of Things, either by incorporating open source technology or by making public the details of their own designs and software”, this is the idea of the IoT awards organization in which Casa Jasmina completely believes.

The open source movement is for Arduino and consequently for Casa Jasmina, the core of internet in terms of hardware, software and protocols that compose the global communication infrastructure, and in this way the power of collaborative development is the main focus of Casa Jasmina idea.

As a futuristic Wunderkammer, Casa Jasmina will collect and share artificialia to present in a open way system what and how the IoT concepts will change the daily home life.

Winning this competition is for Casa Jasmina the acknowledgement of a project that take on to transform into reality a series of reflections around IoT and open source. Casa Jasmina is really proud to have been selected between 21 projects, because this represent the attention we are trying to attract.

There is still a lot of work, Casa Jasmina is working hard to rich the goal; it’s not simple but awards like this give hope to the project, and show the interest that exists on these issues.

So thank you all

(Read the blogpost on Casa Jasmina blog)

Learning Photosynthesis with an Interactive installation

Photosynthesis is an interactive installation for primary school children created, designed and developed by Moritz von Burkersroda and exhibited at P3 Ambika, University of Westminster.

It’s a  learning  experience to understand the abstract process of photosynthesis in a hands-on way.  Thanks to a physical interaction  kids can easily understand what  plants convert light into chemical energy to fuel their activities.

The installation uses an Arduino to measure data from a photoresistor and a hacked Wii-remote to connect the objects with the video feedback on the screen triggered by a Processing sketch. On the page of the project you can download a Design Research Document about Contextual study theory to understand the relationship between interactivity, learning and educational institutions, like museums.

Monitor your Bonsai with the help of Arduino Uno

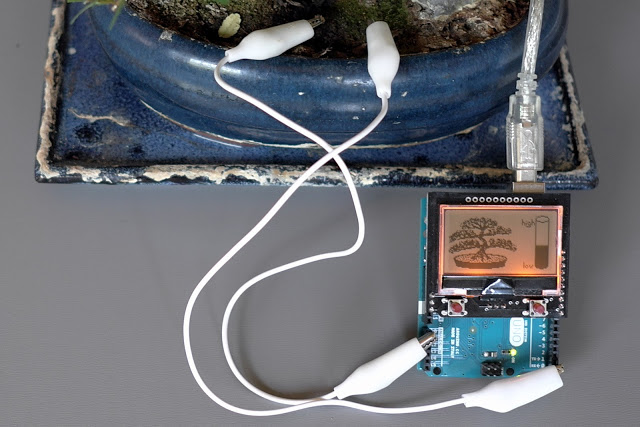
Bonsai trees are not like other plants. There’s no single watering schedule that can be applied to a bonsai and the best way to tell if the bonsai needs water is to touch the soil. Experienced growers know when a tree needs to be watered by observing the foliage or just by the weight of the pot. If you are not used to taking care of this type of tree, Bonsai Watchdog could be the perfect project for you. It runs on Arduino and Genuino Uno and makes it really easy to monitor the moisture level in the soil.

Thomas Baum, created it and shared it some days ago on the Arduino Community on G+ :

Two pencil leads, an Arduino and a 12864 (ST7565) LCD watches out my little bonsai. The filling level shows how often the sapling need to be watered.
source and discription (in german) you can find here:
http://tiny.systems/categorie/lcdProjekt/BonsaiWatchdog.html


FogFinder turns foggy air into a reliable water source

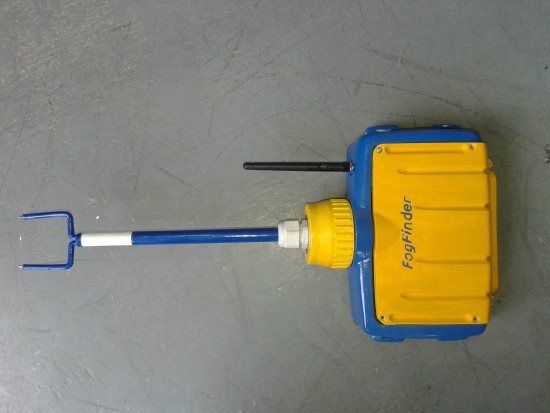
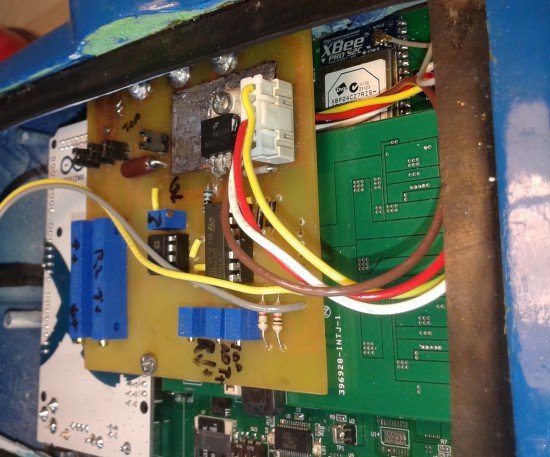
Scientists in Chile are turning foggy air into a reliable water source for nearby residents using a new sensor connected to  Arduino Mega and XBee module. The project is called FogFinder and was developed by Richard LeBoeuf in collaboration with Juan Pablo Vargas and Jorge Gómez at the Universidad de los Andes. It’s a system to generate new renewable source of water for communities and reforestation through use of a probe and wireless communications technology to develop a liquid water flux map for fog harvesting.

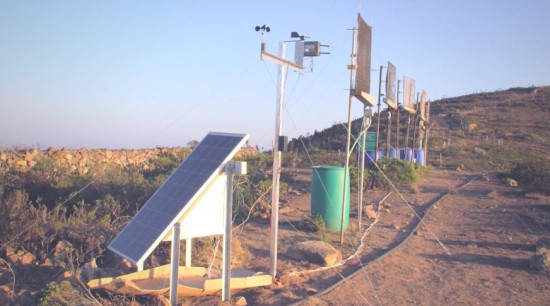
Fog collectors are common in arid climates in Chile where rain runs scarce and are typically installed on hillsides and remote areas where fog is abundant. The innovative part of the project lies in determining where to install these collectors, how to orient them, and understanding how efficient they are at collecting water from the air. This can be done with a new type of sensor called the “Liquid Water Flux Probe” to measure the availability of water at current and potential fog collector sites. The sensor measures the liquid water content and speed of the fog and can be used to understand the optimal location and orientation for each of the collectors.

Matt Ahart  of Digi, the company producing Xbee modules , told us:

“The primary function of the Arduino Mega is to simplify data collection and processing. The development team also made use of software libraries that simplified the use of sensors and API mode configuration for the XBee radios.
Another important reason for using Arduino, is that the Fog Finder project was created by students with only a few months to complete the design and creation of the device. A great thing about Arduino is that the learning curve is very fast and students can quickly start making contributions instead of spending weeks or months trying to understand the software and hardware.”

The FogFinder project has received support from the Universidad de los Andes through its Fondo de Ayuda de Investigación, Andes Iron – Dominga, and the Pontificia Universidad Católica de Chile. In 2014 it was finalist in the Wireless Innovation Project sponsored by the Vodafone Americas Foundation.

Arduino Blog 21 Jan 21:06

Meet the Arduino and Genuino resellers!

In 2015 we’ve been setting-up an independent, modular production network with world-class partners that share our very own approach to open source hardware. We partnered with manufacturers and resellers including Adafruit in United States, Seeedstudio in China, Axel in Italy.

Now we are happy to share with our community the updated page dedicated to resellers, making Genuino and Arduino products available around the world. On the  page you can find all the info and links to get in touch if you are interested in purchasing  boards in your country, or you want to become one of our resellers.

From today  we’ll be also highlighting new resellers on the Arduino blog, so you can get to know them better.


Watterott Electronic (Germany)

The team of Watterott Electronic is manufacturing Genuino boards and is the official Genuino reseller for Germany. We started selling Genuino boards manufactured by Watterott during Maker Faire Rome 2015.

In the picture you can see Stephan Watterott of Watterott Electronic (Germany) holding brand new Genuino boards ready to be shipped!


- Tell us a bit more about Watterott

I founded the company Watterott Electronic in early 2008 as a hobby project in Hausen (Thuringia, Germany). The goal was to offer some own microcontroller boards and special hard to find development components.
My first warehouse was in the garage of my parents house. After about 2 years the garage was to small and I moved to the city of Leinefelde (only 5km away). Until today I added more and more products to our portfolio and also the manufacturing of own boards has increased. Finally at the end of 2015 we became a manufacturer and reseller for Genuino boards.

- What’s your company’s super power?

We can do nearly everything in-house and so we a very short time from the idea to a prototype or final product/board.

- What’s your favorite Arduino or Genuino project?

I have two favorite Arduino/Genuino projects:

  • DIY-Thermocam (previously Cheap Thermocam) from Max Ritter.
    I followed the project from the first hour and I also supported Max on his first prototypes.
    http://www.diy-thermocam.net
  • FabScan (DIY 3D Scanner).
    The project shows how 3D scanning is working and I also designed the Arduino FabScan Shield in 2012.
    http://www.fabscan.org

Contacts

Watterott Store Website – Twitter – Facebook  – Google+