Meet the Arduino and Genuino resellers!

In 2015 we’ve been setting-up an independent, modular production network with world-class partners that share our very own approach to open source hardware. We partnered with manufacturers and resellers including Adafruit in United States, Seeedstudio in China, Axel in Italy.
Now we are happy to share with our community the updated page dedicated to resellers, making Genuino and Arduino products available around the world. On the page you can find all the info and links to get in touch if you are interested in purchasing boards in your country, or you want to become one of our resellers.
From today we’ll be also highlighting new resellers on the Arduino blog, so you can get to know them better.
Watterott Electronic (Germany)
The team of Watterott Electronic is manufacturing Genuino boards and is the official Genuino reseller for Germany. We started selling Genuino boards manufactured by Watterott during Maker Faire Rome 2015.
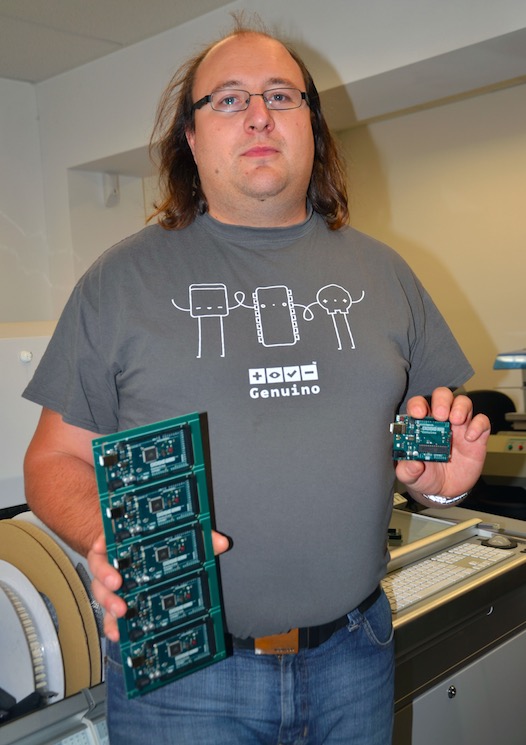
In the picture you can see Stephan Watterott of Watterott Electronic (Germany) holding brand new Genuino boards ready to be shipped!
- Tell us a bit more about Watterott
I founded the company Watterott Electronic in early 2008 as a hobby project in Hausen (Thuringia, Germany). The goal was to offer some own microcontroller boards and special hard to find development components.
My first warehouse was in the garage of my parents house. After about 2 years the garage was to small and I moved to the city of Leinefelde (only 5km away). Until today I added more and more products to our portfolio and also the manufacturing of own boards has increased. Finally at the end of 2015 we became a manufacturer and reseller for Genuino boards.
- What’s your company’s super power?
We can do nearly everything in-house and so we a very short time from the idea to a prototype or final product/board.
- What’s your favorite Arduino or Genuino project?
I have two favorite Arduino/Genuino projects:
- DIY-Thermocam (previously Cheap Thermocam) from Max Ritter.
I followed the project from the first hour and I also supported Max on his first prototypes.
http://www.diy-thermocam.net - FabScan (DIY 3D Scanner).
The project shows how 3D scanning is working and I also designed the Arduino FabScan Shield in 2012.
http://www.fabscan.org
Contacts