Posts with «esp8266» label

Arduino Lighting Controller With Remote Twist

The time for putting up festive lights all around your house is nigh, and this is a very popular time for those of us who use the holiday season as an excuse to buy a few WiFi chips and Arduinos to automate all of our decorations. The latest in this great tradition is [Real Time Logic]’s cloud-based Christmas light setup.

In order to give public access to the Christmas light setup, a ESP8266 WiFi Four Relay board was configured with NodeMCU. This allows for four channels for lights, which are controlled through the Light Controller Server software. Once this is setup through a domain, all anyone has to do to change the lighting display is open up a web browser and head to the website. The creators had homeowners, restaurants, and church displays in mind, but it’s not too big of a leap to see how this could get some non-holiday use as well.

The holidays are a great time to get into the hacking spirit. From laser-projected lighting displays to drunk, animatronic Santas, there’s almost no end to the holiday fun, and you’ve still got a week! (Or 53!)


Filed under: Holiday Hacks
Hack a Day 16 Dec 03:00

More Blinky = More Better – The WS2812FX Library

The WS2812 is an amazing piece of technology. 30 years ago, high brightness LEDs didn’t even exist yet. Now, you can score RGB LEDs that even take all the hard work out of controlling and addressing them! But as ever, we can do better.

Riffing on the ever popular Adafruit NeoPixel library, [Harm] created the WS2812FX library. The library has a whole laundry list of effects to run on your blinkenlights – from the exciting Hyper Sparkle to the calming Breathe inspired by Apple devices. The fantastic thing about this library is that it can greatly shorten development time of your garden-variety blinkables – hook up your WS2812s, pick your effect, and you’re done.

[Harm]’s gone and done the hard yards, porting this to a bevy of platforms – testing it on the Arduino Nano, Uno, Micro and ESP8266. As a proof of concept, they’ve also put together a great demonstration of the software – building some cute and stylish Christmas decorations from wood, aluminium, and hacked up Christmas light housings. Combining it with an ESP8266 & an app, the effects can be controlled from a smartphone over WiFi. The assembly video on YouTube shows the build process, using screws and nails to create an attractive frame using aluminium sheet.

This project is a great example of how libraries and modern hardware allow us to stand on the shoulders of giants. It’s quicker than ever to build amazingly capable projects with more LEDs than ever. Over the years we’ve seen plenty great WS2812 projects, like this sunrise alarm clock or this portable rave staff.
As always, blink hard, or go home. Video after the break.


Filed under: Arduino Hacks, Holiday Hacks, led hacks

Launitor Saves You From Accidentally Smelly Clothes

[domiflichi] is human and fallible. So he can’t be blamed for occasionally forgetting the laundry in one of the machines and coming back to a less than stellar result. However, while fallible, he is not powerless.

What if his washer/dryer could email or text him about his laundry? It seemed simple enough. Add a vibration sensor to the side of the machine along with some brains. When the load is done it will bother him until he comes down to push the button or There Will Come Soft Rains.

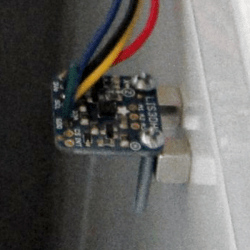
He started off with an Arduino-and-ESP8226 combination and piezo sensors. The piezos had lots of shortcomings, so he switched to accelerometers and things worked much better. We really like the way he mounts them to the side of the washer dryer using the PCB’s mounting screws as angle brackets. The case is a standard project box with some snazzy orange acrylic on the front.

It took some fiddling, but these days [domiflichi]’s clothes are fresher, his cats fed, and his appliances more aware. Video of it in operation after the break.


Filed under: Arduino Hacks, home hacks

oCat is a real-time tracker for popular cat videos

Over the last couple of years, cat videos have become the undisputed champions of the web. Whether it’s kittens playing with their shadows to failed jump attempts to giving each another massages, we’re all guilty of watching a few of these clips from time to time (yes, even at work). Built with this in mind, oCat is a real-time tracker for feline-related activity on the Internet.

oCat consists of two parts: the oCat News Distractor and the Kitty o’Cat Twitter bot. Using Google’s YouTube API, the system works by continuously monitoring for new uploads, the number of new views each day, or a specific video that has received a remarkable amount of attention. It then tweets these stats and prints them out on thermal paper, stamping a paw print on the timeline for every 1,000 views.

Created by Annika Engelhardt, a digital media design master’s student at the University of the Arts in Bremen, oCat uses an Arduino along with an ESP Wi-Fi module, a servo, and an LCD screen. The aim of the project is to increase and reveal the amount of hours people spend watching cat videos online.

The cat is an altered Maneki-neko, holding a stamp using welding wire and hot glue. Even though I filled the stamp with extra ink, it did not work properly and I had to cut out the paw-shape from a sponge and glue it onto the original stamp.

The thermal printer used in the device needs a USB connection, so I used a Raspberry Pi to control it. I wrote a Python script that checks four different RSS news feeds for new posts every 15 minutes and prints one headline with a timestamp every minute.

The Twitter bot was programmed using Python and a library called tweepy. Most of the script is reading JSON files, juggling and comparing data and text files and in the end mixing up parts of a sentence to form a tweet. The bot will be enhanced in the future

Engelhardt exhibited the project at Galerie Flut in Bremen back in October. You can find more pictures and information on the project here.

Arduino Blog 09 Nov 05:49
api  arduino  cat  esp8266  featured  genuino  lcd  servo  wifi  youtube  

Simple Clock from Tiny Chip

If you haven’t jumped on the ESP8266 bandwagon yet, it might be a good time to get started. If you can program an Arduino you have pretty much all of the skills you’ll need to get an ESP8266 up and running. And, if you need a good idea for a project to build with one of these WiFi miracle chips, look no further than [Ben Buxton]’s dated, but awesome, NTP clock.

While the ESP8266 started out as an inexpensive, reliable way to get WiFi capability on essentially anything (and paving the way for a plethora of Internet of Things projects), it was quickly hacked to become a fully programmable development board that can stand on its own. To that end, [Ben] has recognized its capability to run a very minimalistic NTP clock. The standard C++/Arduino environment is available, so he didn’t have to learn any new skills. The parts list is stripped down as well: besides the ESP8266, there’s little more than the four-part seven-segment display. There’s even an Arudino library for these chips that [Ben] made great use of. From there, it’s just a matter of wiring it all up and syncing it with an NTP server.

While it’s not the most involved hack ever, it’s good to be reminded that these chips are cheap and readily available for literally anything that you could imagine. If you haven’t started yet, there’s no reason not to. You can use them to control something like an irrigation system, or if you’re even more adventurous, they can run a 3D printer, too.

Thanks [Itay] for the tip!


Filed under: clock hacks
Hack a Day 11 Sep 15:00

Monitor your solar energy with a dual-axis tracker

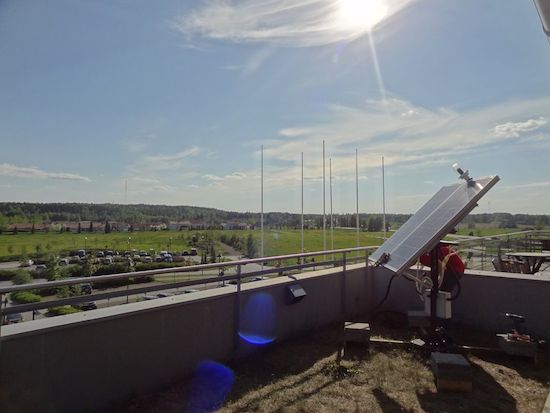
As part of a school project, Bruce Helsen built a dual-axis tracker for optimizing solar panel use during his time as exchange student in Finland. Although adding a tracking system to a larger installation isn’t really a cost-effective option, it can certainly come in handy for smaller units.

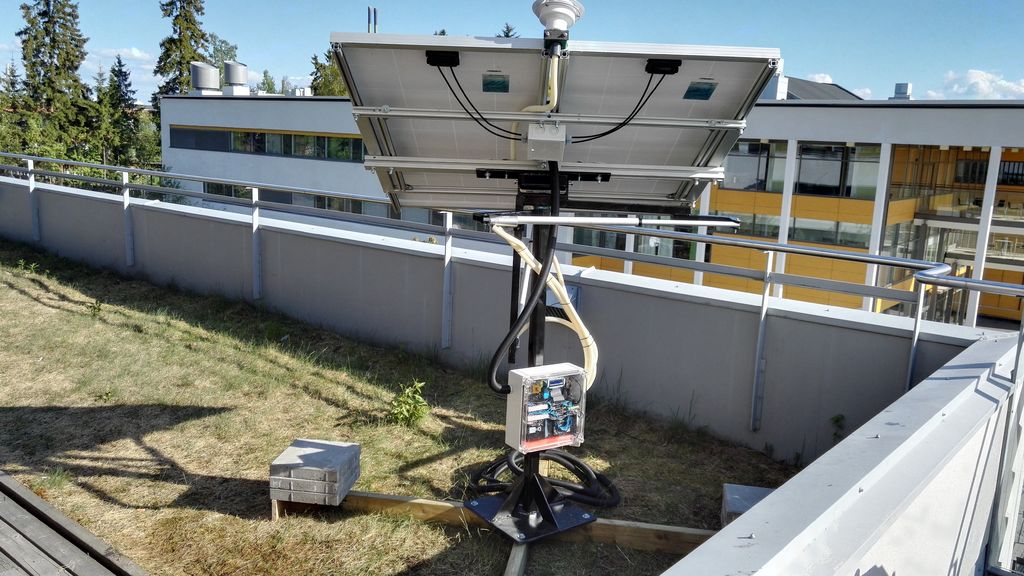
Helsen’s dual-axis tracker works by making sure that the two 12V 150W solar panels stay aligned with the sun for as long as possible, measuring the panels’ voltage and current then calculating the generated power and energy, and sending that data from the monitor to ThingSpeak. There’s also an LCD to display the readings.

The panel’s two axes are controlled by a pair of inexpensive linear actuators. It uses an Arduino Mega for a brain, and an ESP8266 for transmitting the data over to the cloud. Light direction is detected by a homemade light sensor housed inside an industrial lamp enclosure. A 3D-printed crossbeam separates the sensor into four quadrants, with a light-dependent resistor for each. By comparing the average LDR values, the panel is able to point in the best direction.

Looking to monitor your solar energy? Check out Helsen’s project page here.

Dual Axis Solar Tracker with Online Energy Monitor

[Bruce Helsen] built this dual axis solar tracker as one of his final projects for school.

As can be experimentally verified in a very short timeframe, the sun moves across the sky. This is a particularly troublesome behavior for solar panels, which work best when the sun shines directly on them. Engineers soon realized that abstracting the sun away only works in physics class, and moved to the second best idea of tracking sun by moving the panel. Surprisingly, for larger installations the cost of adding tracking (and its maintenance) isn’t worth the gains, but for smaller, and especially urban, installations like [Bruce]’s it can still help.

[Bruce]’s build can be entirely sourced from eBay. The light direction is sensed via a very clever homemade directional light sensor. A 3D printer extruded cross profile sits inside an industrial lamp housing. The assembly divides the sky into four quadrants with a light-dependent resistor for each. By measuring the differences, the panel can point in the optimal direction.

The panel’s two axis are controlled with two cheap linear actuators. The brains are an Arduino glued to a large amount of solar support electronics and the online energy monitor component is covered by an ESP8266.

The construction works quite well. If you’d like to build one yourself the entire BOM, drawings, and code are provided on the instructables page.


Filed under: Arduino Hacks, solar hacks
Hack a Day 24 Jul 21:00

Make a Wi-Fi Enabled Light Switch Turner Onner

Use a servo to flick a light switch mechanically — without ever touching 110V power — with this Wi-Fi “Turner Onner”

Read more on MAKE

The post Make a Wi-Fi Enabled Light Switch Turner Onner appeared first on Make: DIY Projects and Ideas for Makers.

How To Keep An Unruly Dryer In Line

If necessity is the mother of invention, then inconvenience is its frustrating co-conspirator. Faced with a finicky dryer that would shut down mid-cycle with a barely audible beep if its load was uneven (leaving a soggy mass of laundry), [the0ry] decided to add the dryer to the Internet of Things so it could send them an email whenever it shut itself down.

After opening a thinger.io account, adding the soon-to-be device, and setting up the email notification process, [the0ry] combined the ESP8266 Development Board, a photosensitive resistor, and a 5V power supply on a mini breadboard. All that was left was to mount it on the dryer and direct the LDR (light-dependent resistor) to the machine’s door lock LED to trigger an email when it turned off — indicating the cycle had finished or terminated prematurely. A little tape ensured the LDR would only be tripped by the desired light source.

If you’re an apartment-dweller have WiFi in the wash area it would be awesome to see a battery-powered version you take with you. But in general this is a great hardware blueprint as many device have status LEDs that can be monitored in a similar way. If you want to keep the server in-house (literally in this case) check out the Minimal MQTT series [Elliot Williams] recently finished up. It uses a Raspberry Pi as the center server and an ESP8266 is one of the limitless examples of hardware that plays nicely with the protocol.

We love seeing hacks like this because not only does it conserve water and energy by reducing instances of rewashing, but it’s also a clever way to extend the life of an appliance and potentially save hundreds of dollars in replacing it. Add this to the bevvy of hacks that add convenience to one’s home — some of which produce delicious results.


Filed under: Arduino Hacks, home hacks

Not Even Hamsters Are Safe From The Internet Of Things

The internet of things is this strange marketing buzzword that seems to escape from the aether and infect our toasters and refrigerators. Now even a hamster is not safe.

[Mifulapirus]’s hamster, Ham, was living a pleasant hamster life. Then his owner heard about another hamster named Sushi, whose running wheel stats were broadcasted to the internet. Not to be left behind, Ham’s wheel was soon upgraded. Now Ham is burdened by the same social pressures our exercise apps try to encourage us to use. No, we are most certainly not going to tell our friends about two fourteen minute miles with a twenty minute coffee break in the middle, MapMyRun, we are not.

The feat of techno enslavement for the little hamster was accomplished with a custom board, an esp8266, and an arduino as described in the instructable. The arduino can be left out of the project now that the libraries have been ported to the esp8266. A hall effect sensor detects when the 3D printed hamster wheel is spinning.

If you’d like to check in on Ham, the little guy is alive and well, and the twitter is here. It looks like it’s been upgraded since the original article was posted. Now it shows when Ham is awake and running around the cage doing hamster errands.


Filed under: Arduino Hacks
Hack a Day 03 May 16:30