Posts with «esp8266» label

Arduino-Neopixel Traffic Map

This project displays live traffic conditions between two locations on a physical map, using an Adafruit Feather Huzzah that gathers data from the Google Maps API and then sets the color of a string of NeoPixels

Read more on MAKE

The post Arduino-Neopixel Traffic Map appeared first on Make: DIY Projects and Ideas for Makers.

Bitcoin Price Ticker

Are you a Bitcoin miner or trader, but find yourself lacking the compulsive need to check exchange rates like the drug-fuelled daytraders of Wall Street? Fear not – you too can adorn your home or office with a Bitcoin Price Ticker! The post is in Italian but you can read a translated version here.

It’s a straightforward enough build – an Arduino compatible board with an onboard ESP8266 is hooked up with an HD44780-compatible LCD. It’s then a simple matter of scraping the Bitcoin price from the web and displaying it on the LCD. It’s a combination of all the maker staples, tied together with some off-the-shelf libraries – it’s quick, and it works.

What makes the build extra nice is the use of custom characters on the LCD. The HD44780 is a character based display, and this project appears to use a screen with two lines of sixteen characters each. However, a custom character set has been implemented in the display which uses several “characters” on the screen to create a single number. It’s a great way to make the display more legible from a distance, as the numbers are much larger, and the Bitcoin logo has been faithfully recreated as well. It’s small touches like this that can really set a project apart. We’d love to see this expanded to display other financial market information and finished off in a nice case.

If you’re wondering what you can actually do with Bitcoin, check out the exploits of this robotic darknet shopper. Oh, and Microsoft will take them, too.


Filed under: Arduino Hacks
Hack a Day 22 May 06:00

IOT AI in the Cloud using Reinforcement Learning

Let's Make Robots 04 May 23:03
ai  arduino  cloud  esp8266  iot  

Everyone Loves Faster ESP8266 TFT Libs

Reader [Jasper] writes in with glowing praise for the TFT_eSPI library for the ESP8266 and the various cheap 480×320 TFT displays (ILI9341, ILI9163, ST7735, S6D02A1, etc.) that support SPI mode. It’s a drop-in replacement for the Adafruit GFX and driver libraries, so you don’t need to rework your code to take advantage of it. If you’re looking to drive an LCD screen with an ESP8266 and Arduino, check this out for sure.

As a testbed, [Jasper] ported his Tick Tock Timer project over to the new library. He got a sevenfold increase in draw speed, going from 500 ms to 76 ms. That’s the difference between a refresh that’s visibly slow, and one that looks like it happens instantly. Sweet.

Improving software infrastructure isn’t one of the sexiest or most visible hacks, but it can touch the lives of many hackers. How many projects have we featured with an ESP8266 and a screen? Thanks, [Bodmer] for the good work, and [Jasper] for bringing it to our attention.


Filed under: Arduino Hacks, Microcontrollers

Save ESP8266 RAM with PROGMEM

When [sticilface] started using the Arduino IDE to program an ESP8266, he found he was running out of RAM quickly. The culprit? Strings. That’s not surprising. Strings can be long and many strings like prompts and the like don’t ever change. There is a way to tell the compiler you’d like to store data that won’t change in program storage instead of RAM. They still eat up memory, of course, but you have a lot more program storage than you do RAM on a typical device. He posted his results on a Gist.

On the face of it, it is simple enough to define a memory allocation with the PROGMEM keyword. There’s also macros that make things easier and a host of functions for dealing with strings in program space (basically, the standard C library calls with a _P suffix).

However, there’s also a helper class that lets you use a string object that resides in program memory. That makes it even easier to use these strings, especially if you are passing them to functions. As an example [sticilface] writes a string concatenation function that handles PROGMEM strings.

You can use the same techniques for other data, as well, and at the end of the post, there are some very clear examples of different use cases. Under the hood, the ESP8266 doesn’t store data in bytes in program memory. The library routines hide this from you, but it can be important if you are trying to calculate space or do certain kinds of manipulation.

You can also check out the official documentation. If you want to see the technique in action, maybe you’ll be interested in your coworker’s mood. Or, try putting a Jolly Wrencher on your oscilloscope. Both projects use PROGMEM.

[Editor’s note: PROGMEM is in the ESP8266 Arduino codebase from AVR-GCC, and originally wrote (counterinutitively) into RAM.  Some clever hacking fixed that early last year, so now you can use the same AVR-style abstraction with the ESP. It still doesn’t work on the ARM Arduinos.]

Image by [connorgoodwolf] (CC BY-SA 4.0)


Filed under: Arduino Hacks

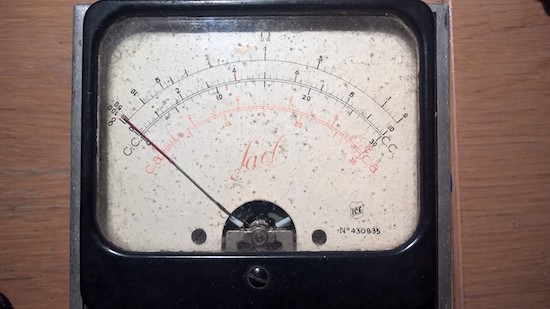
Display time on a 1950s multimeter

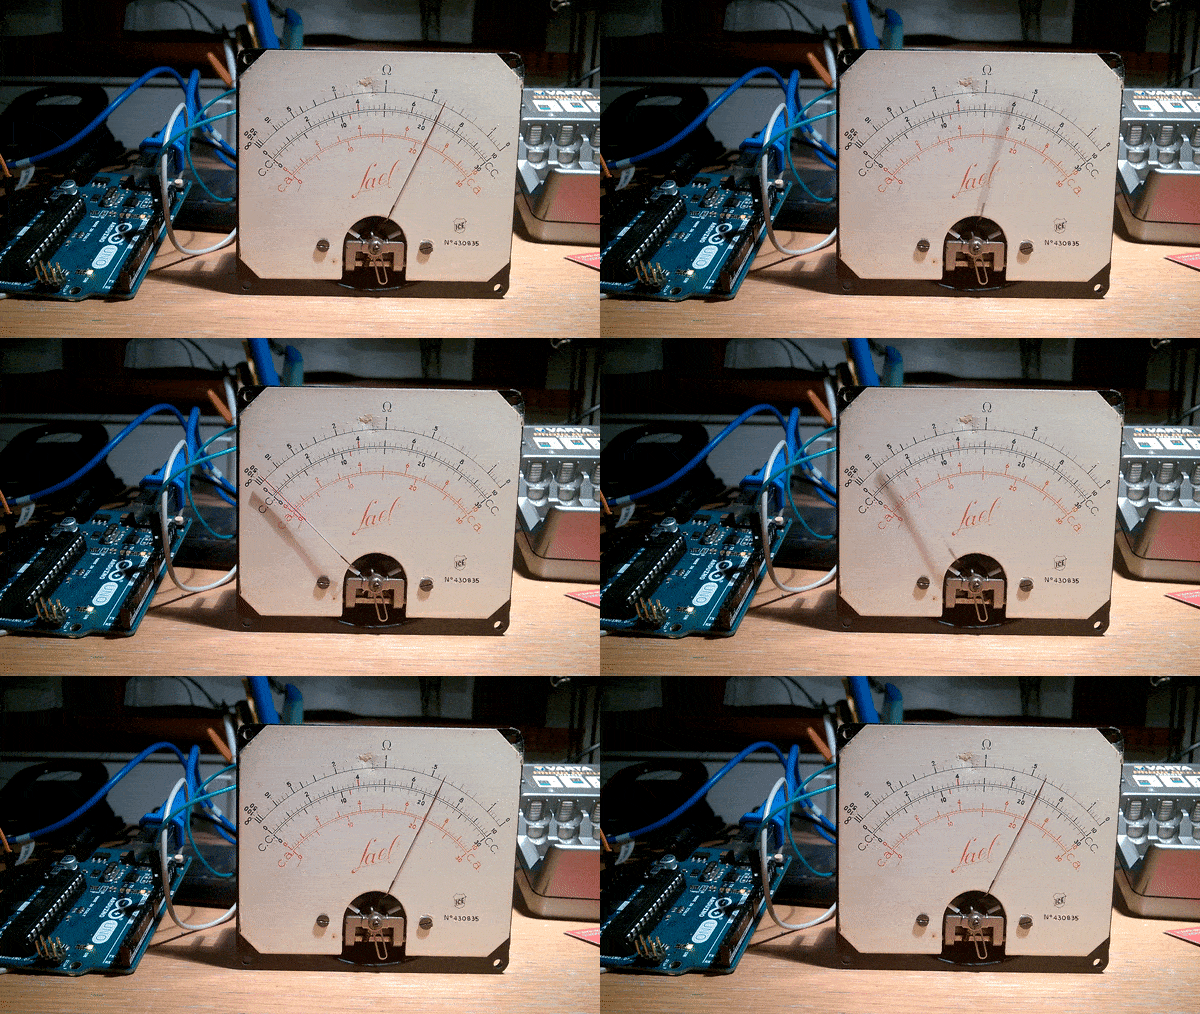
Given an input and some sort of indicator, is there any device that can’t be hacked into a timepiece? With the help of an Arduino Nano and an ESP8266 module, Guilio Pons has created a unique clock out of a 1950s-era multimeter.

Pons’ project not only displays time with an indicator originally meant to reveal electrical values, but is also able to output sounds as needed using a speaker recovered from an old toy. He integrated three LEDs as well as a PIR sensor, so the unit can light up at night.

PWM control from the Arduino takes care of moving the gauge, while the ESP8266 allows the time to be synchronized via the Internet and the alarm adjusted over WiFi.

Want to retrofit a vintage tester of your own? Be sure to check out the Pons’ entire log on Hackaday.io. You can find the software library that he used to play sounds here.

See the Weather at a Glance with this WiFi Wall Mounted Display

Whether you’re lodged in an apartment with a poor view of the sky like [Becky Stern] or are looking for an at-a-glance report of the current weather, you might consider this minimalist weather display instead of checking your computer or your phone every time you’re headed out the door.

The first order of business was to set up her Feather Huzzah ESP8266 module. [Becky] started with a blink test to ensure it was working properly. Once that was out of the way, she moved on to installing a few libraries. Temperature data fetched by an IFTTT feed is displayed on a seven-segment display, while additional feeds separately retrieve information for each basic weather type: sunny, overcast, rain, snow.

All it took to create the sleek display effect was a few pieces of cardboard inside a shadow box frame, a sheet of paper as a diffuser, and twelve Neopixel RGB LEDs hidden inside. Trimming and securing everything in place as well as notching out the back of the frame for the power cable finished the assembly. Check out the build video after the break.

Pair this weather frame with a shoe rack that spotlights the appropriate footwear depending on the weather to really streamline your exit.


Filed under: Arduino Hacks, misc hacks

8 Festive Projects to Ring in the New Year

Ring in 2017 with some DIY projects made in the spirit of New Year's Eve.

Read more on MAKE

The post 8 Festive Projects to Ring in the New Year appeared first on Make: DIY Projects and Ideas for Makers.

How to update esp8266 firmware

In this post, we are going to upload firmware to ESP8266 (ESP-01) . The firmware can be updated by both arduino as well as usb-ttl module.
ESP-01 is wifi SoC module and it has two GPIO pins i.e. GPIO0 AND GPIO2
For using ESP8266, we can use either AT commands using any terminal software/ esplorer ide (it supports lua programmming and AT commands) or we can use arduino library.
ESP8266 is a 8-pin SoC having two GPIO pins, it requires 3.3 volt and the current consumed by wifi module can't be attained through arduino. Therefore, if we are using arduino we need external 3.3 volt power supply.
Esp8266 wifi module can act as STA as well as AP or both


Things required:

1. USB-TTL module
2. Perfboard
3. Male and female berg strip
4. Female to female jumper wires
5. ESP-01
6. Nodemcu flasher
7. Firmware to be updated
8. Little bit of patience :)

Connections:

Make connections as given below:
ESP8266 side                                               USB-TTL module
Rx                                                                  Tx
Tx                                                                  Rx
CH_PD and Vcc                                           3.3 volt provided by the usb-ttl module
GND                                                              GND
GPIO0                                                           GND (while updating the firmware only)

Updating the firmware:

We had connected switch to GPIO0, by pressing the switch it GPIO0 will be grounded
In order to update the firmware, make the connections on perfboard. In this circuit, we are using two switches
one for GND and other for GPIO0.
Download Nodemcu flasher from the link below:
Download firmware from the link below:
Make settings as given in the picture. Browse the firmware file (ends with .bin)

Note: GPIO0 should be grounded while updating the firmware.
Vcc and CH_PD should be connected to 3.3 volt only

Check out the video:


Thanks for visiting this post.

In the meantime, do check my youtube channel:

Fun with electronics