Arduino Video isn’t Quite 4K
Video resolution is always on the rise. The days of 640×480 video have given way to 720, 1080, and even 4K resolutions. There’s no end in sight. However, you need a lot of horsepower to process that many pixels. What if you have a small robot powered by a microcontroller (perhaps an Arduino) and you want it to have vision? You can’t realistically process HD video, or even low-grade video with a small processor. CORTEX systems has an open source solution: a 7 pixel camera with an I2C interface.
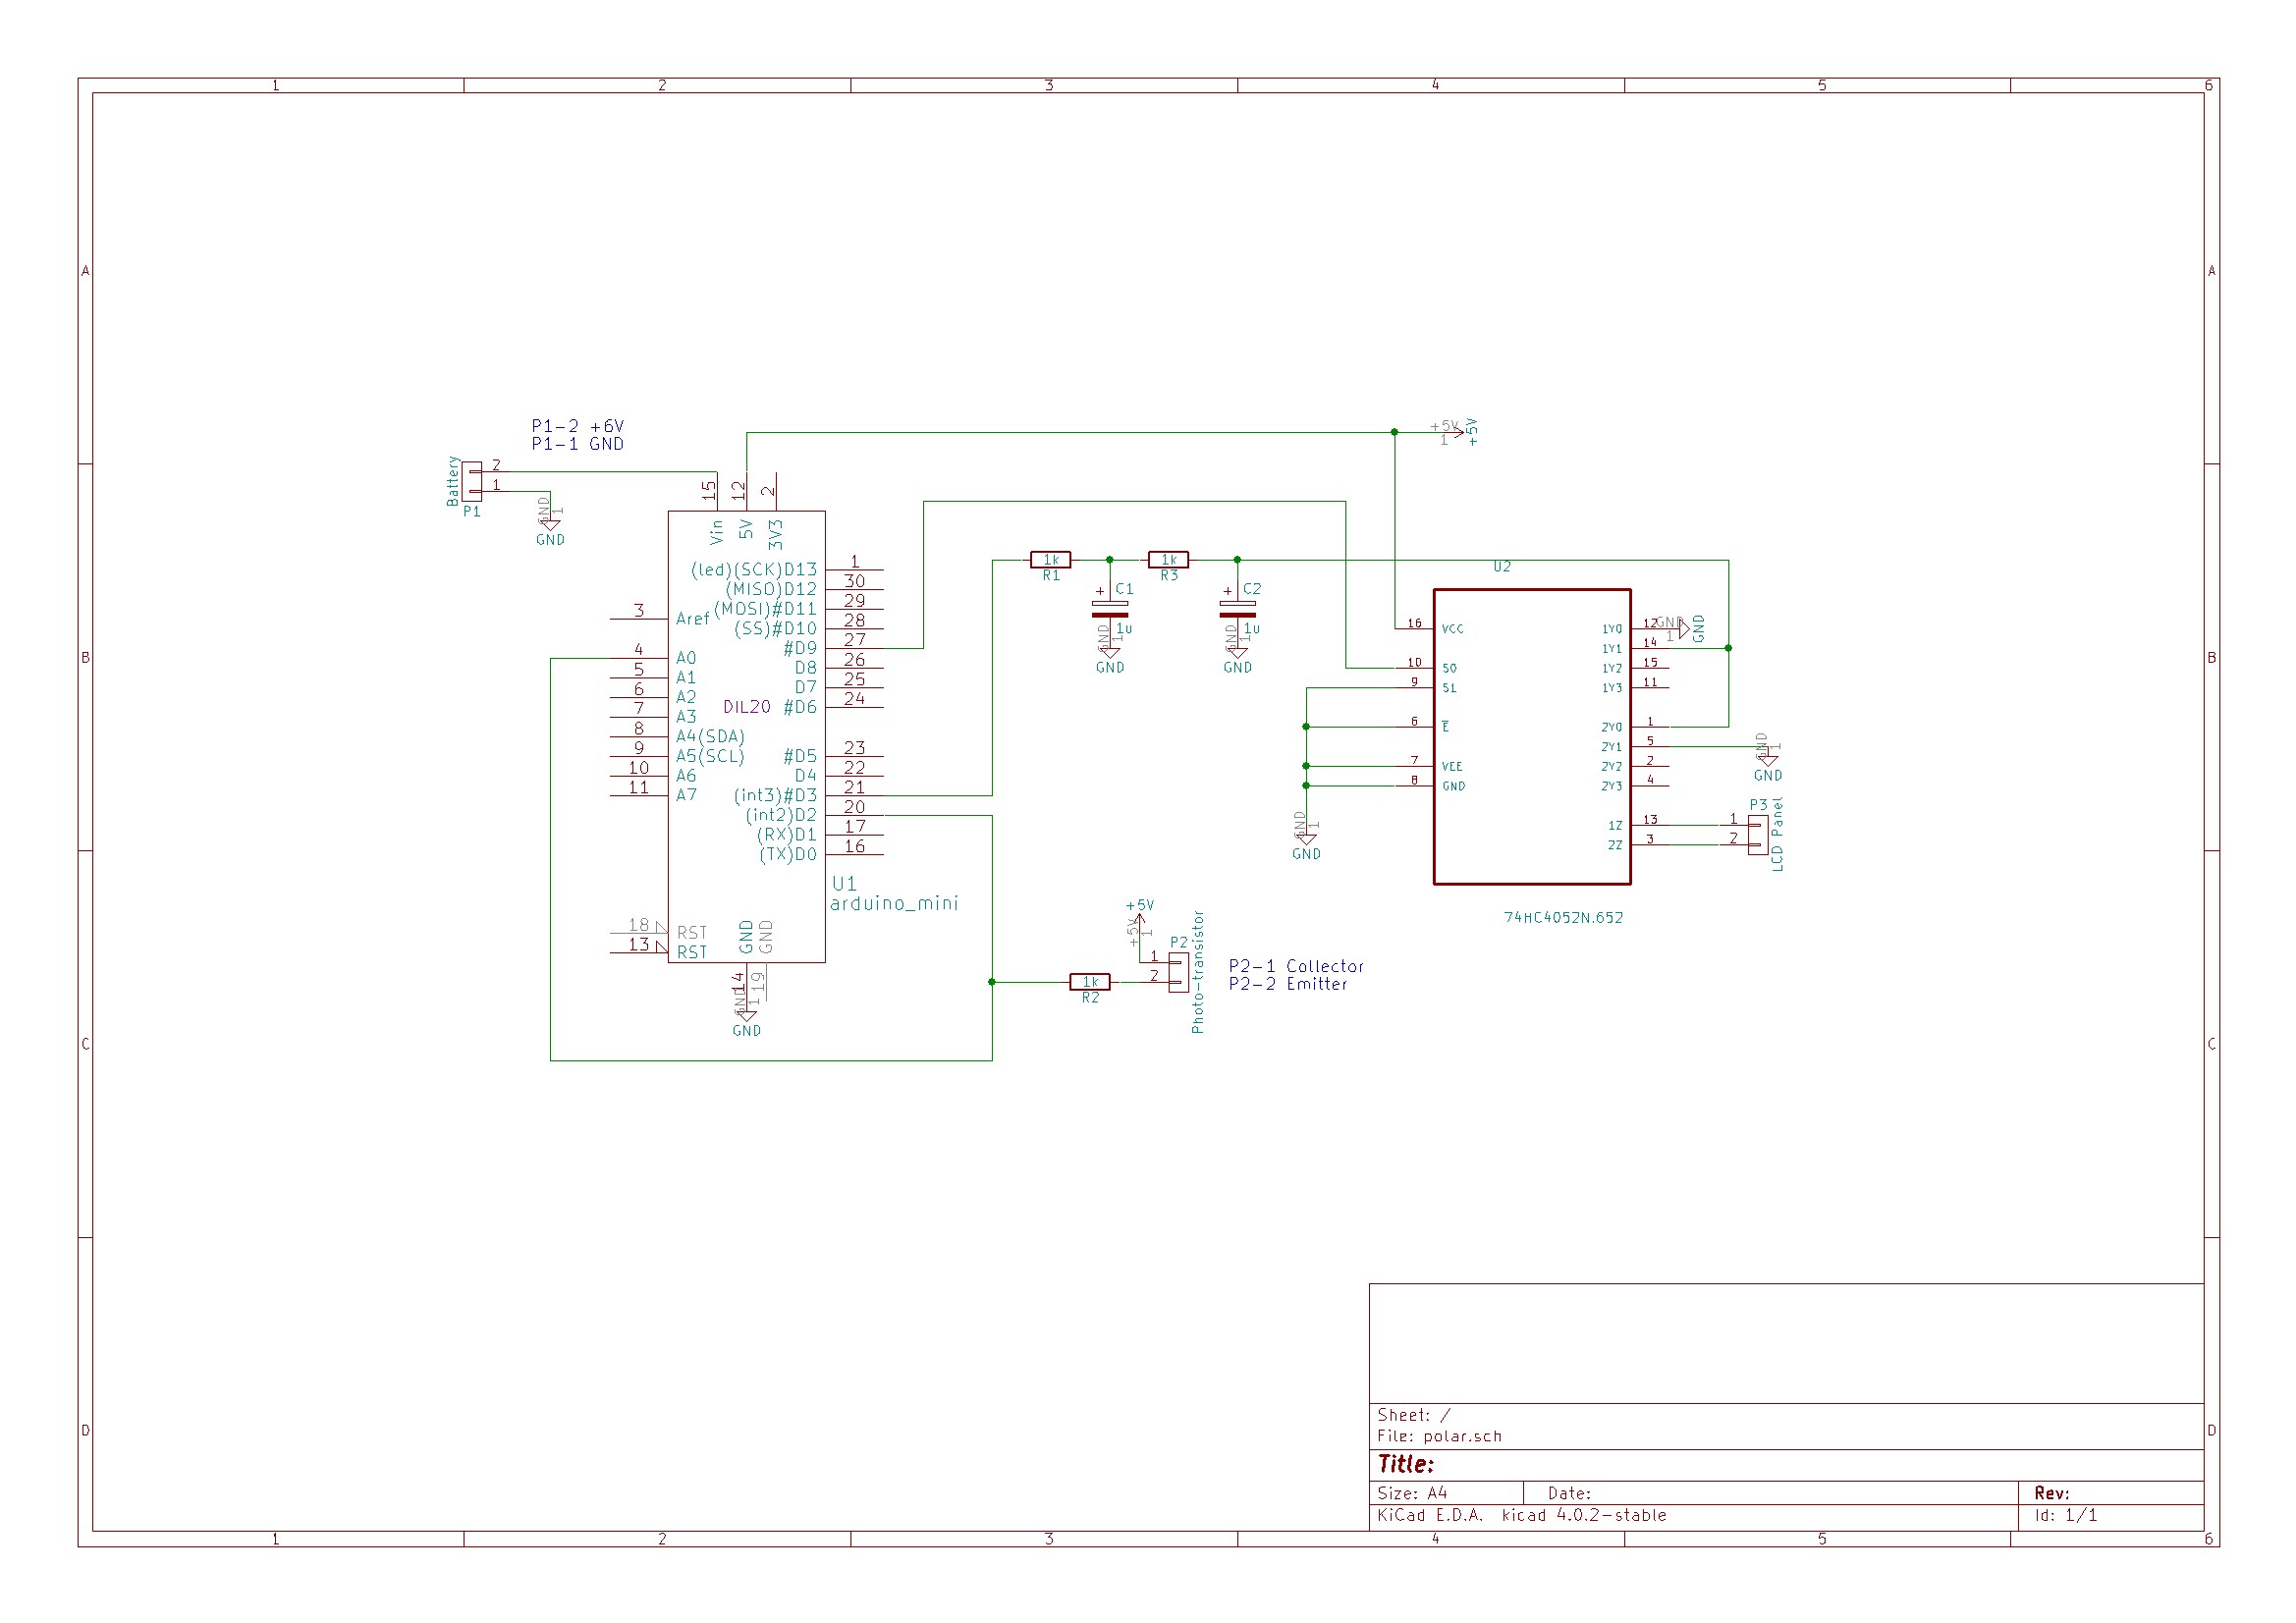
The files for SNAIL Vision include a bill of materials and the PCB layout. There’s software for the Vishay sensors used and provisions for mounting a lens holder to the PCB using glue. The design is fairly simple. In addition to the array of sensors, there’s an I2C multiplexer which also acts as a level shifter and a handful of resistors and connectors.
Is seven pixels enough to be useful? We don’t know, but we’d love to see some examples of using the SNAIL Vision board, or other low-resolution optical sensors with low-end microcontrollers. This seems like a cheaper mechanism than Pixy. If seven pixels are too much, you could always try one.
Thanks [Paul] for the tip.
Filed under: Arduino Hacks, video hacks