

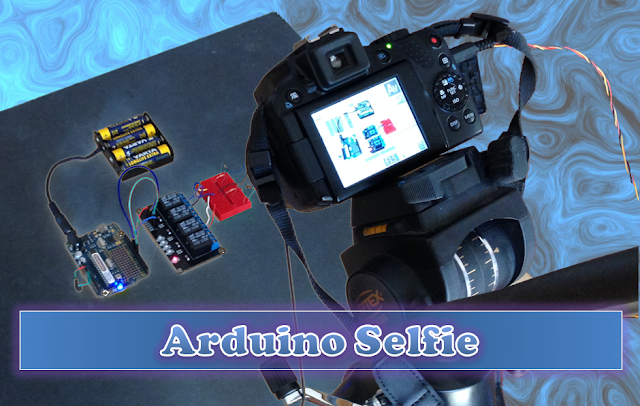
Arduino Selfie
My attention is drawn towards the noise behind me....
I cannot believe it.
There it is.
The Arduino is taking a SELFIE !!
How did this happen?
Well actually, it is not that difficult for an Arduino.
I found out that my Canon Powershot SX50 HS camera has a port on the side for a remote switch. In the "Optional Accessories" section of the camera brochure, it identifies the remote switch model as RS-60E3. I then looked up the model number on this website to find out the size of the jack (3 core, 2.5mm), and the pinout (Ground, focus and shutter) required to emulate the remote switch. Once I had this information, I was able to solder some really long wires to the jack and connect up the circuit (as described below).
Warning : Any circuit you build for your camera (including this one) is at your own risk. I will not take responsibility for any damage caused to any of your equipment.
Parts Required:
- Freetronics Eleven or (Arduino UNO compatible board)
- 4 Channel Relay Module
- 2x 330 ohm resistors
- 2 x diodes
- breadboard
- Jumper Wires (male to male)
- Jumper Wires (female to male)
- Canon Powershot SX50 HS - (here is the brochure)
- Three core, 2.5 mm Jack
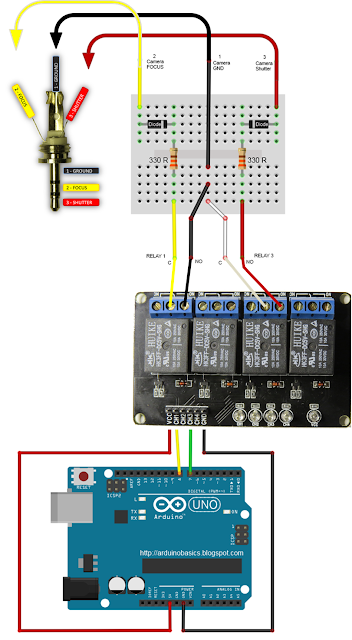
Fritzing Sketch
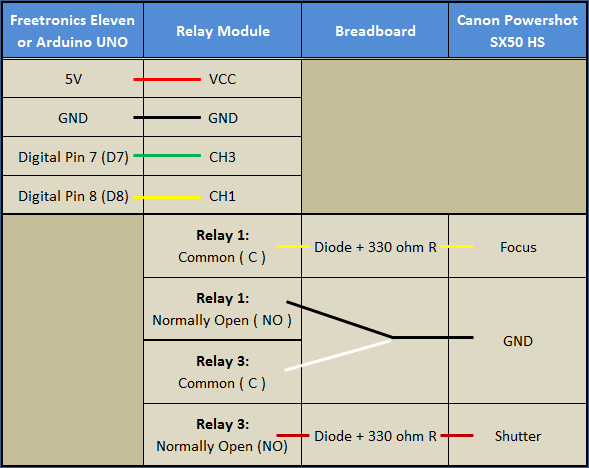
Connection Table
Three core, 2.5 mm jack
Camera Connection to Relays
Jack pinout

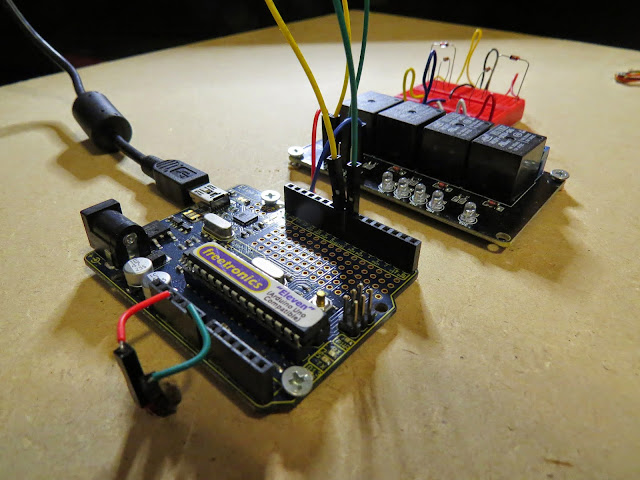
Completed Circuit
Arduino Sketch
1 |
|
By connecting up the camera to an Arduino, the camera just got smarter !!
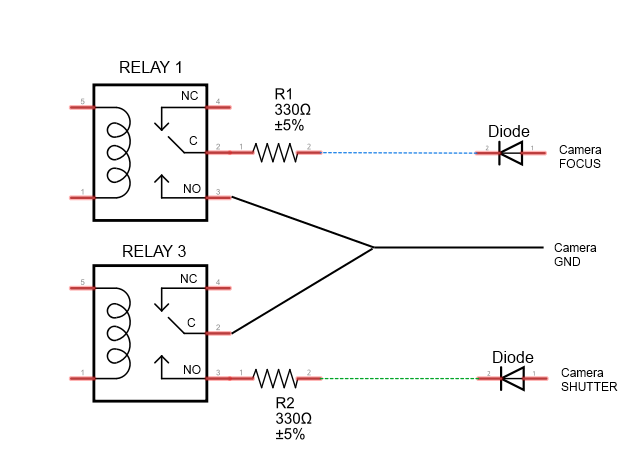
The Arduino connects to 2 different channels on the relay board in order to control the focus and the shutter of the camera. The relays are used to isolate the camera circuit from that of the Arduino. I have also included a couple of diodes and resistors in the circuit as an extra precaution, however they may not be needed.
Warning : Any circuit you build for your camera (including this one) is at your own risk. I will not take responsibility for any damage caused to any of your equipment. Do your research, and take any precautions you see fit.
The Video

Visit my ArduinoBasics Google + page.
Follow me on Twitter by looking for ScottC @ArduinoBasics.
Have a look at my videos on my YouTube channel.

However, if you do not have a google profile...
Feel free to share this page with your friends in any way you see fit.