Posts with «bluetooth» label

Control model trains wirelessly with your smartphone

Model trains have been a staple of DIY hobbiysts for generations, and while wireless control options can be purchased, KushagraK7’s hack lets you use your phone instead.

The setup consists of an Arduino Uno, along with a motor driver shield to vary the trains’s peed and direction, as well as flip turnouts to allow for different sections of track to be used.

The system employs a novel interface system, where an off-the-shelf Bluetooth receiver passes DTMF (telephone dial tones) to a decoder board, which then sends this decoded data on to the Arduino. While some might opt for an HC-05 Bluetooth module or similar, this enables control with a standard tone generator app, and the phone could even be physically connected via a stereo cable if convenient.

Why Have Only One Radio, When You Can Have Two?

There are a multitude of radio shields for the Arduino and similar platforms, but they so often only support one protocol, manufacturer, or frequency band. [Jan Gromeš] was vexed by this in a project he saw, so decided to create a shield capable of supporting multiple different types. And because more is so often better, he also gave it space for not one, but two different radio modules. He calls the resulting Swiss Army Knife of Arduino radio shields the Kite, and he’s shared everything needed for one on a hackaday.io page and a GitHub repository.

Supported so far are ESP8266 modules, HC-05 Bluetooth modules, RFM69 FSK/OOK modules, SX127x series LoRa modules including SX1272, SX1276 and SX1278, XBee modules (S2B), and he claims that more are in development. Since some of those operate in very similar frequency bands it would be interesting to note whether any adverse effects come from their use in close proximity. We suspect there won’t be because the protocols involved are designed to be resilient, but there is nothing like a real-world example to prove it.

This project is unique, so we’re struggling to find previous Hackaday features of analogous ones. We have however looked at an overview of choosing the right wireless tech.

Hack a Day 28 Jul 09:00

Reflowduino: Put That Toaster Oven To Good Use

There are few scenes in life more moving than the moment the solder paste melts as the component slides smoothly into place. We’re willing to bet the only reason you don’t have a reflow oven is the cost. Why wouldn’t you want one? Fortunately, the vastly cheaper DIY route has become a whole lot easier since the birth of the Reflowduino – an open source controller for reflow ovens.

This Hackaday Prize entry by [Timothy Woo] provides a super quick way to create your own reflow setup, using any cheap means of heating you have lying around. [Tim] uses a toaster oven he paid $21 for, but anything with a suitable thermal mass will do. The hardware of the Reflowduino is all open source and has been very well documented – both on the main hackaday.io page and over on the project’s GitHub.

The board itself is built around the ATMega32u4 and sports an integrated MAX31855 thermocouple interface (for the all-important PID control), LiPo battery charging, a buzzer for alerting you when input is needed, and Bluetooth. Why Bluetooth? An Android app has been developed for easy control of the Reflowduino, and will even graph the temperature profile.

When it comes to controlling the toaster oven/miscellaneous heat source, a “sidekick” board is available, with a solid state relay hooked up to a mains plug. This makes it a breeze to setup any mains appliance for Arduino control.

We actually covered the Reflowduino last year, but since then [Tim] has also created the Reflowduino32 – a backpack for the DOIT ESP32 dev board. There’s also an Indiegogo campaign now, and some new software as well.

If a toaster oven still doesn’t feel hacky enough for you, we’ve got reflowing with hair straighteners, and even car headlights.

Building Badges The Hard Way

What’s a hacker to do to profess his love for his dearest beloved? [Nitesh Kadyan] built his lady-love this awesome LED pendant – the LED BLE Hearty Necklace Badge.

The hardware is pretty vanilla by today’s hacker standards. An ATMega328p  does most of the heavy lifting. An HM-11 BLE module provides connection to an Android mobile app. Two 74HC595 shift registers drive 16 columns of red LEDs and a ULN2803 sinks current from the 8 rows. The power section consists of a charger for the 320mAh LiPo and an LDO for the BLE module. All the parts are SMD with the passives mostly being 0603, including the 128 LEDs.

128 LEDs soldered wrong way around

[Nitesh] didn’t get a stencil made for his first batch of boards, so all the parts were painstakingly soldered manually and not in a reflow oven. And on his first board, he ended up soldering all of the LED’s the wrong way around. Kudos to him for his doggedness and patience.

The Arduino code on the ATmega is also quite straightforward. All characters are stored as eight bytes each in program memory and occupy 8×8 pixels on the matrix. The bytes to be displayed are stored in a buffer and the columns are left shifted fast enough for the marquee text effect. The Android app is built by modifying a demo BLE app provided by Google. The firmware, Android app, and the KiCAD design files are all hosted on his Github repository.

[Nitesh] is now building a larger batch of these badges to bring them to hillhacks – the annual hacker-con for making and hacking in the Himalayas. Scheduled for later this month, you’ll have to sign up on the mailing list for details and if you’d like to snag one of these badges. To make it more interesting, [Nitesh] has added two games to the code – Tetris and Snakes. Hopefully, this will spur others to create more games for the badge, such as Pong.

A Well-Chronicled Adventure in Tiny Robotics

Some of us get into robotics dreaming of big heavy metal, some of us go in the opposite direction to build tiny robots scurrying around our tabletops. Our Hackaday.io community has no shortage of robots both big and small, each an expression of its maker’s ideals. For 2018 Hackaday Prize, [Bill Weiler] entered his vision in the form of Project Johnson Tiny Robot.

[Bill] is well aware of the challenges presented by working at a scale this small. (If he wasn’t before, he certainly is now…) Forging ahead with his ideas on how to build a tiny robot, and it’ll be interesting to see how they pan out. Though no matter the results, he has already earned our praise for setting aside the time to document his progress in detail and share his experience with the community. We can all follow along with his discoveries, disappointments, and triumphs. Learning about durometer scale in the context of rubber-band tires. Exploring features and limitations of Bluetooth hardware and writing code for said hardware. Debugging problems in the circuit board. And of course the best part – seeing prototypes assembled and running around!

As of this writing, [Bill] had just completed assembly of his V2 prototype which highlighted some issues for further development. Given his trend of documenting and sharing, soon we’ll be able to read about diagnosing the problems and how they’ll be addressed. It’s great to have a thoroughly documented project and we warmly welcome his robot to the ranks of cool tiny robots of Hackaday.io.

Interactive Plant Lamps for Quiet Spaces

If you’ve spent any serious time in libraries, you’ve probably noticed that they attract people who want or need to be alone without being isolated. In this space, a kind of silent community is formed. This phenomenon was the inspiration [MoonAnchor23] needed to build a network of connected house plants for a course on physical interaction and realization. But you won’t find these plants unleashing their dry wit on twitter. They only talk to each other and to nearby humans.

No living plants were harmed during this project—the leaves likely wouldn’t let much light through, anyway. The plants are each equipped with a strip of addressable RGB LEDs and a flex sensor controlled by an Arduino Uno. Both are hot glued to the undersides of the leaves and hidden with green tape. By default, the plants are set to give ambient light. But if someone strokes the leaf with the flex sensor, it sends a secret message to the other plant that induces light patterns.

Right now, the plants communicate over Bluetooth using an OpenFrameworks server on a local PC. Eventually, the plan is use a master-slave configuration so the plants can be farther apart. Stroke that mouse button to see a brief demo video after the break. [MoonAnchor23] also built LED mushroom clusters out of silicone and cling wrap using a structural soldering method by [DIY Perks] that’s also after the break. These work similarly but use force-sensing resistors instead of flex-sensing.

Networking several plants together could get expensive pretty quickly, but DIY flex sensors would help keep the BOM costs down.

Guitar Game Plays with Enhanced Realism

There’s a lot more to learning how to play the guitar than just playing the right notes at the right time and in the right order. To produce any sound at all requires learning how to do completely different things with your hands simultaneously, unless maybe you’re a direct descendant of Eddie Van Halen and thus born to do hammer ons. There’s a bunch of other stuff that comes with the territory, like stringing the thing, tuning it, and storing it properly, all of which can be frustrating and discouraging to new players. Add in the calluses, and it’s no wonder people like Guitar Hero so much.

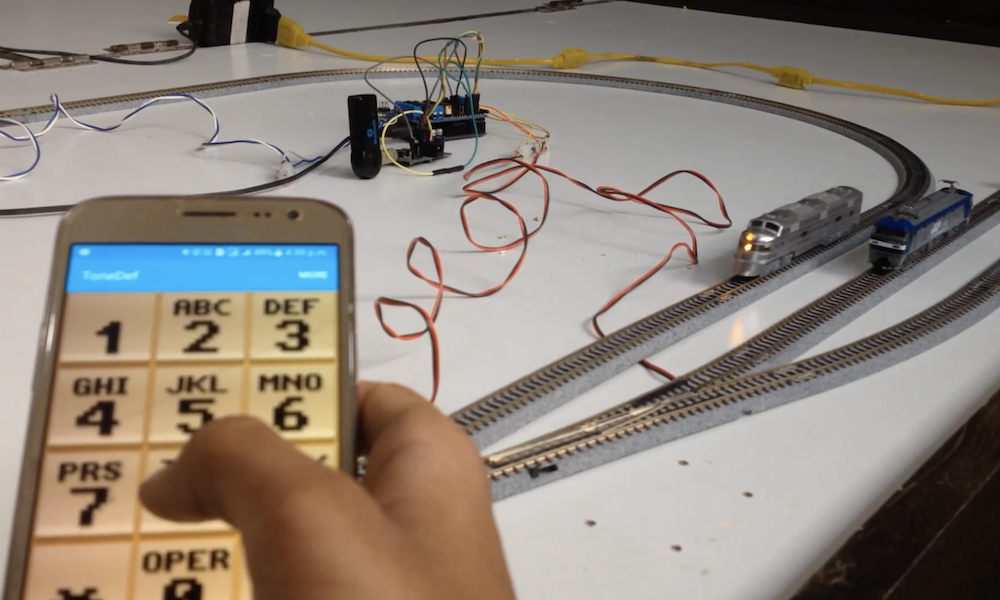
[Jake] and [Jonah] have found a way to bridge the gap between pushing candy colored buttons and developing fireproof calluses and enough grip strength to crush a tin can. For their final project in [Bruce Land]’s embedded microcontroller design class, they made a guitar video game and a controller that’s much closer to the experience of actually playing a guitar. Whether you’re learning to play for real or just want to have fun, the game is a good introduction to the coordination required to make more than just noise.

In an interesting departure from standard stringed instrument construction, plucking is isolated from fretting.  The player fingers notes on four strings but plucks a special, fifth string with a conductive pick that closes the plucking circuit. By contrast, the fretting strings are normally high. When pressed, they contact the foil-covered fingerboard and the circuit goes low. All five strings are made of carbon-impregnated elastic and wrapped with 30AWG copper wire.

All five strings connect to an Arduino UNO and then a laptop. The laptop sends the signal to a Bluefruit friend to change Bluetooth to UART in order to satisfy the PIC32. From there, it goes out via 2-channel DAC to a pair of PC speakers. One channel has the string tones, which are generated by Karplus-Strong. To fill out the sound, the other DAC channel carries undertones for each note, which are produced by sine tables and direct digital synthesis. There’s no cover charge; just click past the break to check it out.

If you’d like to get into playing, but don’t want to spend a lot of money to get started, don’t pass up those $30-$40 acoustics for kids, or even a $25 ukulele from a toy store. You could wind your own pickup and go electric, or add a percussive solenoid to keep the beat.


Filed under: Arduino Hacks, Microcontrollers, Musical Hacks

Hackaday Prize Entry: Safety Glasses Are Also Hands-Free Multimeter

It seems like the multimeter is never easy to see during a project. Whether it’s troubleshooting a vehicle’s electrical system and awkwardly balancing the meter on some vacuum lines and the intake manifold, or installing a new solar panel and hoping the meter doesn’t fall on the ground while the leads are in both hands, it seems like there’s never a good way to see the meter while actually using it. Some meters have a small magnet and strap that can be used to hang them temporarily, but this will only get you so far.

[Alain Mauer]’s entry into the Hackaday Prize looks to solve this glaring problem. Using a heads-up Bluetooth display mounted to a pair of safety glasses, a multimeter can be connected to the device in order to display its information directly to its user. Based on his original idea which used a normal pair of prescription glasses as its foundation, [Alain]’s goal is to reduce safety hazards that might arise when using a multimeter in an awkward or dangerous manner that might not otherwise be possible.

The device uses an Arduino Pro Micro to connect to the multimeter and drive the display. [Alain] notes that the real challenge is with the optical system, however. Either way though, this would be a welcome addition to any lab, workspace, or electrician’s toolbox. Be sure to check out the video of it in action after the break.


Filed under: The Hackaday Prize, tool hacks

Ever hear of the Ford Cylon?

OK, we haven’t heard of a Ford Cylon either. However, there is now a Mustang Cobra out there that has been given a famous Cylon characteristic. [Monta Elkins] picked himself up an aftermarket third brake light assembly, hacked it, and installed it on said Mustang.

The brake light assembly contains 12 LEDs, which unfortunately, are not individually addressable. Additionally, by the looks of it, the brake light housing was not meant to be opened up. That didn’t get [Monta] down though. There’s more than one way to skin a cat, but he chose to use a hot knife to open the assembly, which worked quite well. A rotary cutter tool was used to cut the traces between the LEDs allowing them to be individually controlled with an Arduino. A Bluetooth module allows him to control the new brake light from his smartphone. There are different modes (including a special mode that he shows off at the end of the video) that can be selected via a Bluetooth Terminal app.

There is no schematic or code link in the video itself or the description, but [Monta] did hit the high points. Therefore, it shouldn’t be too hard to replicate.

This isn’t the first brake light hack we’ve featured. This one goes way beyond just animated lightsThis one requires no programming. Rather wear your brake light? We’ve got your back(pack).


Filed under: car hacks, led hacks
Hack a Day 26 May 03:00

Netflix becomes your personal trainer with its new DIY device

Working out can be tough, but inversely, watching Netflix is super easy. The streaming giant doesn't want to distract you from your fitness goals, though. Netflix would much rather be your workout buddy, which is why it posted instructions for making a DIY personal trainer gadget.