Posts with «avr» label

Motor control or servo control


I came across this circuit on google. It controls motor speed by simple flip-flop that gives a PWM signal.

The question is can this be used as a servo control ?

first use 5 volts supply instead of 12 volts ...then by replacing the 3RD NPN transistor with a servo. the + goes up, the - goes down and the signal feeds from the flip flop...can we do that ??

Wild Thumper, progress but help/advice requested

Hi all,

I had a lot of trouble with motor driver boards and my Wild Thumper 4WD chassis - in the end I bought a more expensive motor controller said to handle 60A. I am controlling the paired (left/right side) motors by PWM signal and  it now drives forward/backwards/left/right etc.

read more

Let's Make Robots 26 Sep 17:24
arduino  avr  dagu  raspberry pi  thumper  

Ask Hackaday: Arduino in Consumer Products

Speak with those who consider themselves hardcore engineers and you might hear “Arduinos are for noobs” or some other similar nonsense. These naysayers see the platform as a simplified, overpriced, and over-hyped tool that lets you blink a few LEDs or maybe even read a sensor or two. They might say that Arduino is great for high school projects and EE wannabes tinkering in their garage, but REAL engineering is done with ARM, x86 or PICs. Guess what? There are Arduino compatible boards built around all three of those architectures. Below you can see but three examples in the DUE, Galileo, and Fubarino SD boards.

This attitude towards Arduino exists mainly out of ignorance. So let’s break down a few myths and preconceived biases that might still be lurking amongst some EEs and then talk about Arduino’s ability to move past the makers.

Arduino is NOT the Uno

When some hear “Arduino”, they think of that little blue board that you can plug a 9v battery into and start making stuff. While this is technically true, there’s a lot more to it than that.

  1. An Arduino Uno is justanAVR development board.AVRs are similar to PICs. When someones says “I used a PIC as the main processor”, does that mean they stuck the entire PIC development board into their project? Of course not. It’s the same with Arduino (in most cases), and design is done the same way as with any other microcontroller –
    • Use the development board to make, create and debug.
    • When ready, move the processor to your dedicated board.
  2. What makes an Arduino an “Arduino” and not justan AVR but the bootloader. Thus:
    • An Atmega328P is an AVR processor.
    • An Atmega328P with the Arduino bootloader is an Arduino.
  3. The bootloader allows you to program the AVR with the Arduino IDE. If you remove the bootloader from the AVR, you now have an AVR development board that can be programmed with AVR Studio using your preferred language.

There Is No Special Arduino Language

Arduino “blink” sketch should run on any Arduino compatible board.

Yes, I know they call them sketches, which is silly. But the fact is it’s just c++. The same c++ you’d use to program your PIC. The bootloader allows the IDE to call functions, making it easy to code and giving Arduino its reputation of being easy to work with. But don’t let the “easy” fool you. They’re real c/c++ functions that get passed to a real c/c++ compiler. In fact, any c/c++ construct will work in the Arduino IDE. With that said – if there is any negative attribute to Arduino, it is the IDE. It’s simple and there is no debugger.

The strength comes in the standardization of the platform. You can adapt the Arduino standard to a board you have made and that adaptation should allow the myriad of libraries for Arduino to work with your new piece of hardware. This is a powerful benefit of the ecosystem. At the same time, this easy of getting things up and running has resulted in a lot of the negative associations discussed previously.

So there you have it. Arduino is no different from any other microcontroller, and is fully capable of being used in consumer products along side PICs, ARMs etc. To say otherwise is foolish.

What is the Virtue of Arduino in Consumer Products?

This is Ask Hackaday so you know there’s a question in the works. What is the virtue of Arduino in consumer products? Most electronics these days have a Device Firmware Upgrade (DFU) mode that allows the end user to upgrade the code, so Arduino doesn’t have a leg up there. One might argue that using Arduino means the code is Open Source and therefore ripe for community improvements but closed-source binaries can still be distributed for the platform. Yet there are many products out there that have managed to unlock the “community multiplier” that comes from releasing the code and inviting improvements.

What do you think the benefits of building consumer goods around Arduino are, what will the future look like, and how will we get there? Leave your thoughts below!


Filed under: Arduino Hacks, Ask Hackaday, Hackaday Columns, rants

Arduinos (and other AVRs) Write To Own Flash

In this post on the Arduino.cc forums and this blog post, [Majek] announced that he had fooled the AVR microcontroller inside and Arduino into writing user data into its own flash memory during runtime. Wow!

[Majek] has pulled off a very neat hack here. Normally, an AVR microcontroller can’t write to its own flash memory except when it’s in bootloader mode, and you’re stuck using EEPROM when you want to save non-volatile data. But EEPROM is scarce, relative to flash.

Now, under normal circumstances, writing into the flash program memory can get you into trouble. Indeed, the AVR has protections to prevent code that’s not hosted in the bootloader memory block from writing to flash. But of course, the bootloader has to be able to program the chip, so there’s got to be a way in.

The trick is that [Majek] has carefully modified the Arduino’s Optiboot bootloader so that it exposes a flash-write (SPM) command at a known location, so that he can then use this function from outside the bootloader. The AVR doesn’t prevent the SPM from proceeding, because it’s being called from within the bootloader memory, and all is well.

The modified version of the Optiboot bootloader is available on [Majek]’s Github.  If you want to see how he did it, here are the diffs. A particularly nice touch is that this is all wrapped up in easy-to-write code with a working demo. So next time you’ve filled up the EEPROM, you can reach for this hack and log your data into flash program memory.

Thanks [Koepel] for the tip!


Filed under: Arduino Hacks

Mimimalist Arduino Gaming Platform

A pretty color LCD screen, an Arduino, a buzzer and a joystick is all you need for a minimalist gaming console for under $20. At least, that’s all [João Vilaça] needed to get this sweet version of Tetris up and running. (He’s working on Breakout right now.)

It’s a testament to the current state of the hardware hacking scene that [João] could put this device together in an afternoon for so cheap, presumably after waiting a while for shipments from China. The 320×240 SPI color TFT LCD screen used to cost twice as much as this whole project did. And wiring it up is a simple matter of connecting this pin to that pin. Almost child’s play.

Equally impressive is the state of open source software. A TFT library from Seeed Studios makes the screen interface a piece of cake. [João] wrote his own sound and joystick code, and of course the Tetris gameplay itself, but it’d be much more than a few weeks’ work without standing on the shoulders of giants. Check out [João]’s Github for the project code and stick with us after the break for a demo video and some of our other favorite Arduino gaming hacks.


Now, we’ve seen a whole lot of Arduino-based gaming platforms around here before, and they range from the simplistic black-and-white to the bells-and-whistles of the Gameduino which tacks an FPGA onto your Arduino to enable sprites, awesome sound, and VGA output. But we’ve also got a place in our hearts for simplicity and comprehensibility, and [João]’s device and code has got those in spades.

If you’re ready to push your Arduino skills beyond blinking LEDs, [João]’s game project should be on your reading / building list. We can’t wait to see Breakout.


Filed under: Arduino Hacks
Hack a Day 28 May 03:00
arduino  arduino hacks  avr  game  lcd  tetris  

Arduino IDE Becomes More Open, Less Snarky

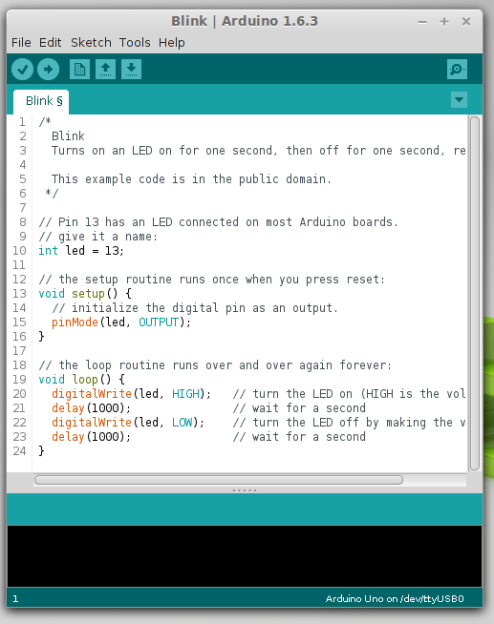
Version 1.6.4 of the Arduino IDE has been out for a little while now, and it has a couple of notable changes. To our eyes, the most interesting change makes adding support for non-standard boards and their configurations within the Arduino IDE a lot simpler. We’ll get into details below.

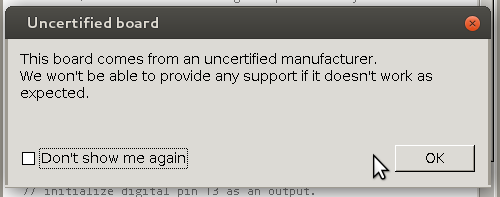
But before that, it’s time to bid farewell to the cheeky little popup window that would deliver a warning message when using a board bearing the USB IDs of their former-partner-turned-competitor. We absolutely agree with [Massimo] that the issues between Arduino SRL / Smart Projects and Arduino LLC are well-enough known in the community, and that it’s time for the popup to fade away.

Now on to the meat of this post. The new “Board Manager” functionality makes it significantly easier for other non-Arduino products to be programmed within the Arduino IDE. Adafruit has a tutorial on using the Board Manager functionality with their products, and it basically boils down to “enter the right URL, click on the boards you want, download, restart Arduino, bam!”

The list of unofficially supported third-party boards is still a bit short, but it includes some stellar entries. For instance, Adafruit has provided the files needed for the ESP8266, which recently received the Arduino treatment. This means that you can simply point your IDE at Adafruit’s URL, and it’ll set you up with everything needed to develop for the ESP8266 from within the comfy Arduino IDE.

Another standout, from our perspective, is this link that simplifies programming bare AVR chips from the Arduino IDE. While programming your Arduino code into a simple AVR ATmega168 has always been possible, it’s never been as easy as it is now.

How it Works

Under the hood, the new board manager system is pretty straightforward. Clicking on one of the links leads to a JSON file with any number of board architecture definitions. Each entry provides text descriptions of the target board that are used for generating menu entries in the Arduino IDE’s pulldown menus, and a link to a zip file. This zip file contains everything necessary to adapt the Arduino libraries to the target board or chip.

For instance, with something simple like the bare-AVR modifications, the zip file simply includes the boards.txt and platform.txt files that the Arduino IDE uses to fill in a lot of board-specific parameters like the CPU clock speed, fuse bit settings, and AVRDUDE command options for flashing new code. For something more involved, like porting Arduino to the ESP8266, the zip file additionally includes the ported Arduino core and library functions, as well as the uploader tools that make Arduino work on that target.

It’s a very interesting experiment to open up the Arduino IDE so transparently to third-party devices. It’ll surely win points with both hackers and retailers of *duinos, and we’re guessing it’ll only encourage porting the Arduino libraries to more platforms. Let’s see where the community takes this one. What do you want to see Arduino ported to next?


Filed under: Arduino Hacks
Hack a Day 13 May 18:01

Slick Six-Voice Synth for AVRs

He started off making an AVR synthesized guitar, but [Erix] ended up with much more: a complete six-voice AVR wavetable synthesis song machine that’ll run on an ATMega328 — for instance, on an Arduino Uno.

If you’re an AVR coder, or interested in direct-digital synthesis or PWM audio output, you should have a look at his code (zip file). If you’d just like to use the chip to make some tunes, have a gander at the video below the break.

It’s pretty sweet to get six channels of 31.25 kHz sampled 8-bit audio running on a 16MHz chip. The code underlying it works through some tricky optimization in the sample update routine (UpdateVoiceSample() in play.c if you’re reading along) and by carefully prioritizing the time critical elements.

For instance, the pitch is updated once every two PWM samples, I/O and other auxiliary player tasks every eights samples, and the sound’s dynamic volume envelope is only recalculated every 48 samples. Doing the slow math as infrequently as possible lets [Erix] make his timing.

And to round out the tools, [Erix] also provides wavetable editors and song generators in Lua to compile the tables of music data that the AVR routines need to run.

If you’re not impressed by this bit of AVR C coding, then you’ve not tried to implement something similar yourself.


Filed under: Arduino Hacks, musical hacks

How to Fix Your Broken MicroView

The response by GeekAmmo and Sparkfun to the MicroView problem has been amazing, but you can fix your broken one fairly simply if you're prepared to crack the case.

Read more on MAKE

New tutorial on how to make an Arduino robot

I posted this on the Facebook page, but thought I'd post it here as well.

I just finished writing an in-depth tutorial on how to make an Arduino-based robot. It's targeted towards beginners and should help someone completely new to robotics to build their first robot, but anyone making a robot with an Arduino will find it useful. Here's picture of the robot I make in the tutorial:

read more

Let's Make Robots 17 Mar 15:47
arduino  avr  robot  robotics  tutorial