In a great display of one hacker’s work being the base for another’s, [Andy] started out with [Jussi Kilpelainen]’s core memory shield for Arduino. As he was playing with the shield he had a desire to “see” the core memory flipping and got the idea to add an LED matrix aligned behind the individual cores.
The first iteration worked, but it only showed the state that the Arduino believed the core memory to be in. What he really wanted was a live read on the actual state. He realized that an Adafruit Featherwing 8×8 matrix display also fits behind the core memory. Now the LEDs update based on the read state of the core memory. This allows him to flip the individual bits with a magnetic stylus and see the result. Very cool.
You can see a video of it working after the break.
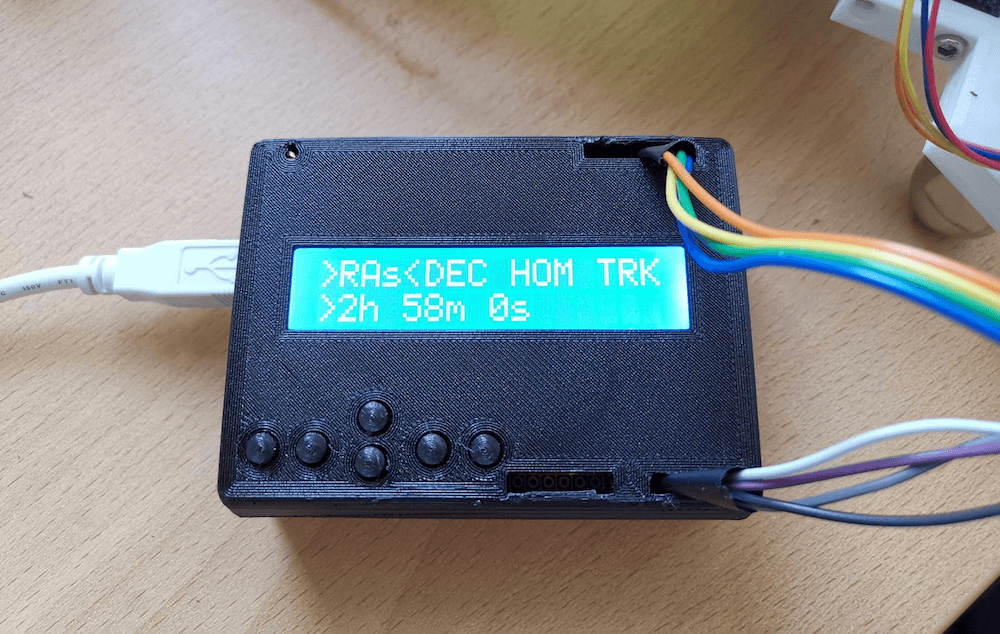
Astrophotography can be challenging, in a large part because your subject matter — or your base, the Earth rather — is constantly moving. In order to take excellent long exposures of far-off objects, Redditor intercipere came up with a beautiful 3D-printable, star-following mount that holds and rotates a DSLR camera.
Now intercipere can simply input the RA/DEC coordinates and the device will automatically move to a desired target in the sky.
Motion is handled by an Arduino Uno and two small stepper motors, with a 16×2 LCD shield user interface. The rig is capable of tracking for at least four minutes, producing this photo of the Andromeda galaxy with a cheapo lens from a heavy light polluted area.
Apparently not satisfied to simulate flights on a single PC monitor, Ryan H came up with his own custom, 3D-printable cockpit setup for the Garmin G1000 avionics suite that uses a 12.1” LCD panel for flight data and a large number of additional inputs. The system is designed around the X-Plane 11 flight simulator, all controlled by an Arduino Mega with SimVim firmware.
The auxiliary display/inputs assemblies use the Arduino as an interface, enabling it to handle 32 tactile switches plus one standard and five dual rotary encoders via five CD74HC4067 16-channel multiplexers.
Bob Clagett likes making holiday decorations. This year, however, he wanted to create something that didn’t just look nice, but was also interactive. What he came up with is a giant Christmas tree that is actually a video game!
His tree-shaped matrix uses seven rows of RGB LEDs attached to the top of the structure to drop simulated snowflakes, represented by white lights. The player moves a dot on the bottom right and left to dodge these falling flakes via a pair of large arcade-style buttons. When the controlling Arduino Mega sees that the player’s position is the same as a snowflake, the game ends.
To make our Christmas tree game light up in the way that we intend, we have to be able to control each LED in an entire strand of lights. Traditional lights just have power run to colored bulbs, which blink or stay lit all together. We found a strand of individually addressable LEDs that are made for outdoor use. This means that each light has a small circuit board attached to each bulb that will receive power and a data signal from a micro-controller. I’m using an Arduino as the micro-controller to send out a signal to each specific light among the many strands.
Our game is very simple, there is a “player” that is restrained to the lowest level of lights in our tree-shaped matrix. That “player” can move left or right to avoid falling “snow.” When the game is played, the player will move while white “snow” lights fall randomly from the top of the tree-shaped matrix. If the “player” and the “snow” occupy the same space on the matrix in the arduino code, you lose. When the game isn’t being played, I used a simple LED flash library to create a Christmasy-looking color series that flashes until someone activates the game.
Now that the game code is working, the lights are blinking appropriately, and the control buttons are moving the “player” around, it’s time to make it look like a tree. To do this, Josh and I drilled holes at even space along some thin PVC material and fed in the lights. Covering those light boards with ping pong balls will help diffuse the LED light and give the whole tree a polished and clean look. These seven LED light boards are then connected to a hub at the top of a 10-foot metal pole. To keep the pole firmly planted on the ground, I poured a bucket of concrete and fixed a pole holder into it.
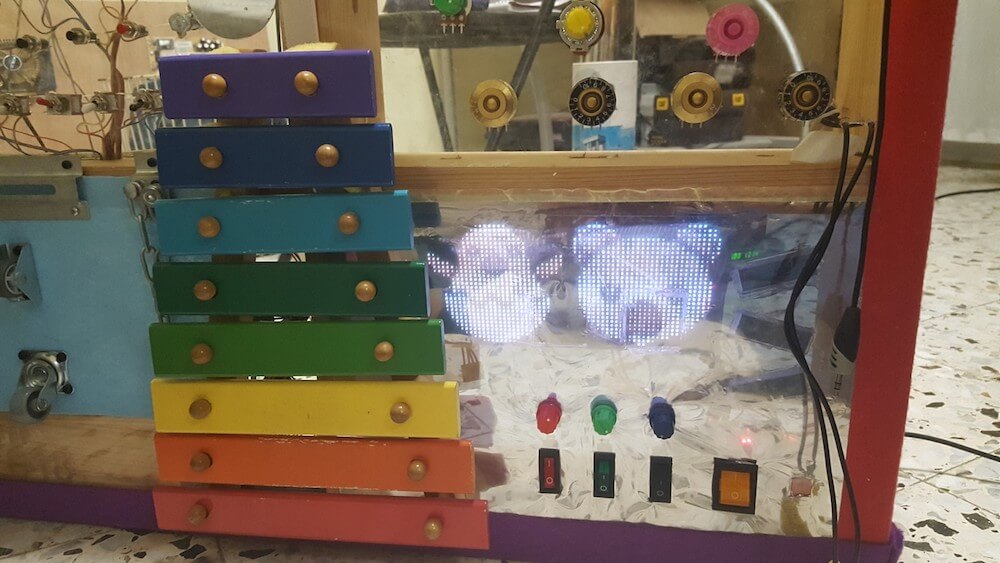
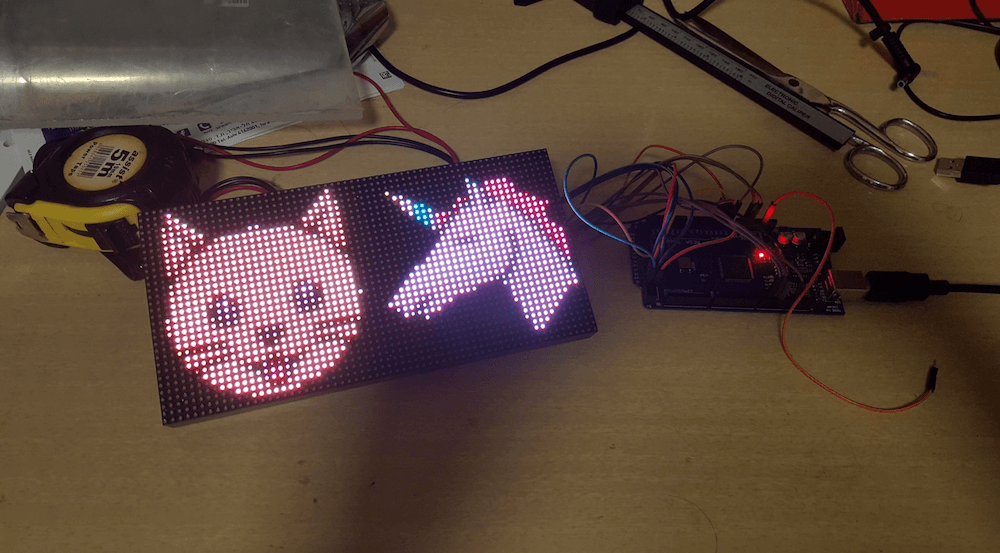
When Amir Avni made a busy board for his then-one-year-old daughter, he left a variety of buttons and switches unconnected. While these were still likely interesting at the time, now that she’s two, he’s added an Arduino Mega-controlled 32×64 LED panel to the rig, taking advantage of these formerly unused input devices.
The busy board images are changed using four potentiometers positioned above it, which select two icons that are each displayed on half the screen. It can also act as a drawing board when the first one is set to its maximum value.
Below that, more potentiometers and some switches are implemented for further image control, along with a power switch to cut things off when playtime is done.
While you may know on some level that an Arduino can help you make music, you probably haven’t seen as good an implementation as this MIDI controller by Switch & Lever.
The device features a numeric pad for note input, which can also be used as a drum pad, and a variety of knobs and even a joystick for modifying the beats. Controls are housed inside a beautiful laser-cut, glued, and finished wooden enclosure.
An Arduino Mega (with its 54 digital IO and 16 analog pins) is used to accommodate the inputs, and data is passed on to a digital audio workstation, or DAW, to produce actual sound.
Code and circuit diagrams are available here if you want to build one, though your setup can be customized however you like!
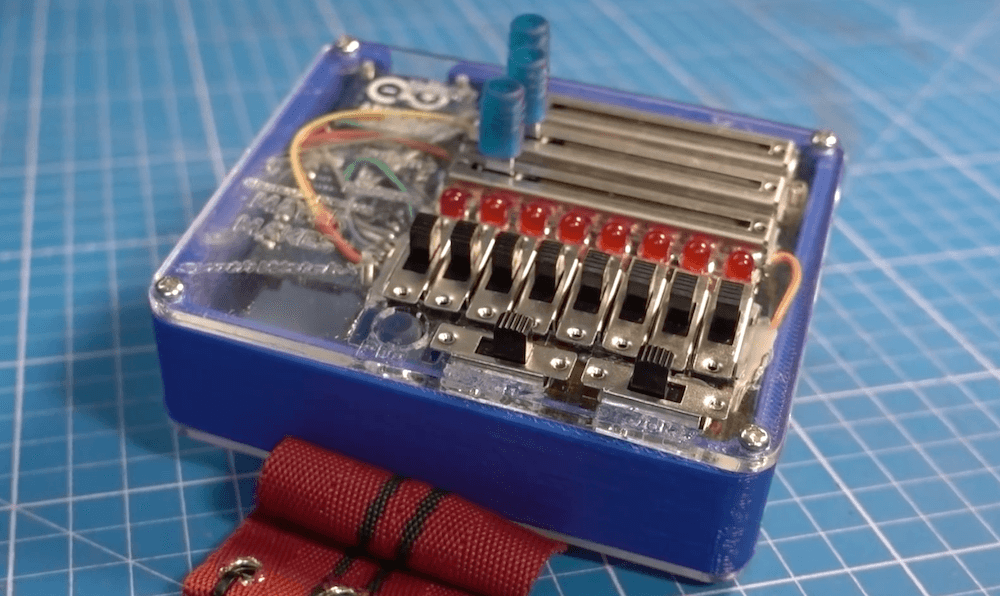
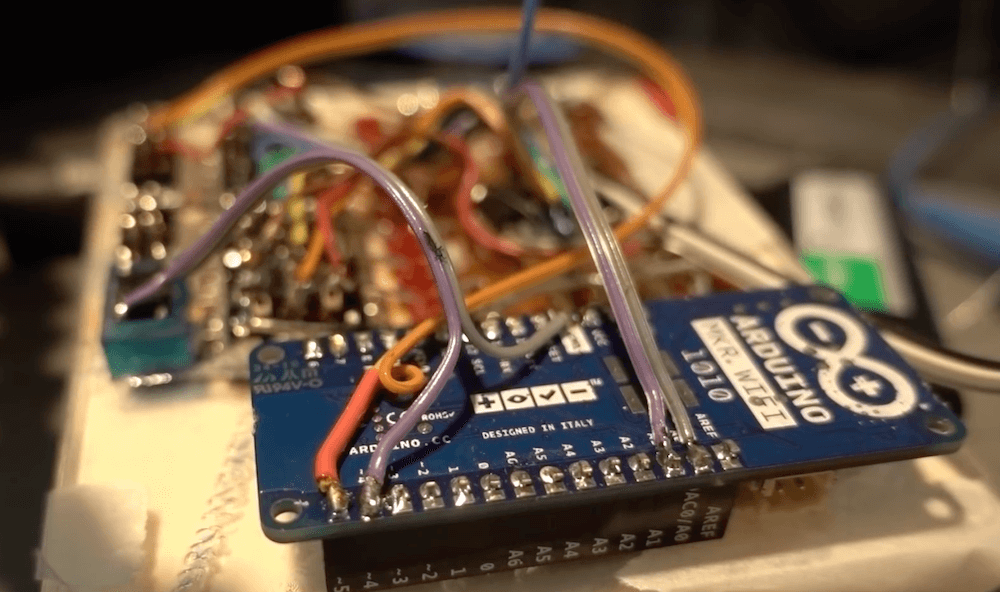
Unless you’re very good, personal synths are fun for you — though often quite annoying for onlookers. After making his own wristwatch-based synth in 2016, Clem Mayer decided to build a new version that’s larger and louder than ever, and programmable via an Arduino controller.
Mayer chose the MKR WiFi 1010 here to take advantage of its LiPo charging abilities. This enables the device to be entirely self-contained in its custom housing, with a variety of switches and sliders for an interface.
Users can program their own “tune” to be played back, or even take advantage of a random sequence generated on startup, then modify the sound as it plays live.
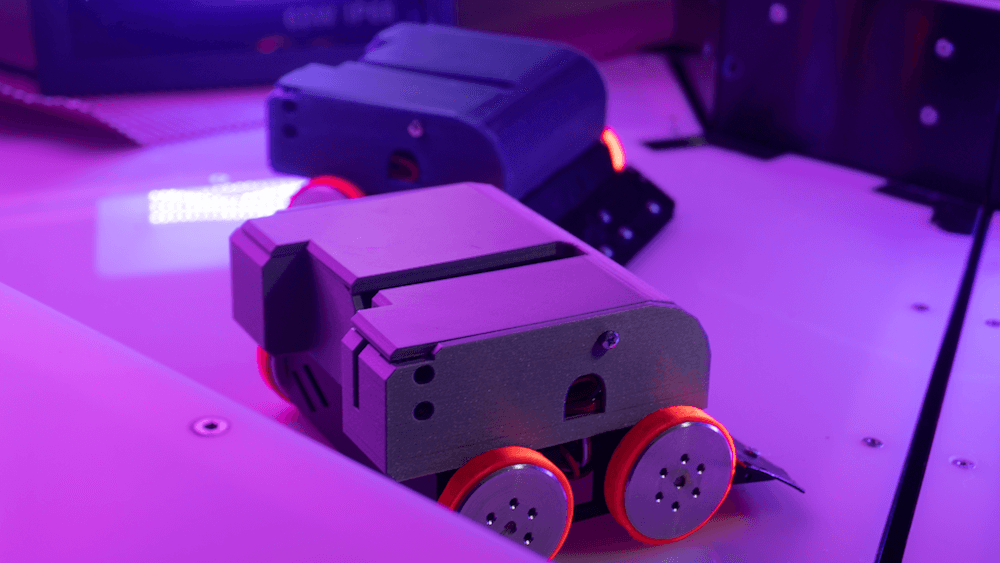
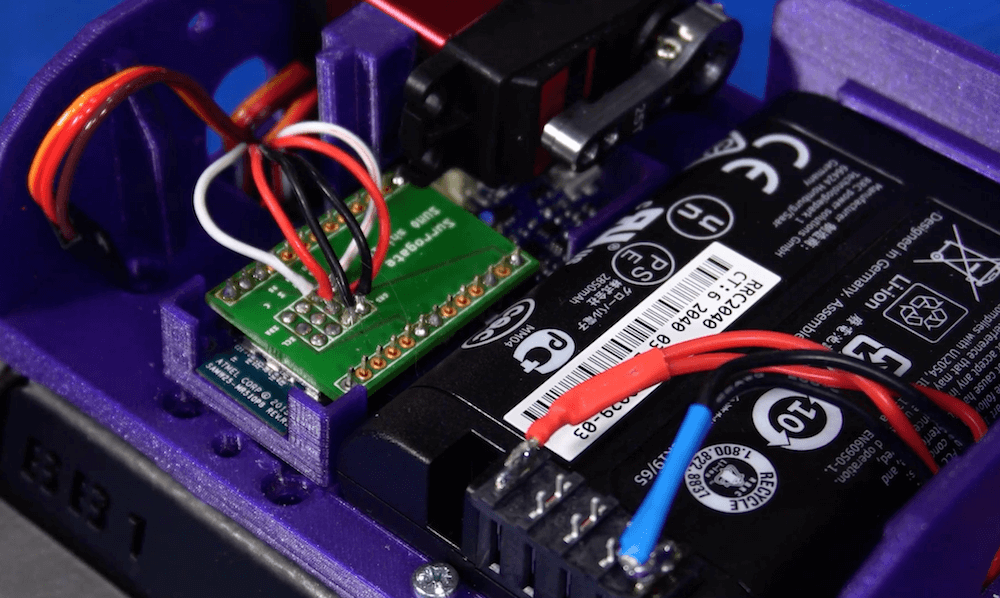
Robot-sumo bouts can be a great way to pit your automation skills against others. Participating normally means a lot of hard work to get your bot functioning properly, and likely a fair amount of travel to meet your opponents. SurrogateTV, however, has a new alternative with their SumoBots Battle Royale game that allows you to fight actual robots over the Internet.
Their customized “pushers” from JSumo are made out of steel sheets, powered by an Arduino, a motor shield and a lithium-ion battery — all housed inside a 3D-printed enclosure — and tracked by a computer vision system. Four motors are used for movement and a servo on the top flips them right side up as needed.
The ring isn’t just a traditional circle either, but an area that is always dynamically changing. SurrogateTV decided on an interactive floor that drops as the game goes on, voted upon by the chat/viewers. A quick overview of the build process and how it works can be seen in the video below.
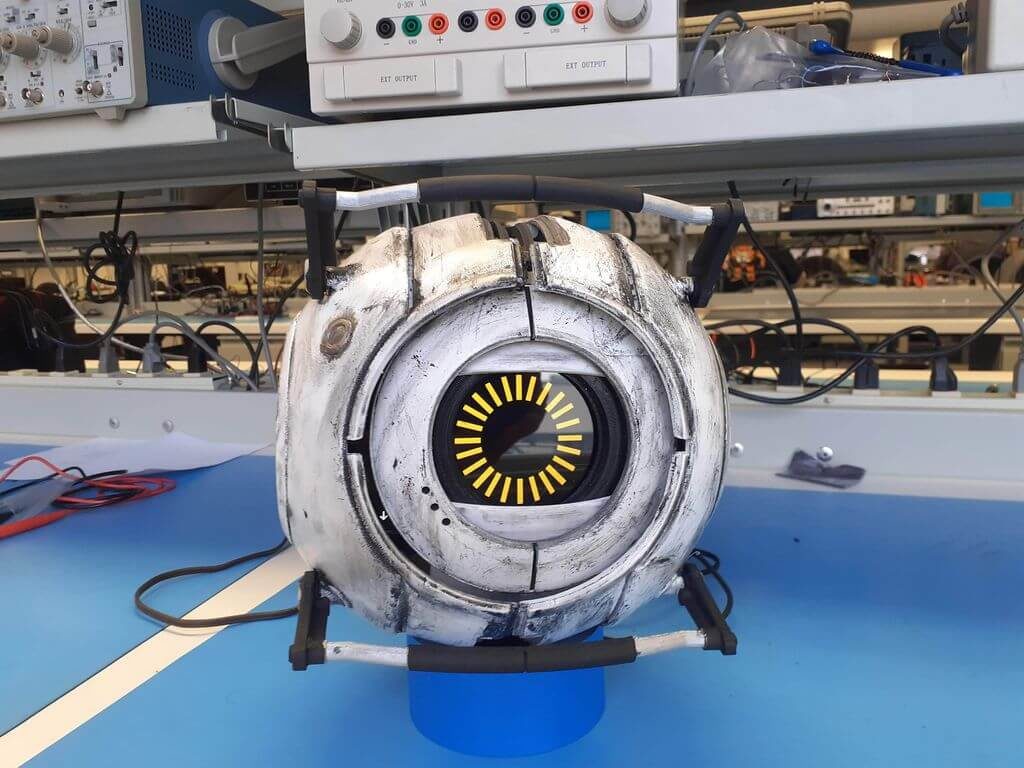
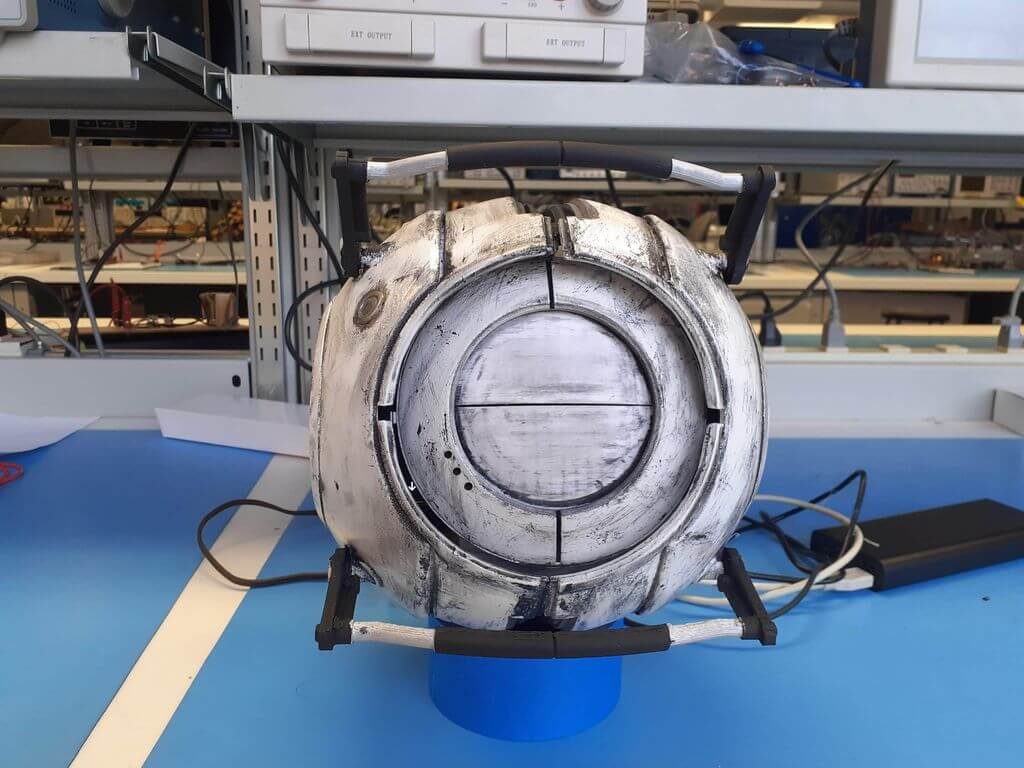
His Space Core is 3D-printed from a model that he found online, scaled up by 300% to fit the electronics inside, including an Arduino Uno and eight servo actuators. As with many projects, there was barely enough room to fit the electrical components, but as seen in the video below, it looks delightfully glitchy.
The Arduino controls the servo-driven eye movement and is linked to a smartphone over Bluetooth for remote operation. A second phone is integrated into the moving eye section, which displays an image of the personality core’s iris, and plays game quotes through its music app.
YouTuber MrTeslonian was asked if he could create an automatic fishing pole for someone with a serious disability. While this would seem like a daunting task, he was able to build one using a spring-loaded mechanism, a number of motors, and an Arduino board.
His portable device takes commands over WiFi, allowing control from a smartphone or computer. When it receives the signal, the pole is automatically pulled back and tension is added to a large spring via a winch. This tension is then released with a servo-actuated system, and a small gearmotor reels the bait back in… hopefully with a fish attached!