Sad news from Germany, with the recent passing of a legend in the crypto community: Mr. Goxx, the crypto-trading hamster. The rodent rose to fame in the crypto community for his trades, which were generated at random during his daily exercise routines — his exercise wheel being used like a roulette wheel to choose a currency, and a pair of tunnels determined whether the transaction would be a buy or sell. His trading career was short, having only started this past June, but he was up 20% over that time — that’s nothing to sneeze at. Our condolences to Mr. Goxx’s owners, and to the community which sprung up around the animal’s antics.
It might seem a little early to start planning which conferences you’d like to hit in 2022, but some require a little more lead time than others. One that you might not have heard of is DINACON, the Digital Naturalism Conference, which explores the intersection of technology and the natural world. The con is set for the entire month of July 2022 and will be held in Sri Lanka. It has a different structure than most cons, in that participants attend for a week or so on a rotating basis, much like a biology field station summer session. It sounds like a lot of fun, and the setting couldn’t be more idyllic.
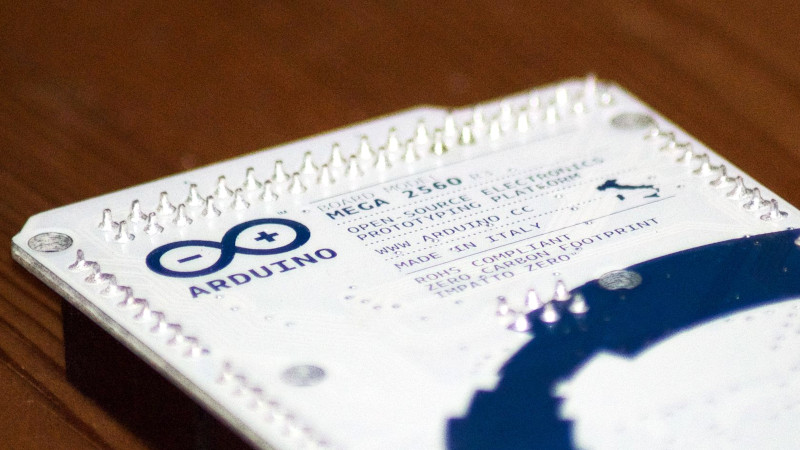
If you haven’t already killed your holiday gift budget buying NFTs, here’s something you might want to consider: the Arduino Uno Mini Limited Edition. What makes it a Limited Edition, you ask? Practically, it’s the small footprint compared to the original Uno and the castellated edges, but there are a bunch of other extras. Each elegant black PCB with gold silk screening is individually numbered and comes in presentation-quality packaging. But the pièce de résistance, or perhaps we should say the cavallo di battaglia, is that each one comes with a hand-signed letter from the Arduino founders. They honestly look pretty sharp, and at $45, it’s really not a bad collector’s piece.
And finally, the YouTube algorithm giveth again, when this infrastructure gem popped up in our feed. You wouldn’t think there’d be much of interest to see in a water main repair, but you’d be wrong, especially when that main is 50′ (15 m) below the surface, and the repair location is 600′ (183 m) from the access hatch. Oh yeah, and the pipe is only 42″ (1 m) in diameter, and runs underneath a river. There’s just so much nope in this one, especially since the diver has to swim into a special turning elbow just to get pointed in the right direction; how he turns around to swim out is not worth thinking about. Fascinating tidbits include being able to see the gravel used to protect the pipe in the riverbed through the crack in the pipe, and learning that big water mains are not completely filled, at least judging by the small air space visible at the top of the pipe. Those with claustrophobia are probably best advised to avoid this one, but it’s still amazing to see how stuff like this is done.
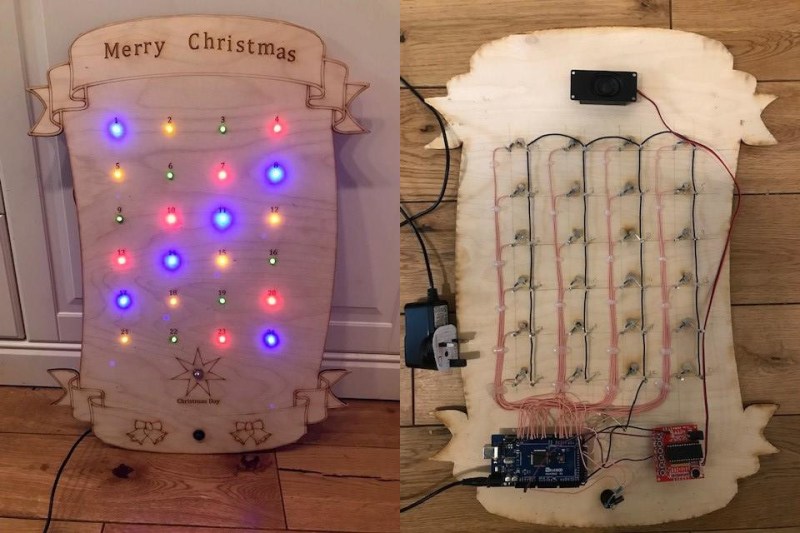
Who says it’s too early to get in the holiday spirit? We say it’s not. After all, people need time to get in the spirit before it comes and goes. And what better way to count down the days until Christmas than an electronic Advent calendar?
[Tom Goff]’s kids had some pretty cool ideas for building a decoration, like a musical, lighted sleigh complete with robotic Santa Claus. While that’s a little much to pull off for this year, they did salvage the music and lights part for their Hackvent calendar.
There are 24 small LEDs for December 1st through the 24th, and a big white star for December 25th. Each day, the kids just push the button and the day’s LED lights up. On the big day, all the small lights cascade off and the white one lights up, then it plays Jingle Bells through a sound playback module.
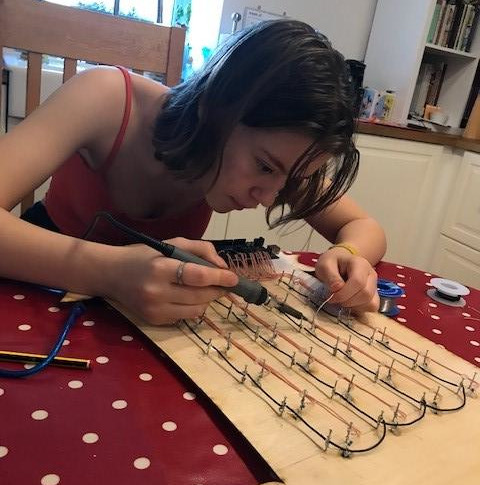
Each LED is connected directly to an input on an Arduino Mega. While there are several ways of lighting up 25 LEDs, this one is pretty kid-friendly. We think the coolest part of this build is that [Tom] and the kids did it old school, with nails hammered into the laser-cut plywood and used as connection terminals. Be sure to check it out in action after the break.
Although a little smaller than its real-world counterpart, the bright yellow housing and illuminated indicators on this pedestrian lamp are instantly recognizable due to their ubiquitous use throughout the United States. The handful of printed parts are held together using friction alone, which makes assembly a literal snap. The ‘safety grill’ with its many angles ended up being one of the most tedious parts of the build process, but the effort was definitely justified, as it just wouldn’t look right without it.
A suitably minuscule ATtiny85 drives a pair of LED strips that effectively mimic the familiar symbols for ‘Walk’ and ‘Don’t Walk’. [sjm4306] has designed the board and case in such a way to accommodate a variety of options. For example, there’s just enough room to squeeze in a thin battery, should you want to power this contraption on-the-go. If you don’t have an ATtiny85 on hand, the board also supports an ATmega328p or even an ESP8266.
All the build details are available over on Hackaday.io. While it’s billed as a ‘night light’, we think this could be an awesome platform for an office toy, similar to this office status light project. Or if you’ve somehow already got your hands on a full-size pedestrian lamp, why not hook it up to the Internet?
It’s become something of a trope in our community, that the simplest way to bestow a level of automation or smarts to a project is to reach for an Arduino. The genesis of the popular ecosystem of boards and associated bootloader and IDE combination is well known, coming from the work of a team at the Interaction Design Institute Ivrea, in Northern Italy. The name “Arduino” comes from their favourite watering hole, the Bar di Re Arduino, in turn named for Arduin of Ivrea, an early-mediaeval king.
As far as we can see the bar no longer exists and has been replaced by a café, which appears on the left in this Google Street View link. The bar named for Arduin of Ivrea is always mentioned as a side note in the Arduino microcontroller story, but for the curious electronics enthusiast it spawns the question: who was Arduin, and why was there a bar named after him in the first place?
The short answer is that Arduin was the Margrave of Ivrea, an Italian nobleman who became king of Italy in 1002 and abdicated in 1014. The longer answer requires a bit of background knowledge of European politics around the end of the first millennium, so if you’re ready we’ll take Hackaday into a rare tour of medieval history.
Defying An Empire
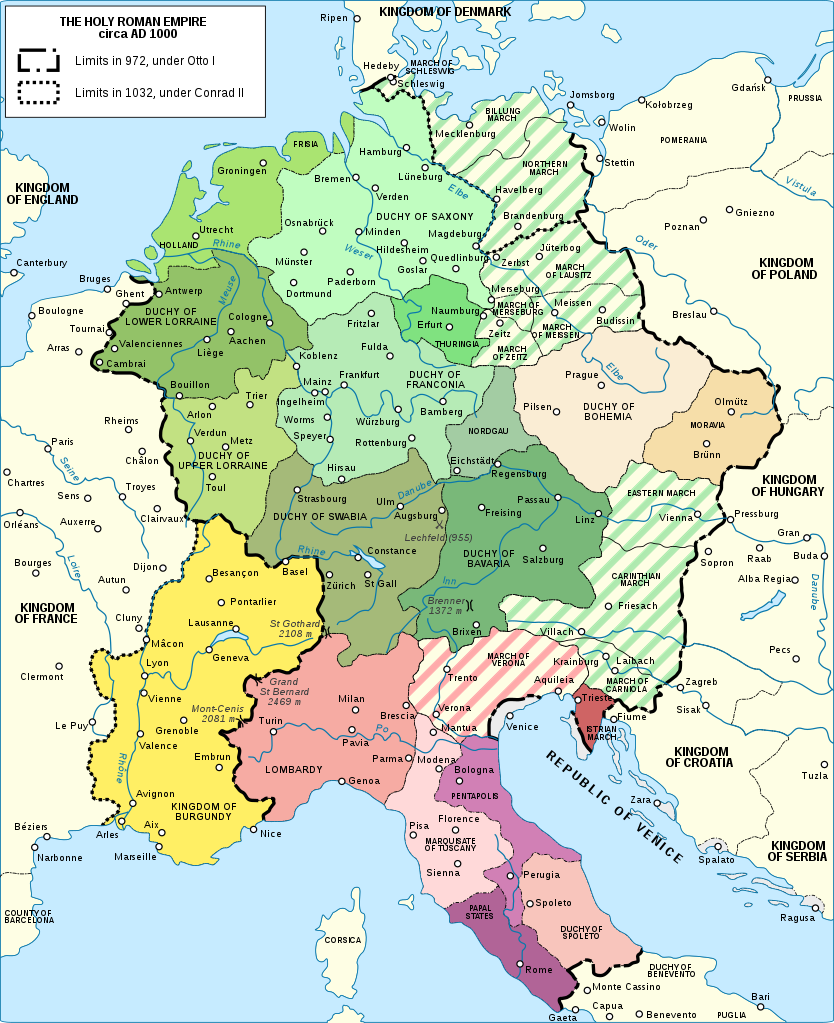
The Holy Roman Empire at the turn of the second millennium. Sémhur derivative work: OwenBlacker, CC BY-SA 3.0
Western Europe’s dominant power at the turn of the first millennium was the Holy Roman Empire, a German-ruled agglomeration of states which though not a direct successor to the Roman Empire had received the recognition of the Papacy as such following the accession of a female ruler as empress of the former Eastern Roman empire in Byzantium. Its young Emperor Otto III died unexpectedly in 1002 without an heir, and in the power vacuum that followed the Italian nobility sought to re-establish their control and break away from German influence. Thus they elected one of their own to become King of Italy, selecting Arduin for the throne.
The tumultuous politics of 10th and 11th century Italy seem to revolve around the struggles between the forces controlled by the bishops, largely aligned with or appointed by the Holy Roman Emperor, and those of the nobility who seem to have been alternately on the side of — or fighting against — the Emperor. Arduin had been excommunicated twice, once in Rome before Otto himself and his Papal appointment Sylvester II, after burning the cathedral of Vercelli and killing its bishop.
The Empire Strikes Back
There seem to be no contemporary depictions of Arduin, this stylised one is from a later century. Marilynmerlo, CC BY-SA 3.0.
When the newly crowned Emperor Henry II immediately sent a force to depose Arduin, it was repulsed, leading to Henry himself leading a larger army and defeating him in 1004. This and Henry’s subsequent coronation as King of Italy in the city of Pavia might have been the end of the story, but as the newly crowned king and his retinue were driven from the city by rioting it is evident that he did so without the support of his populace. Thus while Arduin had lost control of part of his claimed kingdom he continued to hold power from his base in Ivrea and spent the next decade still asserting himself as King of Italy despite Henry also holding the crown. He was eventually defeated and forced to abdicate in 1013, and died the following year.
If there’s something to take away from this tale of European politics a millennium past, it’s the surprise at how little he leaves us. For other medieval figures there might be a statue or perhaps a fresco in a church, but for Arduin beyond the stylised portrait evidently drawn centuries later we have no depiction of him. If the town of which he was once ruler had not memorialised him in a street name that in turn prompted the owner of a bar to use his name, it’s possible nobody but a few historians would ever have known about him. Perhaps here is a lesson in measuring the legacies of our politicians here in the 21st century.
So we have the love of some Italian post-grads for their favourite watering hole to thank for our familiarity with the name of an obscure medieval king, and now we know a little more about him and his life. Perhaps we should all turn to our local pub for inspiration when naming our projects, though in my case I’m not sure that The Sow And Pigs would be as edifying an appellation.
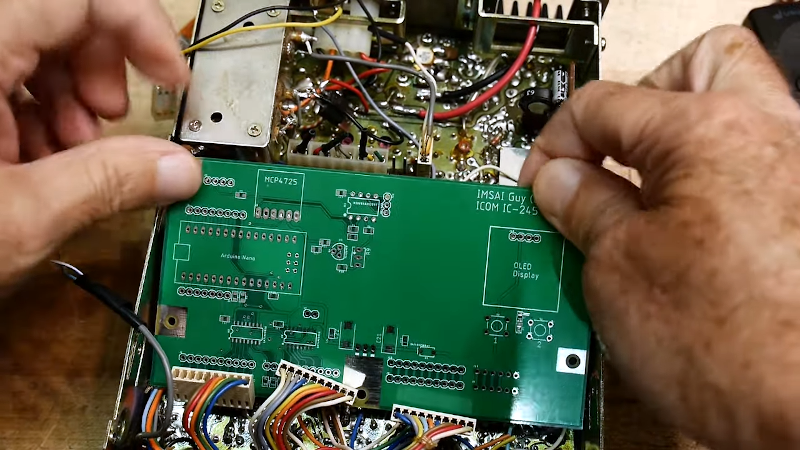
Old radios didn’t have much in the way of smarts. But as digital synthesis became more common, radios often had as much digital electronics in them as RF circuits. The problem is that digital electronics get better and better every year, so what looked like high-tech one year is quaint the next. [IMSAI Guy] had an Icom IC-245 and decided to replace the digital electronics inside with — among other things — an Arduino.
He spends a good bit of the first part of the video that you can see below explaining what the design needs to do. An Arduino Nano fits and he uses a few additional parts to get shift registers, a 0-1V digital to analog converter, and an interface to an OLED display.
Unless you have this exact radio, you probably won’t be able to directly apply this project. Still, it is great to look over someone’s shoulder while they design something like this, especially when they explain their reasoning as they go.
The PCB, of course, has to be exactly the same size as the board it replaces, including mounting holes and interface connectors. It looks like he got it right the first time which isn’t always easy. Does it work? We don’t know by the end of the first video. You’ll have to watch the next one (also below) where he actually populates the PCB and tests everything out.
We all know the story arc that so many projects take: Build. Fail. Improve. Fail. Repair. Improve. Fail. Rebuild. Success… Tweak! [Kris Harbour] is no stranger to the process, as his impressive YouTube channel testifies.
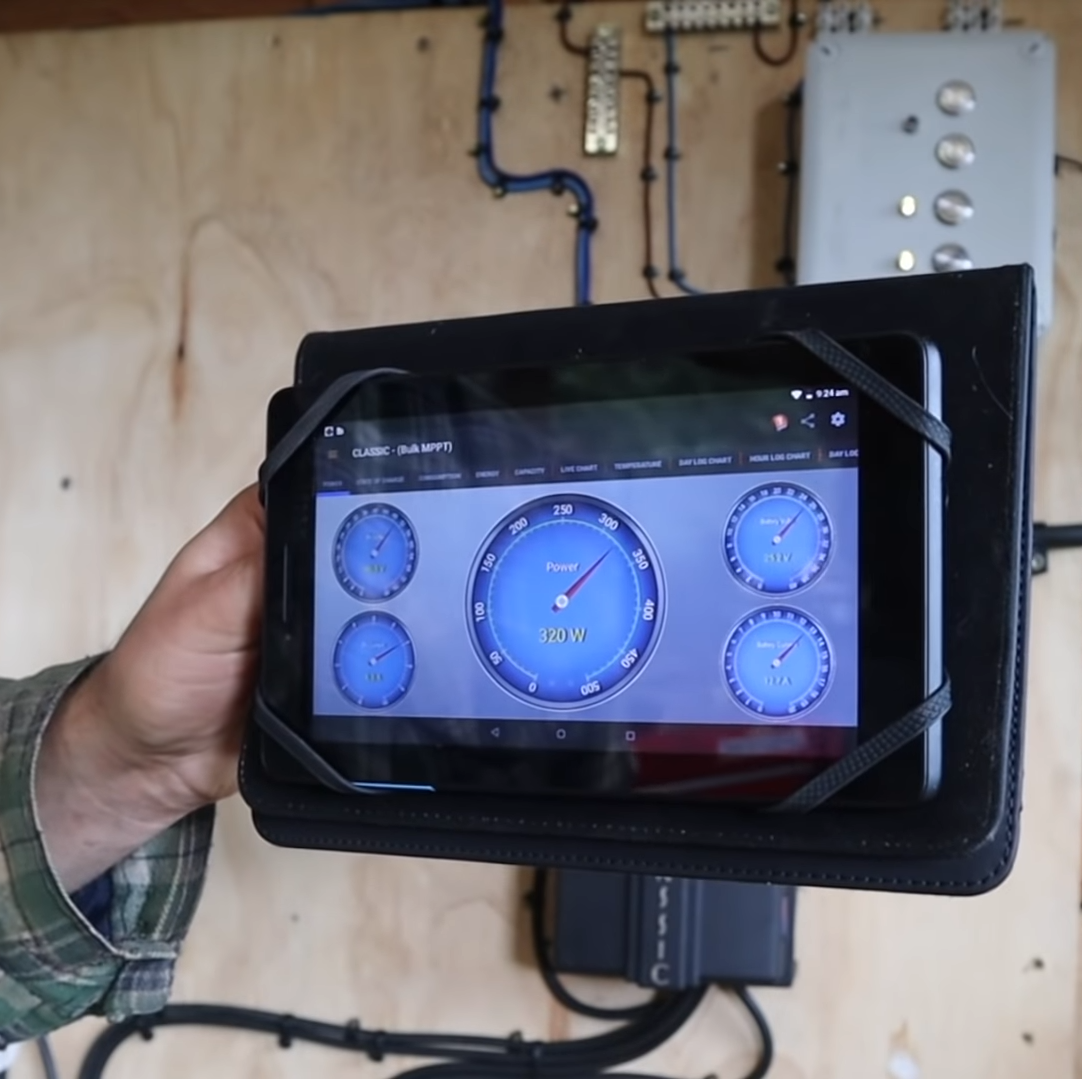
An IOT charge controller makes power management easier.
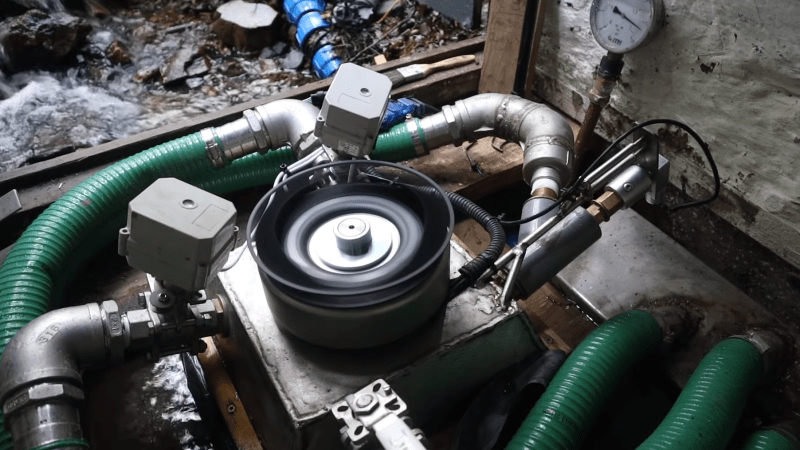
Among all of [Kris’] off-grid DIY adventures, his 500 W micro hydroelectric turbine has us really pumped up. The impressive feat of engineering features Arduino/IOT based controls, 3D printed components, and large number of custom-machined components, with large amounts of metal fabrication as well.
[Kris] Started the build with a Pelton wheel sourced from everyone’s favorite online auction site paired with an inexpensive MPPT charge controller designed for use with solar panels. Eventually the turbine was replaced with a custom built unit designed to produce more power. An Arduino based turbine valve controller and an IOT enabled charge controller give [Kris] everything he needs to manage the hydroelectric system without having to traipse down to the power house. Self-cleaning 3D printed screens keep intake maintenance to a minimum. Be sure to check out a demonstration of the control system in the video below the break.
As you watch the Hydro electric system playlist, you see the hacker spirit run strong throughout the initial build, the failures, the engineering, the successes, and then finally, the tweaking for more power. Because why stop at working when it can be made better, right? We highly recommend checking it out- but set aside some time. The whole series is oddly addictive, and This Hackaday Writer may have spent inordinate amounts of time watching it instead of writing dailies!
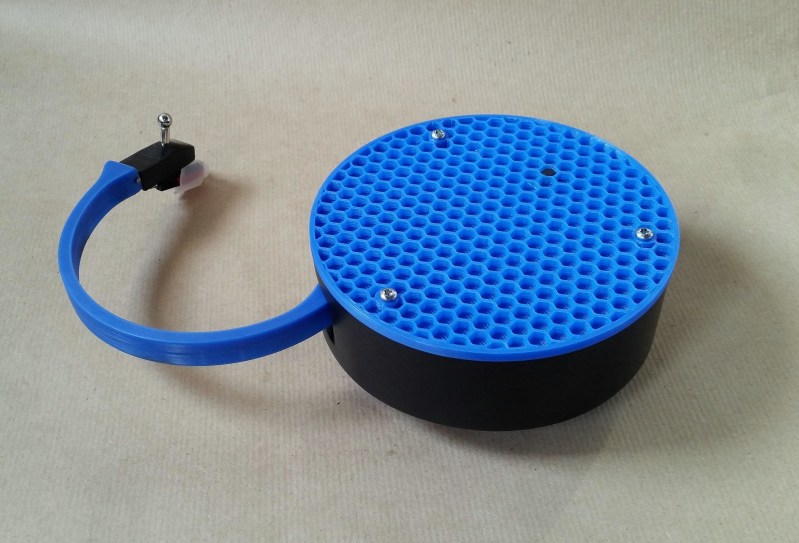
Not since the Audio-Technica Sound Burger, or Crosley’s semi-recent imitation, have we seen such a portable unit. But that’s not even the most notable part — this thing runs inversely to normal record players. Translation: the record stands still while the the player spins, and it sends the audio over Bluetooth to headphones or a speaker.
Inside this portable player is an Arduino Nano driving a 5 VDC motor with a worm gear box. There really isn’t too much more to this build — mostly power, a needle cartridge, and a Bluetooth audio transmitter. There’s a TTP223 touch module on the lid that allows [JGJMatt] to turn it off with the wave of a hand.
[JGJMatt] says this is a prototype/work-in-progress, and welcomes input from the community. Right now the drive system is good and the Bluetooth is stable and able, but the tone arm has some room for improvement — in tests, it only played a small section of the record and skidded and skittered across the innermost and outermost parts. Now, [JGJMatt] is trying two-part arm approach where the first bit extends and locks into position, and then a second arm extending from there and moves around freely.
Commercial record players can do more than just play records. If you’ve got an old one that isn’t even good enough for a thrift store copy of a Starship record, you could turn it into a pottery wheel or a guitar tremolo.
What an incredible journey the Arduino concept has been. Remember when we proclaimed that The Arduino is Here To Stay after they sold 10 thousand units? Well, now they’ve sold over 10 million, and they want to celebrate. They are announcing the Arduino Uno Mini Limited Edition. A pint sized nod to the ubiquitous Arduino […]
Over on the Spectrum web site, [Dale] — a relatively new ham radio operator — talks about his system for sending text messaging over VHF radios called HamMessenger. Of course, hams send messages all the time using a variety of protocols, but [Dale] wanted a self-contained and portable unit with a keyboard, screen, and a GPS receiver. So he built one. You can find his work on GitHub.
At the heart of the project is MicroAPRS, an Arduino firmware for packet radio. Instead of using a bigger computer, he decided to dedicate another Arduino to do everything but the modem function.
You can probably figure out the rest. A $10 GPS, a battery pack, a charge controller, and a few user interface parts like an OLED screen and a keyboard. In addition, there’s an SD card to store messages.
Of course, we couldn’t help but notice that our cell phone has a keyboard, screen, GPS, and storage. We might have been tempted to work out a way to connect the radio to it by Bluetooth. But we have to admit the little HamMessenger setup is cool-looking and probably lasts longer on a charge than our phone, too.


