Posts with «arduino» label

Arduino Activated Automotive Aerodynamic Apparatus is… (Spoiler Alert!)

Sometimes a great hack is great for no other reason than that it’s fun, and [Michael Rechtin]’s DIY Active Aero Spoiler and Air Brake certainly qualifies as a fun hack. This is a mod designed to live in a world where looks are everything, stickers add horsepower, and a good sound system is more important than good wheel alignment. Why is that? Because like the switch that exists only to activate the mechanism that turns it off, the DIY Active Aero Spoiler and Air Brake seen below is almost completely useless. So to understand its allure, we must understand its inspiration.

For a few decades now, luxury sports car manufacturers have been adding active aerodynamic components to their vehicles. For example, several Porsche models feature adaptive spoilers that adjust to driving conditions. Super cars such as the Bugatti Veyron have spoilers that flip up at high angles during braking to increase drag and reduce braking distance. All of these features are sadly missing from the average two or four door family-car-turned-wannabe-track-fiend. Until now!

[Michael] has created a new active spoiler for every mall-bound muffler-challenged hand me down. The build starts with a CNC cut foam wing which is covered with fiberglass, Bondo (an automotive necessity) and some faux carbon fiber for that go-fast feel. An Arduino, IMU, two servos, and a battery pack detect deceleration and automatically increase the spoiler angle just like the big boys, but without needing any integration into the vehicles systems. Or bolts, for that matter.

It’s unlikely that the braking force is enough to slow down the vehicle though, given that it’s not enough to pop the suction cups holding it to the trunk lid. But does it have the “wow” factor that it was designed to induce? Spoiler Alert: It does!

As it turns out, this isn’t the first adjustable spoiler featured here at Hackaday, and this adjustable spoiler on a car that’s made for actual racing is quite interesting.

Thanks to [Zane] for the tip on this project!

Meowing Box Will Befuddle Your Friends

If you don’t own a cat, hearing the sound of one meowing from somewhere in the house probably comes as quite a shock. The Cat Prank box built by [Reuben] promises to deliver such hilarity with aplomb. 

The idea is simple: hide the Cat Prank box in a cupboard or other space in a friend’s house, and it will meow from its secret location. When found, either the light sensor or motion sensor will trigger the yowling of an angry feline, with hopefully startling effects.

An Arduino Mini is the brains of the operation, paired with an XY-V17B sound module which plays the required animal wailings. There’s also a 433 MHz radio module that lets the prankster trigger meowing via remote control.

Code is available for those wishing to build their own. We’d love to see a mod with a time delay built in, so the device could be hidden and left to start meowing at some later date when the prankster is far away.

Similar work has graced these pages before, like the devilishly fiendish OpenKobold design. Just make sure your friends are receptive to such jokes before you go ahead and invest time and hardware in the prank!

Hack a Day 30 Jan 06:00

Robotic Xylophone Makes Music with MIDI Magic

The MIDI format has long been used to create some banging electronic music, so it’s refreshing to see how [John P. Miller] applied the standard in his decidedly analog self-playing robotic xylophone.

Framed inside a fetching Red Oak enclosure, the 25-key instrument uses individual solenoids for each key, meaning that it has no problem striking multiple bars simultaneously. This extra fidelity really helps in reproducing the familiar melodies via the MIDI format. The tracks themselves can be loaded onto the device via SD card, and selected for playback with character LCD and rotary knob.

The software transposes the full MIDI music spectrum of a particular track into a 25-note version compatible with the xylophone. Considering that a piano typically has 88 keys, some musical concessions are needed to produce a recognizable playback, but overall it’s an enjoyable musical experience.

Perhaps most remarkable about this project is the documentation. If you want to build your own, everything you need to know is available online, and the no-solder approach makes this project very accessible. Most of the write-up happened some years ago, and we’re really interested to see what improvements have been made since.

The robotic xylophone is reminiscent of these automatic tubular bells from some time ago. These musical hacks can be particularly inspiring, and we can’t wait to see more.

[Thanks Assad Ebrahim for the great tip.]

Arduino Meets Quantum Computer

Quantum computers aren’t quite ready for the home lab, but since there are ways to connect to some over the Internet, you can experiment with them more easily than you might think. [Norbert] decided to interface a giant quantum computer to an ordinary Arduino. Why? Well, that isn’t necessarily clear, but then again, why not? He explains basic quantum computing and shows his setup in the video below.

Using the IBM quantum computer and the open source Qiskit makes it relatively easy, with the Python code he’s using on the PC acting as a link between the Arduino and the IBM computer. Of course, you can also use simulation instead of using the real hardware, and for such a simple project it probably doesn’t matter.

Granted, the demo is pretty trivial, lighting an LED with the state of qubit. But the technique might be useful if you wanted to, say, gather information from the real world into a quantum computer. You have to start somewhere.

We’ve looked at quantum computers before. They tell us it is the next big thing, so we want to be prepared. Qiskit is one of several options available today to make it easier.

I2C To The Max With ATtiny

The Arudino is a powerful platform for interfacing with the real world, but it isn’t without limits. One of those hard limits, even for the Arduino MEGA, is a finite number of pins that the microcontroller can use to interface with the real world. If you’re looking to extend the platform’s reach in one of your own projects, though, there are a couple of options available. This project from [Bill] shows us one of those options by using the ATtiny85 to offload some of an Arduino’s tasks using I2C.

I2C has been around since the early 80s as a way for microcontrollers to communicate with each other using a minimum of hardware. All that is needed is to connect the I2C pins of the microcontrollers and provide each with power. This project uses an Arduino as the controller and an arbitrary number of smaller ATtiny85 microcontrollers as targets. Communicating with the smaller device allows the Arduino to focus on more processor-intensive tasks while giving the simpler tasks to the ATtiny. It also greatly simplifies wiring for projects that may be distributed across a distance. [Bill] also standardizes the build with a custom dev board for the ATtiny that can also double as a shield for the Arduino, allowing him to easily expand and modify his projects without too much extra soldering.

Using I2C might not be the most novel of innovations, but making it easy to use is certainly a valuable tool to add to the toolbox when limited on GPIO or by other physical constraints. To that end, [Bill] also includes code for an example project that simplifies the setup of one of these devices on the software end as well. If you’re looking for some examples for what to do with I2C, take a look at this thermometer that communicates with I2C or this project which uses multiple sensors daisy-chained together.

Arduino IDE Creates Bootable x86 Floppy Disks

Arguably the biggest advantage of the Arduino ecosystem is how easy it is to get your code running. Type a few lines into the IDE, hit the button, and in a few seconds you’re seeing an LED blink or some text get echoed back over the serial port. But what if that same ease of use didn’t have to be limited to microcontrollers? What if you could use the Arduino IDE to create computer software?

That’s exactly what boot2duino, a project developed by [Jean THOMAS] hopes to accomplish. As you might have guessed from the name, the code you write in the Arduino is turned into a bootable floppy disk image that you can stick into an old PC. After a few seconds of beeping and grinding your “Hello World” should pop up on the monitor, and you’ve got yourself the world’s biggest Arduino.

A minimal x86 Arduino sketch.

Now to be clear, this isn’t some kind of minimal Linux environment that boots up and runs a compiled C program. [Jean] has created an Arduino core that provides basic functionality on x86 hardware. Your code has full control over the computer, and there’s no operating system overhead to contend with. As demonstrated in a series of videos, programs written with boot2duino can display text, read from the keyboard, and play tones over the PC’s speaker.

The documentation for boot2duino says the project serves no practical purpose, but we’re not so sure. While the feature set is minimal, the low overhead means you could theoretically press truly ancient PCs into service. There’s certainly an appeal to being able to write your code on a modern OS and effortlessly deploy it on a retrocomputer, from somewhat modernized versions of early computer games to more practical applications. If any readers end up exploring this concept a bit further, be sure to let us know how it goes.

PsyLink An Open Source Neural Interface For Non-Invasive EMG

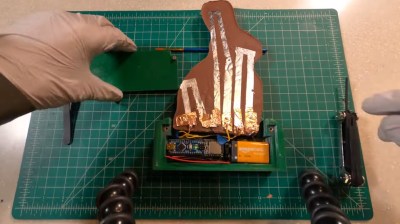
We don’t see many EMG (electromyography) projects, despite how cool the applications can be. This may be because of technical difficulties with seeing the tiny muscular electrical signals amongst the noise, it could be the difficulty of interpreting any signal you do find. Regardless, [hut] has been striving forwards with a stream of prototypes, culminating in the aptly named ‘Prototype 8’

The current prototype uses a main power board hosting an Arduino Nano 33 BLE Sense, as well as a boost converter to pump up the AAA battery to provide 5 volts for the Arduino and a selection of connected EMG amplifier units. The EMG sensor is based around the INA128 instrumentation amplifier, in a pretty straightforward configuration. The EMG samples along with data from the IMU on the Nano 33 BLE Sense, are passed along to a connected PC via Bluetooth, running the PsyLink software stack. This is based on Python, using the BLE-GATT library for BT comms, PynPut handing the PC input devices (to emit keyboard and mouse events) and tensorflow for the machine learning side of things. The idea is to use machine learning from the EMG data to associate with a specific user interface event (such as a keypress) and with a little training, be able to play games on the PC with just hand/arm gestures. IMU data are used to augment this, but in this demo, that’s not totally clear.

An earlier prototype of the PsyLink.

All hardware and software can be found on the project codeberg page, which did make us double-take as to why GnuRadio was being used, but thinking about it, it’s really good for signal processing and visualization. What a good idea!

Obviously there are many other use cases for such a EMG controlled input device, but who doesn’t want to play Mario Kart, you know, for science?

Checkout the demo video (embedded below) and you can see for yourself, just be aware that this is streaming from peertube, so the video might be a little choppy depending on your local peers. Finally, if Mastodon is your cup of tea, here’s the link for that. Earlier projects have attempted to dip into EMG before, like this Bioamp board from Upside Down Labs. Also we dug out an earlier tutorial on the subject by our own [Bil Herd.]

Servo Plotter Needs Nothing Exotic

Although the widespread use of 3D printers has made things like linear bearings and leadscrews more common, you still can’t run down to your local big-box hardware store and get them. However, you can get drawer slides and any hobby shop can sell you some RC servos. That and an Arduino can make a simple and easy plotter. Just ask [JimRD]. You can also watch it do its thing in the video below.

Of course, servos aren’t usually what you use in a plotter. But the slides convert the rotation of the servo into linear motion. One servo for X and one for Y is all you need. Another microservo lifts the pen up and down using a hinge you could also get from a hardware store.

Is it pretty? No. Does it do amazing artwork? No, again. But it is the kind of thing you could probably throw together from things you happen to have hanging around, especially if you are about to trash an old desk or cabinet with slides in it.

This would make a great rainy day project. We are suckers for simple plotter projects even though you could just mate a pen to your 3D printer or CNC machine. Those won’t fit your whiteboard, though.

Cool the Shop with a Thermal Battery-Based System

Having any kind of shop is pretty great, no matter how large it may be or where it’s located. If the shop is in an outbuilding, you get to make more noise. On the other hand, it will probably get pretty darn hot in the summer without some kind of cooling system, especially if you don’t have a window for a breeze (or a window A/C unit).

[Curtis in Seattle] built an awesome thermal battery-based cooling system for his shop. The battery part consists of five 55-gallon drums full of tap water that are connected in series and buried a foot underground, about two feet out from the wall. There are two radiators filled with water and strapped to 20″ box fans  — one inside the shop, which sends heat from the shop into the water, and another outside that transfers heat out of the water and into the cool night air. Most summer days, the 800-square-foot shop stays at a cool 71°F (21.7°C).

We love that the controls are housed in an old film projector. Inside there’s an Arduino Uno running the show and taking input from four DS18B20 one-wire temperature sensors for measuring indoor, outdoor, battery, and ground temperatures. There are four modes accessible through the LCD menu — idle, cool the shop, recharge mode, and a freeze mode in case the outside temperature plummets. Why didn’t [Curtis in Seattle] use anti-freeze? It’s too expensive, plus it doesn’t usually get that cold. (Although we hear that Seattle got several inches of snow for Christmas.) Check it out after the break.

If you can’t just go burying a bunch of 55-gallon drums in the ground where you live, consider building a swamp cooler out of LEGO.

Thanks for the tip, [Zane Atkins]!

Snap-Together Macropad Does It Without Solder

Maybe we’re biased, but we think everyone has a use for a macropad. It’s just a matter of time before a highly personalized set of speed controls starts to sound like a great time-saving device to have around.

Trouble is, macropads are usually kind of expensive to buy outright, and not everyone feels comfortable building keyboards. Okay, so what if you didn’t even have to solder anything? That’s the idea behind [Jan Lunge]’s hand-wired macropad.

You will still want to open a window for ventilation if you build this one, because this macropad requires a lot of 3D printing. What it doesn’t require is glue or screws, because everything snaps together.

Of course, the star of this build is [Jan]’s hot swap socket design. We especially love the little clip that holds the column wires in place while also providing a spacer between those and the row wires. Everything is connected up to a Pro Micro with non-insulated wire and held in place with bends at the ends and the magic of tension. Be sure to check out the build video after the break.

Thirsty for more than a six pack of switches? This design is easy to scale up until you run out of microcontroller inputs. At that point, you might want to add screens to keep track of all your macros.

Thanks for the tip, [BaldPower]!