Strumbot: The Guitar that Strums Itself
[Clare] isn’t the most musically inclined person, but she can strum a guitar. Thanks to a little help from an Arduino, she doesn’t even have to do that.
She built the strumbot, which handles the strumming hand duties of playing the guitar. While [Claire] does believe in her strumbot, she didn’t want to drill holes in her guitar, so hot glue and double-sided foam tape were the order of the day.
The business end of the strumbot is a micro servo. The servo moves two chopsticks and draws the pick across the strings. The tiny servo surprisingly does a great job getting the strings ringing. The only downside is the noise from the plastic gears when it’s really rocking out.
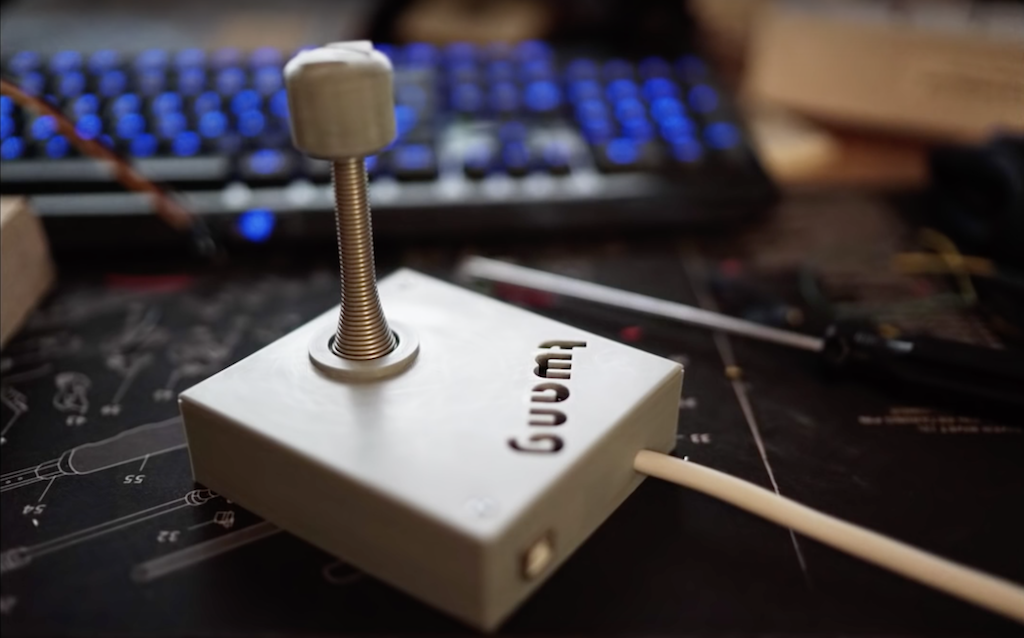
Strumbot’s user interface is a 3D-printed case with three buttons and three LEDs. Each button activates a different strum pattern in the Arduino’s programming. The LEDs indicate the currently active pattern. Everything is powered by a USB power pack, making this a self-contained hack.
[Clare] was able to code up some complex strum patterns, but the strumbot is still a bit limited in that it only holds three patterns. It’s good enough for her rendition of “Call Me Maybe”, which you can see in the video after the break. Sure, this is a simple project, not nearly as complex as some of the robotic guitar mods we’ve seen in the past. Still, it’s just the ticket for a fun evening or weekend project – especially if you’re introducing the Arduino to young coders. Music, hacking, and modding – what more could you ask for?


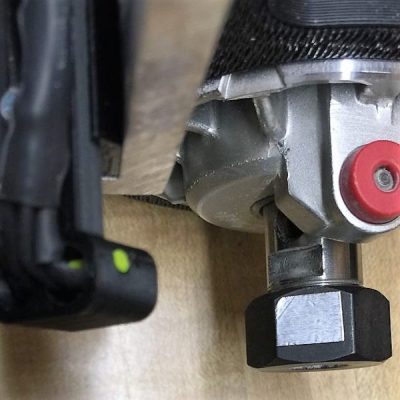 The CNC router in question is the popular Sienci, and the 3D-printed brackets for the photodiode and LED are somewhat specific for that machine. But [tmbarbour] has included STL files in his exhaustively detailed write-up, so modifying them to fit another machine should be easy. The sensor hangs down just far enough to watch a reflector on one of the flats of the collet nut; we’d worry about the reflector surviving tool changes, but it’s just a piece of shiny tape that’s easily replaced. The sensor feeds into a DIO pin on a Nano, and a small OLED display shows a digital readout along with an analog gauge. The display update speed is decent — not too laggy. Impressive build overall, and we like the idea of using a piece of PLA filament as a rivet to hold the diodes into the sensor arm.
 A delightful version of a clever one-dimensional game has been made by [Critters] which he calls