Posts with «arduino mega» label

The Weather Followers randomizes your digital experience

As our lives become more and more automated, we tend to rely on computers and unseen algorithms to “protect” us from unapproved experiences. In order to illustrate this concept, and hopefully introduce serendipitous events to our digital lives, David Columbini has come up with an installation that feeds information to users via a web app, available only when it’s on display.

Instead of implementing a carefully designed algorithm, what users experience is based on constantly evolving local weather data sensed by a physical machine equipped with an Arduino Mega, a Raspberry Pi, various sensors, and some other components.

“The Weather Followers” is comprised of four different instruments: a wind-driven messaging app, a pollution-distorted selfie tool, a music player based on the rhythm of rain, and even a device that erases your feed depending on the sun’s intensity!

The installation is comprised of two elements, the four weather instruments and the webapp. Users are invited to connect to the weather machine through the webapp and choosing between one of the four weather instruments: Windy encounters (when your digital social life follows the wind), Polluted Selfie (when your digital individual life follows the pollution), Drizzly Rhythms (when your digital audio life follows the rain) and finally Sun(e)rase (when your digital overwhelming life follows the sun).

More details on the project can be found here. If you want to see another weather/digital world combination by Columbini, be sure to check out this balloon messaging system!

Desktop Robot Head and Arm

Primary image

What does it do?

Desktop Robot

Hi Everyone. Its been a long time since I last posted a robot project on here but I wanted to share my latest project with you all. I have always enjoyed making various types of robot but I have a particular soft spot for desktop robots. I like the idea of a little robot pal sat next to me on the desk that I can develop when I get the spare time.

Cost to build

Embedded video

Finished project

Number

Time to build

Type

URL to more information

Weight

read more

SKELLY the Skeleton Robot

While it might seem like a long time away to most people, if you’re looking to make an amazing automated display for Halloween, it’s time to start planning! One idea would be an automated skeleton robot like SKELLY.

This particular robot was built using an Arduino Mega, a Cytron PS2 Shield, a modified sensor shield, and a wireless PS2 controller. SKELLY is equipped with a total of eight servos: six for bending his shoulders, elbows and wrists, one for running his mouth, and another for turning his head. There is also a pair of LEDs for eyes, and a small motor in his head with a counterweight that allows him to shake.

SKELLY is programmed using the Visuino visual programming environment. As seen in the videos below, the robot–which is the author’s first–is quite nimble, waving and moving along with an automatic piano!

Motorgan is an electromagnetic organ

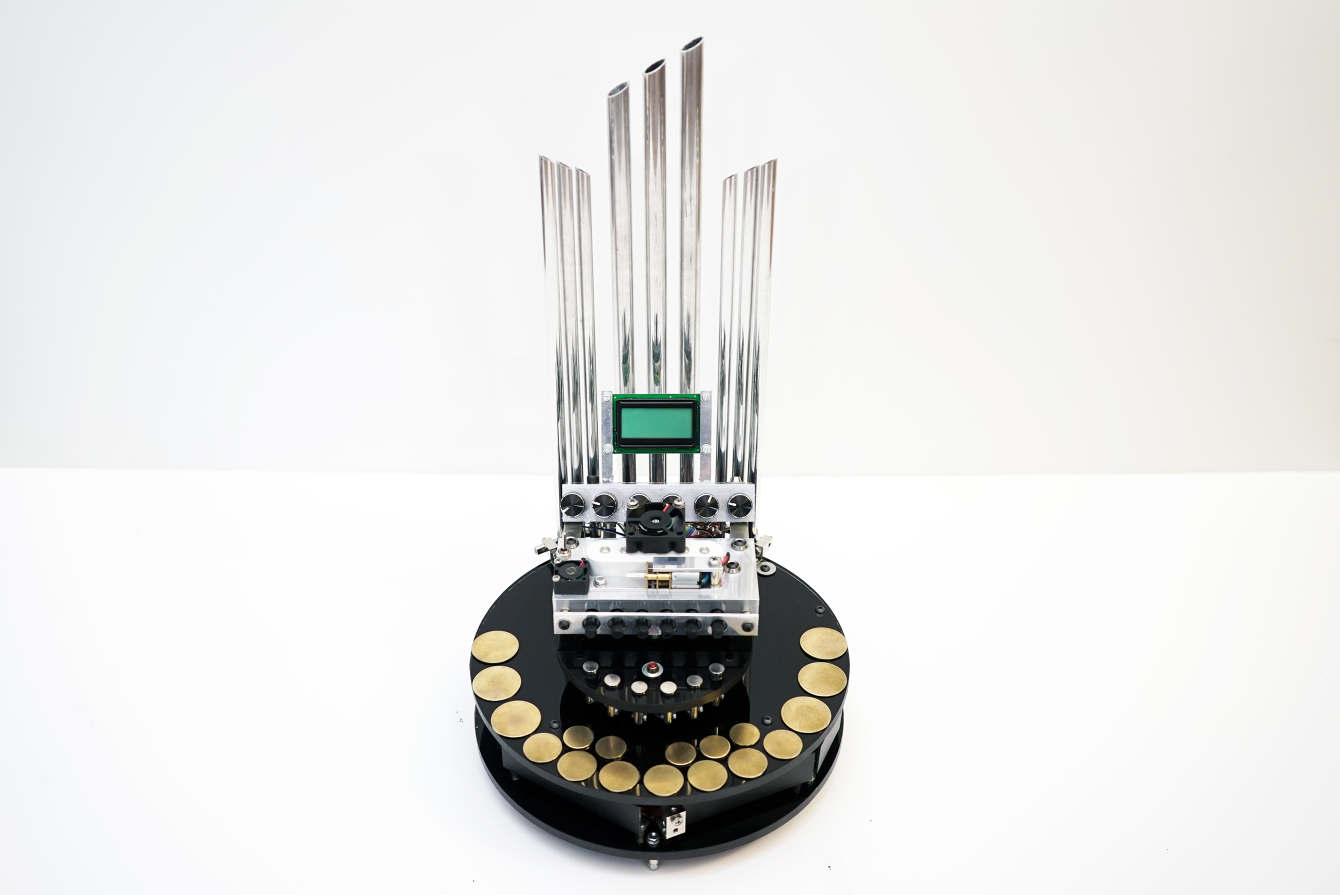
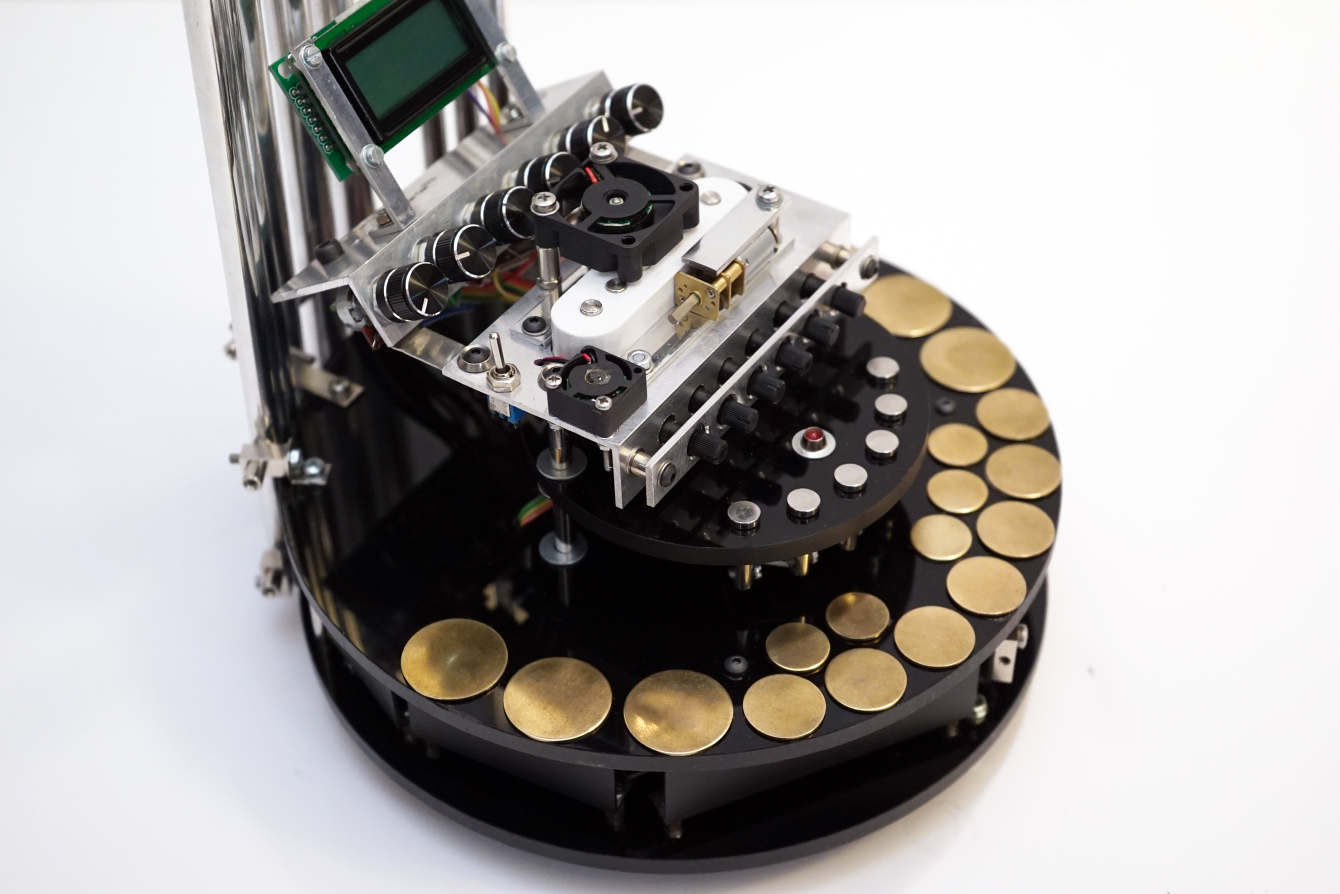
What do you get when you combine three small motors with a guitar pickup and a touch keypad? That would be the Motorgan by Moscow-based media artist Dmitry Morozov (aka ::vtol::). The result is a unique Arduino Mega-controlled instrument that looks and sounds like he somehow combined a V8 engine with a pipe organ.

The electromagnetic/electromechanical organ uses two differently sized PC cooling fans, as well as a gear motor to produce various sounds. A separate keypad is used for each motor, and each of the 24 keys can be tuned with a potentiometer, which reportedly allows one to “make any kind of music.”

The speed of each motor is controlled by voltage changes via touch keyboard with 24 keys. Keyboard is split into three parts (registers) for each motor, so it’s possible to play chords/polyphonic lines by taking one note from each register. Electromagnetic fields produced by motors are picked up with a single coil guitar pickup.

As you might suspect, it’s not exactly an easy instrument to play, but the results are certainly stunning, or perhaps you might even say “shocking.” Be sure to check out ::vtol::’s latest project in the video below!

Arduino Blog 22 Aug 20:22

The GuitarBot will strum you a song

While many Makers have musical skill, others attempt to compensate for their lack of it by producing automatic instruments that play themselves. One such attempt started in 2015 as a collaborative project between three University of Delaware professors as part of an initiative known as “Artgineering.” This was meant to “create a public spectacle… to demonstrate that engineering and art can work together harmoniously.”

Although many would consider engineering to be an art in itself, if you’d like to create your own robotic band, this Instructables write-up for the GuitarBot is a great place to start.

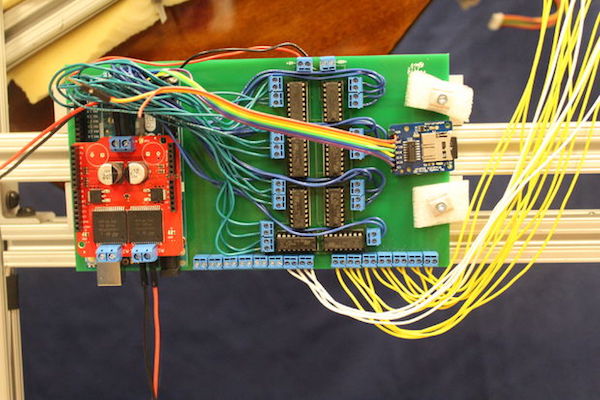
The guitar-playing robot is comprised of three major components: the brains, a strummer, and a chord mechanism. An Arduino Mega, a specially-ordered PCB and several shields are used for control, and a series of solenoids press down frets as needed. Finally, strumming is handled by a pick that is pulled by a DC motor and belt assembly, all of which is held up by an aluminum frame.

Physically mix digital colors with Colorwise

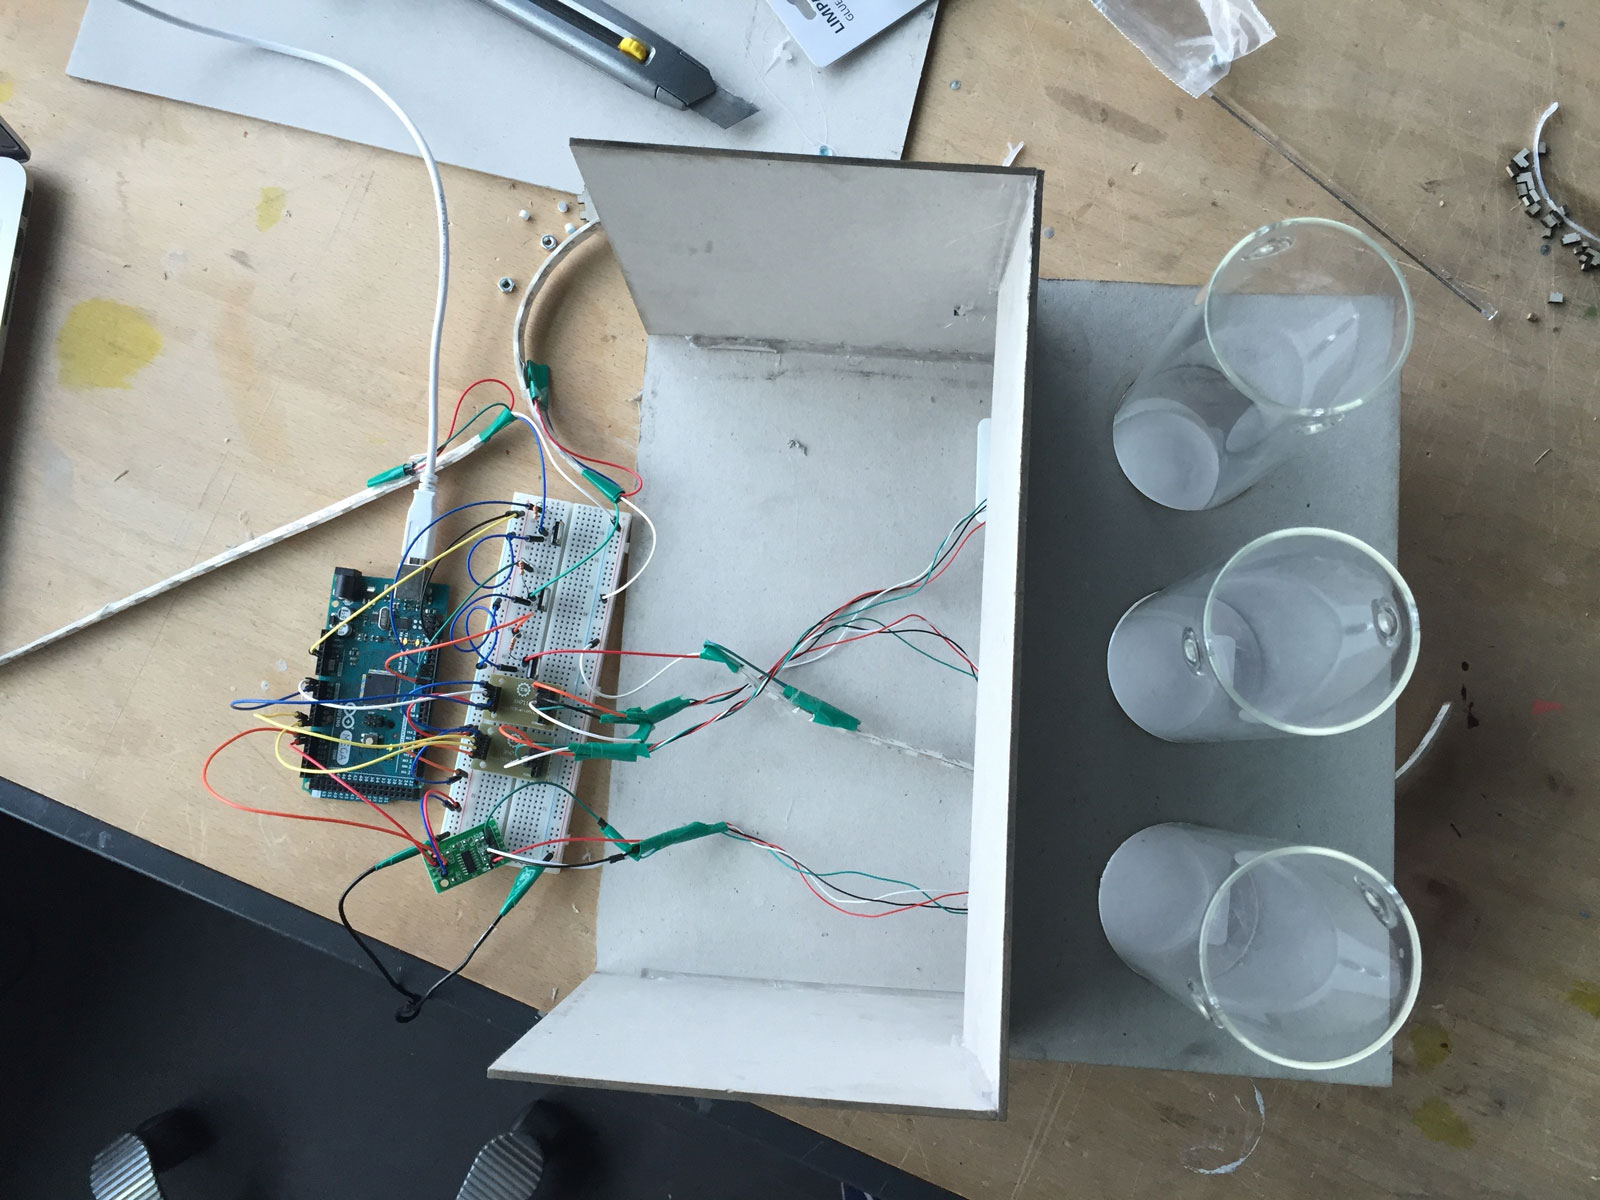
As seen here, mixing colors in real life is simple enough to understand, if difficult to perfect. With red, green and blue, any color in the rainbow can be produced, and the same can be done virtually using these digital RGB components. To help make color theory easier to grasp, Justin Daneman and Tore Knudsen developed a tangible interface that employs an Arduino to detect the fill levels of three cylinders, which represent red, green, and blue.

The intensity of each color is increased by pouring more water into the corresponding container, and decreased by removing it with a syringe. In one mode, users can explore how RGB colors create and affect a digital image on a computer screen, which in this case is Leonid Afremov’s painting “Misty Mood.” A second Color Challenge mode places a random color onscreen—or even in another glass—and participants try to match it by correctly proportioning the three liquid containers.

Colorwise is a physical game and exploration concept that aims to create awarness about digital color theory. More spiecifically, the RGB color system. Through a tangible interface of three cylinders, you mix different combinations of red, green and blue. This is done with water which works as a metaphor for digital data. By rearranging the water, a feedback of aesthetic visual and audio is experienced.

You can read more about Colorwise on its page here, and see a demo of it below!

An Arduino-powered backlit Clemson Tiger Paw

Most people support their school or favorite sports team by buying a shirt or tuning into games. Jacob Thompson, however, took things one step further and created his own Arduino-powered, backlit Clemson Tiger Paw.

Thompson’s “WallPaw,” as he calls it, uses an Arduino Uno to receive signals from an infrared remote and to pick up sounds with a small microphone. This information is passed on to an Arduino Mega, which controls a five-meter-long strip of WS2812 LEDs to provide lighting effects.

He notes that it would be possible to use only one Arduino board for everything, but patterned his code after this tutorial that included two. The paw itself is cut out of wood and clear acrylic, allowing the lights underneath to shine through nicely.

You can see the build in action below and find more details on Thompson’s website here.

Create an interactive laser sheet generator with Arduino

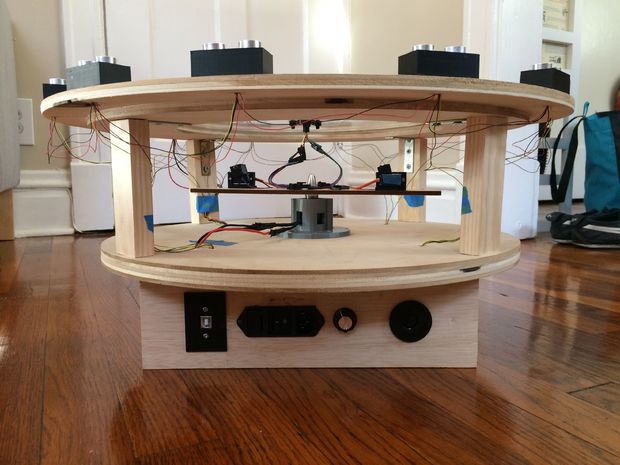
What’s better than a laser? How about two rapidly rotating lasers, attached to servo motors and controlled by an Arduino Mega? That’s exactly what Jon Bumstead made with his “Interactive Laser Sheet Generator.”

In addition to controlling the lasers, his device can sense hand motion on top of it using an array of 12 ultrasonic sensors, and can even coordinate music through a built-in MIDI output.

As seen in the demonstration video, Bumstead’s project–which was constructed with the help of a CNC router–looks like a cross between a coffee table and a test fixture for a space vehicle. When activated, a brushless motor spins the two lasers at a high speed, while the Mega controls the laser angles via two servos, creating a unique vortex-like light show!

I included distance sensors in the device so that the laser sheets could be manipulated by moving your hand towards them. As the person interacts with the sensors, the device also plays music through a MIDI output. It incorporates ideas from laser harps, laser vortexes, and POV displays. The instrument is controlled with an Arduino Mega that takes in the inputs of ultrasonic sensors and outputs the type of laser sheet formed and music generated. Due to the many degrees of freedom of the spinning lasers, there are tons of different laser sheet patterns that can be created.

You can find more details on the laser sheet generator on Instructables.

Search for coins and jewelry with this DIY metal detector

While using a metal detector to find valuable jewelry, and less valuable aluminum cans, can be interesting, the more accurately you can pinpoint the “treasure,” the easier it is. For excellent accuracy while maintaining a wide sensing field, Maker “TechKiwiGadgets” built a detector with not one, but four sets of sensing coils, all controlled using an Arduino Mega.

The device generates and senses a magnetic pulse from each set of coils, which is modified if there is a metallic object present. In search mode, the four signals are combined into a single display, and once an object is located, the four sensors can be shown in a split-screen. You can then dig where, and only where, it’s needed, minimizing work and your environmental impact!

Want to create your own? Check out TechKiwiGadgets’ Instructables page for more details and see a demo of it below!