Posts with «toy» label

DIY Hot Wheels Drag Race Timer

[Apachexmd] wanted to do something fun for his three-year-old son’s birthday party. Knowing how cool race cars are, he opted to build his own Hot Wheels drag race timer. He didn’t take the easy way out either. He put both his electronics and 3D printing skills to the test with this project.

The system has two main components. First, there’s the starting gate. The cars all have to leave the gate at the same time for a fair race, so [Apachexmd] needed a way to make this electronically controlled. His solution was to use a servo connected to a hinge. The hinge has four machine screws, one for each car. When the servo is rotated in one direction, the hinge pushes the screws out through holes in the track. This keeps the cars from moving on the downward slope. When the start button is pressed, the screws are pulled back and the cars are free to let gravity take over.

The second component is the finish line. Underneath the track are four laser diodes. These shine upwards through holes drilled into the track. Four phototransistors are mounted up above. These act as sensors to detect when the laser beam is broken by a car. It works similarly to a laser trip wire alarm system. The sensors are aimed downwards and covered in black tape to block out extra light noise.

Also above the track are eight 7-segment displays; two for each car. The system is able to keep track of the order in which the cars cross the finish line. When the race ends, it displays which place each car came in above the corresponding track. The system also keeps track of the winning car’s time in seconds and displays this on the display as well.

The system runs on an Arduino and is built almost exclusively out of custom designed 3D printed components. Since all of the components are designed to fit perfectly, the end result is a very slick race timer. Maybe next [Apachexmd] can add in a radar gun to clock top speed. Check out the video below to see it in action.


Filed under: Arduino Hacks, toy hacks

The Lightgame Project: A Multiplayer Arduino Game

Summer is upon us. The Lightgame Project is a multiplayer reaction time based game built around the Arduino. It’s a perfect rainy day project for those restless kids (and adults!). Designed by two undergraduate students [Efstathios] and [Thodoris] for a semester long project, all the hard work has already been done for you.

There are tons of reasons we love games that you can build yourself. For one, it’s an amazing way to get children interested in hobby electronics, making, and hacking. Especially when they can play the game with (and show off to) their friends. Another reason is that it is a perfect way to share your project with friends and family, showcasing what you have been learning. The game is based on your reaction time and whether or not you press your button when another players color is shown. The project is built around two Arduinos connected via I2C. The master handles the mechanics of the game, while the slave handles the TFT LCD and playing music through a buzzer.

I2C is a great communication protocol to be familiar with and this is a great project to give it a try. [Efstathios] and [Thodoris] did a great job writing up their post, plus they included all the code and schematics needed to build your own. It would be great to see more university professors foster open source hardware and software with their students. A special thanks goes out to [Dr. Dasygenis] for submitting his student’s work to us!


Filed under: Arduino Hacks
Hack a Day 29 May 03:00

How to Control Your Cheap RC Car with a Computer

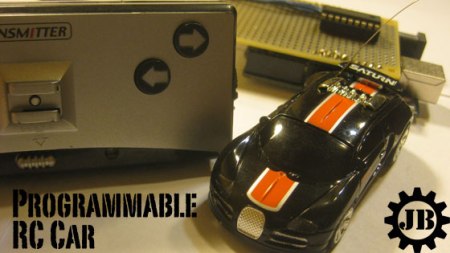
[Jon] wrote in to tell us about his programmable RC car, and the Howto guide that he’s made. According to him, this project can be constructed with $9 worth of parts plus an Arduino and a small toy car. So around $50 if you’re starting from scratch.

At it’s core, this project is about using the Arduino to allow your computer to send signals to the toy car. For this, [Jon] has included JAVA code that should be able to run on Mac, Linux, and PC operating systems. The Arduino code is also included.

Most small RC cars like those used in this project switch on at full speed or turn off, but this project allows the PC/Arduino to give the car PWM signals to control the speed. As pointed out in the video after the break, this can be a bit jerky at slow speed, but still a neat effect. A decent amount of soldering is required to get this project working, but it may be a good project especially if you have some of the parts already available!


Filed under: arduino hacks, toy hacks
Hack a Day 29 Aug 13:01
arduino  arduino hacks  c car  r  toy  toy hacks  

Lite Brites fade, but LED clocks are forever

Ahh, the Lite Brite.

What could be more fun than pushing dozens of little plastic pegs through a piece of black paper in order to create a pixelated, though colorful image? Well, I can think of quite a few things more engaging than that, and luckily so can [Lonnie Honeycutt] over at MeanPC.

While contemplating what to build with a pile of LEDs, his daughter came into the room with her portable Lite Brite. He thought that the pegs she was using looked awfully similar to the LEDs on his desk, so he did some test fitting and was surprised to see that they fit almost perfectly.

[Lonnie] thought that the toy would make an excellent clock, and his daughter happily agreed to let Dad do some tinkering. A few hours, an Arduino, and some Charlieplexing later, he had a nice looking clock that his kids were sure to enjoy.

If you’re interested in seeing more about how constructed, be sure to check out his YouTube channel and Instructable, where he happily provides all of the build details.


Filed under: arduino hacks, led hacks, toy hacks

Babel Fish Language Toy


Fans of Douglas Adams will no doubt catch the reference to The Hitchhiker’s Guide to the Galaxy in the title of Becky Stern’s latest project, The Babel Fish Language Toy. This sound- and RFID-enabled Arduino project with a crafty enclosure helps you learn foreign languages with RFID flash cards. When you bring a flash card near the fish’s tongue, you’ll hear the pronunciation of the word, which comes from .WAV files that you pre-load onto the SD card. And naturally, a full how-to writeup and video will help you along the way should you decide to make your own. Xie xie Becky!


Filed under: Arduino, Education
MAKE » Arduino 04 Aug 14:00
arduino  education  fish  language  nfc  project  rfid  toy  

Sunny the RFID lion

Primary image

What does it do?

Reads RFID tags then plays .wav files, also uses a mic to hear loud nosies.

     This is a copy of the RFID bear on Make. I have however added a few new features in the code like a ram check, a random file player and a sound response. The random file player I adds another dimension to the character. If you would like to make you own it is very easy.

Cost to build

$130,00

Embedded video

Finished project

Complete

Number

Time to build

5 hours

Type

URL to more information

Weight

1200 grams

read more

Crayolascope hacks toys into foot-thick 3D display

Artist Blair Neal, as many other great creators have before him, turned to children's toys as the source of inspiration for his latest project. Crayolascope is a rudimentary 3D display hacked together from several Glow Books, a light-up play on a flip-book from the titular company. The installation, currently housed at the New York Hall of Science in Flushing, layers 12 of its component clear plastic sheets to create a roughly one-foot deep display that plays a simple pre-drawn animation. The whole thing is controlled by an Arduino Mega, that can either play back the neon scribbles at varying speeds (controlled by a knob built into the console) or scrub through frame by frame. Neal isn't quite done tweaking the Crayolascope either. As it stands he's limited to between 14 and 18 frames, before it becomes too difficult to see through the sheets. And it requires near total darkness for optimal operation. To see it in action check out the video after the break.

Continue reading Crayolascope hacks toys into foot-thick 3D display

Crayolascope hacks toys into foot-thick 3D display originally appeared on Engadget on Mon, 25 Jun 2012 16:59:00 EST. Please see our terms for use of feeds.

Permalink | Email this | Comments

Sphero goes modular, spins out for a drive (video)


Sphero's hooked up with a new whip, albeit a retro-fitted one. Skylar, a Junior Developer at Orbotix, modded an old RC car with an Arduino board, H-bridge and a few trackball parts, enabling the remote control ball to serve as its brain. Just in time too -- there's only so much fun you can have getting the little orb stuck behind the filing cabinets. Still, it's certainly a leap beyond purposing it to pull an iPhone-toting chariot.

Sean Buckley contributed to this post.

Sphero goes modular, spins out for a drive (video) originally appeared on Engadget on Mon, 19 Mar 2012 02:36:00 EST. Please see our terms for use of feeds.

Permalink | Email this | Comments

n/a
Let's Make Robots 01 Jan 00:00
315mhz  arduino  cabinet  furniture  jet  light  toy