Posts with «sparkfun» label

Magnetometer was not fried

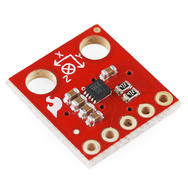
MAG3110 breakout board by Sparkfun

In Learning to Use I2C, I talked about the difficulty I’d been having getting the MAG3110 breakout board from Sparkfun to work, and my fears that I had burned it out by running it overnight at 5v (instead of the rated 3v).  I suspected that my problem was really a software problem, but debugging the software when I was afraid that the hardware was fried seemed like an exercise in futility.

I bought another of the breakout boards from Sparkfun (they’re only $15), and soldered on a header yesterday.  The code failed in almost exactly the same way with the new (presumed good) part as with the old (presumed fried) part, so I was convinced that the problem was indeed in the software.

I spent half of yesterday and most of this morning carefully rewriting the library of I2C interface code.  I was starting with example code from Sparkfun for the MMA8452Q accelerometer, which I had generalized to handle other I2C devices.

The library worked fine with the accelerometer, so I thought it was ok, but it did not work with the magnetometer. I added a lot of error checking (making sure that the microprocessor was in the expected state after each I2C operation), and found that things were not working as expected. The extra error checking made it much easier to diagnose the problems. I had to re-read the I2C documentation in the ATMega328 datasheet several times, to make sure that I had all the details right (I didn’t, of course). The documentation in that data sheet is better than several of the tutorials I’ve seen on line, and is both thorough and comprehensible in describing the interface.

I did not implement all features of the I2C  interface—in fact, I have a rather minimal implementation that uses polling rather than interrupts and assumes that the Arduino will always be the bus master.  Those assumptions are fine for most Arduino projects, which just use the I2C bus for talking to a handful of peripherals, but sometime in the future I may need to make a more complete set of code that can handle multiple masters, the Arduino as a slave device, and interrupts rather than polling and waiting for operations to finish.

Because I was more interested in simplicity and robustness than speed, I rewrote the code so that transactions were finished (and appropriate status checked) before functions returned.  With these changes I found that the STOP condition was not happening, despite being requested.  All other operations on the bus are checked with the TWINT bit  of the TWCR register and the upper bits of the TWSR register, but determining that STOP has completed requires checking the TSWTO bit of the TWCR register. The code I had started from just checked the TWINT bit for the other operations, and had a fixed timeout that was too short—it did no checking at all on the STOP state, just adding a fixed delay.

Once I got the STOP timing cleaned up (and earlier, making sure to send NAK when reading the last byte), everything worked fine.  The accelerometer code  had probably worked ok because there were enough delays after stops that the stops completed, even though I had not checked to make sure.  With the fixed code, even the magnetometer that I thought I had fried seems to work ok.

The interface for the students in the Robotics Club is fairly simple (much simpler than the standard “Wire” library):

// Read one register
uint8_t i2cReadRegister(uint8_t i2c_7bit_address, uint8_t address);
// Read num_to_read registers starting at address
void i2cReadRegisters(uint8_t i2c_7bit_address, uint8_t address, uint8_t num_to_read, uint8_t * dest);

// Write one register
void i2cWriteRegister(uint8_t i2c_7bit_address, uint8_t address, uint8_t data);
// Write num_to_write registers, starting at address
void i2cWriteRegisters(uint8_t i2c_7bit_address, uint8_t address, uint8_t num_to_write, const uint8_t *data);

I suppose I should check that there are no problems when I connect both devices to the same I2C bus, before handing this over to the students to use for their robot.

I should also put the i2c.h and i2c.cpp in some public place for others to use (perhaps on github? maybe on my web pages at work?). It is really a shame that WordPress.com does not permit code-like files as pages.

Related articles

Tagged: accelerometer, Arduino, i2c, magnetometer, robotics, SparkFun, SparkFun Electronics

Learning to use I2C

For the Santa Cruz Robotics Club, I’ve bought three sensors for their underwater ROV: a magnetometer, an accelerometer, and a pressure sensor.

Originally, we were going to an ADXL335 accelerometer (with a breakout board by Adafruit Industries) and an MPXHZ6250A pressure sensor (no magnetometer), for which I designed a small PC board, but once the specs for this year’s mission came out, we saw that they wanted us to determine compass headings for a “sunken ship”, so it seemed a natural thing to add a magnetometer to the hardware.  After looking at what was available, I chose the MAG3110 breakout board from Sparkfun, because it provided a triple-axis magnetometer for only $15.

The MAG3110 is an I2C interface, which means we need only 2 wires to hook it up (and the wires can be shared with other I2C devices).  If we are going to all the trouble of figuring out an I2C interface, I figured we might as well use it for the accelerometer as well, so I got a MMA8452Q breakout board from Sparkfun also.

I decided to do a simple test program for the I2C parts before handing them over to the robotics club, so that they could be sure they had working parts.  It was a good thing I did, because I spent more than an entire day trying to get the parts to work.  I finally gave up on the “Wire” library from the Arduino website, and tried using the i2c.h file from Sparkfun (example code linked to from the accelerometer web page).  I got that working and rewrote the library as a proper .h and .cpp file, so that it could be installed as a normal Arduino library, adding some of the utility calls that had been buried in the MMA8452 demo code.

The MMA8452Q code was working fine, so I tried using the same i2c library for the MAG3110 magnetometer.

I had gotten MAG3110 working with the Wire library, but running at 5v (I’d not noticed that it was a 3.3v part—rather, I thought I’d checked that it was a 5v part, but I was wrong).  I’d left it powered at 5v all night, and I think I burned it out, as it was quite warm in the morning.  Today, I can read and write the registers of the MAG3110, but the xyz values are not coming out reasonable at all—I frequently get the same values (like 0xF9F9)and 0x1DF9), independent of the orientation. If I read all the registers, a lot of them come out as 0xF9 or 0x1D.  Even the WHO_AM_I register (which should be 0xC4) often comes out 0x1D.  I seem to get intermittent correct values for registers, but mostly bogus values.

I’ll feel stupid if I order another part and it turns out to be a software bug, but I’m pretty sure the chip is fried.  But I guess it is time to do another Sparkfun order. (I owe them some business, after calling them for the replacement photointerrupter.)

Incidentally, I tried finding a usable pressure sensor with an I2C interface, but it doesn’t look like anyone is making them except for barometric pressure ranges for dry gases.  I suppose Freescale will eventually come out with a full range of I2C pressure sensors, but my guess is that will be a long time coming, as the automotive and industrial applications have a pretty long product design cycle (unlike consumer electronics, which is driving the barometric pressure sensors).


Tagged: accelerometer, Adafruit Industries, Arduino, magnetometer, robotics, SparkFun, SparkFun Electronics

Ethernet Arduinos (and Compatibles)

Also on the spreadsheet, three boards with built-in ethernet:
  • There's finally an official Arduino Ethernet ($60), complete with RJ45 port. It has an FTDI cable header for programming (no USB), a microSD card slot for storage, and there's an optional PoE daughter card.
  • SparkFun also released an Arduino-compatible board with ethernet, the Ethernet Pro ($55), but without the SD card slot. It's less cluttered than the official board, hopefully the price will come down as more people build projects around them.
  • Additionally, the Freetronics EtherTen ($70) includes a microSD slot and (mini) USB interface.
All of these are compatible with an Arduino (or Arduino-compatible) board with the ethernet shield ($40) on top, but I wonder: will shields fit on any of these without hitting the magjack? Or do they use taller female pin sockets? They're also equivalent to an Arduino hooked up to a Wiznet W5100, eg. with a WIZ811MJ module ($20!). Too bad Adafruit doesn't sell the ethernet module breakout shield anymore, but at least the design files are still available.

Call me cheap, but these all seem overpriced, being based around a $4 microcontroller! With a basic Arduino board at $20 and WIZ811MJ module at $20, why isn't the SparkFun Ethernet Pro $40 or $45?

More 'duinos on the Spreadsheet

I've continued to add Arduino-compatible boards to the spreadsheet, bringing the count to 119 boards. You can get there easily by remembering "allarduinos" and going to http://tinyurl.com/allarduinos or http://bit.ly/allarduinos.

Some recent additions to the spreadsheet: