Posts with «sparkfun electronics» label

Low-cost Arduino-compatible electronics kit

There is an Indiegogo campaign to sell a kit for learning electronics that seems to have better pricing than most of the similar kits I’ve seen: BE MAKER! KIT plus FREE lessons on electronics, from Zero to Internet of Things | Indiegogo.

The most popular product they are selling seems to be a $69 kit with a microprocessor board (a clone of the Arduino Leonardo); a “shield” with an LCD display driver, pushbuttons, microSD card reader, 2 servo connections, RGB LED strip driver, and Ethernet adapter; a bunch of useful electronics parts (including an LCD display for the shield and an RGB LED strip); “lessons” (which are probably just assembly instructions for different projects, but may be more tutorial) and a box to keep all the tiny parts in.

As Arduino and Arduino-compatible kits go, this one looks pretty good.  Forget about it for holiday gift-giving though, as they don’t expect to deliver until February 2014.  If you want something similar for this year, look at the somewhat more expensive kits from AdaFruit or SparkFun.


Filed under: Uncategorized Tagged: Adafruit Industries, Arduino, education, electronics, Indiegogo, SparkFun Electronics

Nerf gun prototype 1

The Santa Cruz Robotics Club met again today, for the first time in over a month.  The current project is not the underwater ROV (we’re all getting very tired of waterproofing problems), but an automated Nerf gun.

The club members came up with some very ambitious plans for the Nerf gun (which included getting a Raspberry Pi and doing image processing to have a self-aiming gun), but I’m making them build quick-and-easy prototypes to try out their ideas one step at a time.  I don’t think I can get an Raspberry Pi this summer—the companies doing the distribution aren’t taking more orders (just expressions of interest) and they don’t expect to clear the current backlog until September at the soonest.  They are doing batches of 100,000 units, and that doesn’t seem to be enough to shrink the lead time—if anything, the lead time is growing.

So, giving up on image processing for this summer, there are still a lot of things to build.  For today’s four-hour meeting (which included a 1-hour trip to the hardware store and a fifteen-minute snack break), the goal was simply to test out the basic launcher concept: an air reservoir pressurized by a bike pump, a solenoid valve, and a barrel.

The first prototype. The air reservoir is about 18″ of 1-½” PVC pipe on the left, and the barrel is about 24″ of ½” PVC pipe on the right.

The biggest problem was that the valve has ¾” male pipe threads, but we wanted 1-½” PVC pipe for the reservoir (because we had a piece handy—we may build a bigger reservoir later) and ½” PVC pipe for the barrel (because Nerf darts just fit inside—probably Nerf guns were prototyped with PVC barrels).  Our hardware store run was to get threaded adapters to make things fit.We wanted everything to be joined with screw threads, so that we could disassemble the components and replace them or add elbows as needed.

Note that the ½” PVC pipe is also a good size for compressed-air paper “rockets”.  The term “rocket” is a misnomer here, as all the acceleration occurs while the rocket is on the launcher—it is modeled more like a gun than like a rocket. (But my soda-bottle rocket simulator can model these paper bullets also.)  It would probably best to have a shorter barrel for doing rocket launching—just the length of the rocket and no more, since the longer barrel results in more pressure loss with no gain in launch speed.

The bicycle valve glued into a ½” female-threaded end cap was one I’ve had for a long time, as part of a soda-bottle rocket launcher. I had two of them, and both failed in testing today (the Barge cement holding the valve stem in failed—we’ve now reglued them with a different cement), though we managed some testing before the failure.

The solenoid valve we used was the same model (sold by Sparkfun) as the one used for the vacuum bottle on the ROV.  It has ¾” male pipe threads on each side.  To make it air-tight we had to disassemble it and grease the rubber membrane thoroughly with vaseline or faucet grease, but we had done that months ago, so it did not need to be done today.  The valve only works in one direction, but the high-pressure side is clearly marked by a metal intake screen, so assembling it the right way around is easy.

I was not sure that the solenoid valve would work in this application. It is not the model of valve that the compressed-air “rocket” people have used—those valves cost about twice as much and have female threaded ends rather than male threaded ends. I think that the mechanism they use may open up a bigger channel for air or water than the cheap solenoid valve sold by Sparkfun.

My first concern was that I did not know whether the valve would open up wide enough and fast enough to let a blast of air through to get a clean launch.  Second, I did not know whether we could open and close the valve fast enough to retain pressure in the reservoir for doing multiple shots.

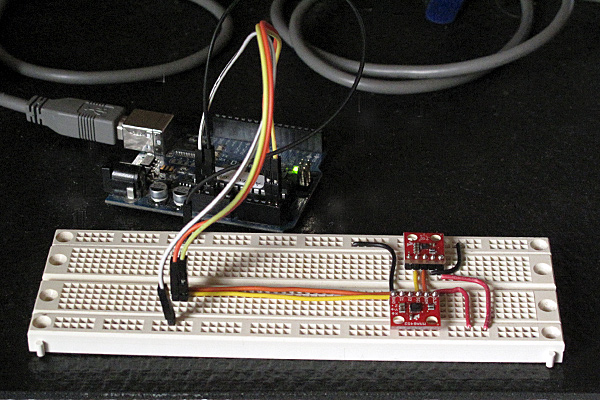
We controlled the solenoid valve with an Arduino and the Hexmotor motor-control board (which is really overkill for one solenoid—a single power transistor would be enough to interface the Arduino to a solenoid, but I did not have one handy).  My son wrote an Arduino program to allow us to experiment with the duration of the solenoid pulse.  If it were too short, the Nerf dart would not leave the barrel.  If it were too long, air pressure would be wasted.  He allowed for 100 µsec increments in pulse duration, under control from commands on the USB serial line.

Because the glue they used takes 24 hours to set properly, we only tested at low pressure today (20–30 psi).  At those pressures, a 16 msec pulse was not long enough for the dart to clear the barrel, but a 19.2 msec pulse was easily long enough. We were also able to launch a 14g paper “rocket” left over from Maker Faire, though it did not go as high as the approximately 1.6g “Nerf” darts (I think several of the foam darts we have a different brand). We would not have expected it to go as high, since it was only accelerated for its 11″ length, not the 24″ length of the barrel for the darts, and it weighed a lot more.

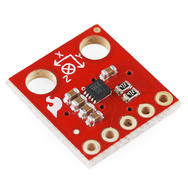
One thing I thought about was monitoring the air pressure in the reservoir electronically. I doubt that we’ll put a pressure sensor in the reservoir, though, as the sensors I have only go up to 250 kPa absolute (about 21 psi above atmospheric pressure—about as low as we could fire with).  Freescale makes a 145psi (1000 kPa) sensor, the MPX5999D, but it is a differential sensor without port tubes (so would be difficult to mount) and it costs $13.

Perhaps the other thing worth doing today is to analyze how fast the Nerf dart should be going as it leaves the barrel, and how high it should fly if we shoot it straight up.  The physics here is fairly simple, if we assume that opening the solenoid valves connects us to a constant-pressure source. (In practice, we saw about a 10psi or 70kPa drop in pressure after one shot. If the pressure is P, then the force on the dart is P*area.  The cross-sectional area of the foam dart is a little hard to measure, because of the squishiness of the foam, but the inside diameter of the barrel is 1.45cm, for a cross-sectional area of 1.65 cm^2. At 140 kPa (about 20 psi), the force on the dart would be 23 Newtons.  That force is applied for about 60 cm (the length of the barrel), for a total energy of about 14 Joules.

We can use the kinetic energy of the dart to get its speed (E = ½ m v2), so for 140 kPa, the dart should leave the barrel at about 130 m/s or 290 mph. I suspect that we are not getting anywhere near that speed, for several reasons, including leakage of air around the dart, limited speed of air moving through the valve, and friction of the dart in the barrel (mainly from the pressure wave in front of it, but also from rubbing on the sides of the barrel).

We can also use the kinetic energy of the dart to estimate how high it would fly (ignoring air resistance, which is obviously hugely important for a low density object like a foam dart). The potential energy of a mass at height h is , so the height it would go without air resistance is . For 14 Joules and 1.6 grams, that would be almost 900m. I think that 20m is a more reasonable estimate for the height the dart went, though I never could see it near the top of its trajectory.

I tried adding the specs for the Nerf dart and a 60cm barrel to my rocket simulator (to get a crude estimate of the effect of air drag), and for 140 kPa I got an estimated max speed of 132m/s and an estimated max height of 52.6m. I don’t know if that height is reasonable—certainly it is better than the no-air-resistance estimate. The 6.78 second estimated time of flight seems to be fairly reasonable, though we never timed it.

Doubling the pressure increases the maximum velocity by a factor of 1.414, but only increases the maximum height to 60.8 m, a 16% increase. Doubling the barrel length has about the same effect. Air drag is what determines the speed of the dart, and that is the least well-modeled part of my simulation.

On Thursday, when they club meets again, they’ll try experimenting with higher pressures, and see whether 17 or 18 msec pulses are long enough—the shorter the pulse the less air will be wasted, and the more shots they can make from the reservoir.  It may be necessary to design a bigger reservoir or add a compressor to the design, since they eventually want a fully automatic Nerf gun, not the one-shot muzzle-loader that they made as the prototype today.  They’ll also start designing a pan-tilt mechanism for the Nerf gun, probably prototyping it out of Lego Technic components.


Filed under: Robotics Tagged: Arduino, Nerf gun, nerf guns, physics, rocket, simulation, SparkFun Electronics

Sensor board for underwater ROV

Since I had bought the robotics club an I2C accelerometer and magnetometer, I decided to make a new PC board for them to mount the accelerometer, the magnetometer, and the pressure gauge on the same board.  I don’t have the SMD soldering skills to solder all the chips onto one board, and I already had breakout boards for the accelerometer and magnetometer from Sparkfun, so I decided just to put connectors for those breakout boards onto the back of the pressure sensor board.  (The back, because the pressure sensor on the front has to be stuck through a hole in the dry box and glued in place.

The new boards are tiny (1.05″ × 1.425″), so I decided to try BatchPCB (which has pricing by the square inch) rather than 4pcb.com (which has fixed pricing per board, up to a fairly large size).  The price from BatchPCB was $10 per order plus $2.50/square inch plus $0.90 for shipping, so ordering 3 copies of the board (though I only needed one), cost me $22.12, substantially less than a single board from 4pcb.com, which is $33 plus $17.30 shipping and handling per board (plus an extra $50 if your board has multiple boards on it).  The 4pcb price is lower if your board is bigger than about 15.76 square inches, so even my HexMotor boards (at 12.44 square inches) would be cheaper from BatchPCB.  If you get multiple boards from 4pcb.com on a single panel and cut them apart yourself, the breakeven point is about 35.76 square inches for a single design (so three HexMotor boards from a single 4pcb.com panel is cheaper than from BatchPCB). For multiple designs on a single panel, the 4pcb.com deal is better: for 3 different designs, a total of 27.04 square inches would make 4pcb.com the cheaper way to go.

If you want a copy of the board, you can order it from BatchPCB, or pick up the Eagle files from my web site and order copies from elsewhere.  I’ve put the HexMotor Eagle files on line also, but not put them on the BatchPCB site.  I should probably upload them there sometime.

Bottom line: BatchPCB is better for small numbers of tiny boards, but 4pcb.com is better for larger boards and multiple designs.

The BatchPCB orders came back quite quickly (12 days from order to delivery by mail), though I had been worried because their design-rule check, which they say takes minutes had taken about 8 hours.  The problem was that each check takes a few minutes, but they had hundreds in the queue over the weekend, and it took a full day to clear the queue.

I had less trouble soldering the pressure gauge this time (this was my second attempt at soldering surface mount devices).  You can see in the pictures above that the results are much cleaner than in my first attempt.

The robotics club has tested the pressure sensor on the new board (using their own code on the Arduino) and it seems to work ok,  have drilled the hole in the dry box for the port, and glued the sensor board in place using superglue.  It seems to be waterproof (at least down to 1 foot—we’ve not tested in deep water yet).

Related articles

Tagged: accelerometer, Arduino, BatchPCB, magnetometer, pressure sensor, Printed circuit board, ROV, SparkFun Electronics

Magnetometer and accelerometer read simultaneously

In Learning to Use I2C and Magnetometer not fried, I talked about interfacing the MAG3110 magnetometer and MQA8452Q accelerometer to an Arduino.  For both, I’m using breakout boards from Sparkfun Electronics.

I  checked today that there are no problems when I connect both devices to the same I2C bus.

The first test was very simple: I put both the breakout boards into a breadboard and wired them together, then tried running each of the programs I’d written for the chips separately. Result: no problems—worked first time.

I then tried merging the programs (cleaning up any naming conflicts) so that both could be run from the same code.  After a few typo fixes, this also worked fine

I think I’m now ready to hand over the software to the students to use for their robot.

I still need to put the i2c.h, i2c.cpp, and accel_magnet code in some public place for others to use (perhaps on github? maybe on my web pages at work?) [UPDATE 2012-jan-31: I have put the libraries and the sample code for the accelerometer and magnetometer at http://users.soe.ucsc.edu/~karplus/Arduino/]

One thing that is still missing is doing tilt correction for the compass heading.  Since the ROV is not expected to remain level (the accelerometer is intended to be used in a feedback loop to adjust the pitch, with anything from -90° to +90° being reasonable), getting a good compass heading requires rotating the magnetometer readings into the horizontal plane.  Only one of the students in the robotics club has had trigonometry or matrix math, so I’ll have to work with him to get him to figure out how to do the tilt correction. It may be simplest conceptually  to compute pitch and roll angles first, then rotate twice, rather than trying to do the whole tilt correction in one step (especially since the Arduino does not have matrix libraries).

Related articles

Tagged: accelerometer, Arduino, I²C, magnetometer, robotics, SparkFun, SparkFun Electronics

Magnetometer was not fried

MAG3110 breakout board by Sparkfun

In Learning to Use I2C, I talked about the difficulty I’d been having getting the MAG3110 breakout board from Sparkfun to work, and my fears that I had burned it out by running it overnight at 5v (instead of the rated 3v).  I suspected that my problem was really a software problem, but debugging the software when I was afraid that the hardware was fried seemed like an exercise in futility.

I bought another of the breakout boards from Sparkfun (they’re only $15), and soldered on a header yesterday.  The code failed in almost exactly the same way with the new (presumed good) part as with the old (presumed fried) part, so I was convinced that the problem was indeed in the software.

I spent half of yesterday and most of this morning carefully rewriting the library of I2C interface code.  I was starting with example code from Sparkfun for the MMA8452Q accelerometer, which I had generalized to handle other I2C devices.

The library worked fine with the accelerometer, so I thought it was ok, but it did not work with the magnetometer. I added a lot of error checking (making sure that the microprocessor was in the expected state after each I2C operation), and found that things were not working as expected. The extra error checking made it much easier to diagnose the problems. I had to re-read the I2C documentation in the ATMega328 datasheet several times, to make sure that I had all the details right (I didn’t, of course). The documentation in that data sheet is better than several of the tutorials I’ve seen on line, and is both thorough and comprehensible in describing the interface.

I did not implement all features of the I2C  interface—in fact, I have a rather minimal implementation that uses polling rather than interrupts and assumes that the Arduino will always be the bus master.  Those assumptions are fine for most Arduino projects, which just use the I2C bus for talking to a handful of peripherals, but sometime in the future I may need to make a more complete set of code that can handle multiple masters, the Arduino as a slave device, and interrupts rather than polling and waiting for operations to finish.

Because I was more interested in simplicity and robustness than speed, I rewrote the code so that transactions were finished (and appropriate status checked) before functions returned.  With these changes I found that the STOP condition was not happening, despite being requested.  All other operations on the bus are checked with the TWINT bit  of the TWCR register and the upper bits of the TWSR register, but determining that STOP has completed requires checking the TSWTO bit of the TWCR register. The code I had started from just checked the TWINT bit for the other operations, and had a fixed timeout that was too short—it did no checking at all on the STOP state, just adding a fixed delay.

Once I got the STOP timing cleaned up (and earlier, making sure to send NAK when reading the last byte), everything worked fine.  The accelerometer code  had probably worked ok because there were enough delays after stops that the stops completed, even though I had not checked to make sure.  With the fixed code, even the magnetometer that I thought I had fried seems to work ok.

The interface for the students in the Robotics Club is fairly simple (much simpler than the standard “Wire” library):

// Read one register
uint8_t i2cReadRegister(uint8_t i2c_7bit_address, uint8_t address);
// Read num_to_read registers starting at address
void i2cReadRegisters(uint8_t i2c_7bit_address, uint8_t address, uint8_t num_to_read, uint8_t * dest);

// Write one register
void i2cWriteRegister(uint8_t i2c_7bit_address, uint8_t address, uint8_t data);
// Write num_to_write registers, starting at address
void i2cWriteRegisters(uint8_t i2c_7bit_address, uint8_t address, uint8_t num_to_write, const uint8_t *data);

I suppose I should check that there are no problems when I connect both devices to the same I2C bus, before handing this over to the students to use for their robot.

I should also put the i2c.h and i2c.cpp in some public place for others to use (perhaps on github? maybe on my web pages at work?). It is really a shame that WordPress.com does not permit code-like files as pages.

Related articles

Tagged: accelerometer, Arduino, i2c, magnetometer, robotics, SparkFun, SparkFun Electronics

Learning to use I2C

For the Santa Cruz Robotics Club, I’ve bought three sensors for their underwater ROV: a magnetometer, an accelerometer, and a pressure sensor.

Originally, we were going to an ADXL335 accelerometer (with a breakout board by Adafruit Industries) and an MPXHZ6250A pressure sensor (no magnetometer), for which I designed a small PC board, but once the specs for this year’s mission came out, we saw that they wanted us to determine compass headings for a “sunken ship”, so it seemed a natural thing to add a magnetometer to the hardware.  After looking at what was available, I chose the MAG3110 breakout board from Sparkfun, because it provided a triple-axis magnetometer for only $15.

The MAG3110 is an I2C interface, which means we need only 2 wires to hook it up (and the wires can be shared with other I2C devices).  If we are going to all the trouble of figuring out an I2C interface, I figured we might as well use it for the accelerometer as well, so I got a MMA8452Q breakout board from Sparkfun also.

I decided to do a simple test program for the I2C parts before handing them over to the robotics club, so that they could be sure they had working parts.  It was a good thing I did, because I spent more than an entire day trying to get the parts to work.  I finally gave up on the “Wire” library from the Arduino website, and tried using the i2c.h file from Sparkfun (example code linked to from the accelerometer web page).  I got that working and rewrote the library as a proper .h and .cpp file, so that it could be installed as a normal Arduino library, adding some of the utility calls that had been buried in the MMA8452 demo code.

The MMA8452Q code was working fine, so I tried using the same i2c library for the MAG3110 magnetometer.

I had gotten MAG3110 working with the Wire library, but running at 5v (I’d not noticed that it was a 3.3v part—rather, I thought I’d checked that it was a 5v part, but I was wrong).  I’d left it powered at 5v all night, and I think I burned it out, as it was quite warm in the morning.  Today, I can read and write the registers of the MAG3110, but the xyz values are not coming out reasonable at all—I frequently get the same values (like 0xF9F9)and 0x1DF9), independent of the orientation. If I read all the registers, a lot of them come out as 0xF9 or 0x1D.  Even the WHO_AM_I register (which should be 0xC4) often comes out 0x1D.  I seem to get intermittent correct values for registers, but mostly bogus values.

I’ll feel stupid if I order another part and it turns out to be a software bug, but I’m pretty sure the chip is fried.  But I guess it is time to do another Sparkfun order. (I owe them some business, after calling them for the replacement photointerrupter.)

Incidentally, I tried finding a usable pressure sensor with an I2C interface, but it doesn’t look like anyone is making them except for barometric pressure ranges for dry gases.  I suppose Freescale will eventually come out with a full range of I2C pressure sensors, but my guess is that will be a long time coming, as the automotive and industrial applications have a pretty long product design cycle (unlike consumer electronics, which is driving the barometric pressure sensors).


Tagged: accelerometer, Adafruit Industries, Arduino, magnetometer, robotics, SparkFun, SparkFun Electronics