Posts with «servo» label

Design and 3D Print Robots with Interactive Robogami

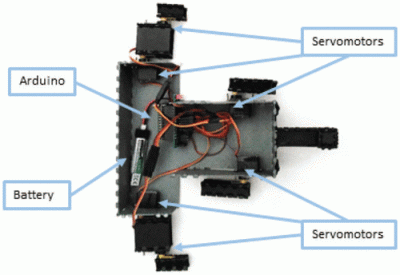
Internals of 3D printed “print and fold” robot. [Image source: MIT CSAIL]
Robot design traditionally separates the body geometry from the mechanics of the gait, but they both have a profound effect upon one another. What if you could play with both at once, and crank out useful prototypes cheaply using just about any old 3D printer? That’s where Interactive Robogami comes in. It’s a tool from MIT’s Computer Science and Artificial Intelligence Laboratory (CSAIL) that aims to let people design, simulate, and then build simple robots with a “3D print, then fold” approach. The idea behind the system is partly to take advantage of the rapid prototyping afforded by 3D printers, but mainly it’s to change how the design work is done.

To make a robot, the body geometry and limb design are all done and simulated in the Robogami tool, where different combinations can have a wild effect on locomotion. Once a design is chosen, the end result is a 3D printable flat pack which is then assembled into the final form with a power supply, Arduino, and servo motors.

A white paper is available online and a demonstration video is embedded below. It’s debatable whether these devices on their own qualify as “robots” since they have no sensors, but as a tool to quickly prototype robot body geometries and gaits it’s an excitingly clever idea.

Perhaps there’s an opportunity to enhance the “3D print, then fold” approach Robogami uses with this concept for making flexible prints out of non-flexible material, or incorporating simple 3D printed circuitry.

Thanks to [Adam] for the tip!


Filed under: robots hacks

Zero-Intrusion Wireless Light Switch

What do you do if your light switch is too far from your desk, and you’re in a rental property so you can’t put in extra wiring to install an electronic control for it? Get up and turn it on or off by hand? Of course not!

If you are [Guyfromhe], you solve this problem with a servo attached to a screw-on light switch faceplate, and you control it with a pair of Arduino/nRF24L01 combos. It’s a pretty simple arrangement, the wireless link simply takes the place of a serial cable that instructs the Arduino on the light switch to operate the servo that in turn moves the switch. The whole thing is triggered through his home automation system, which in turn responds to an Amazon Dash button on his desk. Yes, it’s complex. But turning on the light has been automated without intrusion into his landlord’s domain, and that’s all that matters.

On a more serious note, he’s put some Arduino code up on his write-up, as well as a YouTube video we’ve put below the break.

This is by no means the first such switch we’ve seen, after all we featured a nicer 3D printed servo light switch the other month, and one with a breadboarded Arduino in 2015. While we’re at it though, it would be nice to see a few designed for European switches too.


Filed under: home hacks

Arduino + Geometry + Bicycle = Speedometer

It is pretty easy to go to a big box store and get a digital speedometer for your bike. Not only is that no fun, but the little digital display isn’t going to win you any hacker cred. [AlexGyver] has the answer. Using an Arduino and a servo he built a classic needle speedometer for his bike. It also has a digital display and uses a hall effect sensor to pick up the wheel speed. You can see a video of the project below.

[Alex] talks about the geometry involved, in case your high school math is well into your rear view mirror. The circumference of the wheel is the distance you’ll travel in one revolution. If you know the distance and you know the time, you know the speed and the rest is just conversions to get a numerical speed into an angle on the servo motor. The code is out on GitHub.

Granted, reading a magnet, keeping time, and driving a servo isn’t exactly cutting edge. On the other hand, it made us think about what other kinds of outputs you could drive. We haven’t seen a nixie tube speedometer (well, not on a bicycle, anyway), for example. Or maybe one built with mechanical flip numbers like an old clock.

We have seen some with Arduinos and lots of LEDs (although, again, not really for a bicycle). This speedometer might still be our favorite, though.


Filed under: Arduino Hacks, transportation hacks

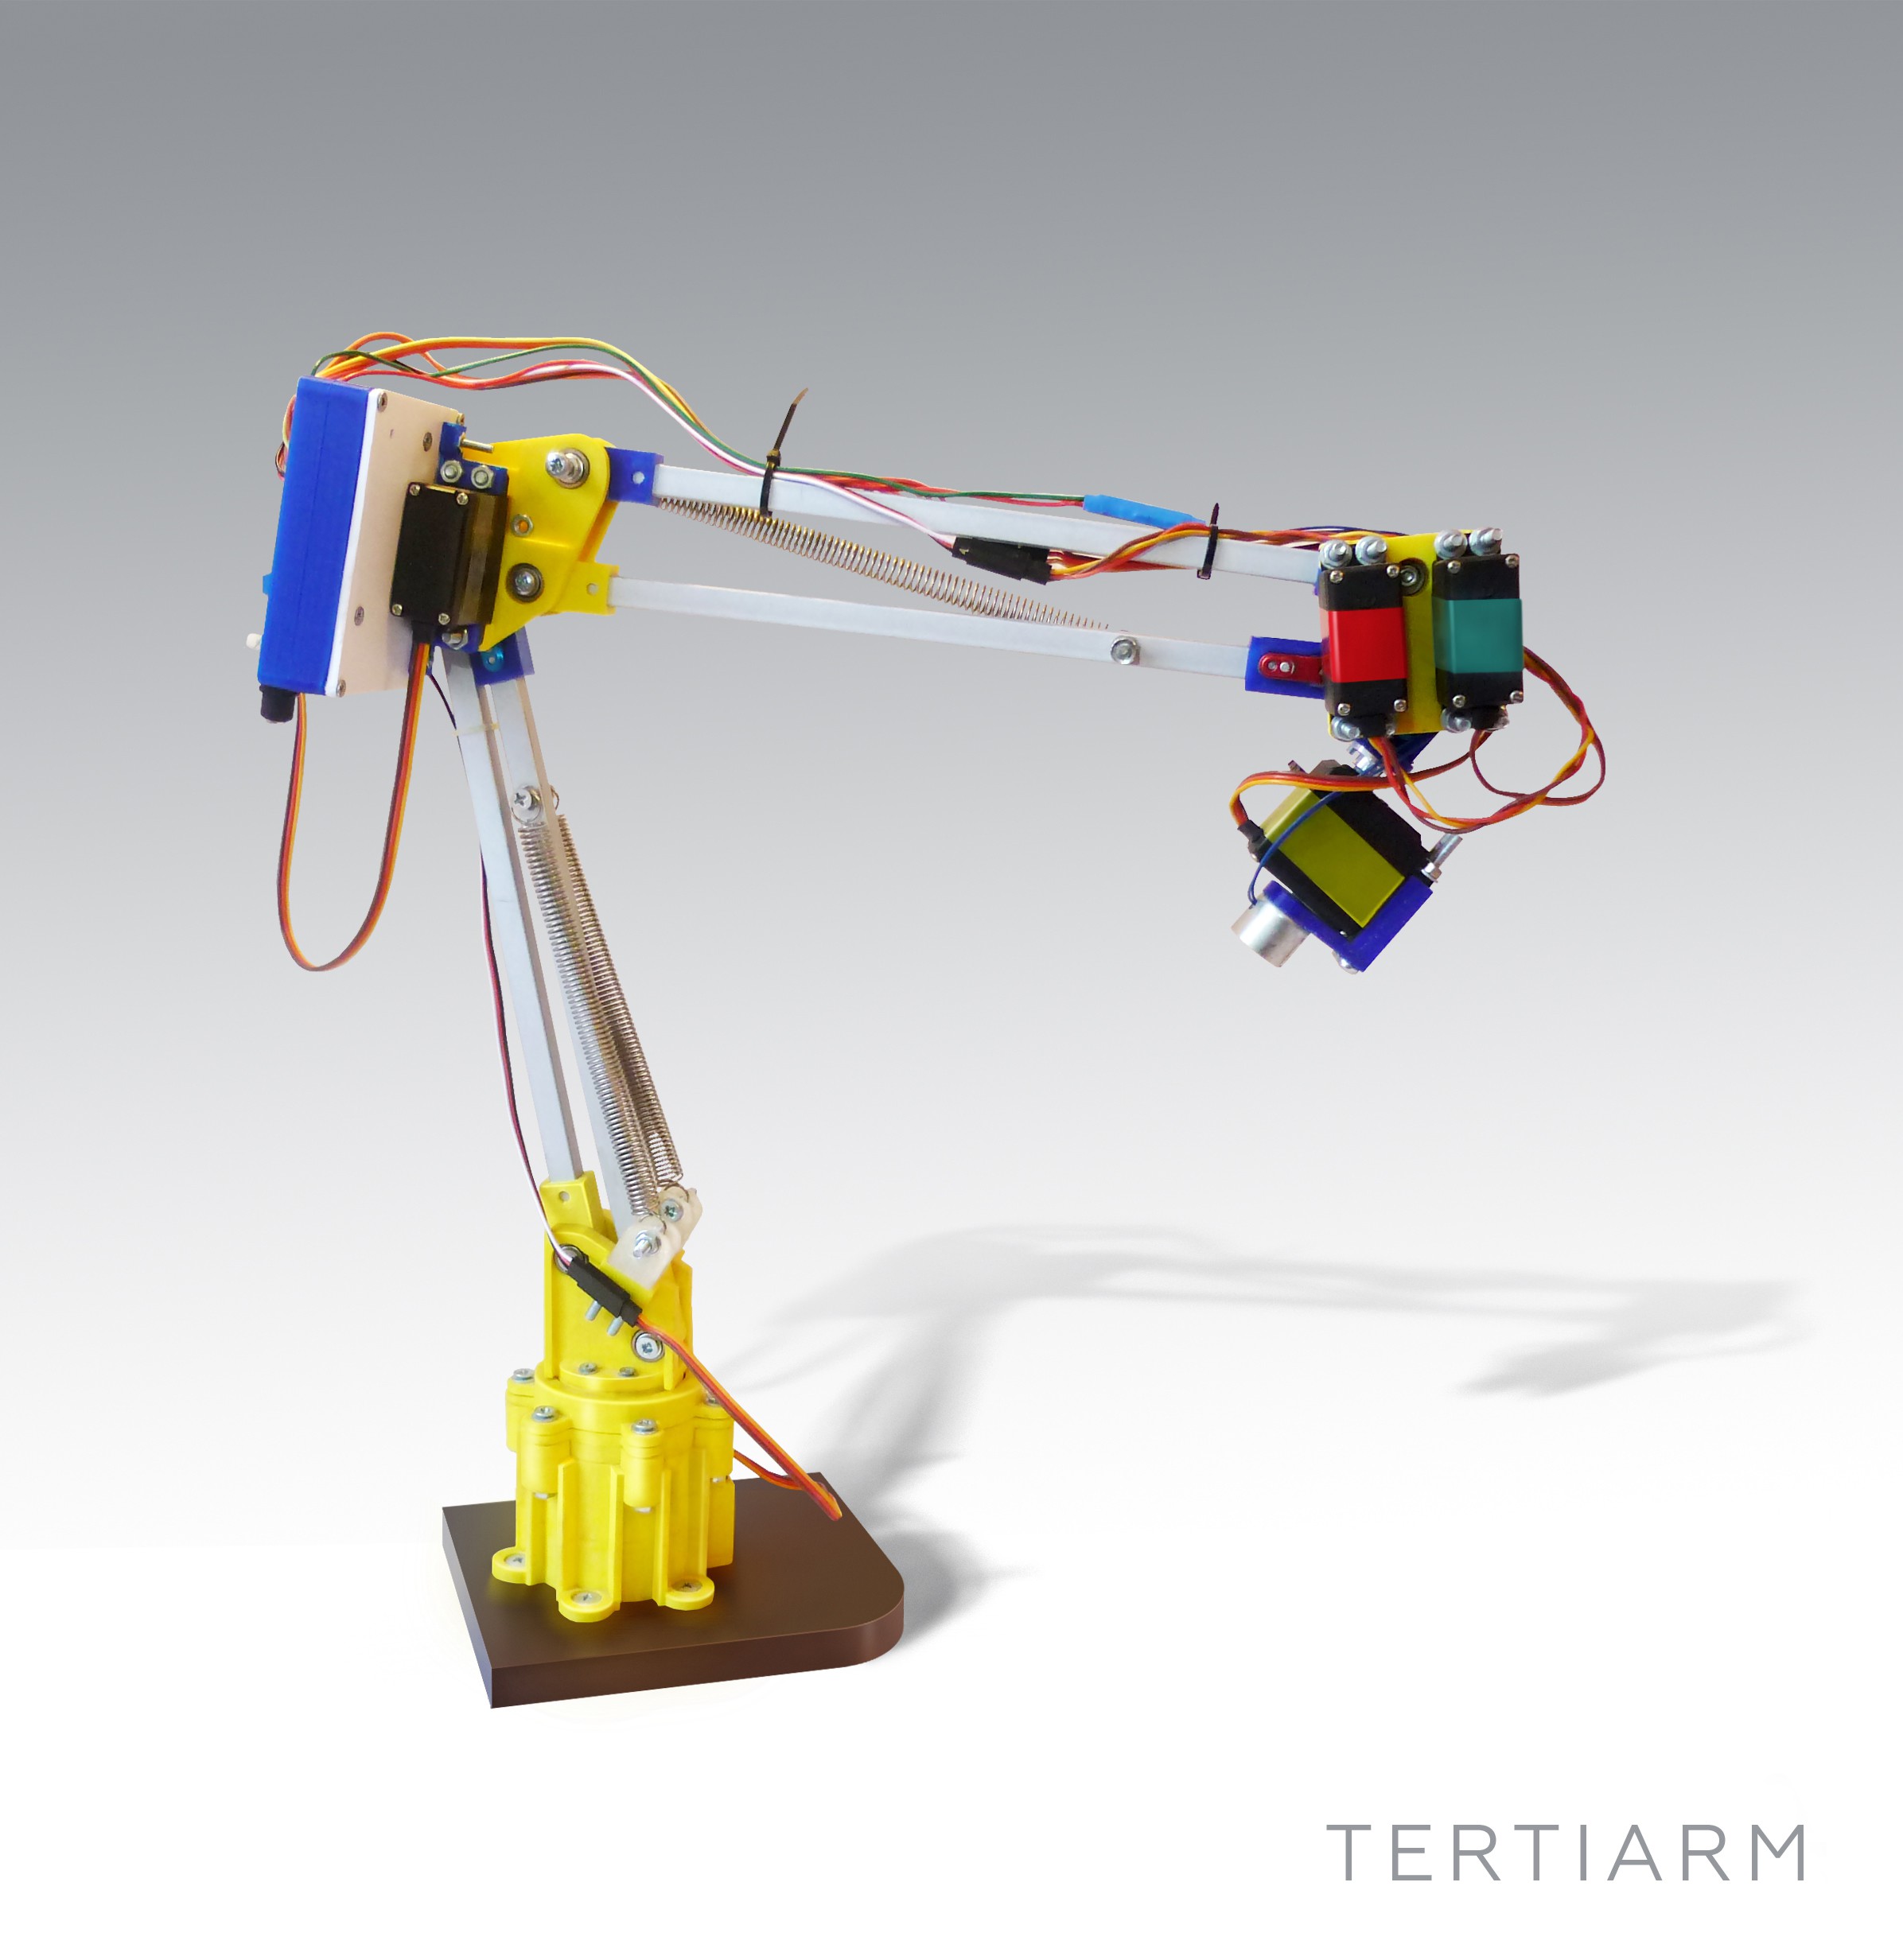
Tertiarm - low cost, 3d printed robot arm based on Ikea lamp

Primary image

What does it do?

Move things, push buttons, etc.

Cost to build

Embedded video

Finished project

Complete

Number

Time to build

Type

URL to more information

Weight

read more

Let's Make Robots 07 Feb 15:54

Tertiarm - low cost, 3d printed robot arm based on Ikea lamp

Primary image

What does it do?

Move things, push buttons, etc.

Cost to build

Embedded video

Finished project

Complete

Number

Time to build

Type

URL to more information

Weight

read more

Let's Make Robots 07 Feb 15:54

Tertiarm - low cost, 3d printed robot arm based on Ikea lamp

Primary image

What does it do?

Move things, push buttons, etc.

Cost to build

Embedded video

Finished project

Complete

Number

Time to build

Type

URL to more information

Weight

read more

Let's Make Robots 07 Feb 15:54

Newton’s Cradle for Those Too Lazy to Procrastinate

Desk toys are perfect for when you don’t want to work. There’s a particularly old desk toy called the Newton’s cradle. If you don’t know the name, you’d still recognize the toy. It is some ball bearings suspended in midair on strings. If you pull back, say, two balls and let them swing to impact the other balls, the same number of balls on the other side will fly out. When they return, the same number will move on the other side and this repeats until friction wears it all down.

We think [JimRD] might be carried away on procrastination. You see, he not only has a Newton’s cradle, he has automated it with an Arduino. According to [Jim], this is his third attempt at doing so. You can see the current incarnation in the video, below.

There are two servos. One pulls back the balls and releases them and the other stops the balls in anticipation of the next operation. The servo that pulls the balls back is clearly magnetic. At first, we thought it was an electromagnet and that deenergizing it released the balls. That’s not the case. Instead, the servo arm has a permanent magnet, but foam decouples it from the ball so that if the arm pulls far enough away, the ball can escape.

Because of the differences in magnets, ball bearings, and other factors, if you try to duplicate this, you’ll probably have to experiment a little with the angles and speeds in the code. The ball stop servo is probably unnecessary, as long as you don’t mind waiting for the thing to wind down on its own.

If you don’t have a cradle, you could always make one yourself. We’d probably avoid using light bulbs, though.


Filed under: Arduino Hacks

Raspberry Pi and Alexa Make Teddy Ruxpin Smarter than the Average Bear

Behold the unholy union of Amazon’s Alexa and that feature-limited animatronic bear from the 80s, Teddy Ruxpin. Alexa Ruxpin?

As if stuffing Alexa inside a talking fish weren’t bad enough, now Amazon’s virtual assistant can talk to you through the creepy retro plush thanks to [Tinkernut]’s trip down memory lane. Having located a Teddy Ruxpin on eBay for far less than the original $70 that priced it out from under his childhood Christmas tree, [Tinkernut] quickly learned that major surgery would be necessary to revive the Ruxpin. The first video below shows the original servos being gutted and modern micro servos grafted in, allowing control of the mouth, eyes, and nose via an Arduino.

With the bear once again in control of its faculties, [Tinkernut] embarked on giving it something to talk about. A Raspberry Pi running AlexaPi joined the bear’s recently vacated thorax with the audio output split between the bear’s speaker and the analog input on the Arduino. The result is a reasonable animation, although we’d say a little tweaking of the Arduino script might help the syncing. And those eyes and that nose really need to get into the game as well. But not a bad start at all.

This isn’t the first time that Teddy Ruxpin has gone under the knife in the name of hacks, and it likely won’t be the last. And the way toy manufacturers are going, they might just beat us hackers to the punch.


Filed under: toy hacks

WALTER - The Arduino Photovore Insect Robot

Primary image

What does it do?

Navigate around and seeking light

[Please excuse my English]

Cost to build

Embedded video

Finished project

Complete

Number

Time to build

Type

URL to more information

Weight

read more