Posts with «pid» label

Ball Balancing Arduino-Style

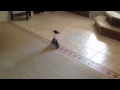
If you have a good sense of balance, you can ride a unicycle or get on TV doing tricks with ladders. We don’t know if [Hanna Yatco] has a good sense of balance or not, but we do know her Arduino does. Her build uses the ubiquitous HC-SR04 SONAR sensor and a servo.

This is a great use for a servo since a standard servo motor without modifications only moves through part of a circle, and that’s all that’s needed for this project. A PID algorithm measures the distance to the ball and raises or lowers a beam to try to get the ball to the center.

Servos like this usually operate in radio control vehicles and they are very easy to drive. A pot coupled to the shaft generates a pulse that the servo internally compares to a pulse from the microcontroller. If the pulse is wider than the reference pulse, the motor drives in one direction. If the pulse is narrower than the reference, the motor operates in the other direction. Just how much it drives depends on how much difference there is between the two pulses. When the pulses match, the servo motor stops moving. This pulse arrangement is very simple to drive from a logic output on an Arduino or other microcontrollers.

The build details are a bit sparse, but you can see in the video the general layout, and she links to a similar project that inspired this one if you are looking for more details.

You can do the same trick in two dimensions if you prefer. Or perhaps you’d like to try using a time of flight sensor, instead.


Filed under: Arduino Hacks
Hack a Day 15 Dec 00:00

Basic Toolkit for the Basement Biohacker

Laying hands on the supplies for most hacks we cover is getting easier by the day. A few pecks at the keyboard and half a dozen boards or chips are on an ePacket from China to your doorstep for next to nothing. But if hacking life is what you’re into, you’ll spend a lot of time and money gathering the necessary instrumentation. Unless you roll your own mini genetic engineering lab from scratch, that is.

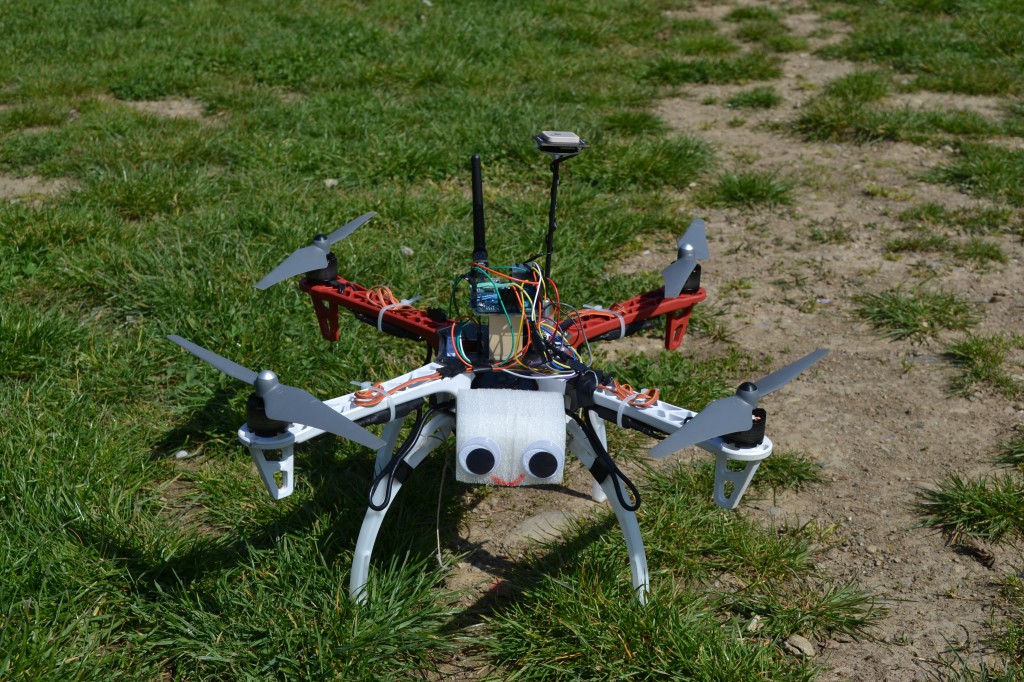
Taking the form of an Arduino mega-shield that supports a pH meter, a spectrophotometer, and a PID-controlled hot plate, [M. Bindhammer]’s design has a nice cross-section of the instruments needed to start biohacking in your basement. Since the piggybacks on an Arduino, all the data can be logged, and decisions can be made based on the data as it is collected. One example is changing the temperature of the hot plate when a certain pH is reached. Not having to babysit your experiments could be a huge boon to the basement biohacker.

Biohacking is poised to be the next big thing in the hacking movement, and [M. Bindhammer]’s design is far from the only player in the space. From incubators to peristaltic pumps to complete labs in a box, the tools to tweak life are starting to reach critical mass. We can’t wait to see where these tools lead.


Filed under: chemistry hacks, misc hacks

Building a quadcopter running on Arduino Yún

Comelicottero is a quadcopter based on Arduino Yún created during the Master in Computer Science at the Universita’ degli Studi of Milan (Italy) by Simone Castellani, Giovanni Intorre and Andrea Toscano:

The idea was to build a drone able to be controlled through WiFi from any PC, tablet or smartphone . Comelicottero is equipped with an accelerometer and a gyroscope for the stability obtained by a PID-based control system. Since Servo library is too slow for the quadcopter dynamics, an hardware PWM was implemented to obtain a 400Hz PWM signal.

The communication between the ground station on a PC and the quadcopter relies on WiFi and, in order to get better results, Bridge library was replaced with an efficient python script on OpenWRT-Yun. On top of that all the code was written to maximise Arduino Yún capabilities. The Navigation System has been designed, simulated on PC, implemented and tested. The autonomous navigation is going through an additional testing due to magnetometer interferences with motors’ magnetic field.

The user can control and monitor data coming from the drone using a gamepad attached to a laptop with a custom software installed.

The sketch and all the documentation will be soon available on GitHub and released with GNU license. In the meanwhile follow their Youtube Channel for updates.


Arduino Blog 08 Jun 20:59

How to: Super Simple Self-Balancing Robot Tutorial

Since the introduction of the segway, DIYers have been building their own self-balancing transportation devices.  Before you go off and build a full-size version, here’s a simple project to help you learn the basics of control system design (the software which powers the balancing act).  Essentially, a microcontroller reads sensors such as gyroscopes and accelerometers, then uses a PID algorithm to make minute adjustments to the robot’s wheels.

The little robot featured above is powered by an Arduino Nano and remotely controlled via bluetooth.  Additionally, the device features three potentiometers to fine tune the balancing algorithm.  Both the wheels and body were 3D printed.  To learn how to build your own minature self-balancing robot, check out the full project details and be sure to check out these three epic self-balancing posts:

Don’t Miss Out:

PID Control + Arduino


Here we have this submission from [IgorAraujo] about how to use an Arduino as PID.

A proportional integral derivative controller (PID controller) is a common method of controlling robots. PID theory will help you design a better control equation for your robot.

On his [website] there are more pictures, videos and a detailed description, but all in Portuguese.

Arduino Blog 29 Nov 11:57
arduino  gallery  pid  

Building a better PID smoker controller

[Matt] wanted to have more control over his meat smoker so he built this advanced PID smoker controller. It uses the solid state relay seen in the bottom-right of this image to switch the smoker’s heating element. But all of the other goodies that are included add several features not usually found in these builds.

This is a replacement for the commercial PID unit he used on the original build. That monitored the temperature in the smoker, using predictive algorithms to maintain just the right heat level. But this time around [Matt] is looking for extra feedback with a second sensor to monitor meat temperature. Using an Arduino with an SD shield he is able to data log the smoking sessions, and his custom code allows him to specify temperature profiles for resting the meat after it has hit the target temperature. It kind of reminds us of a reflow oven controller… but for food.


Filed under: cooking hacks
Hack a Day 11 Oct 20:01

Wii Nunchuck controlled robot exhibits rock solid balancing

[Willy Wampa] is showing off his self-balancing robot. What strikes us about the build is how well tuned his feedback loop seems to be. In the video after the break you will see that there is absolutely no visible oscillation used to keep its balance.

The parts used are quite easy to obtain. The acrylic mounting plates are his wife’s design and were custom cut through the Pololu service. They were also the source of the gear motors. He’s using a SparkFun IMU with an Arduino and a motor shield. He first posted about the build about a month ago, but the new revision switches to a Pololu motor driver shield which he says works much better, and adds control via a wireless Wii Nunchuck.

The PID loop which gives it that remarkably solid upright stance is from a library written by [Brett Beauregard]. Once again the concept of open source lets us build great things by standing on the shoulders of others.

[via Reddit]


Filed under: robots hacks
Hack a Day 25 Sep 18:01

Self balancing robot uses cascading PID algorithms

At this point we’re beginning to think that building a self-balancing robot is one of the rights of passage alongside blinking some LEDs and writing Hello World on an LCD screen. We’re not saying it’s easy to pull off a build like this one. But the project makes you learn a lot about a wide range of topics, and really pushes your skills to the next level. This latest offering comes from [Sebastian Nilsson]. He used three different microcontrollers to get the two-wheeler to stand on its own.

He used our favorite quick-fabrication materials of threaded rod and acrylic. The body is much taller than what we’re used to seeing and to help guard against the inevitable fall he used some foam packing material to protect the top level. Three different Arduino boards are working together. One monitors the speed and direction of each wheel. Another monitors the IMU board for position and motion feedback, and the final board combines data from the others and takes care of the balancing. Two PID algorithms provide predictive correction, first by analyzing the wheel motion, then feeding that data into the second which uses the IMU feedback. It balances very well, and can even be jostled without falling. See for yourself in the clip after the break.


Filed under: robots hacks
Hack a Day 20 Jul 21:01

Selfbalancing robot (Arduino)

Primary image

What does it do?

In the video you can see that the robot stays at roughly the same spot on the floor and handles a lighter push without any problem. To achieve this I have two cascade PID controllers and low pass filter on both wheel speed and the robot's angle.

Cost to build

$300,00

Embedded video

Finished project

Complete

Number

Time to build

Type

wheels

URL to more information

Weight

read more

n/a