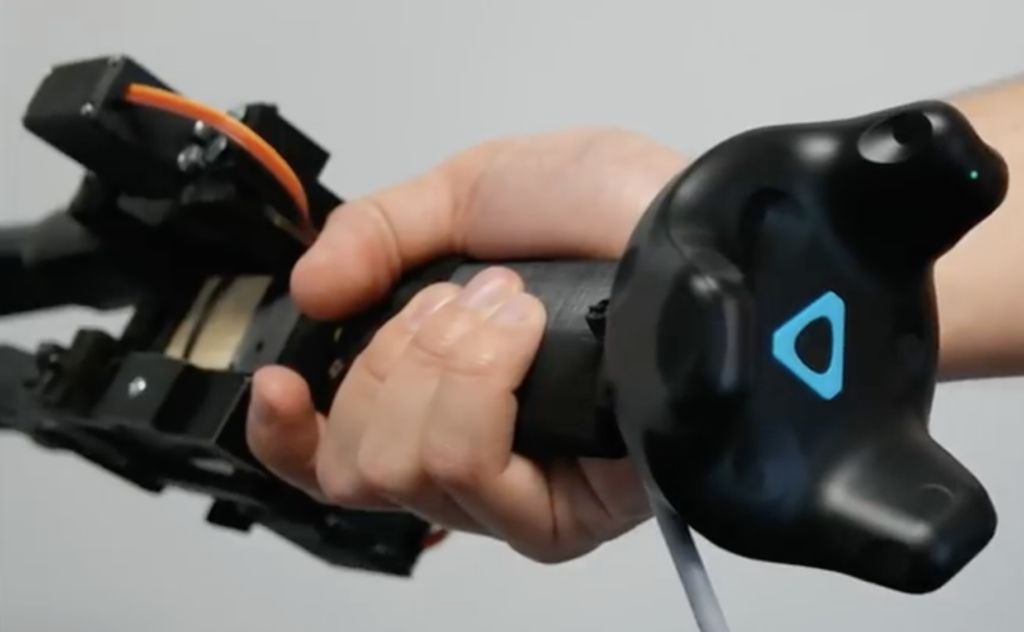
As seen here, “Standard controllers for virtual reality (VR) lack sophisticated means to convey realistic, kinesthetic impression on size, resistance or inertia.” To overcome these limitations, André Zenner and Antonio Krüger at the German Research Center for Artificial Intelligence (DFKI) have come up with Drag:on—a haptic feedback device that changes air resistance and weight distribution using a commercially-available hand fan.
Drag:on uses a pair of MG996R servos to actuate the fan, shifting its weight and air resistance as needed to simulate a virtual environment. The assembly is attached to an HTC Vive tracker, and an Arduino Nano provides control and computer interface via a USB serial link.
Drag:on leverages the airflow occurring at the controller during interaction. By dynamically adjusting its surface area, the controller changes the drag and rotational inertia felt by the user. In a user study, we found that Drag:on can provide distinguishable levels of haptic feedback. Our prototype increases the haptic realism in VR compared to standard controllers and when rotated or swung improves the perception of virtual resistance. By this, Drag:on provides haptic feedback suitable for rendering different virtual mechanical resistances, virtual gas streams, and virtual objects differing in scale, material and fill state
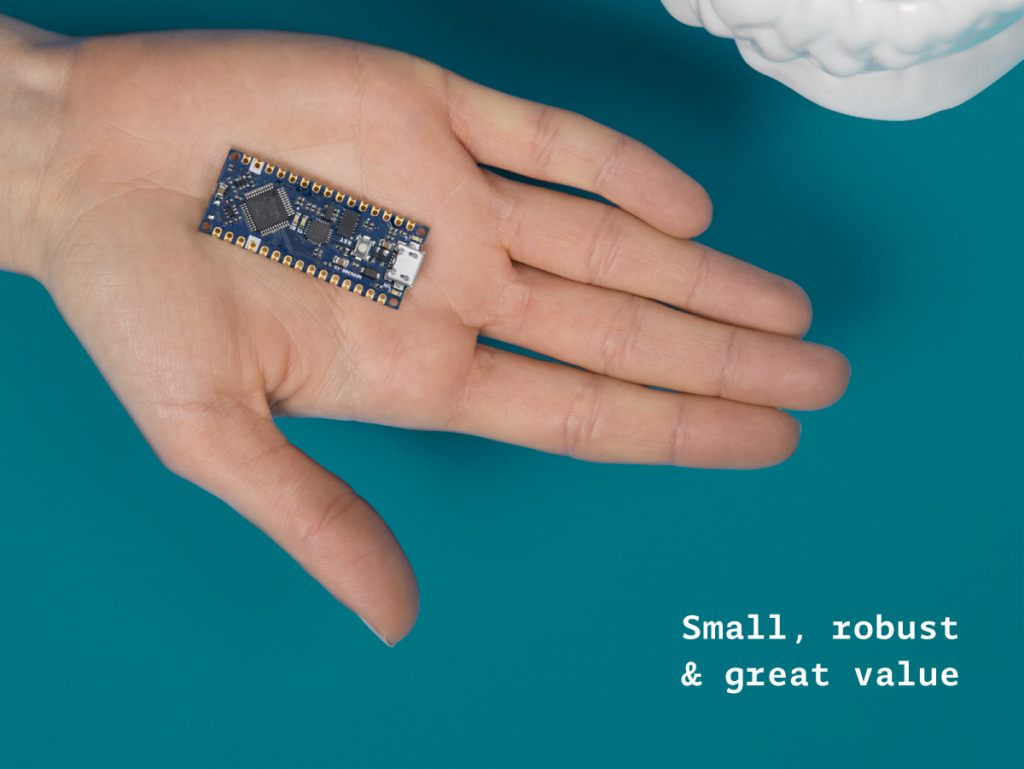
The original Arduino Nano occupies a special place in many makers’ hearts. The tiny footprint (48*18 mm), reliability and tons of examples makes the Nano perfect for wearables, drones — in fact any project made to last.
The Nano is back! The new entry-level Arduino Nano Every manages to pack in even more features at an even lower price – just $9.90 / €8.00 without headers — and is backwards compatible with the original. Dario Pennisi led the development of the Arduino Nano Every. We sat down with him to learn more.
Why did you decide to create the Arduino Nano Every?
Searching for “Arduino Nano project” yields millions of results. But you also find people complaining about boards not working. Of course these boards are usually clones (not genuine Arduino boards)! Clones can be cheaper but reliability issues can mean you need to pay for more, or are frustrated trying to get them to work.
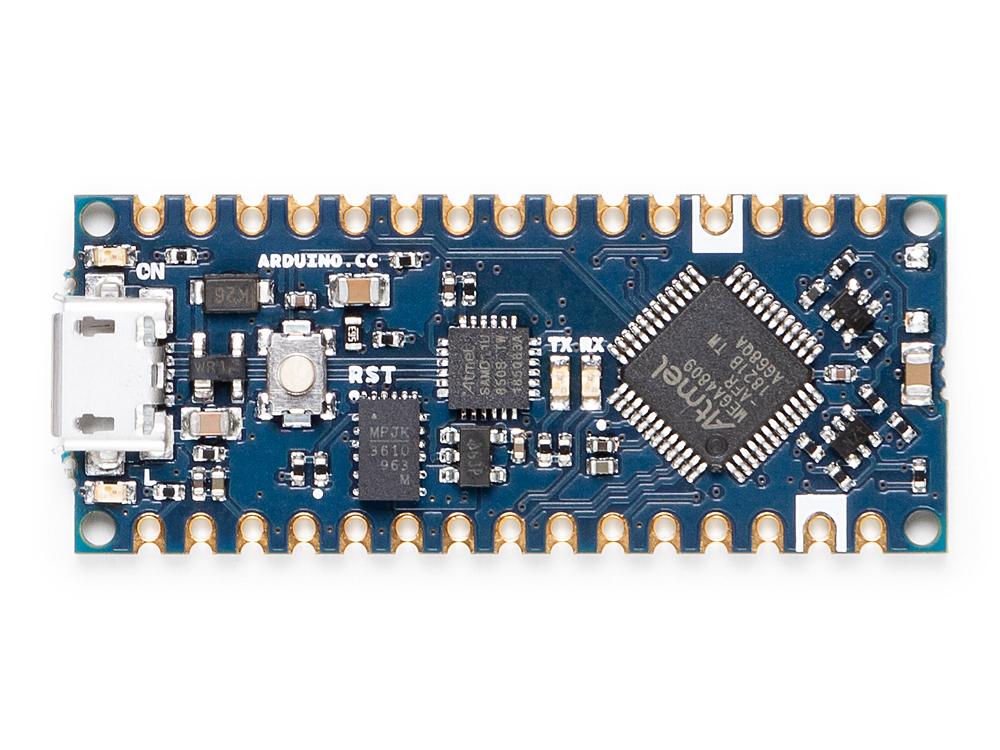
This is why we made the Arduino Nano Every. It’s reliable, affordable and more powerful. We’ve used a quality USB chip so people won’t have connection or driver issues. The newer ATmega4809 microcontroller fixes limitations of older ATmega328p based boards – you can add a second hardware serial port! As well as more peripherals and memory, the Configurable Custom Logic (CCL) is a great way to get beginners more interested in hardware. Finally, the separate processor handling the USB interface makes it possible to implement USB classes such as Human Interface Device (HID) instead of just the classic CDC/UART.
We see the Arduino Nano Every at the heart of wearable projects; in experiments, in prototypes or in a full cosplay setup! Sensors and motors can be connected without too much fuss which means it’s great for robotics, drones and 3D printing too. Not only is it a great choice for makers – in buying a genuine Arduino they will be supporting us in continuing to contribute to open source for the whole community to benefit from.
Can you tell us the three key features of Nano Every?
New processor with more memory and new peripherals, still 5V capable. The added memory will unleash creativity and open to more complex applications and the new peripheral set, which includes a second serial port, will finally allow communicating at the same time with a PC and with peripherals such as a wireless interface or a GPS.
The new power supply architecture based on a high efficiency DC-DC converter allows powering the board at up to 21V and to drive output peripherals with up to 950mA without overheating
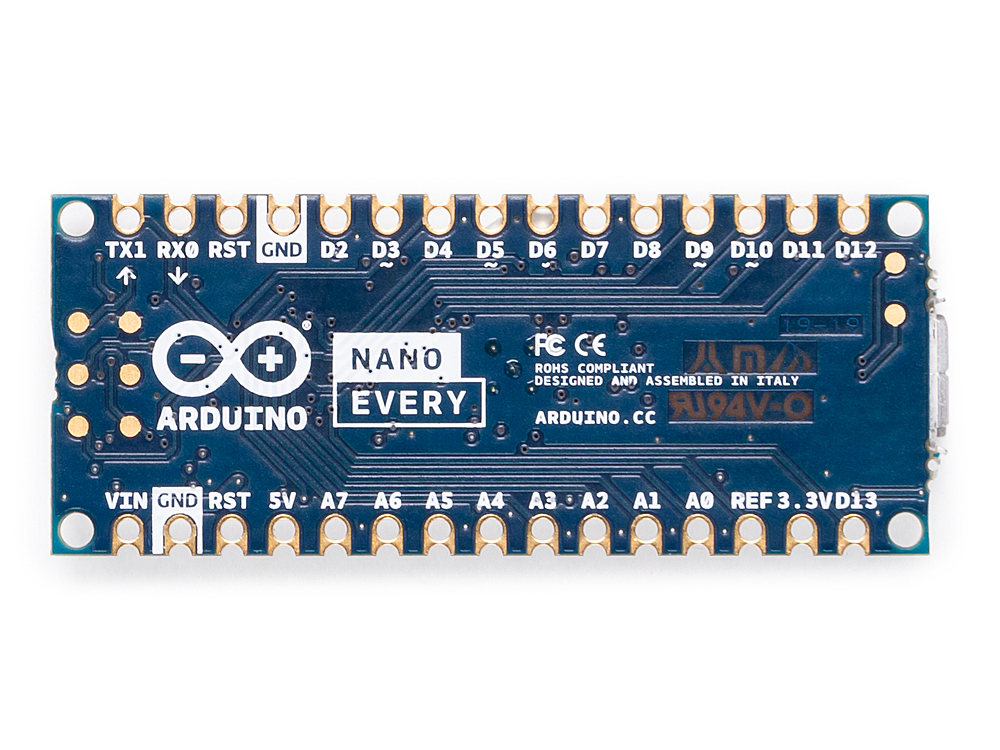
Castellated contacts and flush bottom side allow soldering the Nano Every directly on a board as a traditional SMT component, opening the possibility to reduce final product size and helping the use in volume applications
So the processor is the same as the Uno WiFi R2 and it has more Flash and more RAM. The sketches made for the Nano are going to run on the Every as they are? Is it truly a replacement with zero modification in any Nano based project? Please elaborate.
Actually the ATmega4809 we use on Uno WiFi R2 and Nano Every is not directly compatible with ATmega328p, however we’ve implemented a compatibility layer which translates low level register writes without any overhead so the result is that most libraries and sketches, even those accessing directly GPIO registers, will work out of the box
Why you decided to offer the board with no headers supplied or soldered in the basic package?
Not only are new Nano boards are offered without headers, they all are totally flat on the bottom side and offer castellated pads on the sides, so you can actually solder them on your PCB as a standard SMT component using a normal pick & place machine.
The price is really aggressive, did you compromise on Arduino quality standards to achieve this?
We’ll never give up on Arduino quality standards and we’re still manufacturing in Italy making sure that our ethical values are strictly followed. The lower price point on these products has been achieved thanks to a careful optimization on purchasing prices and by trimming our margins as we believe that it’s important to give makers the quality they deserve at competitive prices.
The Arduino Nano Every is now available for pre-order on the Arduino online store with headers or without headers mounted (estimated shipping date: mid-June 2019).
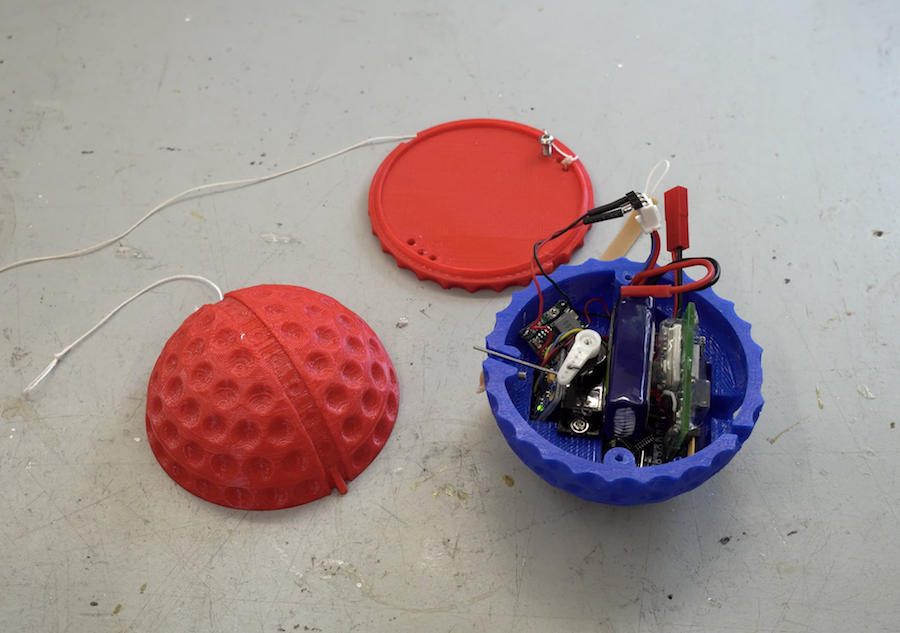
YouTuber Tom Stanton built a trebuchet about a year ago. Now, in order to figure out just how high it can toss something, he designed a custom altitude tracking device in the form of an oversize golf ball.
An Arduino Nano is squeezed inside this sphere, along with a battery, an altimeter, an accelerometer, and even a small servo. The altimeter is used for primary height measurement, while the accelerometer detects launches. A servo then deploys a parachute four seconds later to keep the electronics safe.
As it turns out, the trebuchet is able to fling the ball in the air 60 meters. While impressive, per Stanton’s discussion, it may not be as efficient as you might suspect! Be sure to check out the project in the video below!
Consider all the tools that modify how light is transmitted and received: lasers direct light in a tightly focused beam and telescopes let us focus on an area far away. While there are certainly ways to modify sound, these techniques are not nearly as developed as their light counterparts.
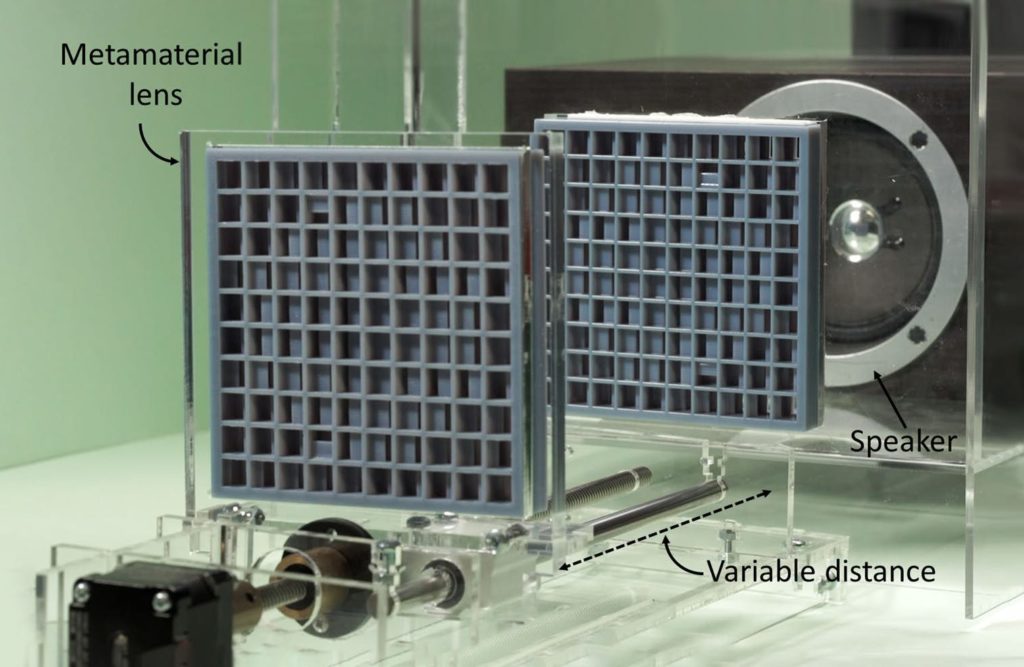
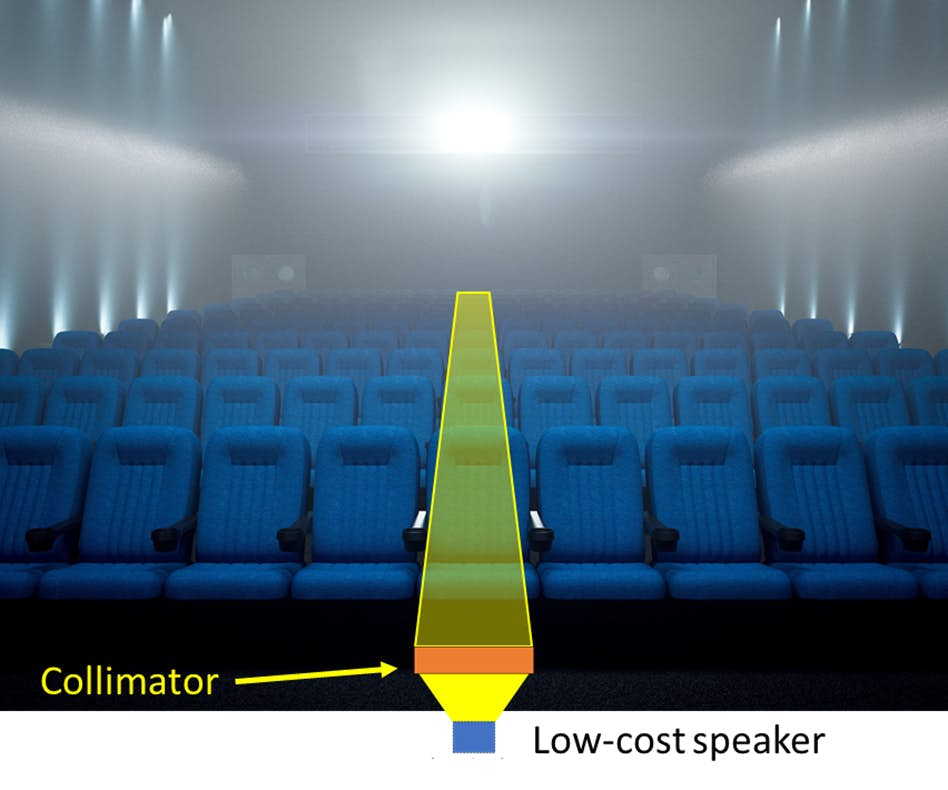
With hopes of changing that, researchers from the University of Sussex and the University of Bristol have been working with metamaterials—normal materials like plastic, paper, wood or rubber with an internal structure designed to manipulate sound waves—to build acoustic lenses.
The team demonstrated the first dynamic metamaterial device with the zoom objective of a varifocal for sound, as well as create a collimator capable of transmitting sound as a directional beam from a standard speaker.
The lenses are attached to the collimator, and can be used to direct sound from a speaker or two can be employed together to construct an adjustable focus system. Focal length is regulated by the distance between the two lenses, which is controlled by an Arduino Nano and a single stepper motor mounted to an adjustable rail.
Consider how interactive devices have come to dominate our lives. Once the purview of a select few in large laboratories, powerful gadgets—supercomputers even—are carried with us everywhere we go in the form of smartphones. And as everything around us becomes increasingly more connected, those that have no interest in the technical aspects of computing will still need to know how to configure the networked things throughout their homes.
As an experiment in interactive design, Austrian researchers Florian Güldenpfennig, Daniel Dudo, and Peter Purgathofer have come up with a ‘Magic Paradigm’ for programming.
Their project uses a wand with a built-in RFID reader, allowing it to sense which RFID tagged object it’s pointing to and register various sequences. This enables devices to be customized as needed, many of which contain an Arduino Nano as ‘active’ units and an nRF24L01+ module for communication. A central desktop/Arduino setup is also implemented to coordinate system elements.
We are surrounded by an increasing number of smart and networked devices. Today much of this technology is enjoyed by gadget enthusiasts and early adaptors, but in the foreseeable future many people will become dependent on smart devices and Internet of Things (IoT) applications, desired or not. To support people with various levels of computer skills in mastering smart appliances as found, e.g., in smart homes, we propose the ‘magic paradigm’ for programming networked devices. Our work can be regarded as a playful ‘experiment’ towards democratizing IoT technology. It explores how we can program interactive behavior by simple pointing gestures using a tangible ‘magic wand’. While the ‘magic paradigm’ removes barriers in programming by waiving conventional coding, it simultaneously raises questions about complexity: what kind of tasks can be addressed by this kind of ‘tangible programming’, and can people handle it as tasks become complex? We report the design rationale of a prototypical instantiation of the ‘magic paradigm’ including preliminary findings of a first user trial.
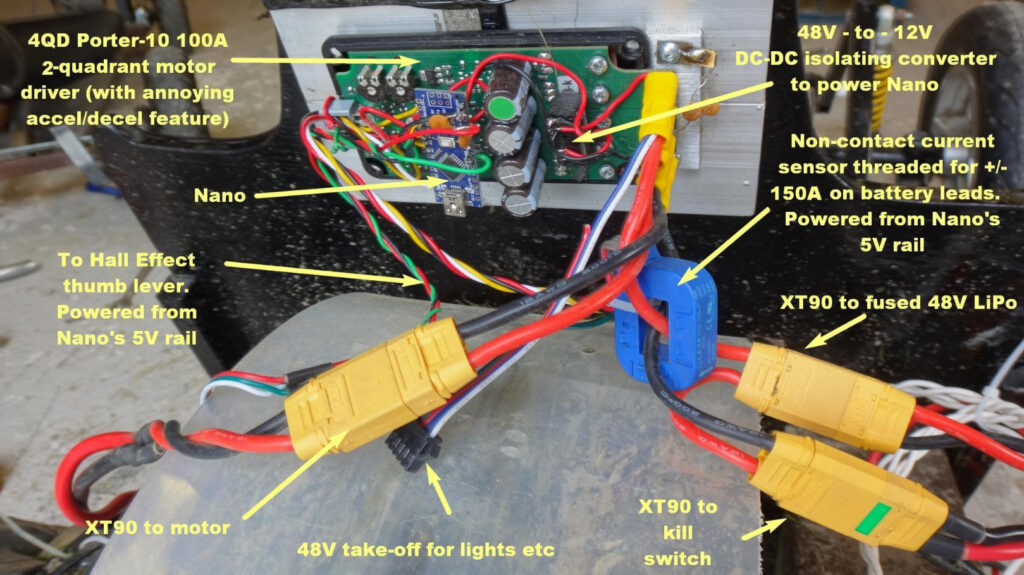
Hacky Racers, an electric vehicle racing series that’s part of the Power Racing Series, encourages drivers to put together their own hacky vehicle. While it looks like a lot of fun, in order to keep things relatively safe, current powering the car is regulated by an inline fuse from the battery, effectively limiting the top power output to the motor—thus keeping speed in check.
This means that while drivers need some control over how fast their motor is running, traditional PWM control where as much power is thrown to the motor as needed to keep it at a certain speed doesn’t really work. Instead, you need a system that controls how much current is provided. It’s a subtle problem, solved here with the addition of an Arduino Nano, which regulates output based on feedback from a current clamp sensor. While it won’t let a racer exceed the current limit, it does allow for maximum output when needed without tripping the fuse!
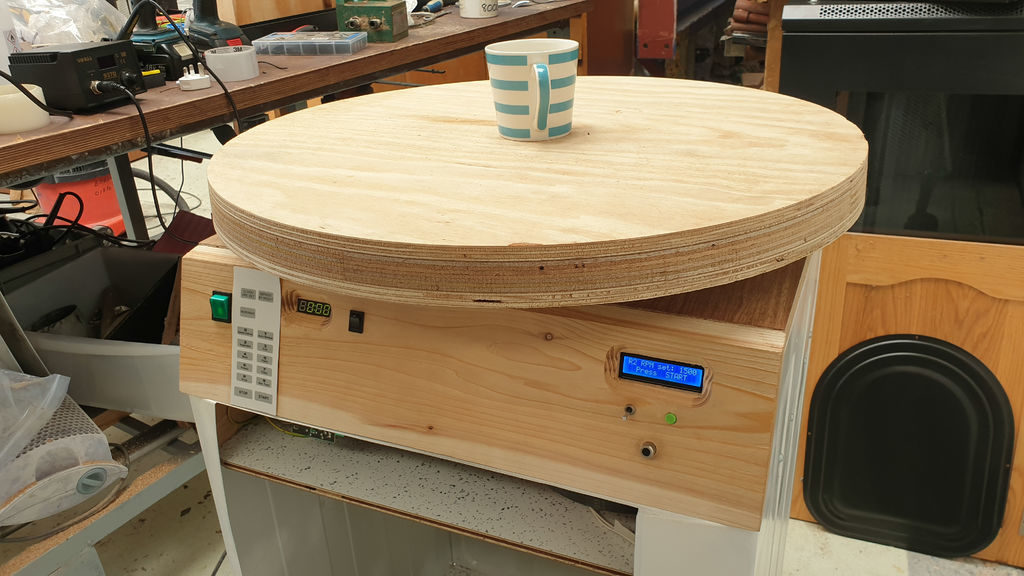
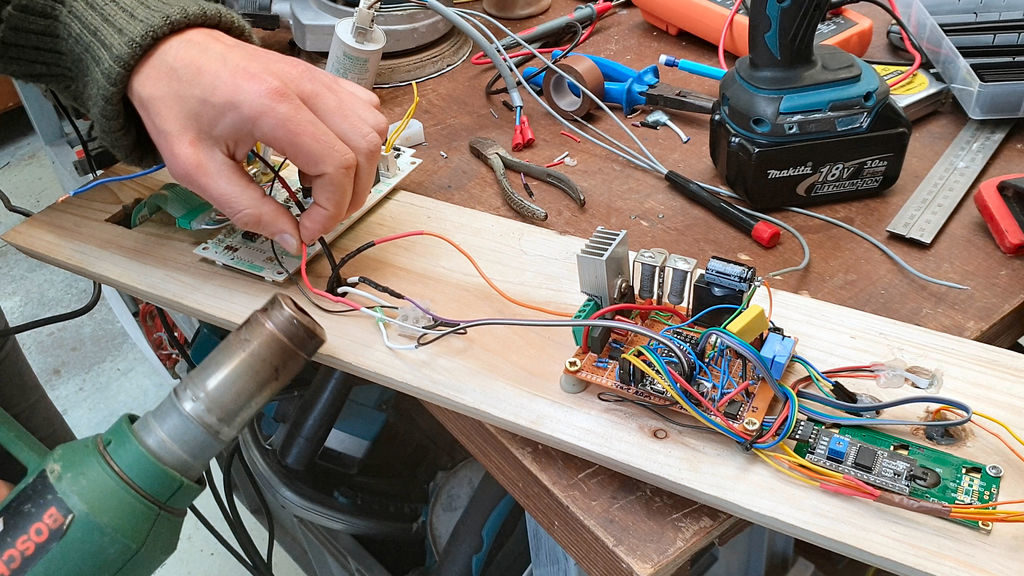
If you have a broken washing machine, you may want to think twice before disposing of it. As Stephen John Saville shows in this multi-use rotary table project, they can provide a wealth of parts, from the actual physical structure/table of the build, to a motor that’s able to run via AC or DC, and various other mechanical components. There’s even an electronic timer salvaged from an old microwave.
To keep the turntable running at the desired speed, he used an Arduino Nano connected to a triad circuit, along with an LM393 chip and optocoupler to implement closed-loop control. User feedback is shown on a 16×2 LCD screen, updated every two seconds to avoid interfering with speed control functions.
More info on this clever hack can be found in its well-detailed write-up, and be sure to check out the very entertaining video of what’s involved in such a repurposing feat below!
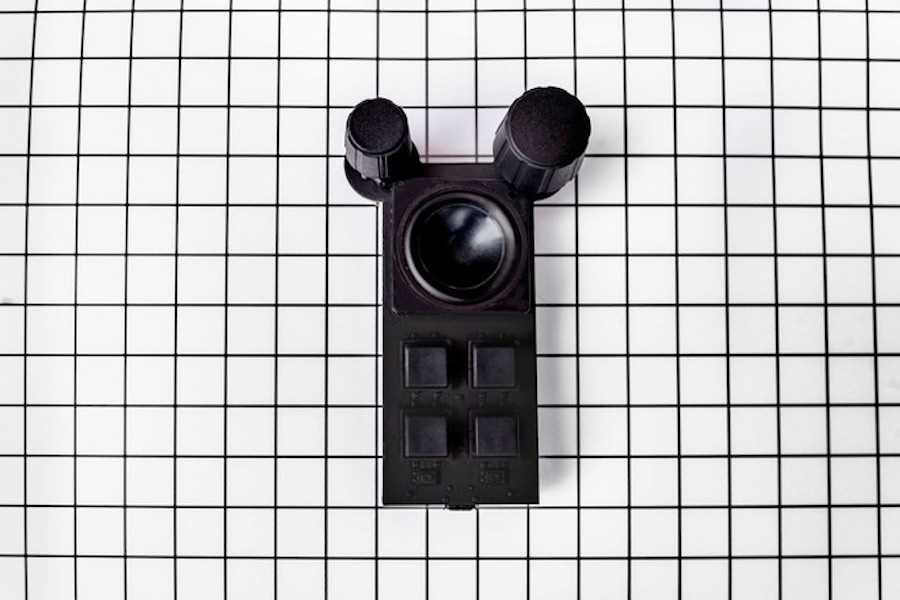
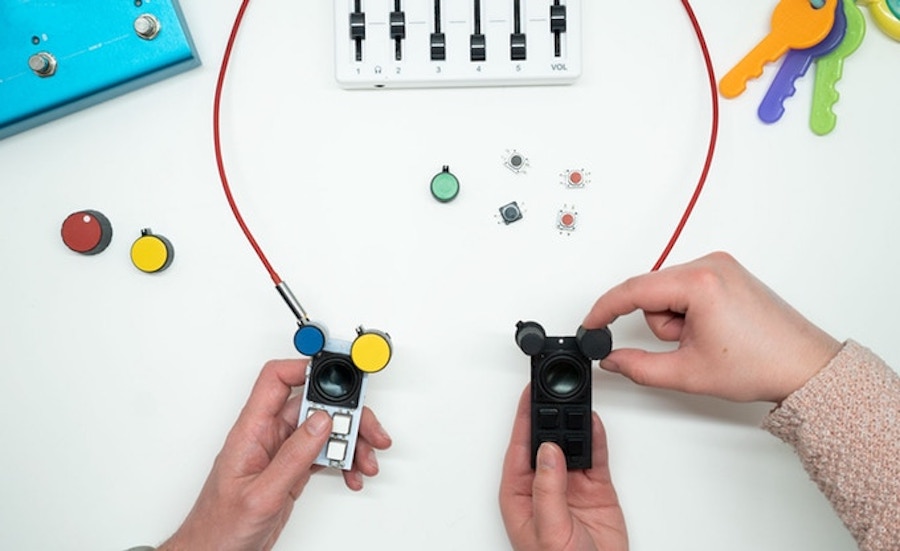
There are a wide variety of ways to create electronic music. For a capable machine that fits in the palm of your hand and is loud enough to use outdoors, however, it’s hard to imagine a battery-powered device cooler than Bitty from Curious Sound Objects.
The pocket-sized drum machine and synthesizer, currently on Kickstarter, was prototyped using an Arduino Nano and will be fully Arduino-compatible when released. This means that in addition to changing the sound and interface around with readily-available sound packs—which include Theremin Bitty, Techno Bitty, Basement Bitty, Trap Bitty, Lofi Bitty, and Beach Bitty—it can be programmed with the Arduino IDE. The device can even run sound software written for other Arduino boards.
Bitty features four sample trigger buttons, a pair of knobs, and a speaker. Designed for entry-level EDM enthusiasts and studio musicians alike, you can play the drums and melodies manually, as well as trigger patterns to produce dance music or hip hop beats. These can be chosen via the left knob, while the right knob handles pitch, note selection, and arpeggiation.
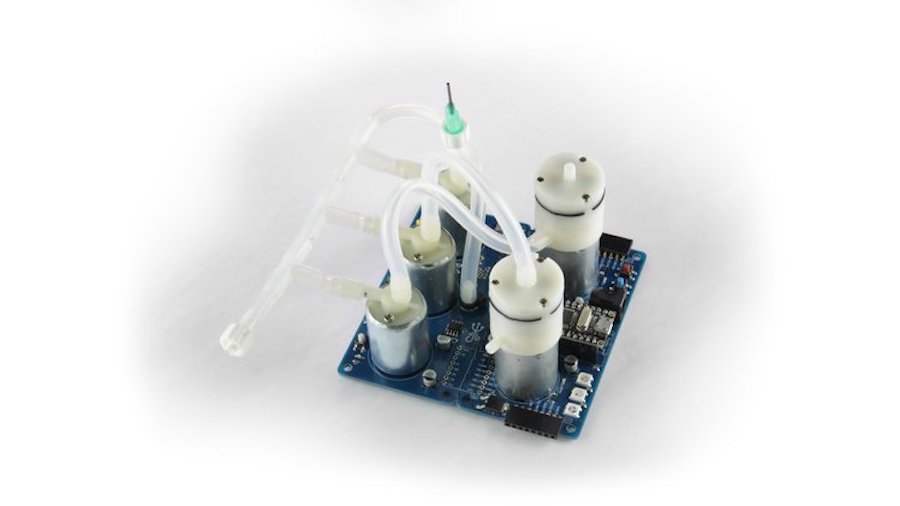
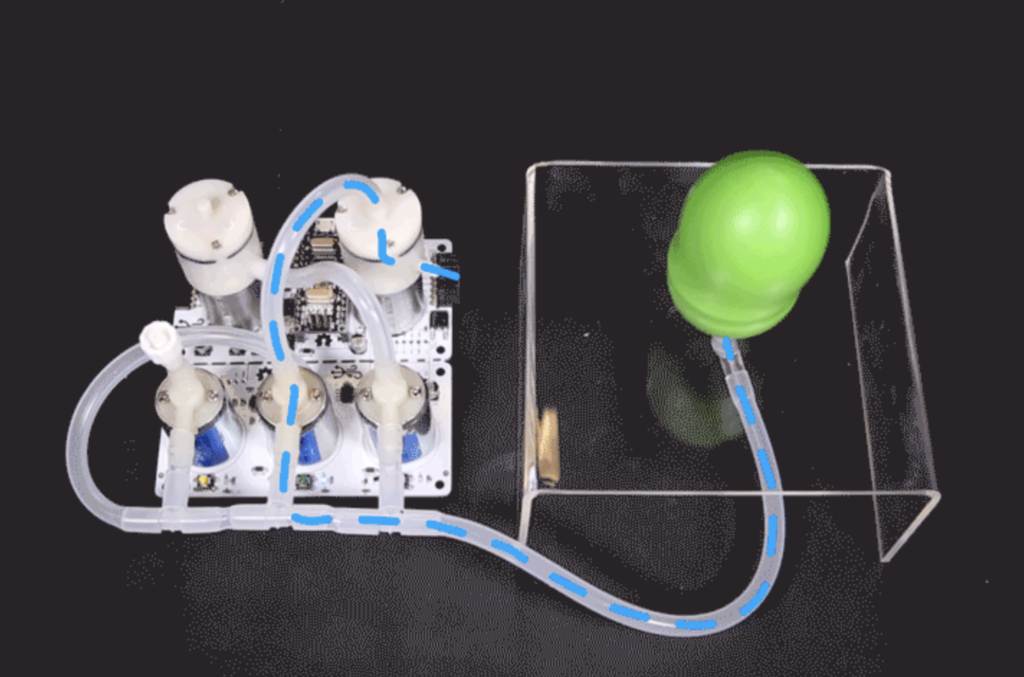
Arduino boards have been employed in all sorts of robotics and IoT applications, although working with air as a power source is less than straightforward. In order to make this experience easier, the Programmable-Air pneumatics kit puts everything you need for simple air power experimentation into one package.
It features pressure and vacuum pumps, as well as pneumatic valves and a pressure sensor. An Arduino Nano is implemented as the controller, and a custom library is available here, so programming should be a snap.
Programmable-Air has a built-in high-pressure pump, vacuum pump, pneumatic valves, pressure sensor, and an Arduino Nano. The output from Programmable-Air is a single tube that goes into your soft robot or pneumatic actuator. By controlling the motors and valves, you can push air in or out of the actuator, or let it exchange air with the atmosphere. All the while you get feedback about the state of the actuator through the pressure sensor.
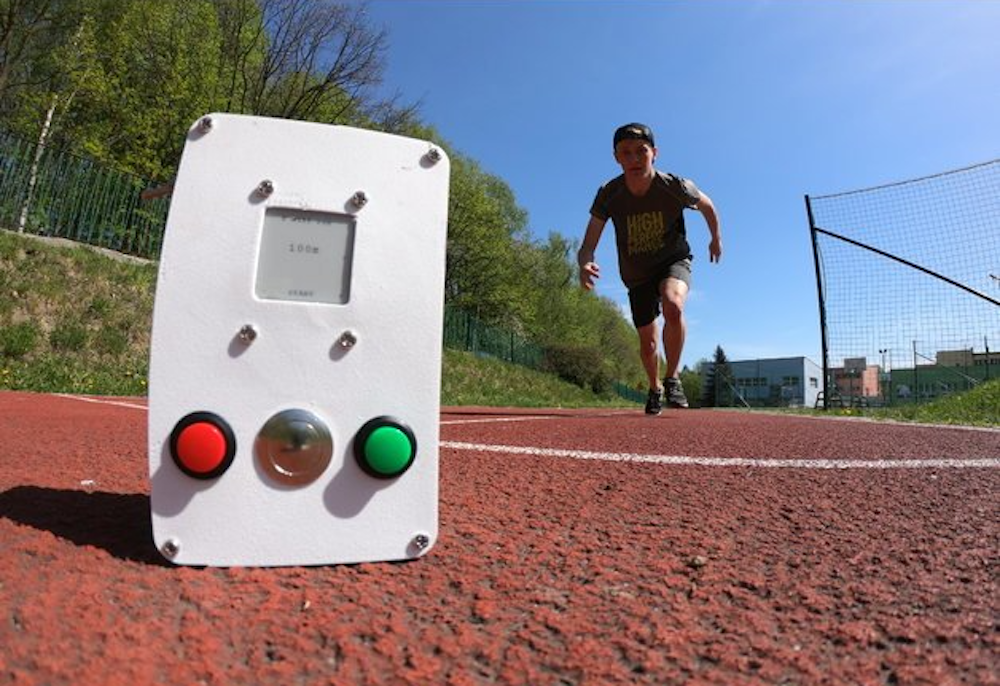
Nikodem Bartnik enjoys running, as well as making things, and he’s been able to combine both pursuits in the form of an ultrasonic race timer.
The device is placed at the finish line and mounted to a tripod. Once a runner gets into position, the start of the sprint is signaled with the beep of a small speaker.
Everything is controlled by an Arduino Nano, while user feedback is provided via a small ePaper display. A pair of buttons also enable the runner to adjust the distance from 50m to 1km.
Although Bartnik is still no Usain Bolt, he’s planning to practice and hopefully improve his 100m dash time. Code is available on GitHub if you’d like to build something similar, along with 3D print files for the enclosure on Thingiverse.