Posts with «nano» label

An Arduino-powered dice generator

Board games can be fun, but what happens when you need more than six, 12, or even 20 possibilities to decide your character’s fate? One could of course use several dice, or an online simulator, but creator “Rehaan33” built something much more elegant in the form of a dedicated dice terminal.

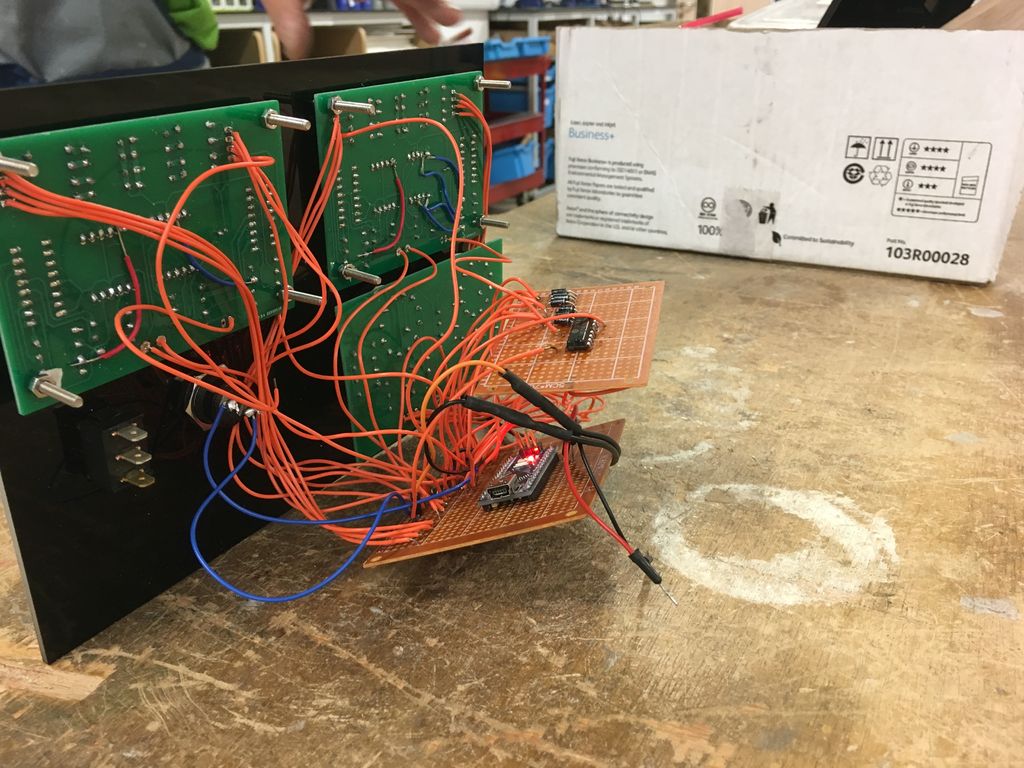
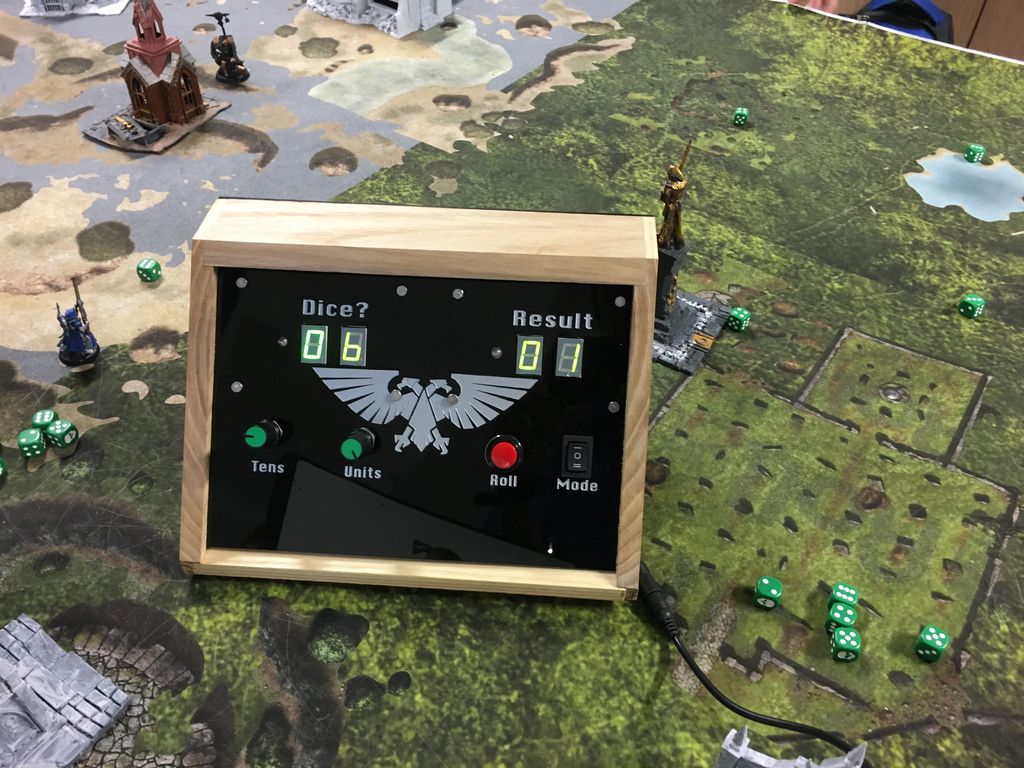
This device takes user input from a pair of rotary switches to the dice high limit, then uses an Arduino Nano to generate a random value when its “roll” button is pressed. Limit and result values are shown on their own seven-segment LED displays. 

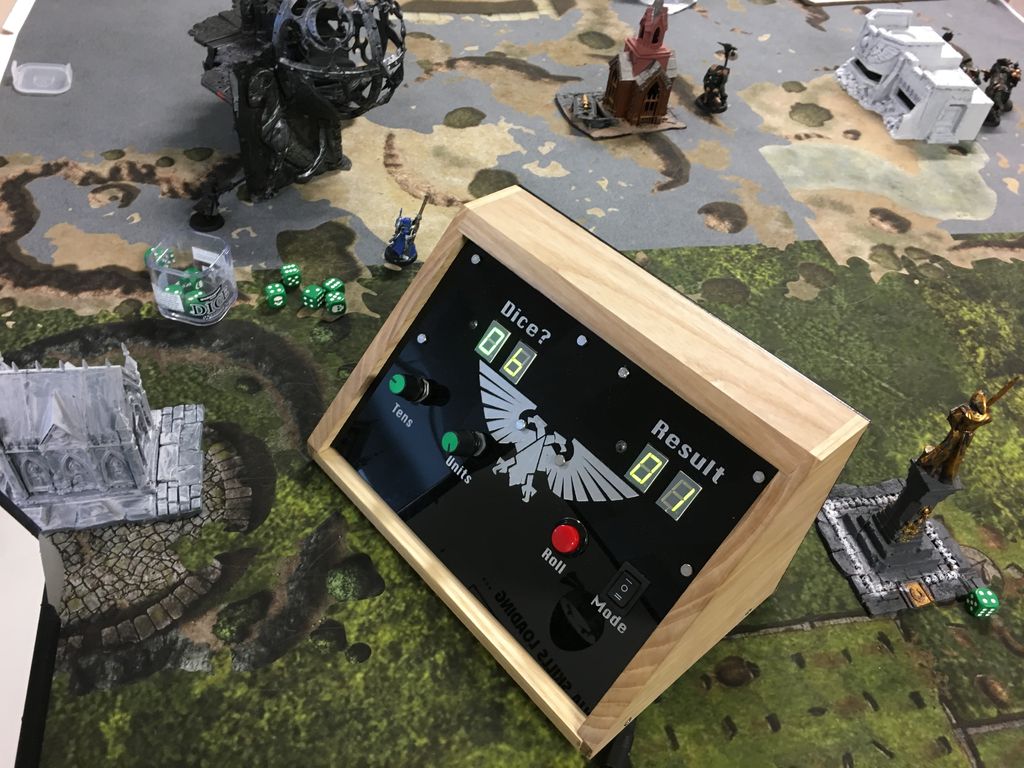
The enclosure for the unit is beautifully constructed out of ash wood and black acrylic, which should fit in nicely with a variety of games, including Warhammer 40,000 for which it was designed.

Arduino Blog 22 Jan 19:15

Upgrading a ride-on car to a joystick-controlled assistive device

Child-sized wheelchairs can be difficult to come by, and unfortunately aren’t as much fun as something like a ride-on car. The South Eugene Robotics Team, or FRC2521, decided to address both challenges by building a mini Jeep augmented for kids with limited mobility.

Instructions found here detail how to modify the battery-powered toy, including what can be recycled and what extra parts will need to be purchased. In the new configuration, the Jeep’s two rear motors are configured for differential control, with the input regulated by an Arduino Nano and a pair of electronic speed controllers (ESCs). 

In this project, a joystick replaces the original pedal and steering wheel, and it looks like a lot of fun when implemented in the similarly-outfitted firetruck below.

ClearCrawler Strandbeeest walks under Arduino control

Maker Jeremy S. Cook has been building Theo Jansen-style walkers for literally years, and after several iterations has come up with what he calls the “ClearCrawler.” 

This little guy stands at just over 15 inches tall — including its comparatively large clear cylindrical head — and travels around via a pair of motors that move four legs on either side like tank treads.

For control, Cook is using an Arduino Nano onboard, along with a motor driver, plus an Uno and joystick shield as the remote unit. Communication between the two is accomplished by a pair of nRF24L01+ radio modules. 

Code for the project is available on GitHub, and the build is split up into an electronics and mechanical section in the videos below.

Arduino Blog 03 Dec 19:44

This New Nano Pack Has EVERYthing You Need

The Arduino Nano Every is now available in a 3 and 6 pack – perfect for running a course or powering all your projects with Arduino.

For those countless creations requiring a small and easy to use microcontroller board, the Nano Every has the tiniest Arduino form factor out there measuring just 45x18mm. Whether you’re working on a low-cost robotics project for the entire classroom or presenting a complex prototype with many functional blocks, this pack offers exactly what you need – a batch of Nano Every boards at a great price! 

This robust little board costs as little as €7.50 each ($9.30 each) in the 6 pack, saving €0.50 ($0.60) per board versus the single. It’s now more affordable than ever to forecast the local across town by building your own little band of Gnome Weather Forecasters in your class.

If you are interested in the ARDUINO NANO EVERY – PACK, visit the Arduino online store at this link.

TipText enables one-handed text entry using a fingertip keyboard

Today when you get a text, you can respond with message via an on-screen keyboard. Looking into the future, however, how would you interact unobtrusively with a device that’s integrated into eyeglasses, contacts, or perhaps even something else?

TipText is one solution envisioned by researchers at Dartmouth College, which uses a MPR121 capacitive touch sensor wrapped around one’s index finger as a tiny 2×3 grid QWERTY keyboard.

The setup incorporates an Arduino to process inputs on the grid and propose a number of possible words on a wrist-mounted display that the user can select by swiping right with the thumb. A new word is automatically started when the next text entry tap is received, allowing for a typing speed of around 12-13 words per minute.

Competition robot picks up (almost) all the balls

For the Warman Design and Build Competition in Sydney last month, Redditor ‘Travman_16 and team created an excellent Arduino-powered entry. The contest involved picking up 20 payloads (AKA balls) from a trough, and delivering them to a target trough several feet away in under 60 seconds.

Their autonomous project uses Mecanum wheels to move in any direction, plus a four-servo arm to collect balls in a box-like scoop made out of aluminum sheet. 

An Arduino Mega controls four DC gear motors via four IBT-4 drivers, while a Nano handles the servos. As seen in the video, it pops out of the starting area, sweeps up the balls and places them in the correct area at an impressive ~15 seconds. 

It manages to secure all but one ball on this run, and although that small omission was frustrating, the robot was still able to take fifth out of 19 teams. 

Arduino Blog 09 Nov 00:17
arduino  mega  nano  robotics  robots  

Cisco switches converted into a cocktail machine

If you want to whip up a cocktail, you can measure out the components by hand, or you could use a robotic assistant like this setup by creator Sven Tantau.

Tantau’s project employs an Arduino Nano to control 24 peristaltic pumps via a relay card, plus an ESP32 to run a web interface and send I2C commands to the Arduino letting it know which pumps to enable.  

The pumps, along with the relays and other components, are arranged inside the stripped shell of two Cisco Catalyst switches. In fact, the only electrical part from the router that’s still in use is the 12V power supply. 

This does, however, do a fantastic job of looking good while hiding the electronics inside, and transport tubing is nicely arranged on a 3D-printed grid where the Ethernet plugs once connected!

Arduino Blog 29 Oct 20:36

Baby Cheetah is a mini, MIT-inspired quadruped robot

Although we can’t all have the MIT Mini Cheetah at home, Jegatheesan Soundarapandian decided to make his own version — measuring just 23 cm x 9 cm x 9 cm.

As shown in the video below, the aptly named “Baby Cheetah” does an amazing job of getting around on four legs, and is not only able to walk upright, but can even move at a crouch, turn, and tilt forwards or backwards.

The robot is equipped with eight SG90 servos to actuate each 3D-printed leg linage assembly, giving the limbs excellent mobility in a vertical plane. An Arduino Nano is used for control, while an HC-05 Bluetooth module links to a smartphone running a custom app for user interface. 

More info and Arduino code is available in Soundarapandian’s project write-up.

5 Arduino projects to get you Halloween-spired

October 31st is almost here and we’re all super excited, because this is the perfect time for some DIY fun! Nothing to wear? Not a problem! Need a spook-tacular decoration? We’ve got just the thing.

To help get you into the spirit, we’ve selected a handful of Halloween-themed projects from the Arduino Project Hub that will surely catch the attention of trick-or-treaters (or send them screaming into the night.)  

Talking Triceratops Skull

Make your Echo Dot a bit more interesting than a hockey puck using an Arduino Uno, a Motor Shield, a 3.5mm TRS splitter, and an amplified speaker.

Animatronic Halloween Prop

This Arduino Mega-based robot can be operated remotely from your smartphone or move about autonomously, complete with creepy lights and a terrifying soundtrack.

LED Eye Mask

Stand out as you walk through the neighborhood by customizing a store-bought mask with an eye made of LEDs and a mouth that flashes red. 

Dropping Spider

Here’s a quick, last-minute scare prank for your porch. Drop a fake spider on anyone that tries to ring your doorbell via an Arduino Uno, an HC-SR04 ultrasonic sensor, and a servo. 

Ultimate Dry Ice Machine

Add some special effects to your party with a 3D-printed, Arduino Nano-powered fog machine that’s controllable over Bluetooth. 

Have a project of your own? Be sure to share it with us! 

You can make this 3D-printed, Arduino-powered IR thermometer yourself

If you want to measure the temperature of an object, one very convenient way is to use an infrared thermometer. MN Maker didn’t have one, and after wondering just how hot a component was getting, he decided to simply build one.

His device utilizes an Arduino Nano for control, and resides inside a 3D-printed enclosure that he designed. Temperature sensing is handled by an MLX90614 IR thermometer on a GY-906 breakout board, and a small laser is used for aiming. Once the temperature is obtained, it’s displayed on an OLED screen in the back of the housing in both Celsius and Fahrenheit. 

Arduino code and print files are available via the project’s write-up.