Posts with «microcontrollers» label

Custom Calculator Brings Us Back To The 70s

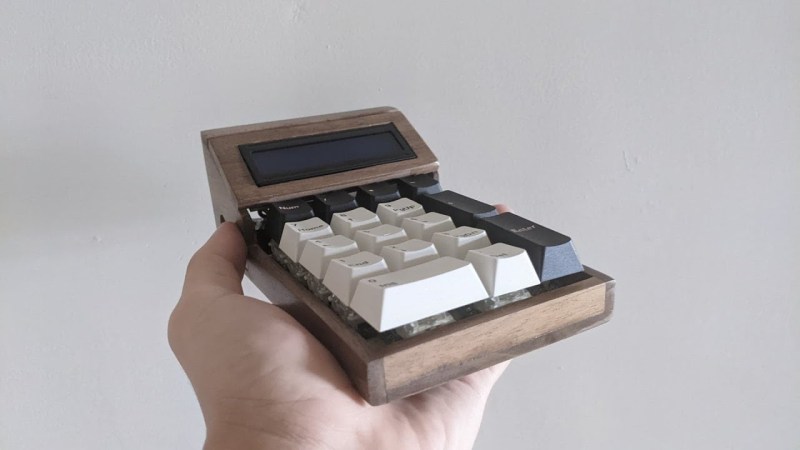
There are certain design aesthetics from every era that manage to survive the fads of their time and live throughout history. Ancient Greek architecture is still drawn upon for design inspiration in modern buildings, the mid-century modern style from the 60s still inspires various designs of consumer goods, and the rounded, clean looking cars from the 90s are still highly desirable qualities in automotive design. For electronics, though, we like this 70s-inspired calculator that [Aaron] recently built.

The calculator hearkens back to the days of calculators like the HP-29C with its large buttons and dot-matrix display. [Aaron] built the case out of various woods with a screen angled towards the user, and it uses a LCD display similar to those found in antique calculators. The brain of the calculator is an Arduino which fits easily into the case, and [Aaron] also built the keyboard from scratch with Cherry MX-style mechanical keys soldered together into a custom shape.

The software to run the calculator is fairly straightforward, but we are most impressed with the woodworking, styling, and keyboard design in this build. [Aaron] is also still ironing out some bugs with the power supply as it uses a DC-DC converter to power the device from a single lithium battery. For those who are more fond of early 2000s graphing calculators instead, be sure to take a look at this graphing calculator arcade cabinet.

GGWave Sings the Songs of Your Data

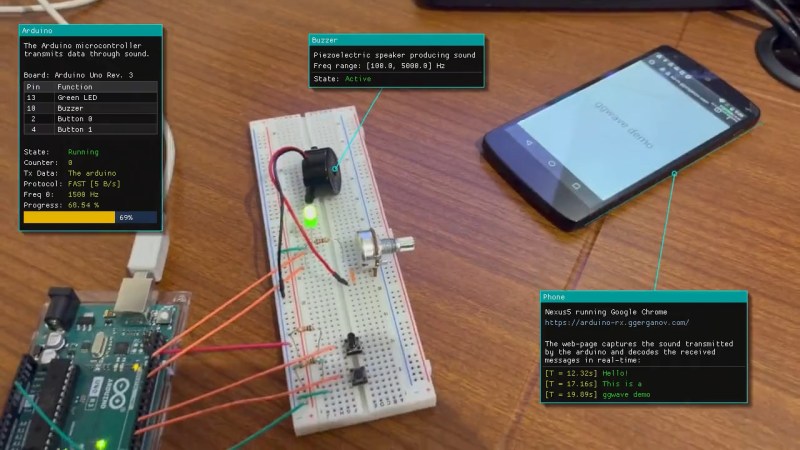
We’re suckers for alternative data transmission methods, and [Georgi Gerganov]’s ggwave made us smile. At its core, it’s doing what the phone modems of old used to do – sending data encoded as different audio tones. But GGwave does this with sophistication!

It splits the data into four-bit chunks, and uses 16 different frequency offsets to represent each possible value. But for each chunk, these offsets are added to one of six different base frequencies, which allows the receiving computer to tell which chunk it’s in. It’s like a simple framing concept, and it makes the resulting data sound charmingly like R2-D2. (It also uses begin and end markers to be double-sure of the framing.) The data is also sent with error correction, so small hiccups can get repaired automatically.

What really makes ggwave shine is that it’s ported to every platform you care about: ESP32, Arduino, Linux, Mac, Windows, Android, iOS, and anything that’ll run Python or JavaScript. So it’ll run in a browser. There’s even a GUI for playing around with alternative modulation schemes. Pshwew! This makes it easy for a minimalist microcontroller-based beeper button to control your desktop, or vice-versa. An ESP32 makes for an IoT-style WiFi-to-audio bridge. Write code on your cell phone, and you can broadcast it to any listening microcontroller. Whatever your use case, it’s probably covered.

Now the downside. The data rate is slow, around 64-160 bits per second, and the transmission is necessarily beepy-booopy, unless you pitch it up in to the ultrasound or use the radio-frequency HackRF demo. But maybe you want to hear when your devices are talking to each other? Or maybe you just think it’s cute? We do, but we wouldn’t want to have to transmit megabytes this way. But for a simple notification, a few bytes of data, a URL, or some configuration parameters, we can see this being a great software addition to any device that has a speaker and/or microphone.

Oh my god, check out this link from pre-history: a bootloader for the Arduino that runs on the line-in.

Hack a Day 06 Jul 19:30

UART Can’t? Arduino CANSerial Can!

[Jacob Geigle] had a problem. A GPS unit and a Bluetooth-to-serial were tying up all the hardware UARTs on an AVR Arduino project. “Software serial”, I hear you say. But what if I told you [Jacob] already had the board in question sending out data over CAN bus?

[Jacob]’s sweet hack creates an arbitrary number of CAN “devices” inside the Arduino code, and can treat each one of them as its own serial data channel. The “N” in CAN stands for network, after all. The trick is to create a device ID for each desired CANSerial interface, which is done in his library using the usual Arduino setup step. A buffer takes care of storing all the different channels until they can be pushed out over the hardware CAN peripheral. On the big-computer side of things, some software listens for the different “device” enumeration IDs and assigns each a virtual serial port.

While this was a hack born of necessity, we can see it as a clever opportunity to segregate information coming from the microcontroller into different streams. Maybe a debug channel, a command channel, and a data channel? They’re virtual devices, so go nuts!

While we usually see CANbus in its native habitat – inside your car – it’s also cool to think of the uses we could put it to. For instance, controlling a 3D printer. Need a CAN refresher? We’ve got just the ticket.

[Bus photo: Malta Bus; The terminus, Valletta by John Haslam. Can photo: Paint Cans by Daniel R. Blume. Horrible visual pun: I’m afraid that’s on us. You try finding images for CANbus code!]

Hack a Day 05 Jul 06:00

Blinking an Arduino LED, in Julia

The Julia programming language is a horrible fit for a no-frills microcontroller like the ATMega328p that lies within the classic Arduino, but that didn’t stop [Sukera] from trying, and succeeding.

All of the features that make Julia a cool programming language for your big computer make it an awful choice for the Arduino. It’s designed for interactivity, is dynamically typed, and leans heavily on its garbage collection; each of these features alone would tax the Mega to the breaking point. But in its favor, it is a compiled language that is based on LLVM, and LLVM has an AVR backend for C. Should just be a simple matter of stubbing out some of the overhead, recompiling LLVM to add an AVR target for Julia, and then fixing up all the other loose ends, right?

Well, it turns out it almost was. Leaning heavily on the flexibility of LLVM, [Sukera] manages to turn off all the language features that aren’t needed, and after some small hurdles like the usual problems with volatile and atomic variables, manages to blink an LED slowly. Huzzah. We love [Sukera’s] wry “Now THAT is what I call two days well spent!” after it’s all done, but seriously, this is the first time we’ve every seen even super-rudimentary Julia code running on an 8-bit microcontroller, so there are definitely some kudos due here.

By the time that Julia is wedged into the AVR, a lot of what makes it appealing on the big computers is missing on the micro, so we don’t really see people picking it over straight C, which has a much more developed ecosystem. But still, it’s great to see what it takes to get a language designed around a runtime and garbage collection up and running on our favorite mini micro.

Thanks [Joel] for the tip!

This DIY UPDI Programmer is Nice and Cheap

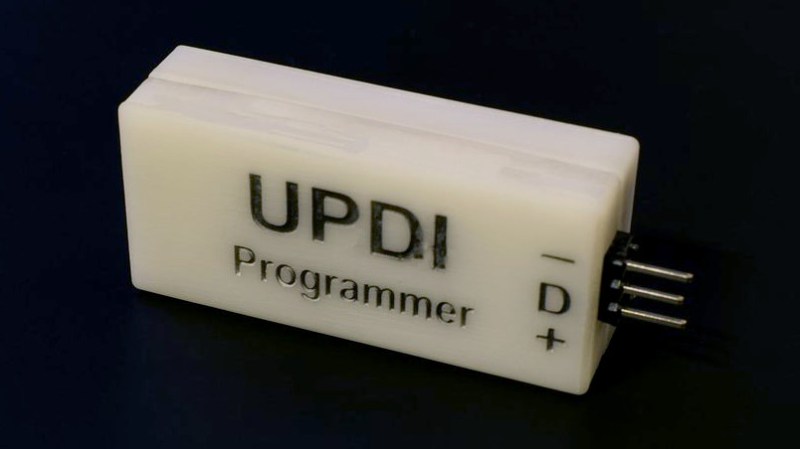
[Daumemo] likes experimenting with DIY electronics, and like many people, eventually ran across an AVR microcontroller with a Unified Program and Debug Interface (UPDI). One option is of course to purchase an UPDI programmer, but an even better solution was to make a DIY USB version from nice, cheap parts.

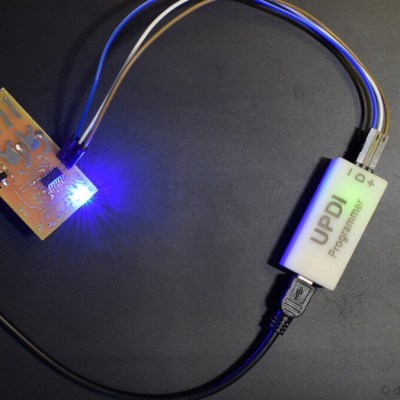
Programming an Attiny404 over the UPDI interface.

UPDI is an interface for external programming and on-chip debugging of microcontrollers, and [Daumemo]’s solution is based on the jtag2updi project. It combines an Arduino Nano (in this case, a clone) with a single resistor, a single capacitor, and a six pin angled header (with a cleverly bent pin) to enable programming UPDI devices over a USB connection. [Daumemo] is happy to report that the device works just fine in both Microchip Studio with AVRDUDE, or PlatformIO.

Is an Arduino Nano a bit overpowered in this role? Maybe, but the price is certainly right. There’s no need for a custom PCB either, since everything can be soldered direct to the Nano board. A matching 3D printed enclosure is about all that’s needed to make a robust and reliable DIY USB UPDI programmer out of a handful of parts, and that sounds good to us.

On the other hand, if you do find yourself making custom PCBs, you may be interested in another of [Daumemo]’s DIY projects: a printable structure to turn a rotary tool into a PCB drill press.

IR Translator Makes Truly Universal Remote

Universal remotes are a handy tool to have around if you have many devices that would all otherwise have their own remote controls. Merging them all into a single device leads to less clutter and less frustration, but they are often not truly “universal” as some of them may not support every infrared device that has ever been built. If you’re in a situation like that it’s possible to build a truly universal remote instead, provided you have a microcontroller and a few infrared LEDs on hand.

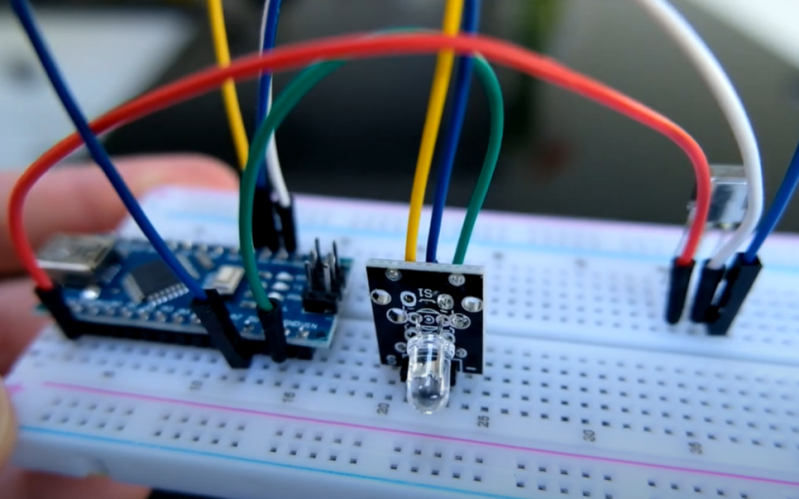
This was the situation that [Matt] found himself in when his Amazon Fire TV equipment control feature didn’t support his model of speakers. To get around this he programmed an Arduino to essentially translate the IR codes from the remote and output a compatible set of codes to the speakers.This requires both an IR photodiode and an IR LED but little else other than the codes for the remote and the equipment in question. With that all set up and programmed into the Aruino, [Matt]’s remote is one step closer to being truly “universal”.

While [Matt] was able to make use of existing codes in the Arduino library, it is also possible to capture the codes required manually by pointing a remote at a photodiode and programming a microcontroller to capture the codes that you need. [Matt] used a Raspberry Pi to do this when debugging this project, but we’ve also seen this method used with a similar build which uses an ESP8266 to control an air conditioner via its infrared remote control capabilities.

I2C To The Max With ATtiny

The Arudino is a powerful platform for interfacing with the real world, but it isn’t without limits. One of those hard limits, even for the Arduino MEGA, is a finite number of pins that the microcontroller can use to interface with the real world. If you’re looking to extend the platform’s reach in one of your own projects, though, there are a couple of options available. This project from [Bill] shows us one of those options by using the ATtiny85 to offload some of an Arduino’s tasks using I2C.

I2C has been around since the early 80s as a way for microcontrollers to communicate with each other using a minimum of hardware. All that is needed is to connect the I2C pins of the microcontrollers and provide each with power. This project uses an Arduino as the controller and an arbitrary number of smaller ATtiny85 microcontrollers as targets. Communicating with the smaller device allows the Arduino to focus on more processor-intensive tasks while giving the simpler tasks to the ATtiny. It also greatly simplifies wiring for projects that may be distributed across a distance. [Bill] also standardizes the build with a custom dev board for the ATtiny that can also double as a shield for the Arduino, allowing him to easily expand and modify his projects without too much extra soldering.

Using I2C might not be the most novel of innovations, but making it easy to use is certainly a valuable tool to add to the toolbox when limited on GPIO or by other physical constraints. To that end, [Bill] also includes code for an example project that simplifies the setup of one of these devices on the software end as well. If you’re looking for some examples for what to do with I2C, take a look at this thermometer that communicates with I2C or this project which uses multiple sensors daisy-chained together.

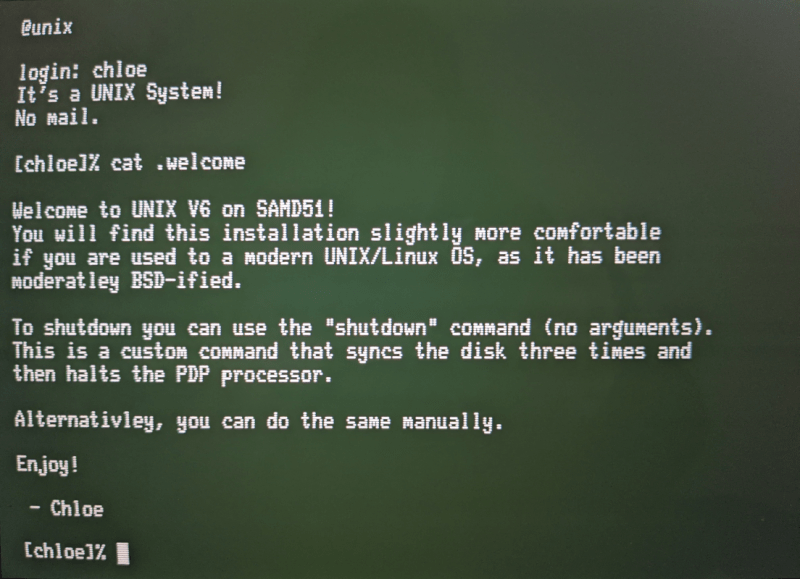
Run UNIX On Microcontrollers With PDP-11 Emulator

C and C++ are powerful tools, but not everyone has the patience (or enough semicolons) to use them all the time. For a lot of us, the preference is for something a little higher level than C. While Python is arguably more straightforward, sometimes the best choice is to work within a full-fledged operating system, even if it’s on a microcontroller. For that [Chloe Lunn] decided to port Unix to several popular microcontrollers.

This is an implementation of the PDP-11 minicomputer running a Unix-based operating system as  an emulator. The PDP-11 was a popular minicomputer platform from the ’70s until the early 90s, which influenced a lot of computer and operating system designs in its time. [Chloe]’s emulator runs on the SAMD51, SAMD21, Teensy 4.1, and any Arduino Mega and is also easily portable to any other microcontrollers. Right now it is able to boot and run Unix but is currently missing support for some interfaces and other hardware.

[Chloe] reports that performance on some of the less-capable microcontrollers is not great, but that it does run perfectly on the Teensy and the SAMD51. This isn’t the first time that someone has felt the need to port Unix to something small; we featured a build before which uses the same PDP-11 implementation on a 32-bit STM32 microcontroller.

Vektor Kollektor Inspector

With the world opening up again, [Niklas Roy] and [Kati Hyyppä] have been busy making a public and collaborative project. Meet the Vektor Kollektor, a portable drawing machine experience, complete with a chip-tune soundtrack. It’s great to see public art meet the maker community with zero pretension and a whole lot of fun!

The build started with an HP7475A pen plotter from the 80s, one that was DOA (or was fried during initial testing). [Niklas] and [Kati] kept the mechanism but rebuilt the controls allowing for easy integration with an Arduino Nano and to be powered with a motorcycle battery.

The magic seems to be less in the junk-bin build (which is great) and more in the way this team extended the project. Using a joystick with arcade buttons as an input, they carted Vektor Kollektor to public parks and streets where they invited others to make art. The Kollekted drawings are available on a gallery website in a very cool animated form, freely available for download, on t-shirts, 3D prints, and on coffee mugs because, why not?

Some select drawings are even spray-painted on walls using a large plotter, and we really hope [Niklas Roy] and [Kati Hyyppä] share details on that build soon. Of course this comes hot on the heels of the workshop window cyborg we saw from these two hardware artists.

PNG Image Decoding Library Does it With Minimal RAM

Want to display a PNG file on a display attached to an Arduino or other microcontroller board? You’ll want to look at [Larry Bank]’s PNGdec, the Arduino-friendly PNG decoder library which makes it much easier to work with PNG files on your chosen microcontroller.

The PNG image format supports useful features like lossless compression, and was generally developed as an improved (and non-patented) alternative to GIF files. So far so great, but it turns out that decoding PNG files on a microcontroller is a challenge due to the limited amount of memory compared to desktop machines. When the PNG specification was developed in the 90s, computers easily had megabytes of memory to work with, but microcontrollers tend to have memory measured in kilobytes, and lack high-level memory management. [Larry]’s library addresses these issues.

PNGdec is self-contained and free from external dependencies, and also has some features to make converting pixel formats for different display types easy. It will run on any microcontroller that can spare at least 48 K of RAM, so if that sounds useful then check out the GitHub repository for code and examples.

We’ve seen [Larry]’s wonderful work before on optimizing GIF playback as well as rapid JPEG decoding, and these libraries have increasing relevance as hobbyists continue to see small LCD and OLED-based displays become ever more accessible and affordable.

[PNG logo: PNG Home Site]