Posts with «makers» label

Maker builds feeding machine that lets his cat ‘hunt’ for food

Although automated pet feeders seem to be a dime a dozen these days, Benjamin Millam’s project is on a whole ‘nother level. Last year, the Maker created a system that caters to the primal instincts of his indoor cat, Monkey, by training him to look for plastic balls hidden around the house and then drop them into the machine. Once the apparatus recognizes the RFID-tagged balls, food gets dispensed into the bowl.

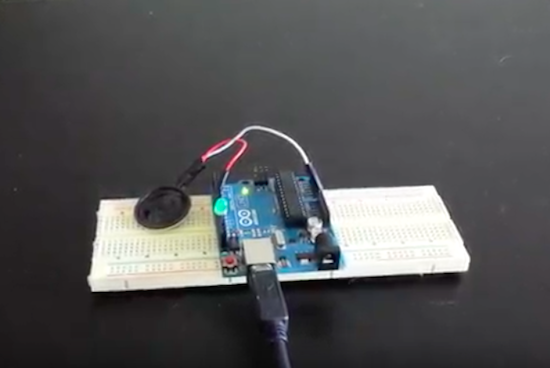
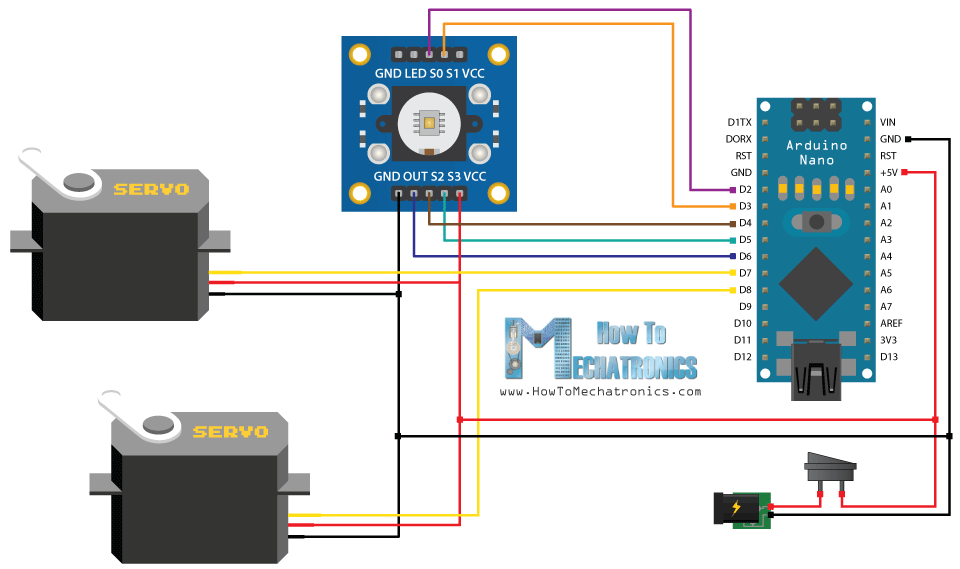
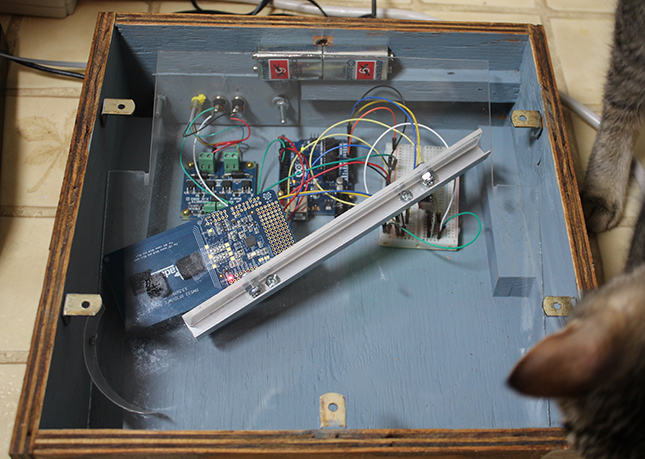
The system is comprised of a modified Super Feeder, an Adafruit RFID reader, a remote antenna, a few relays and an Arduino Uno. Millam writes that he conceived the idea after learning why cats repeatedly scour the same area.

What if my cat, while out on patrol, actually found its prey? Surely this would bring him one step closer towards a more fulfilled and self-actualized indoor kitty existence. I imagined hiding little bowls of food around the house… then I imagined me actually refilling these bowls. Then I imagined having to move them around to different hiding spots, spilling, forgetting, and every so often, perhaps only after following a trail of ants, finding one undiscovered and rancid. Hmmm, maybe there’s a way to hide something else, a way to hide something other than food, a way to make something not-food = food…

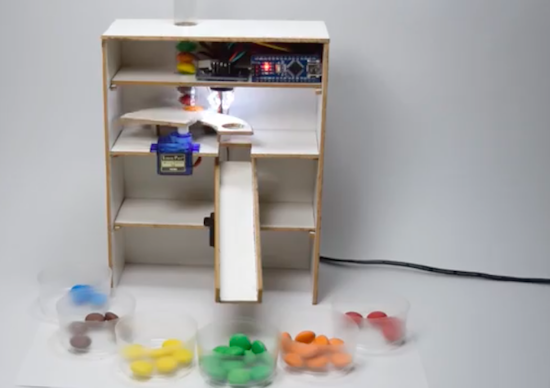
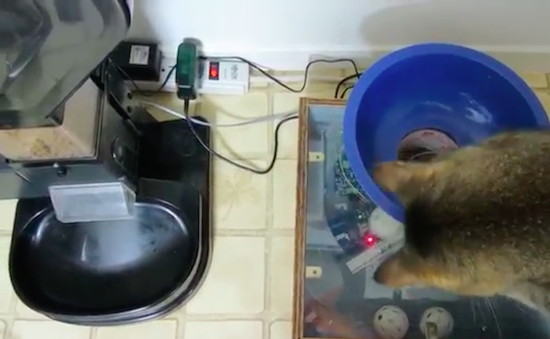
Throughout the day, the feline seeks out a series of embedded balls and plops them into a blue bowl on top of the makeshift device. From there, gravity takes over. As the ball makes its way down the shoot, the RFID tag is scanned and and the program is initiated. The Arduino switches on the relay that closes the feeder’s power circuit, and voila!

The Maker does note, however, that a little training is needed in order for this method work. While we’ll have to wait and see if this becomes an actual product, you can watch Monkey go after some Wiffle Balls right meow!

The most incessant (and annoying) Arduino project ever?

If you live with your family, a significant other or a few roommates, and you’re looking for a fun prank to drive them nuts, Connor Nishijima has the perfect trick for you: an Arduino cricket. Unlike actual crickets that are relatively consistent with the sounds they make, this one is a far cry from that. Instead, the Maker’s project will chirp for a brief second, and then go into a deep sleep for a random amount of time between three minutes and three hours. As you could imagine, this can make the source of the noise extremely difficult to pinpoint!

Nishijima combined the JeeLib library for reducing current consumption and his new library for 8-bit volume control to bring the insanely annoying “cricket” to life using nothing more than a speaker, a 7800mAh USB battery, and an Arduino. The best part? He estimates that the setup has enough juice to last for months, if not years. In his case, he enclosed the electronics within a box along with some magnets, then placed it in his vent to mess with his buddy.

For the lowest current comsumption with minimal effort, I’ll be using a 16MHz Arduino Pro Micro with a few power-hog components like the power LED desoldered. Unfortunately, the PWM speeds needed for my Volume lib only work well at 16MHz so far, so using 8MHz to conserve power is out.

However, the awesome battery calculator at Oregon Embeddedtells me that at 16mA “awake” current and 200uA “asleep” current (being asleep more than 95% of the time) this should last more than three years. Of course, the battery itself will have some drain involed with it’s circuitry, but even a FOURTH of the estimated battery life still puts us at almost a full year which is good enough for me, and bad enough for my friend.

Those wishing to give this prank a try can check out Nishijima’s videos below, as well as his code on GitHub.

Turn your printer into a MOCO slider with Arduino

Product designer Eduard Puertas continues to impress us with his makeshift motion control projects. Recently, the animation enthusiast had come across a broken HP printer on the street; rather than let it be picked up by the garbage truck, he decided to repurpose it into a MOCO slider for stop motion and time-lapse photography.

Aside from the printer’s mechanical parts, Puertas used an Arduino Uno, some stepper drivers, and Dragonframe software to bring his idea to life. You can see the end result below!

Ride to work on an Arduino-based electric unicycle

Some people drive their car to work. Some walk. Others ride their bike. Well, in Nick Thatcher’s case, he prefers to hop on his own electric unicycle. The serial creator of self-balancing vehicles has just completed his latest project, dubbed  “Plan-B.”

Unlike his other builds, this time Thatcher set out to make Plan-B a true “commuter” unicycle with the utmost portability–boasting a foldable design, a handle on its rear for easy carrying, and a LiFePo4 battery to keep it lightweight.

His newly-constructed personal transport is equipped with a 24V 350W geared motor and a SyRen 50A motor controller, along with an Arduino Uno and an IMU to help maintain the cycle’s stability. Beyond that, Plan-B uses a wheelbarrow wheel with a chain drive from the motor.

Watch Thatcher commute in style below!

Monitor your solar energy with a dual-axis tracker

As part of a school project, Bruce Helsen built a dual-axis tracker for optimizing solar panel use during his time as exchange student in Finland. Although adding a tracking system to a larger installation isn’t really a cost-effective option, it can certainly come in handy for smaller units.

Helsen’s dual-axis tracker works by making sure that the two 12V 150W solar panels stay aligned with the sun for as long as possible, measuring the panels’ voltage and current then calculating the generated power and energy, and sending that data from the monitor to ThingSpeak. There’s also an LCD to display the readings.

The panel’s two axes are controlled by a pair of inexpensive linear actuators. It uses an Arduino Mega for a brain, and an ESP8266 for transmitting the data over to the cloud. Light direction is detected by a homemade light sensor housed inside an industrial lamp enclosure. A 3D-printed crossbeam separates the sensor into four quadrants, with a light-dependent resistor for each. By comparing the average LDR values, the panel is able to point in the best direction.

Looking to monitor your solar energy? Check out Helsen’s project page here.

Kick the habit with a cigarette smoke-detecting shirt

You’ve heard it before, smoking is bad for your health. However, despite the countless warnings, millions of people continue to use cigarettes–including 7th grade student Petter’s dad. Mindful of this, the young Maker came up with a new way to shame smokers into quitting.

The aptly named “Cigarette Smoke Detecting Shirt” consists of an Arduino LilyPad, a smoke sensor, and three LED sequins, all sewn into the t-shirt using conductive thread. When cigarette smoke is sensed, one of three different lights illuminate alongside a message to embarrass the wearer such as “stinky breath,” “yellow teeth,” or “lung cancer.”

In the future, Petter hopes to finish the prototype and start making more shirts to sell on Etsy. Whether or not this idea takes off, it’s pretty cool nonetheless. As Adafruit puts it, “This is such a fine example of a project that works on an issue and gets students excited about STEM.”

This Arduino machine will sort your Skittles by color

Do you just really hate yellow Skittles? Only love the red ones? Well, why waste your time sorting them out yourself when an automated machine can do it for you? As part of a recent tutorial, Dejan Nedelkovski has built what we calls the “Arduino Color Sorter” using a TCS3200 color sensor, two hobbyist servo motors, and an Arduino Nano.

How it works is fairly straightforward: The candies are stored within a plastic tube on top of the contraption and dropped onto a platform attached to the first servo. The motor then rotates the platform, bringing the Skittle to the color sensor. From there, the bottom servo moves into position while the top servo rotates again until the candy falls into the guide rail and into its respective bin.

So whether you’re tired of grouping your Skittles or need to meet the request of rockstars like Van Halen (no brown M&Ms!), you can find the Arduino Color Sorter’s 3D model, code and instructions here.


Turn your old cellphone into a smartwatch

Do you have an old cellphone lying around somewhere? Don’t know what to do with it? Time to blow off that dust and convert the ‘dumb’ device into a smartwatch? This is exactly what Tinkernut has done. His DIY wearable not only tells time, but connects wirelessly to his smartphone over Bluetooth and notifies him of incoming calls and text messages via light and vibration.

The build itself uses an LCD screen and vibrating motor from a Nokia 1100 along with an Arduino Pro Mini to drive the system. A 3.7V 1100mAh rechargeable battery powers the gadget. All the electronics are soldered together to a perfboard, and housed inside a 3D-printed case.

Have an obsolete phone you’d love to repurpose into modern-day tech? Tinkernut has put together a detailed three-video series that explains everything from extracting the display, to connecting it to the Arduino, to creating an app in the MIT App Inventor. Admittedly, this project kept things simple; however, there are plenty of other features you can add, including a pedometer to count steps or a real-time clock module so you can keep time without having the watch tethered to your mobile device.

Build your own coin-operated Wi-Fi hotspot ticketing system

Reddit user “jeff122885” has come up with a fairly simple yet clever coin-operated ticketing system for his Wi-Fi network. The setup consists of a Ch-926 multi-coin acceptor, a MikroTik Groove, and an Arduino Uno with a microSD card module. The unique password for the hotspot is stored in the SD card and read by the Arduino.

Once the coins are deposited, the voucher code, Wi-Fi name, duration, cost, and instructions on how to connect are printed onto a receipt. You can see it all in action below!

The CALEIDUINO is a digital and sound reactive kaleidoscope

The CALEIDUINO is an Arduino-based digital and sound reactive kaleidoscope, designed to serve as a toy, an art object, and a tool for teaching electronics and programming in a playful yet creative way.

At the heart of CALEIDUINO is a PCB for connecting an Arduino Nano, a TFT 1.8 “display, an analog 3-axis accelerometer GY-61, a piezoelectric, a switch, and a 9V battery–all of which are housed inside a hexagonal methacrylate case. Just like in any kaleidoscope, t three mirrors in triangular prism shape, while an accelerometer collects a user’s movement to generate the psychedelic graphics and sounds.

In terms of software, the CALEIDUINO uses the Arduino IDE along with the Adafruit GFX and ST7735 libraries. The project is entirely open source and is the work of artist José Manuel González. You can read more about the device here, or see it in action below.