Posts with «keyboard» label

Connecting a Keyboard to a Vintage PC-XT, the Hard Way

We’re not sure if there’s any single characteristic that qualifies someone as a hacker. After all, we’re a pretty eclectic bunch, with skills that range all over the map, and what one person feels is trivial, others would look upon as black magic. But there’s one thing we’re sure of: if you find yourself reading the original POST code for the PC-XT motherboard just to get a keyboard working, you’re pretty much our kind of people.

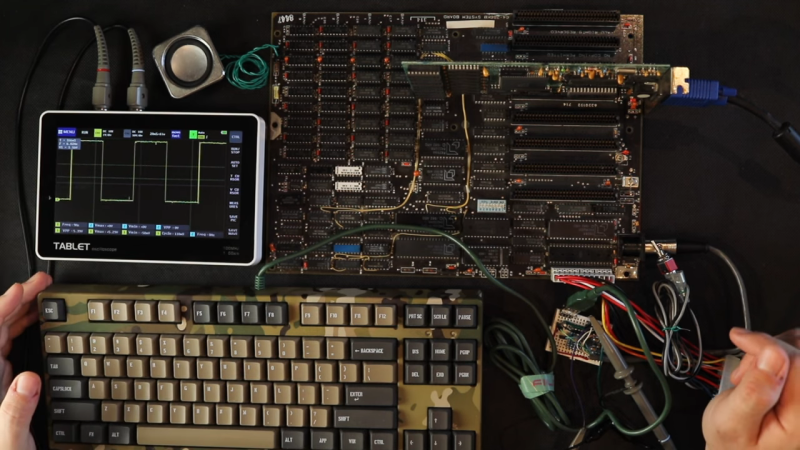
That was the position [Anders Nielsen] found himself in as work progresses on his “PC-XT from Scratch” project, which seeks to build a working mid-80s vintage IBM Model 5160 using as many period-correct parts as possible. The first installment of the series featured the delicate process of bringing the motherboard up, lest the magic smoke was released. After seeing some life out of the old board, [Anders] needed a little IO, specifically video and keyboard. The video side of the equation was relatively trivial, with an early-90s VGA card from eBay — not exactly period correct, but good enough to get something to display.

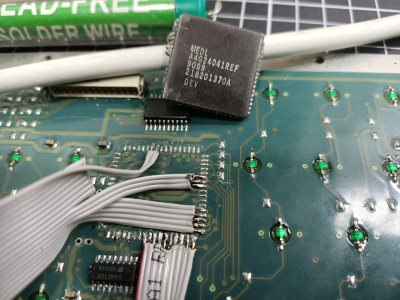
The keyboard was another matter entirely. It’s not too much of a chore to find a keyboard that’ll talk to a PC-AT, but the PC-XT had an entirely different protocol, not to mention that chunky 5-pin DIN connector. As with many things, the solution involved building an adapter out of an Arduino, but the process was not exactly low-friction. First, there was the question of dealing with the open-collector outputs on the keyboard, which required code changes. Next, [Anders] broke out the oscilloscope to check waveforms, and found a weird 9-Hz square wave on top of the keyboard clock signal. That ended up being a sign that the keyboard was stuck in a manufacturing test mode, according to a read-through of the power on self-test (POST) source code. A tiny tweak of the Arduino code got everything working.

We’ve got to say that we’re loving this deep dive into the internals of a piece of computer history. [Anders] teased the next step, which will use an empty ROM socket on an old network card to load some assembly code onto the XT. We’re very much looking forward to that exploit.

Hack a Day 08 Feb 06:00

Mechanical Keyboard Is Also a Mouse

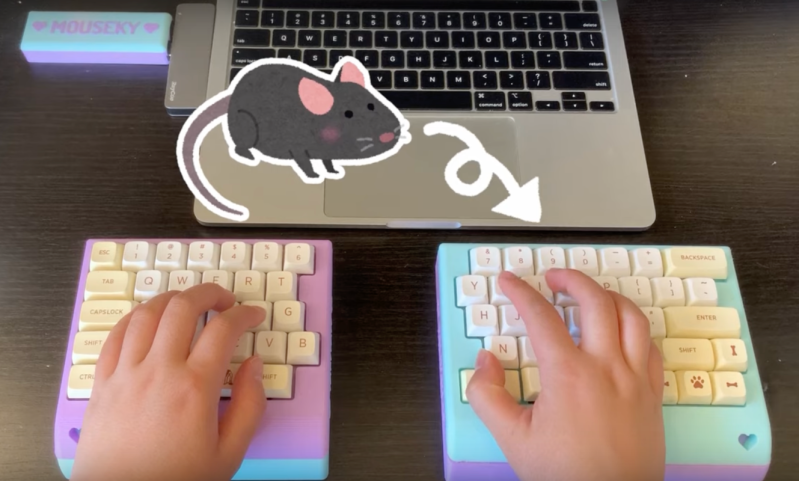
The mechanical keyboard community is a vibrant, if not fanatical, group of enthusiasts determined to find as many possible ways of assembling, building, and using as many high-quality keyboards as possible. With so many dedicated participants, most things that can be done with a keyboard already have been done. So when something as unique as this split keyboard that also doubles as a mouse pops up, we take notice.

The keyboard is a custom build from [Taliyah Huang] which uses a pair of Arduinos, one in each half of the keyboard, to communicate key and mouse information to a third Arduino which is plugged in to her laptop. The right-hand half of the keyboard also includes the circuitry from an optical mouse, which gets powered up when the caps lock button is held down. When activated, this allows the keyboard to be used as a mouse directly. It also includes support for most Mac gestures as well, making it just as useful as a trackpad.

While there were some problems with the design, including being slightly too tall to be ergonomic and taking nearly 24 hours of soldering to complete, the prototype device is an interesting one especially since it allows for full control of a computer without needing a dedicated mouse. For other unique mechanical keyboard concepts, we recently featured this build which takes design and functionality cues from the Commodore 64.

A Handy Tester for a Mountain of PS/2 Keybords

The hacking life is not without its challenges, and chief among these is the tendency to always be in acquisition mode. When we come across a great deal on bulk equipment, or see a chance to rescue some obscure gear from the e-waste stream, we generally pounce on it, regardless of the advisability.

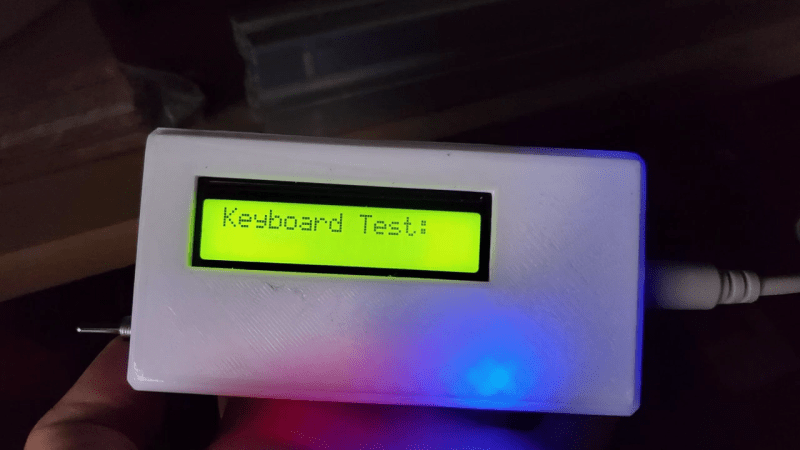
We imagine this is why [Nathan] ended up with a hoard of PS/2 keyboards. Seriously, there are like thousands of the things. And rather than lug a computer to them for testing, [Nathan] put together this handy Arduino-based portable tester to see which keyboards still have some life left in them. The video below goes into detail on the build, but the basics are pretty simple — an Arduino, a 16×2 LCD display, and a few bits and bobs to run it off a LiPo pack and charge it up. Plus, of course, a PS/2 jack to plug in a keyboard and power it up. Interestingly, the 16×2 display is an old Parallax unit, from the days when RadioShack still existed and sold their stuff. That required a little effort to get it working with the Arduino, but in the end it works like a charm — plug in a keyboard and whatever you type shows up on the screen.

Of course, it’s hard to look at something like this, and that mountain of keyboards in the background, and not scheme up ways to really automate the whole test process. Perhaps an old 3D printer with a stylus mounted where the hot end would go could press each key in turn while the tester output is recorded — something like this Wordle-bot, but on a keyboard scale. That kind of goes against [Nathan]’s portability goal, but it’s still fun to think about.

Hack a Day 12 Jul 16:30
2  arduino  arduino hacks  keyboard  ps  serial  test  tool hacks  

Custom Macro Keyboard With Sweet Backlighting

From the smallest 60% keyboards for those with no desk space to keyboards with number pads for those doing data entry all day, there’s a keyboard size and shape for just about everyone. The only problem, even with the largest keyboards, is that they’re still fairly limited in what they can do. If you find yourself wishing for even more functionality, you might want to build something like this custom macro keyboard with built-in LED backlighting.

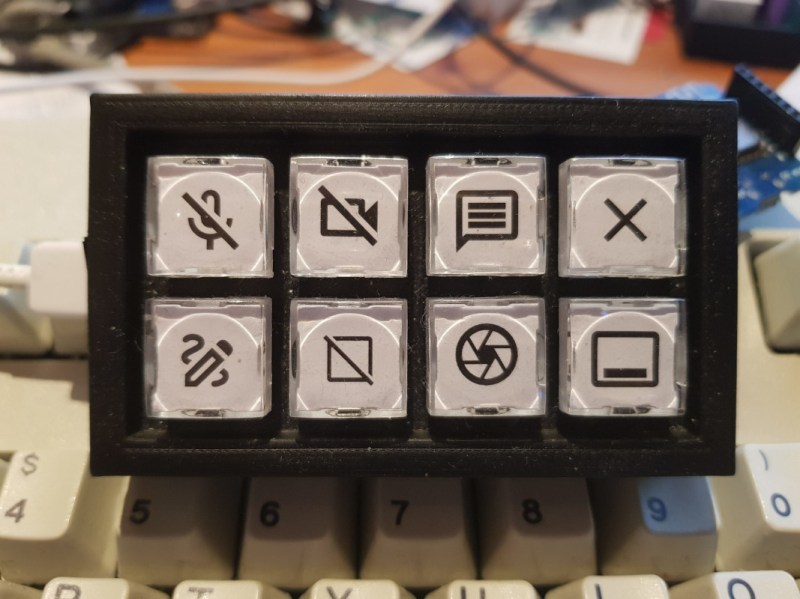
Rather than go with a standard mechanical keyboard switch like a Cherry MX, this build is based around TS26-2 pushbuttons with built-in LED lighting. [atkaper] only really needed one button for managing the mute button on MS Teams, but still built a total of eight switches into this keyboard which can all be individually programmed with different functions. The controller is an Arduino Leonardo and the enclosure was 3D printed.

Paired with the classic IBM Model M keyboard, this new macro keyboard adds plenty of functionality while also having control over LED backlighting. Macro keyboards are incredibly useful, especially with their ability to easily change function with control over the software that runs on them. The key to most builds is the 32U4 chip found in some Atmel microcontrollers which allows it to easily pass keyboard (and mouse) functionality to any computer its plugged in to.

Custom Macro Keyboard With RGB Lighting

From the smallest 60% keyboards for those with no desk space to keyboards with number pads for those doing data entry all day, there’s a keyboard size and shape for just about everyone. The only problem, even with the largest keyboards, is that they’re still fairly limited in what they can do. If you find yourself wishing for even more functionality, you might want to build something like this custom macro keyboard with built-in LED backlighting.

Rather than go with a standard mechanical keyboard switch like a Cherry MX, this build is based around TS26-2 pushbuttons with built-in LED lighting. [atkaper] only really needed one button for managing the mute button on MS Teams, but still built a total of eight switches into this keyboard which can all be individually programmed with different functions. The controller is an Arduino Leonardo and the enclosure was 3D printed.

Paired with the classic IBM Model M keyboard, this new macro keyboard adds plenty of functionality while also having control over LED backlighting. Macro keyboards are incredibly useful, especially with their ability to easily change function with control over the software that runs on them. The key to most builds is the 32U4 chip found in some Atmel microcontrollers which allows it to easily pass keyboard (and mouse) functionality to any computer its plugged in to.

Touch-Typing On Fingertips? Prototype Says It Could Work

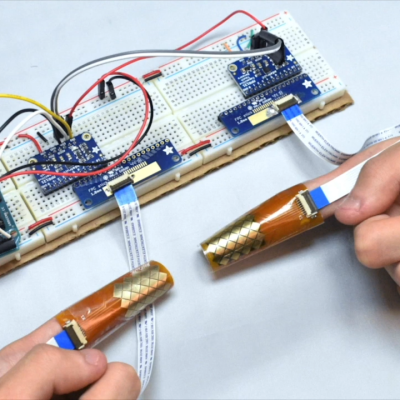
The fingertips are covered in touch sensors, each intended to be tapped by the thumbtip of the same hand.

Touch-typing with thumbs on a mobile phone keyboard is a pretty familiar way to input text, and that is part of what led to BiTipText, a method of allowing bimanual text input using fingertips. The idea is to treat the first segments of the index fingers as halves of a tiny keyboard, whose small imaginary keys are tapped with the thumbs. The prototype shown here was created to see how well the concept could work.

The prototype hardware uses touch sensors that can detect tap position with a high degree of accuracy, but the software side is where the real magic happens. Instead of hardcoding a QWERTY layout and training people to use it, the team instead ran tests to understand users’ natural expectations of which keys should be on which finger, and how exactly they should be laid out. This data led to an optimized layout, and when combined with predictive features, test participants could achieve an average text entry speed of 23.4 words per minute.

Judging by the prototype hardware, it’s understandable if one thinks the idea of fingertip keyboards may be a bit ahead of its time. But considering the increasingly “always on, always with you” nature of personal technology, the goal of the project was more about investigating ways for users to provide input in fast and subtle ways. It seems that the idea has some merit in principle. The project’s paper can be viewed online, and the video demonstration is embedded below.

One interesting thing is this: the inertia of users being familiar with a QWERTY layout is apparent even in a forward-thinking project like this one. We covered how Dvorak himself struggled with people’s unwillingness to change, even when there were clear benefits to doing so.

[via Arduino Blog]

The Clickiest Keyboard Ever

No matter how clicky your keyboard is, nothing compares to the sensory experience of using a typewriter. The sounds that a typewriter makes, from the deep clunk of hitting the spacebar to the staccato of keys striking paper to the ratchety kerchunk of returning the carriage, are a delight compared to the sterile, soulless clicks of even the noisiest computer keyboard. Oh, and the bell — who doesn’t love the bell?

Unwilling to miss out on the feel of real typing, [Jatin Patel] whipped up this solenoid-powered typewriter simulator. The first version had the core functionality, with a line of six solenoids mounted to a strip of wood. The coils are connected to an Arduino through a relay board; a Python program running on his PC reads every keypress and tells the Arduino which solenoid to fire. Each one sounds different somehow, perhaps due to its position on the board, or maybe due to differences in mounting methods. Whatever the cause, the effect is a realistic variability in the sounds, just like a real typewriter.

Version two, shown in the video below, ups the simulation with a motor that moves the solenoid rack one step with each keypress, to simulate the moving carriage of a typewriter. The last solenoid rings a bell when it’s time to return the carriage, which is done with a combination wrench as a handle. Weird hex, but OK.

Can’t get enough typewriter action? We understand; check out this typewriter-cum-USB keyboard, the tweeting typewriter, or this manual typewriter that pulls some strings.

KVM Uses Many Arduinos

The Arduino platform is one of the most versatile microcontroller boards available, coming in a wide variety of shapes and sizes perfect for everything from blinking a few LEDs to robotics to entire home automation systems. One of its more subtle features is the ability to use its serial libraries to handle keyboard and mouse duties. While this can be used for basic HID implementations, [Nathalis] takes it a step further by using a series of Arduinos as a KVM switch; although admittedly without the video and mouse functionality yet.

To start, an Arduino Uno accepts inputs from a keyboard which handles the incoming serial signals from the keyboard. From there, two Arduino Pro Micros are attached in parallel and receive signals from the Uno to send to their respective computers. The scroll lock key, which doesn’t do much of anything in modern times except upset Excel spreadsheeting, is the toggle switch between the two outputs. Everything is standard USB HID, so it should be compatible with pretty much everything out there. All of the source code and schematics are available in the project’s repository for anyone who wants to play along at home.

Using an Arduino to emulate a USB input device doesn’t have to be all work and no play, the same basic concept can also be used to build custom gaming controllers.

MIL-SPEC Keyboard Now Salutes USB

When [easyjo] picked up this late ’80s Marconi mil-spec keyboard for cheap, he knew it wouldn’t be easy to convert it to USB — just that it would be worth it. Spoiler alert: those LEDs aren’t a mod, they’re native. They get their interesting shape from the key traces, which are in the four corners.

Despite having way-cool buttons such as WPNS HOLD, and the fact that Control is on the home row where it belongs, this keyboard does not look fun to type on at all for any length of time. Of course, the point of this keyboard is not comfort, but a reliable input device that keeps out dust, sweat, liquids, and the enemy.

This is probably why the controller is embedded into the underside of the key switch PCB instead of living on its own board.  [easyjo] tried to analyze the signals from the existing 26-pin connector, but it didn’t work out.

So once he was able to decode the matrix, he removed the controller chip and wired the rows and columns directly to an Arduino Leonardo. Fortunately, the LEDs were just a matter of powering their columns from the front side of the board.

The availability of certain kinds of military surplus can make for really interesting modernization projects, like adding POTS to a field telephone.

Via r/duino

TipText enables one-handed text entry using a fingertip keyboard

Today when you get a text, you can respond with message via an on-screen keyboard. Looking into the future, however, how would you interact unobtrusively with a device that’s integrated into eyeglasses, contacts, or perhaps even something else?

TipText is one solution envisioned by researchers at Dartmouth College, which uses a MPR121 capacitive touch sensor wrapped around one’s index finger as a tiny 2×3 grid QWERTY keyboard.

The setup incorporates an Arduino to process inputs on the grid and propose a number of possible words on a wrist-mounted display that the user can select by swiping right with the thumb. A new word is automatically started when the next text entry tap is received, allowing for a typing speed of around 12-13 words per minute.