His Space Core is 3D-printed from a model that he found online, scaled up by 300% to fit the electronics inside, including an Arduino Uno and eight servo actuators. As with many projects, there was barely enough room to fit the electrical components, but as seen in the video below, it looks delightfully glitchy.
The Arduino controls the servo-driven eye movement and is linked to a smartphone over Bluetooth for remote operation. A second phone is integrated into the moving eye section, which displays an image of the personality core’s iris, and plays game quotes through its music app.
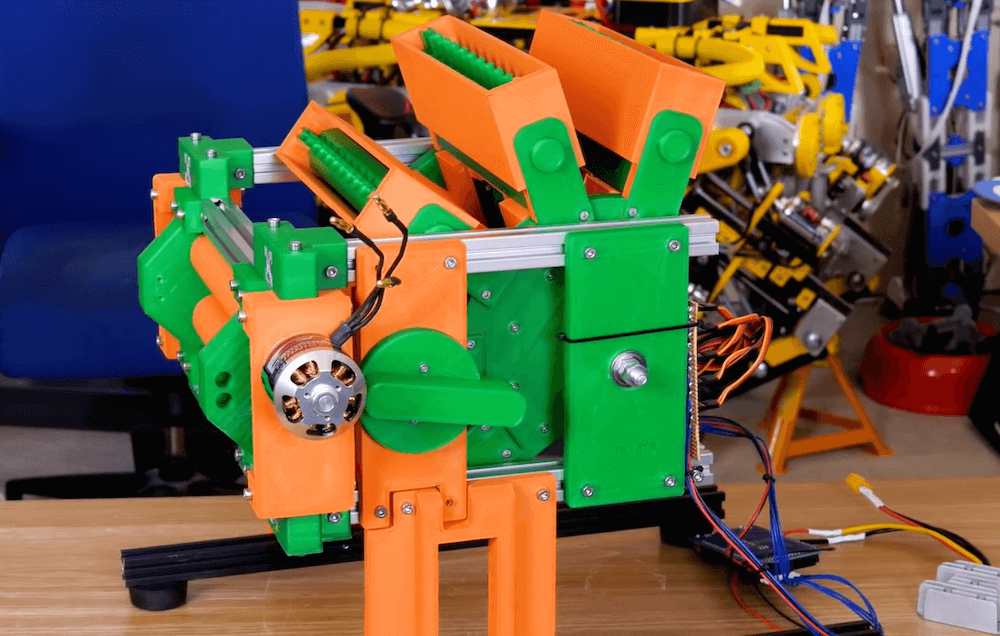
Nerf guns can be a lot of fun, but what if you want your launcher to shoot 10 projectiles simultaneously? Is so, then look no further than James Bruton’s custom blaster.
His 3D-printed project employs two BLDC-powered rollers to accelerate cartridges of 10 darts each, and allows for quick reloading via a clever manual locking mechanism. The device holds five magazines, for total of 50 darts.
When loaded, an arcade-style button fires the darts, pushing them into the rollers at the same time using a couple of servo motors. Everything is powered by a six-cell 24V LiPo battery, while an Arduino Mega is used for control, and to track which cartridge is in place, enabling the operator to concentrate on getting shots downrange!
This post is from Edoardo Tenani, DevOps Engineer at Arduino.
In this blog, we’re going to answer: How does one store sensitive data in source code (in this case, Ansible playbooks) securely and in a way that the secrets can be easily shared with the rest of the team?
Ansible is an open source community project sponsored by Red Hat, it’s the simplest way to automate IT. Ansible is the only automation language that can be used across entire IT teams from systems and network administrators to developers and managers.
At Arduino, we started using Ansible around the beginning of 2018 and since then, most of our infrastructure has been provisioned via Ansible playbooks: from the frontend servers hosting our websites and applications (such as Create Web Editor), to the MQTT broker at the heart of Arduino IoT Cloud.
As soon as we started adopting it, we faced one of the most common security problems in software: How does one store sensitive data in source code (in this case, Ansible playbooks) securely and in a way that the secrets can be easily shared with the rest of the team?
Ansible configuration system comes to the rescue here with its built-in mechanism for handling secrets called Ansible Vault, but unfortunately it had some shortcomings for our use case.
The main disadvantage is that Vault is tied to Ansible system itself: In order to use it, you have to install the whole Ansible stack. We preferred a more self-contained solution, possibly compiled in a single binary to ease portability (i.e. inside Docker containers).
The second blocker is the “single passphrase” Ansible Vault relies on: a shared password to decrypt the entire vault. This solution is very handy and simple to use for personal projects or when the team is small, but as we are constantly growing as a company we preferred to rely on a more robust and scalable encryption strategy. Having the ability to encrypt different secrets with different keys, while being able to revoke access to specific users or machines at any time was crucial to us.
The first solution we identified has been Hashicorp Vault, a backend service purposely created for storing secrets and sensitive data with advanced encryption policies and access management capabilities. In our case, as the team was still growing, the operational cost of maintaining our Vault cluster was considered too high (deploying a High Available service that acts as a single point of failure for your operations is something we want to handle properly and with due care).
Around that same time, while reading industry’s best practices and looking for something that could help us managing secrets in source code, we came across mozilla/sops, a simple command line tool that allows strings and files to be encrypted using a combination of AWS KMS keys, GCP KMS keys or GPG keys.
Sops seemed to have all the requirements we were looking for to replace Ansible Vault:
A single binary, thanks to the porting from Python to Golang that Mozilla recently did.
Able to encrypt and decrypt both entire files and single values.
Allow us to use identities coming from AWS KMS, identities that we already used for our web services and where our operations team had access credentials.
A fallback to GPG keys to mitigate the AWS lock-in, allowing us to decrypt our secrets even in the case of AWS KMS disruption.
The same low operational cost.
Sops’ adoption was a great success: The security team was happy and the implementation straightforward, with just one problem. When we tried to use Sops in Ansible configuration system, we immediately noticed what a pain it was to encrypt variables.
We tried to encrypt/decrypt single values using a helper script to properly pass them as extra variables to ansible-playbook. It almost worked, but developers and operations were not satisfied: It led to errors during development and deployments and overall felt clumsy and difficult.
Next we tried to encrypt/decrypt entire files. The helper script was still needed, but the overall complexity decreased. The main downside was that we needed to decrypt all the files prior to running ansible-playbook because Ansible system didn’t have any clue about what was going on: those were basically plain ansible var_files. It was an improvement, but still lacking the smooth developer experience we wanted.
As Ansible configuration system already supports encrypted vars and storing entire files in Ansible Vault, the obvious choice was to identify how to replicate the behaviour using Sops as the encryption/decryption engine.
Following an idea behind a feature request first opened upstream in the Ansible repository back in 2018 (Integration with Mozilla SOPS for encrypted vars), we developed a lookup pluginand a vars plugin that seamlessly integrate Ansible configuration system and Sops.
No more helper scripts needed
Just ensure Sops executable is installed, correct credentials are in place (ie. AWS credentials or GPG private key) and run ansible-playbook as you normally would.
We believe contributing to a tool we use and love is fundamental in following the Arduino philosophy of spreading the love for open source.
You can test it out right away by downloading the plugin files from the PRs and adding them in your local Ansible controller installation. You will then be able to use both plugins from your playbooks. Documentation is available, as for all Ansible plugins, in the code itself at the beginning of the file; search for DOCUMENTATION if you missed it.
If you can leave a comment or a GitHub reaction on the PR, that would be really helpful to expedite the review process.
What to do from now on?
If you’re a developer you can have a look at Sops’ issues list and contribute back to the project!
The Sops team is constantly adding new features (like a new command for publishing encrypted secrets in latest 3.4.0 release, or Azure Key Vault support) but surely there are interesting issues to tackle. For example, the Kubernetes Secret integration being discussed in issue 401 or the –verify command discussed in issue 437.
Made with <3 by the Arduino operations team!
Ansible® is a registered trademark of Red Hat, Inc. in the United States and other countries.
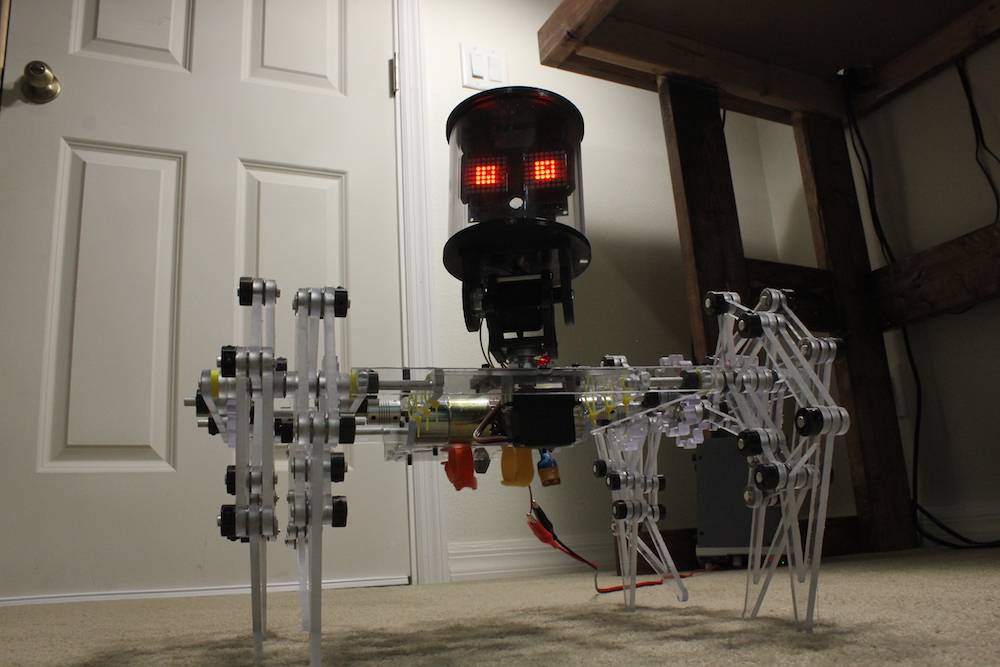
Maker Jeremy S. Cook has been building Theo Jansen-style walkers for literally years, and after several iterations has come up with what he calls the “ClearCrawler.”
This little guy stands at just over 15 inches tall — including its comparatively large clear cylindrical head — and travels around via a pair of motors that move four legs on either side like tank treads.
For control, Cook is using an Arduino Nano onboard, along with a motor driver, plus an Uno and joystick shield as the remote unit. Communication between the two is accomplished by a pair of nRF24L01+ radio modules.
Code for the project is available on GitHub, and the build is split up into an electronics and mechanical section in the videos below.
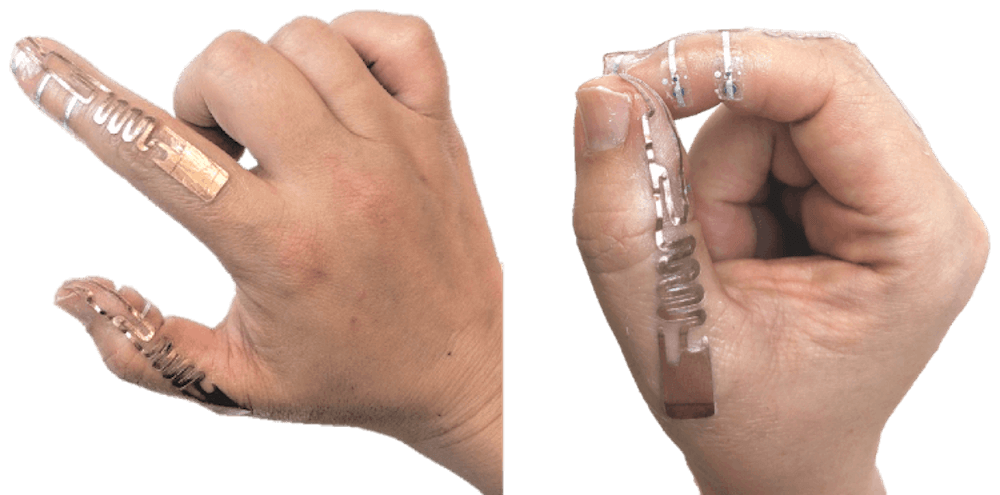
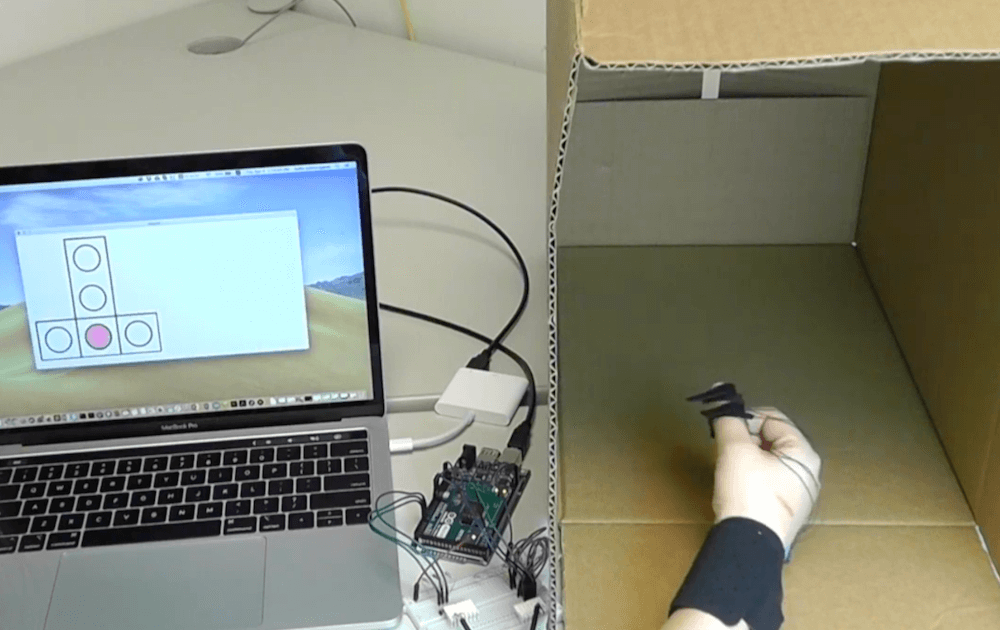
Researchers at the University of Waterloo in Canada have developed a novel hand-based input technique called Tip-Tap that amazingly requires no batteries.
The wearable device uses a series of three custom RFID tags on both the thumb and index finger with half an antenna on each digit. When the fingertips are touched together, a signal is sent to the computer indicating where the thumb and index finger intersect, which is mapped as a position on a 2D grid.
Usability experiments were carried out using an Arduino Mega, with both on-screen visual feedback and without. Possible applications could include the medical field, where Tip-Tap can be added to disposable gloves enabling surgeons to access a laptop without dictating inputs to an assistant or sterilization issues.
We describe Tip-Tap, a wearable input technique that can be implemented without batteries using a custom RFID tag. It recognizes 2-dimensional discrete touch events by sensing the intersection between two arrays of contact points: one array along the index fingertip and the other along the thumb tip. A formative study identifies locations on the index finger that are reachable by different parts of the thumb tip, and the results determine the pattern of contacts points used for the technique. Using a reconfigurable 3×3 evaluation device, a second study shows eyes-free accuracy is 86% after a very short period, and adding bumpy or magnetic passive haptic feedback to contacts is not necessary. Finally, two battery-free prototypes using a new RFID tag design demonstrates how Tip-Tap can be implemented in a glove or tattoo form factor.
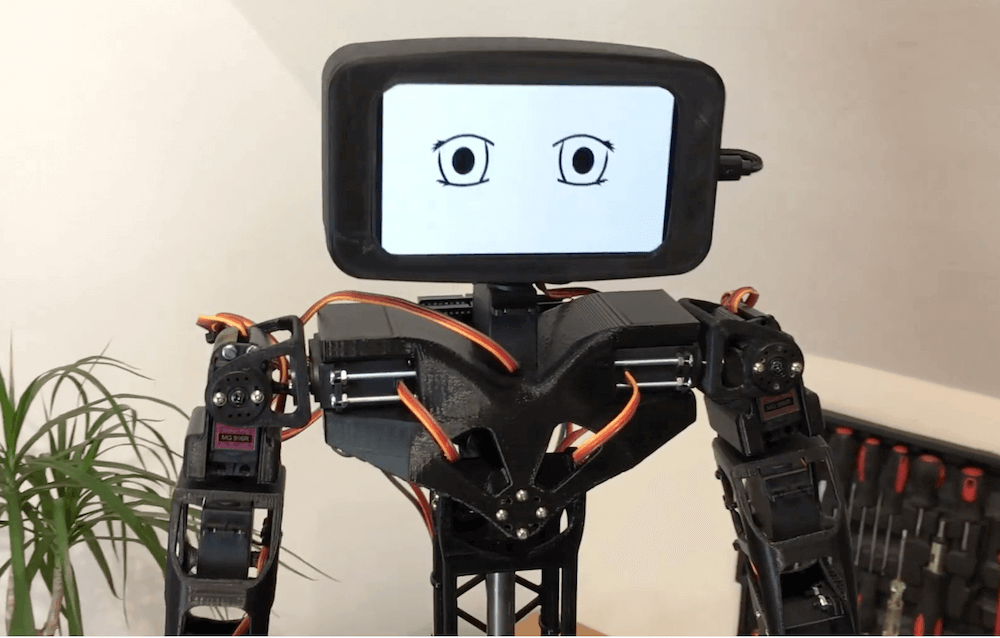
If you’d like to build your own vaguely humanoid robot, but don’t care about it getting around, then look no farther than Aster.
The 3D-printed bot is controlled by an Arduino Uno, with a servo shield to actuate its 16 servo motors. This enables it to move its arms quite dramatically as seen in the video below, along with its head. The legs also appear to be capable of movement, though not meant to walk, and is supported with a column in the middle of its structure.
Aster’s head display is made out of an old smartphone, and in the demo it shows its eyes as green geometric objects, an animated sketch, and then, somewhat shockingly, as different humans. Print files for the project are available here and the design is actually based on the more expensive Poppy Humanoid.
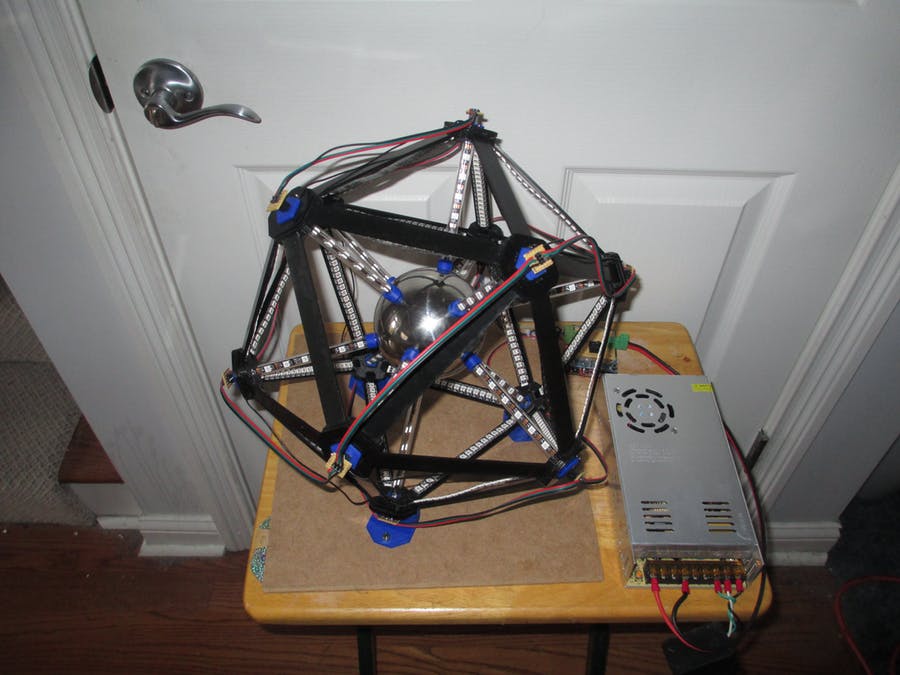
Convex regular icosahedrons contain 30 edges and 12 vertices. This makes for an interesting math problem, but as demonstrated by this project out of the LVL1 hackerspace in Louisville, Kentucky, its geometry also presents an excellent target for a massive number of LEDs.
Their build, in fact, consists of 708 programmable LEDs arranged facing inward on the edges and doubled over on each vertex support. These supports lead to a central stainless steel ball, reflecting a massive amount of light to the surrounding area.
Everything is controlled by an Arduino Mega, along with an Uno-style prototyping shield, and power is provided by a massive 5V 60A supply unit.
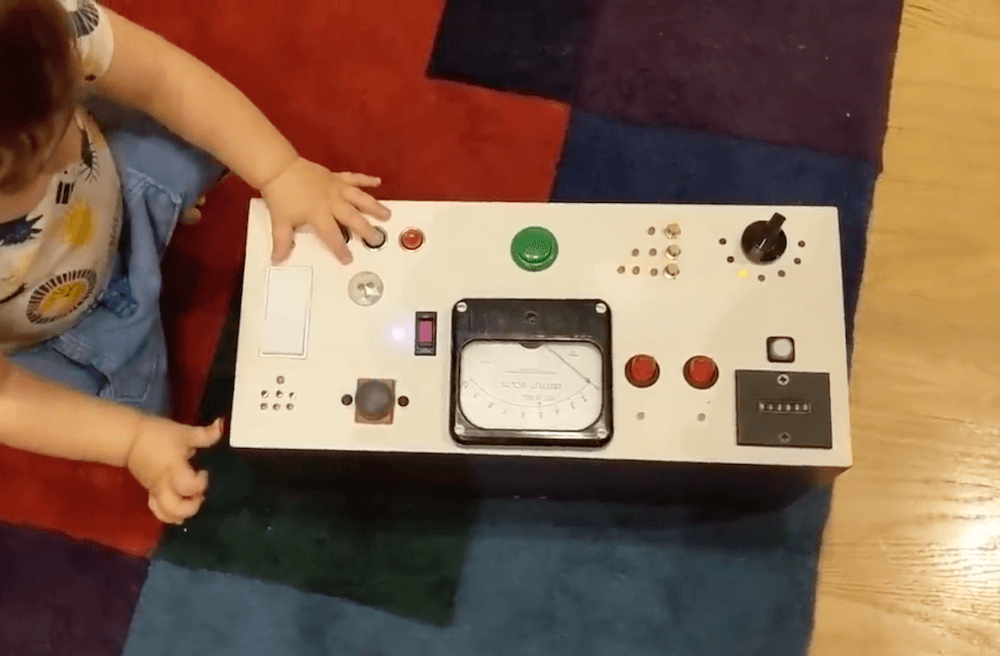
Like most one-year-olds, CodePanda’s son really likes pushing buttons. Rather than purchasing a so-called busy board that might teach him skills like unlocking doors or plugging in electrical outlets, he decided to build his own custom device controlled by an Arduino Uno.
The resulting toy features a wide variety of lights, buttons and switches, and makes sounds to keep the little guy entertained. In the center, a big green button activates an analog voltmeter, which not only looks cool, but actually indicates the battery level of the unit.
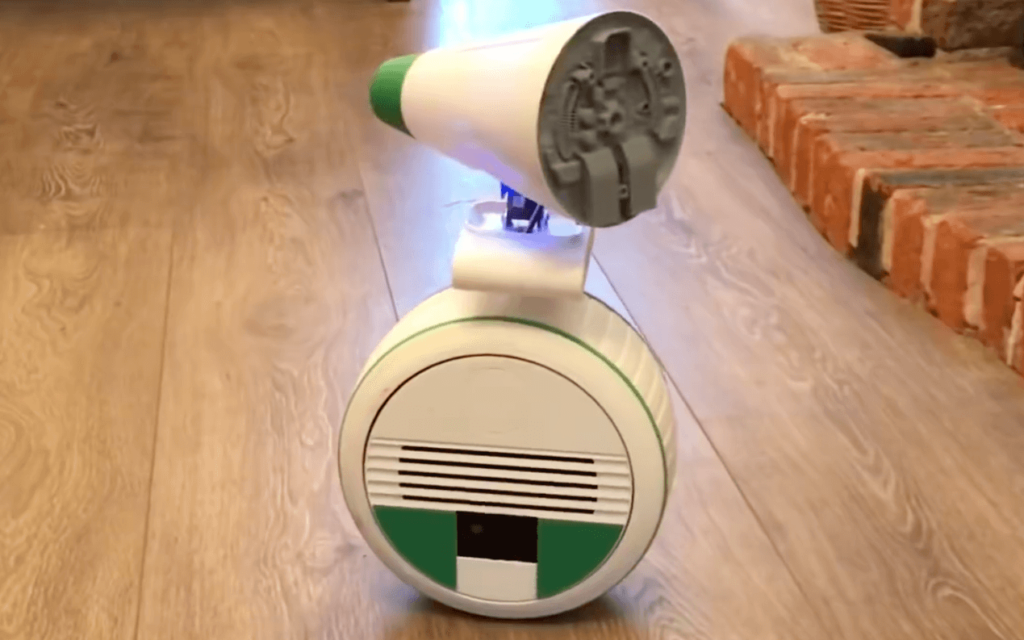
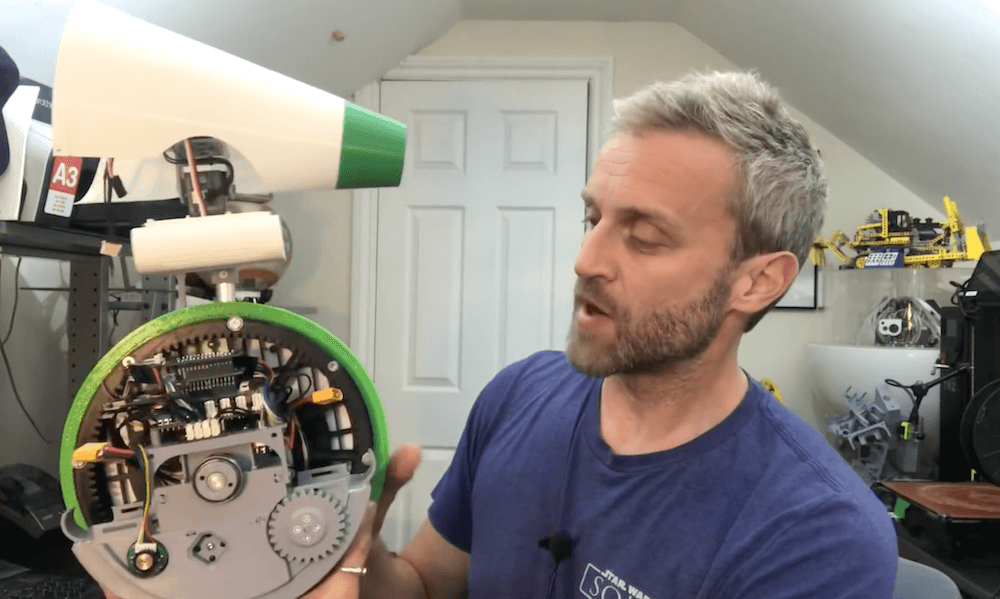
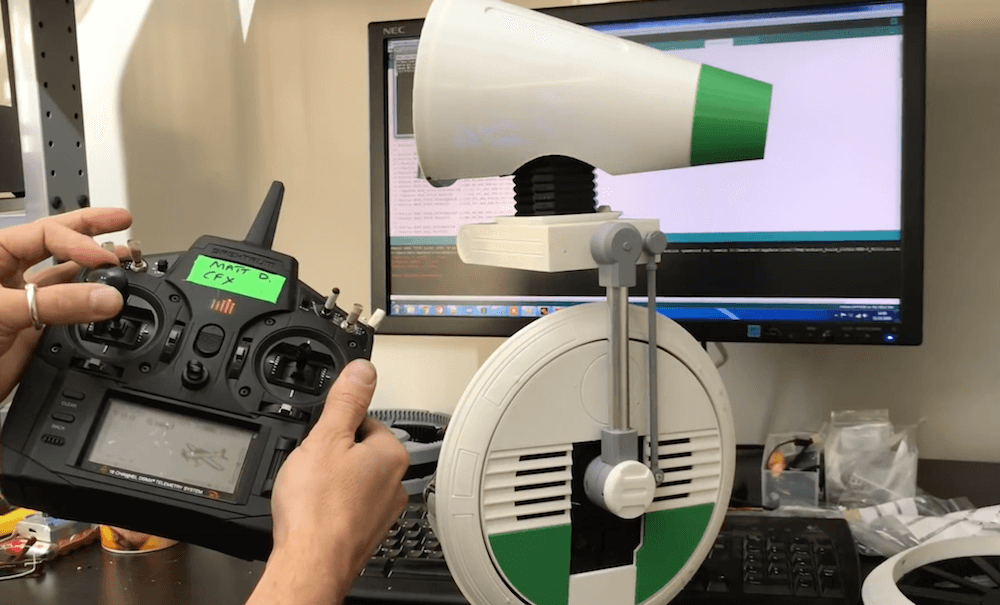
While it’s yet to make its premiere, Matt Denton has already built the D-O droid from Star Wars: The Rise of Skywalker using a MKR WiFi 1010 for control, along with a MKR IMU Shield and a MKR Motor Carrier.
The droid scoots around on what appears to be one large wheel, which conceals the Arduino boards as well as other electronics, batteries, and mechanical components. Denton’s wheel design is a bit more complicated mechanically than it first appears, as its split into a center section, with thin drive wheels on the side that enable differential steering.
On top, a cone-shaped head provides sounds and movement, giving the little RC D-O a ton of personality. The droid isn’t quite finished as of the video below, but given how well it works there, the end product should be amazing!
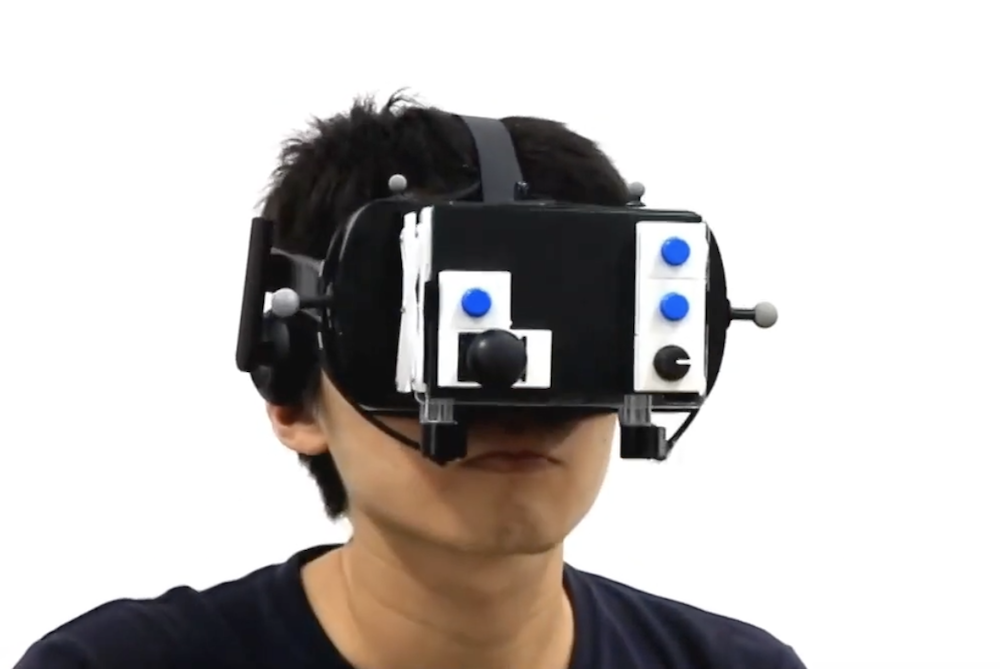
When using a virtual reality (VR) system, you may need to flip a switch, touch a button, etc., which can be represented by a carefully coordinated series of pixels in front of your eyes. As a physical alternative — or augmentation — researchers at the National Chiao Tung University in Hsinchu, Taiwan have developed a system of interchangeable physical control panels, called FaceWidgets, that reside on the backside of head-mounted unit itself.
When a wearer places their palm near their face (and headset), this is sensed and an on-screen canvas appears depending on the application. They can then manipulate these widgets both physically and in the virtual world to control the experience.
Physical interactions are detected with the help of an Arduino Mega and the facial control pad even extends and retracts for optimal usage via a motor shield and stepper motors.
We present FaceWidgets, a device integrated with the backside of a head-mounted display (HMD) that enables tangible interactions using physical controls. To allow for near range-to-eye interactions, our first study suggested displaying the virtual widgets at 20 cm from the eye positions, which is 9 cm from the HMD backside. We propose two novel interactions, widget canvas and palm-facing gesture, that can help users avoid double vision and allow them to access the interface as needed. Our second study showed that displaying a hand reference improved performance of face widgets interactions. We developed two applications of FaceWidgets, a fixed-layout 360 video player and a contextual input for smart home control. Finally, we compared four hand visualizations against the two applications in an exploratory study. Participants considered the transparent hand as the most suitable and responded positively to our system.