Posts with «featured» label

Five students create the perfect grilling thermometer

For those of us who aren’t grill masters, knowing when a piece of meat is done can be quite the challenge. To help ensure they never under or overcook their steaks again, five Rice University students recently developed a seven-sensor grilling thermometer as part of their senior engineering design project.

The team — which goes by the name Five Guys and Ribeyes — considers the Meatmaster to be the perfect barbecue accessory, which will hopefully take the headaches and uncertainties out of grilling.

We are using a food-safe multimaterial sheath primarily made of plastic, but with horizontally placed gold-plated copper casings every quarter inch. Inside each of these casings, we have placed a small thermistor to measure the temperature. The thermistors are wired to a printed circuit board and Arduino, which displays the multiple temperatures on an LCD screen.

When inserted into the meat, the array of sensors will provide a temperature profile throughout the depth of the steak. This will enable error-free grilling.

By using a multimaterial sheath instead of solely stainless steel, the team eliminated any unwanted vertical heat flow along the length of the probe but still allowed for fast heat conduction between the meat and sensor. The probe was 3D-printed using PEEK plastic and holds thermistors enclosed in copper casings along the length of the probe; the thermistors then provide fast, accurate and discrete temperature readings.

So far Five Guys and Ribeyes says the thermometer is working great, and have already received some positive feedback. Although there are no plans to take the Meatmaster to production just yet, the team is looking to make several improvements before it becomes a consumer product. These enhancements include a more efficient power source (currently powered by a 9V battery with a life of six months), additional sensors, wireless connectivity that pushes updates to your phone, an increased temperature range, a decreased settling time and a better material for the probe itself.

(Photos: Rice University)

Autograph is a machine that creates art using nails and thread

String art is a type of art characterized by an arrangement of thread strung between points to form abstract geometric patterns or representational designs. Thread or wire is wound around a grid of nails hammered onto a wooden board to make unique masterpieces. To expedite the assembly process, London-based studio Laarco has developed a machine capable of ‘printing’ large-scale, gallery-worthy artwork. Autograph uses thousands of nails and a single 500m-long string to construct detailed 40cm x 40cm (16” x 16”) images of celebrities, ranging from David Bowie to Matt Damon to the Beatles. (You can see them all here.)

In terms of hardware, Autograph is equipped with a Raspberry Pi at its core, which sends commands to an Arduino Mega fitted with a 3D printer shield to control the mechanism. The results are absolutely amazing, as you can see in the time-lapse video below.

Brew some iced coffee with an Arduino-controlled drip tower

Like the majority of us, John Edgar Park loves himself a nice cup of fresh-brewed iced coffee to get him through a warm summer day. Conventional hot-brewed coffee methods simply can’t compare; when chilled and served on ice they tend to taste diluted and acidic. Of course, you could always go buy a large cold-brew tower, but unless you’re willing to dig deep into your wallet, they’re usually only accessible to coffee shops. So, like any Maker would, he decided to build his own high-precision, automated tower from scratch using an Arduino-driven solenoid valve for exact drip rate.

For those unfamiliar with cold-brew coffee towers, these systems are comprised of three parts: a water receptacle at the top with a drip control valve, a chamber for grounds in the middle where the brewing takes place, and a carafe to receive the brewed coffee at the bottom. Park elaborates upon his project on MAKE: Magazine:

After much hunting I found the ideal components: a water serving pitcher for the top receptacle, a siphon brewing upper beaker as the grounds chamber, and a flat-bottomed boiling flask as the receiving vessel. For a bit of spiraling glass laboratory aesthetic I added a Graham condenser to the mix, purely for looks.

Since this behemoth would stand 4? tall and need quite a bit of support to hold the components, I decided to mount the tower on the wall using laser cut acrylic holders connected to angle brackets. If you don’t have access to a laser cutter, you can print the linked files and use them as a guide for cutting with a bandsaw or scroll saw.

For ultimate control over the water drip rate, I chose a food-safe solenoid valve and I built an Arduino-based controller for it. The controller consists of a transistor circuit mounted on a prototyping shield, two 1000-ohm potentiometers, and a bit of Arduino code running on an Arduino Uno. This allows you to use the two knobs to adjust the frequency of the valve opening and closing, and the length of time it remains open per drip. Since the volume of water the solenoid valve allows through is much more than we want per drip for a long, overnight brew, I needed to reduce the size of the drip tube inner diameter. I attempted this with various tubes, straws, and fairly janky contraptions, until I eventually succeeded when I “borrowed” the miniature drip valve from my small commercial brewer. A Hario valve (available from coffee parts suppliers online) press-fits very nicely inside ¼” tubing — you can use any food-safe stopcock valve that fits.

PUMA’s robot can beat you (and Usain Bolt) in a race

Man versus machine may sound like a bit of cliché at this point, but PUMA recently took this concept to a whole new level with a shoebox-sized, programmable robot that helps runners push themselves to the limits. The BeatBot — which the apparel company created together with ad agency J. Walter Thompson New York and a team of MIT engineers — is a self-driving, line-following device that provides athletes with a visual target to beat.

The robot works by scanning lines on the track using its nine IR sensors, while wheel rotations are monitored by an Arduino to measure speed and distance. BeatBot is equipped with front and rear-facing GoPro cameras, as well as LED lights on the back so you can see it in your peripheral vision. Data is processed in real-time, making more than 100 adjustment per second to remain on course, navigate turns and finish the race at a pre-determined pace.

To get started, runners enter the time and distance of the race they want, place the robot on the starting line next to them and go. BeatBot is managed through a companion iPhone app that enables the runner to set their own time and goals, which can be anything from surpassing a personal best, competing against a rival, or even breaking world record-holder Usain Bolt’s fastest time with speeds of up to 44.66 km/h (27.7 mph).

Unfortunately, BeatBot is only available for PUMA-sponsored athletes. So for now, you’ll just have do it the old-fashioned way: stopwatch or find a friend.

Retrofit your old appliances with new controls

Unfortunately, home appliances aren’t a one-size-fits-all sort of thing. What works for some may not always work so well for others. With this in mind, Raf Ramakers and the Autodesk Research team have developed a system that will enable you to retrofit your everyday devices with new controls that better suit your needs. RetroFab provides even the most non-tech-savvy users with a design and fabrication environment through which they can easily repurpose their existing physical interfaces with the help of 3D scanning, printing and basic electronics.

We present RetroFab, an end-to-end design and fabrication environment that allows non-experts to retrofit physical interfaces. Our approach allows for changing the layout and behavior of physical interfaces. Unlike customizing software interfaces, physical interfaces are often challenging to adapt because of their rigidity. With RetroFab, a new physical interface is designed that serves as a proxy interface for the legacy controls that are now operated using actuators. RetroFab makes this concept of retrofitting devices available to non-experts by automatically generating an enclosure structure from an annotated 3D scan. This enclosure structure holds together actuators, sensors as well as components for the redesigned interface. To allow retrofitting a wide variety of legacy devices, the RetroFab design tool comes with a toolkit of 12 components.

After loading the 3D scan, you can highlight and select the device’s controls on the model. The system then creates a 3D-printable rendering and offers redesign suggestions. From there, RetroFab automatically generates a housing that fits over the original interface and holds a series of actuators, motors, LEDs and other components, which are all connected to an Arduino.

The individual Arduino microcontrollers that control the enclosure structures run a generic firmware that handles the GPIO pins as well as the wireless communication. Even for retrofitted devices that do not intercommunicate, user input and sensor data from the retrofitted interface is first transmitted from the Arduino microcontroller to the central PC. This module then decides to turn on specific RetroFab actuators and sensors, controlled by the same or a different Arduino microcontroller. This approach makes it possible to change the behavior and interconnect retrofitted devices even after the design and fabrication is completed.

Using its accompanying mobile app, RetroFab also lets you easily interconnect and remotely control your gadgets — whether it’s setting the time on a retrofitted alarm clock or turning off a light switch right from your phone. You can read all about the project in its paper here, or watch the video below.

This weeks ’s Instagram winner hails from Indonesia!

Genuino Day 2016 in Indonesia was organized by the local community, who submitted this winning photo of the group on Instagram. For sharing the pic below, they’ll be receiving a Genuino MKR1000 and a Genuino Mug!

There’s still time to participate in this giveaway, which runs until May 26th. Here’s how:

– Follow our official Arduino.cc account on Instagram

– Share your images on your account on Instagram using hashtag #ArduinoD16 and #GenuinoD16 and mention us with the tag @Arduino.cc

– Every Thursday, from April 7th to May 26th, we are going to choose one of your pics (posted starting April 2nd) and announce the winner of an Arduino or a Genuino MKR1000 and one of our t-shirt or mug  on the blog. That’s a total of of eight lucky people! Easy enough, right?

Remember to also share cool photos relating to your favorite Arduino and Genuino moments in your community beyond Arduino and Genuino Day.
Show us your local activities!

“Electronics for the Humanities” keynote at Arduino Day

Lately I’ve been struggling with the STEM/STEAM approach to teaching computational technology. It assumes you’re either an artist, scientist, or engineer. What about the rest of us? I meet plenty of people who don’t fit any of these categories, yet who use programming and electronic devices in their work. I’m looking to understand their perceptions of how these technologies work, and how they fit into their practices. In this talk, I tried to explain some of what I’ve noticed by observing and working with people from different backgrounds, and to review some of the current tools for teaching a general audience.

Ultimately, I want us to get to a point where we use programming tools in the same way as we use language. We all use language, but we’re not all language-using professionals. We use it casually, expressively, sometimes professionally, in a thousand different ways. We don’t follow all the rules, yet we work together to share a common understanding through language. We’re starting to do the same with media like video, audio, and images as well. Maybe we can get there with programming and computational thought, too.

Watch the video:

Arduino Blog 05 May 15:12

5 robotic bartenders to celebrate Cinco de Mayo

Someday not too far in the future, the idea of having to catch the attention of a bartender or preparing your own drinks at home may be a thing of the past. In celebration of Cinco de Mayo, we’ve compiled a list of of five Arduino robotic mixologists that’ll help whip you up a margarita or daiquiri with just the press of a button.

RumBot

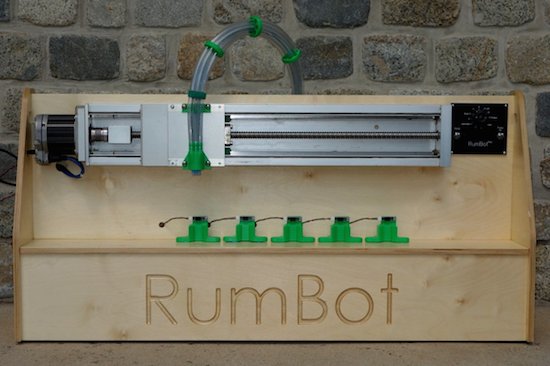
The RumBot is equipped with a set of five reflective optical sensors, each represented by a different drink. Whenever a cup is placed on one of these sensors, the machine is triggered and a pre-programmed recipe begins dispensing the beverage of choice into your mug in as little as three seconds. Drink selection is handled by an Arduino Uno, which communicates with an all-in-one servo motor. This moves the nozzle into place, and then controls the on-time of five pumps to begin pouring the cocktail. RumBot’s frame is comprised of wood and several 3D-printed plastic parts, while a strength knob also lets you configure the amount of alcohol content.
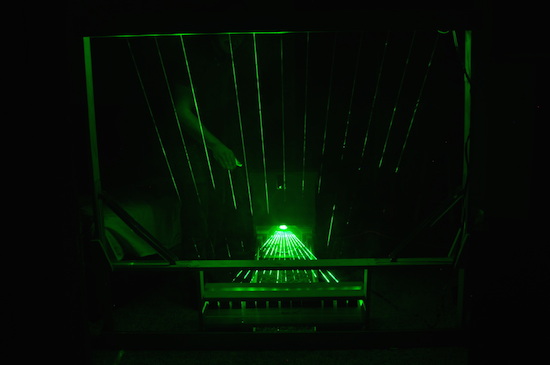
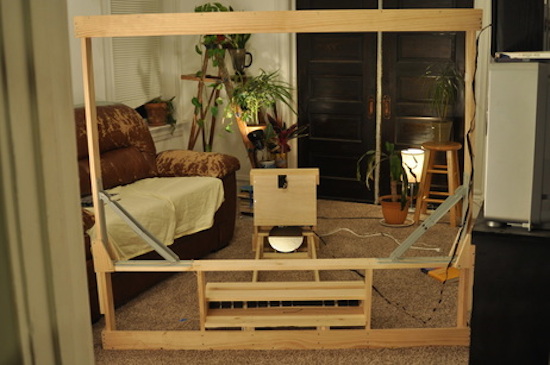
The Inebriator

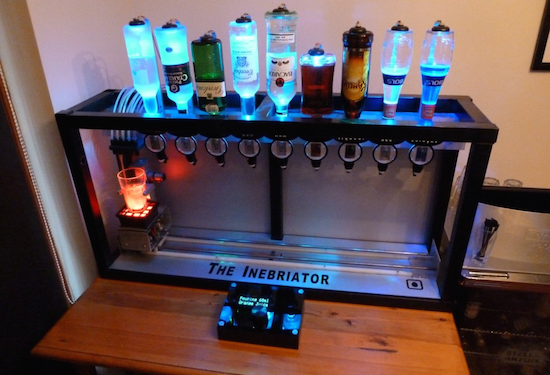
The Inebriator‘s design is fairly simply, with upside-down bottles lined up in a row and optics providing set measures. The user places their glass on a pedestal and selects their drink of choice on its accompanying display. The pedestal then moves along collecting the right spirits as it goes thanks to motors pushing the glass upwards at the appropriate moments. Finally it adds the mixers, connected as and when needed by nitrogen-pressurized tubes to deliver the final touches to the cocktails from a cooler located out of sight. The bot is driven by an Arduino Mega and includes a total of 132 LEDs that change colors each time a new ingredient is added. For some extra effects, the drink tray is surrounded by an Arduino Nano-powered LED ring.

Social Drink Machine

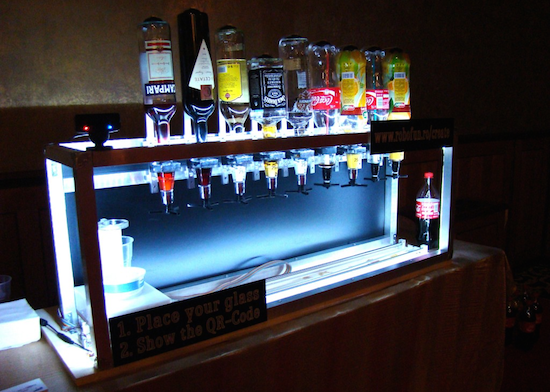
Unlike some other robotic bartenders, the Social Drink Machine uses a Facebook app and Twitter bot to prepare your drink. To get going, you first scan the QR code displayed alongside the device with their mobile phone or sends a tweet to @socialdrinkbot. This will pull up an app, which allows you to select which type of concoction you’d like. You’ll then receive another QR code on your phone that must be shown to the machine’s camera. Set your glass on its holding tray, and the Arduino-powered bot will take care of the rest.
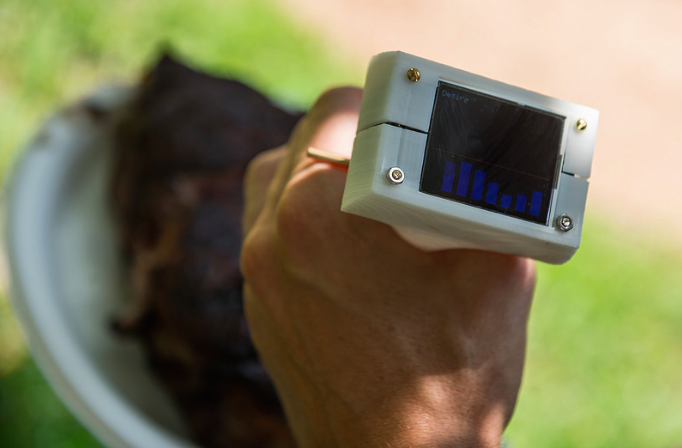
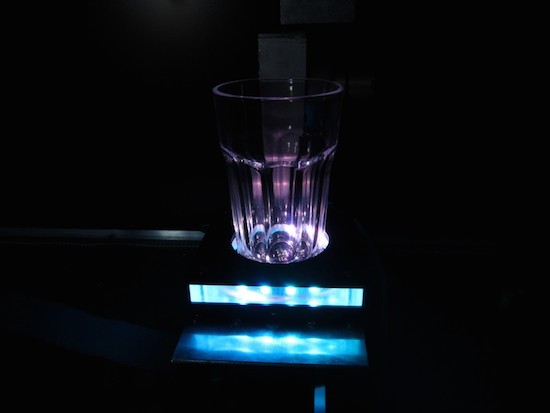
Data Cocktail

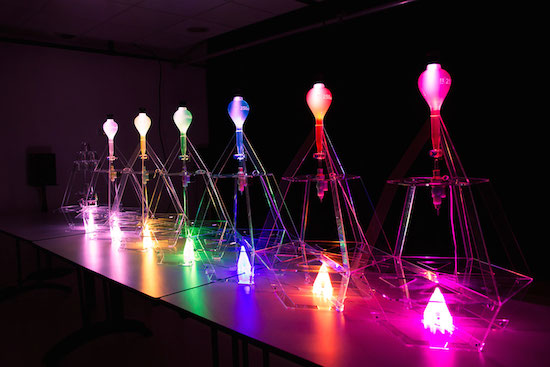
Data Cocktail is an innovative gadget that whips up cocktails based on Twitter activity. The bot, which runs on Arduino Due and Arduino Pro Mini, works by scouring the web for the five latest posts mentioning keywords that are linked to available ingredients, each represented by differently colored bulbs. (The system will accept either words, hashtags and mentions.) These messages are then used to define the composition of the drink and fill the glass accordingly. The result is an original, crowdsourced mixture whose recipe can be printed out.

Drinkmo

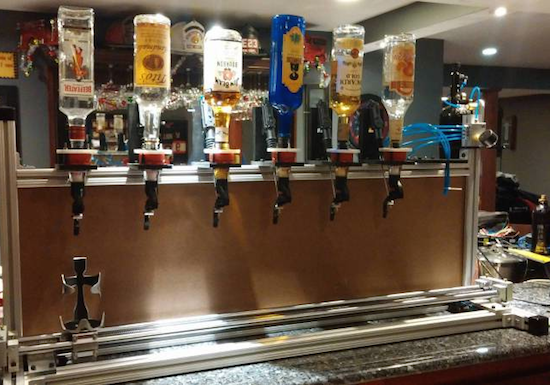
Drinkmo is an automated device that works by rotating a long leadscrew to moves the mixing glass from bottle to bottle. The entire setup is comprised of aluminum extrusion, making it completely expandable. Along the top are gravity fed shot dispensers, which are controlled by 12VDC car lock actuators. The chaser station works differently, though. The chaser bottles are actually pressurized by a paintball gun tank and dispensed using four solenoid valves. Then one valve is actuated, it opens, allowing the pressure to push fluid through the solenoid. The entire system is based on a Raspberry Pi running Raspbian, Tkinter for the GUI and an Arduino Uno for motor control.

Play some tunes on a 13-note MIDI laser harp

Nowadays, it seems like instruments come in all different shapes and sizes. Take Jon Bumstead’s an electronic harp, for example, that plays music by blocking laser beams — similar to how a musician would pluck a stick on the real thing.

The project consists of a laser diode, an Arduino, a galvo, several mirrors to reflect the beams, 13 photoresistors and a couple 3D-printed components for the mounts. The harp’s large frame is made up of three wooden parts that can be folded with a few hinges and held in place with 18 bolts, while the electronics are secured in a box with the galvo mounted at the top.

This laser harp has thirteen strings. To generate these strings, a laser beam is moved to thirteen different position (for thirteen different strings/notes) by moving a mirror galvanometer. The mirror galvanometer, or galvo for short, is a mirror that can quickly move to different positions depending on a control voltage that is sent to it. At the end of each laser beam is a photoresistor that is used to detect if a beam is blocked. When this is detected, a note is played. I also needed the laser beam to be turned off when moving positions so that it appeared as though there were thirteen distinct positions and not a continuous sheet of light.

To generate these signals, I used an Arduino. One of the greatest challenges of the project was creating  an analog output that was fast enough to move the galvo (and laser beam) so that it appeared like there were really thirteen different beams and not a single beam being moved to different positions. I constructed a 4-bit R2R digital to analog converter (DAC). The digital output of pins 8-11 incremented thirteen times (for the thirteen positions), and the DAC generated an analog voltage ranging from 0 to 4V. I then amplified this signal  and ran it through a differential amplifier to get an analog voltage from around -7 to 7 volts for the galvo. The laser diode was synchronized with the galvo using the Arduino.

According to the Maker, the harp can be programmed to direct the beam to any position at any speed. And not only can you put on your very own laser show, but you can control the type of MIDI signal being created as well.

This laser harp is really a MIDI controller (i.e. it does not have its own sound engine). You can select whatever type of MIDI signal you desire. I chose to select middle C to the C one octave higher in frequency. Another MIDI instrument or reader (I used by Macbook Pro and Garageband) must then be used to actually create audio signals that could be played through speakers.

You can see it action in the video below!

Prevent forest fires with the Birdhouse Alarm

The northern part of Spain, which is full of villages, vegetation and wildlife, is prone to wildfires. In fact, nearly 40% of the land was burnt back in 2015. Unfortunately, whenever a fire breaks out in a remote area, it often goes unnoticed or reached before damage occurs. With these instances becoming more common, insurance company Generali decided to find a better solution for early detection.

Their answer to the problem? Birdhouse Alarms. Each wooden (recycled, of course) birdhouse features an Arduino, a solar panel, a rechargeable battery, a smoke sensor and a 3G network connection, enabling it to send a geolocated signal to local authorities in the event of a fire.

The prototypes, which were designed by Ogilvy & Mather, are currently being tested.

Arduino Blog 04 May 14:21