Posts with «diy» label

Having fun with music in a science class

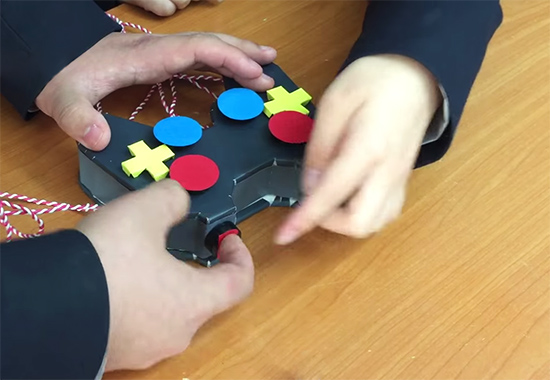
A science teacher at Bundang management high school 20 kilometers southeast of downtown Seoul, South Korea, involved his students in an Arduino Music project running Arduino Uno, Sparkfun Music Instrument Shield and Makey Makey.

Students started studying the principles of sensors and then built their own music instruments using recycled materials. Finally they played them as you can see from the video he shared with us:

See more pictures and videos at this link.

Arduino Blog 24 Mar 20:16
arduino  diy  education  featured  kids  music  science  

An open hardware quartz crystal microbalance for ultra high mass sensitivity

Marco Mauro is a physicist currently employed as Scientific Coordinator at Novaetech, the first Spin-off Company of the National Institute for Astrophysics (INAF) in Italy. He shared with us all the info about a project he’s been working on  and based on Arduino Micro.

OpenQCM is a fully open source scientific microbalance capable of weighing mass deposition down to 1 billionth of gram:

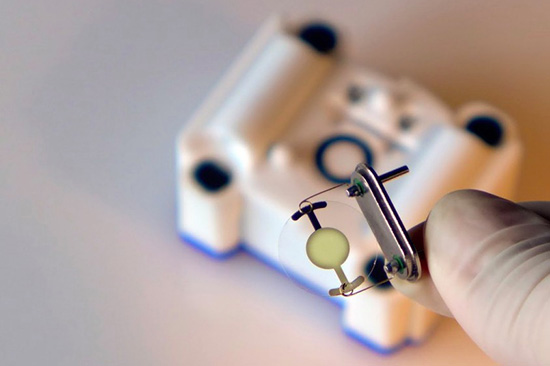
The sensing core of the microbalance is a piezoelectric quartz crystal oscillator. The deposition of a very tiny mass on the surface causes the variation in the quartz frequency. openQCM belongs to a new generation of innovative smart sensor which boast high resolution and ultra high mass sensitivity. The open source strategy made the creation of openQCM available at low cost which represents a bit fraction of the cost of similar scientific products.

openQCM was built keeping in mind the emergent principles of the open source hardware movement. The open source hardware gives people the freedom to control their technology through the open exchange of all the project features, 3D design, electronics and software. The open hardware potentiality is even greater when it comes to hardware for scientific applications.

openQCM is exactly something like that, the first open hardware quartz crystal microbalance with applications in a wide range of scientific fields, such as chemical and biological sensing, material science.

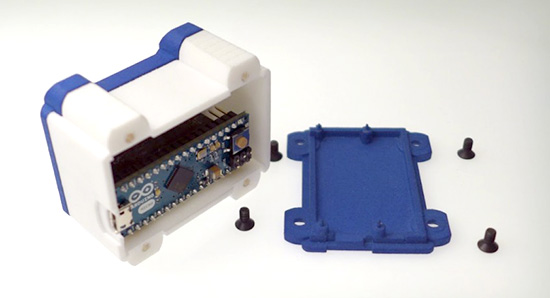
openQCM has an Arduino Micro board inside at heart. By hacking the timer counter of the AtMega32U4 Arduino microcontroller, it is possible to measure the quartz crystal frequency variations using the 16 Mhz microprocessor clock. openQCM team has designed an Arduino Micro shield with an embedded quartz crystal oscillator driver circuit and a temperature sensor. The output of the quartz crystal oscillator driver is fed to the Arduino Micro timer counter and the analog value of the temperature sensor is fed to the analog pin of the board. This configuration allow you measure the quartz crystal frequency with a resolution of 1 Hz, which roughly corresponds to a mass resolution of 700 pg over the entire quartz surface in air.

One of the major challenge of an open hardware project is that such devices require funding to prototype and manufacture. That’s why the openQCM team have selected the 3d printing technology to keep high quality and low cost. Using 3d printing to print out the prototypes via the SLS process from OS Formiga P100, P110, P395, and P730, the openQCM team created the device’s parts, which required a precision down to 60 µm.

The open source concept made openQCM publicly available so that anyone (scientists, technology enthusiast, makers, hobbyist …) can study, modify, and develop the hardware based on the original design. openQCM is now working and ready to win the heart of the scientific community and more.

Go and make one yourself!
Open Source 3D Printed Rocket Engines controlled by Arduino

Fubar Hackerspace (New Jersey) member Graham has been working on an open source liquid fuel rocket engine with regenerative cooling and precise flow control build on Arduino Uno.  In order to test it he’s also built a cool rig for testing propellant flow control:

My project is building Open Source 3D Printed Rocket Engines with Arduino microcontrollers. As an individual interested in building liquid fueled rocket engines as a hobby I quickly realized there were almost no resources online or forums to share or learn from others. I decided to combine my interests in Software, hardware and open source projects to develop and build a functioning liquid fueled rocket engine. However, unlike most other projects it had to be open source and easily re-produced.

In order to ensure it was as open source as possible I used the Arduino Uno board and IDE to develop software to safely control the engine. To meet the easily reproducible requirement I decided that 3D printing was the right approach rather than labor/time intensive traditional machining.

The end result is an engine that can easily be reproduced or modified. This gives others interested in this hobby a starting point for best practices, safety, etc… so that future projects aren’t starting out from scratch.

All of my design files and software are on GitHub  and a detailed description of the write-up is on the FUBAR labs makerspace wiki 

Here’s the video of the testing of the 3D Printed GOX/Ethanol Injector:

Arduino Blog 27 Feb 09:58

Open Source 3D Printed Rocket Engine controlled by Arduino

Fubar Hackerspace (New Jersey) member Graham has been working on an open source liquid fuel rocket engine with regenerative cooling and precise flow control built on Arduino Uno.  In order to test it he’s also built a cool rig for testing propellant flow control:

My project is building Open Source 3D Printed Rocket Engines with Arduino microcontrollers. As an individual interested in building liquid fueled rocket engines as a hobby I quickly realized there were almost no resources online or forums to share or learn from others. I decided to combine my interests in Software, hardware and open source projects to develop and build a functioning liquid fueled rocket engine. However, unlike most other projects it had to be open source and easily re-produced.

In order to ensure it was as open source as possible I used the Arduino Uno board and IDE to develop software to safely control the engine. To meet the easily reproducible requirement I decided that 3D printing was the right approach rather than labor/time intensive traditional machining.

The end result is an engine that can easily be reproduced or modified. This gives others interested in this hobby a starting point for best practices, safety, etc… so that future projects aren’t starting out from scratch.

All of my design files and software are on GitHub  and a detailed description of the write-up is on the FUBAR labs makerspace wiki 

Here’s the video of the testing of the 3D Printed GOX/Ethanol Injector:

Arduino Blog 27 Feb 09:58

Automated Tea Maker

[Pariprohus] wanted to make an interesting gift for his girlfriend. Knowing how daunting it can be to make your own tea, he decided to build a little robot to help out. His automated tea maker is quite simple, but effective.

The device runs off of an Arduino Nano. The Nano is hooked up to a servo, a piezo speaker, an LED, and a switch. When the switch is turned to the off position, the servo rotates into the “folded” position. This moves the steeping arm into a position that makes the device easier to store and transport.

When the device is turned on to the “ready” position, the arm will extend outward and stay still. This gives you time to attach the tea bag to the arm and place the mug of hot water underneath. Finally the switch can be placed into “brew” mode. In this mode, the bag is lowered into the hot water and held for approximately five minutes. Each minute the bag is raised and lowered to stir the water around.

Once the cycle completes, the Nano plays a musical tune from the piezo speaker to remind you to drink your freshly made tea. All of the parameters including the music can be modified in the Nano’s source code. All of the components are housed in a small wooden box painted white. Check out the video below to see it in action.


Filed under: Android Hacks
Hack a Day 29 Jan 03:01

An Arduino at Heart prototyping board you can DIY

Newtc is our latest partner joining the Arduino At Heart program with three new products of the same family.

The Prototyping Board by Newtc is an Arduino At Heart coming in a couple of versions: the DIY version you can assemble and solder yourself and the Assembled version ready to be used. The CPU of the boards ( ATMEGA328P-PU ) is already burned with Arduino Uno bootloader. In addition to the boards, Newtc provides also the Arduino At Heart USB to Serial uploader for Arduino compatible boards.

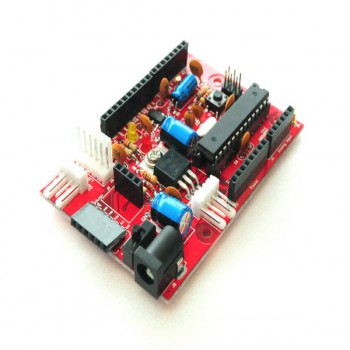
In the picture below you can see the components of the DIY Version and in the video you can follow the tutorial and learn how to assembled it!

Arduino Blog 23 Jan 10:40

A keyboard for Minecraft addicted to customize the gaming experience

The award-winning Minecraft is a very popular PC game and also pretty addictive. It was originally created  by Swedish programmer Markus “Notch” Persson, later developed and supported on different platforms and recently acquired by Microsoft for 2.5$ billions.

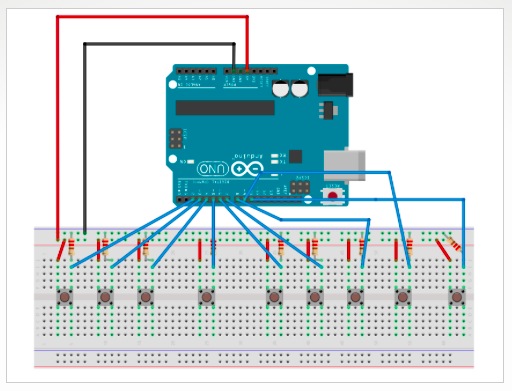
Arduino user lakhanm shared  a DIY keyboard prototyped with Arduino Uno and substituting the basic keyboard controls such as move forwards or backwards. The project is also compatible with most of the Arduino boards. 

Take a look at the circuit below and grab the sketch and bill of materials at this link.


Arduino Blog 22 Sep 16:57

A bike tachometer measuring more than just speed

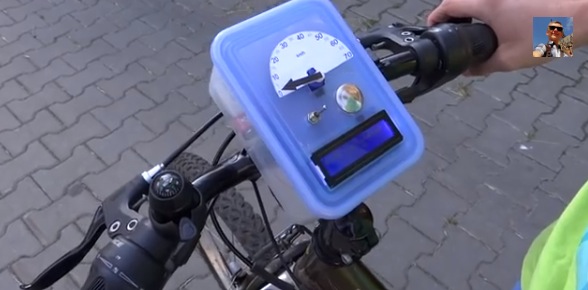
Nikodem is a young maker  based in Poland and shared with us his latest project based on Arduino Leonardo. It’s a DIY bike tachometer providing you with a set of additional information:

It shows your speed, the average speed, the temperature, the trip time and the total distance. You can change it using the button. Additionally, the speed is shown on a tachometer. I built it because I like building new things, I have not found anything like this on the internet so I want to show you how to build a good speedometer as the one on my bike is not as cool as I want .

You can find all the steps to make one yourself on  his Instructable account, and in the meanwhile take a look at the two videos below.


Arduino Blog 08 Sep 19:52

Build your own robotic bartender with Arduino and a 3D printer

You can certainly buy a ready-made drink mixing robot if you're flush with cash, but wouldn't you rather spend that money on the drinks themselves? Yu Jiang Tham thinks so -- he recently designed Bar Mixvah, a robotic bartender you can build yourself with $180 in parts. The key ingredient is an Arduino Nano microcontroller that takes your requests through a web-based interface. After that, it's mostly a matter of 3D printing the frame and wiring up the pumps that will make your beverage a reality.

Filed under: Household, Robots

Comments

Source: Yu Jiang Tham

Engadget 27 May 16:23