Step by step guide installation guide for ch340 USB-UART converter
Hello Friends,
In this tutorial, we will cover how to install ch340 driver for different versions of windows.
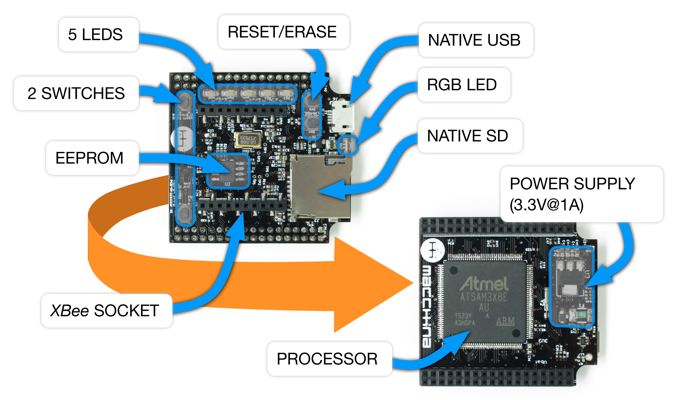
CH340 is USB-UART converter and is used for serial communication with PC/ laptop with external device e.g. GSM module, GPS module, arduino pro, etc.
Things required:
First of all, download the driver from link below:
In this tutorial, we will cover how to install ch340 driver for different versions of windows.
CH340 is USB-UART converter and is used for serial communication with PC/ laptop with external device e.g. GSM module, GPS module, arduino pro, etc.
Things required:
 |
| CH340 USB-UART |
First of all, download the driver from link below:
Download
After downloading, extract the file and follow the steps as follows:
Step 1: Open Device Manager, go to other devices. Right click on the USB2.0-Serial
Step 3: Select the parent directory
Step 4: Viola! your driver has been installed
Now, check with any terminal software. I am using Bray's Terminal.
After downloading, extract the file and follow the steps as follows:
Step 1: Open Device Manager, go to other devices. Right click on the USB2.0-Serial
 |
| Device Manager |
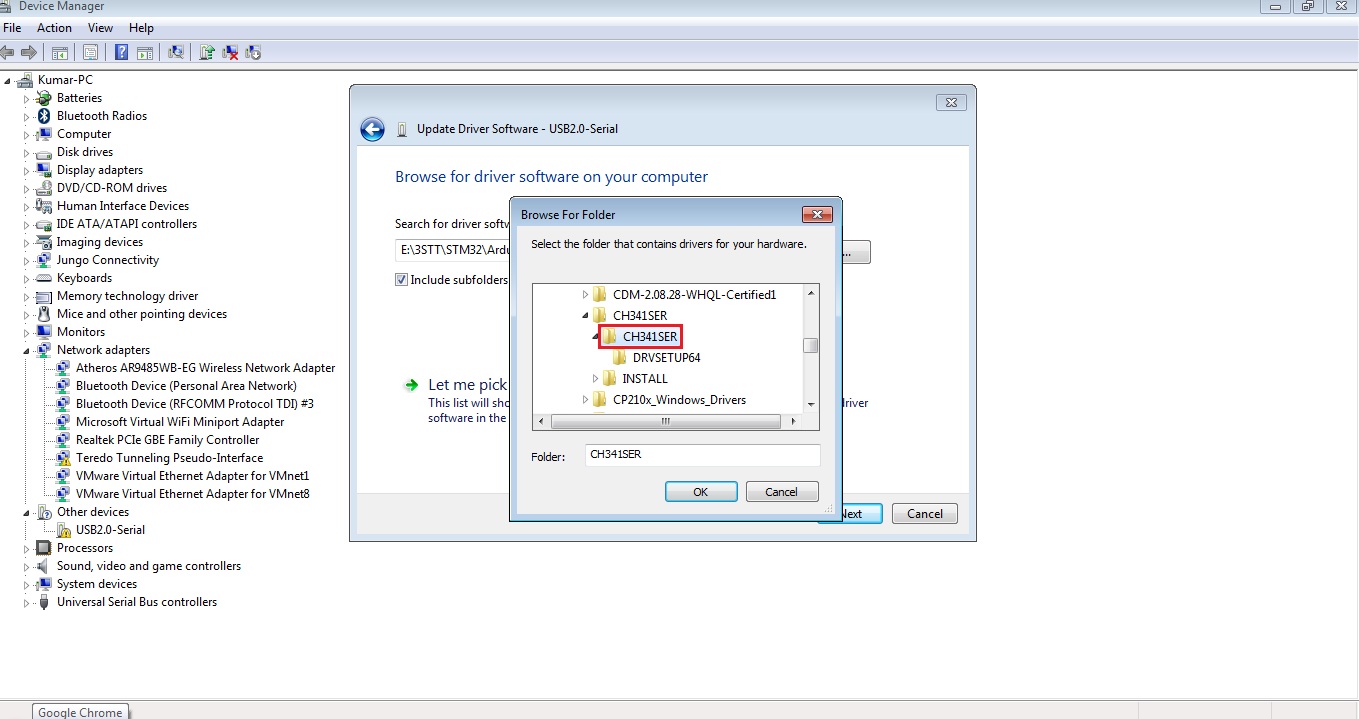
Step 2: Browse the directory, where you had extracted the downloaded file
 |
| Browse the directory |
Step 3: Select the parent directory
 |
| Choosing directory |
Step 4: Viola! your driver has been installed
 |
| Driver installed |