Posts with «community» label

Hamburg Maker Meeting 2012 and Arduino Due preview

Hamburg Maker Meeting 2012, which took place last week and involved about 200 visitors and more than 20 exhibitors, has been a fantastic opportunity to meet and share experience regarding several topics, such as 3D printing, hacking, retro gaming and so on. At the Attraktor Makerspace, several projects have been presented and demonstrated by their inventors, among which we highlight a very nice Arduino-based floppy drive organ that has been employed to play the Tetris game theme.

Moreover, among the others events planned for the meeting, a special sneak-preview session allowed all the interested people to get some insights on the new Arduino Due board, released a couple of days ago.

A video of the event can be found here, while here you may find more pictures.

More information can be found on the homepage of the meeting.

[Via: Hamburg Maker Meeting website]

Workshop Roma, il Report [#arduinotour]

E’ terminato da qualche giorno il primo capitolo dell’#arduinotour, a Roma. E’ stata una esperienza molto interessante che ci ha fatto capire cosa funziona nel nostro metodo di insegnamento , ma che ci ha permesso di aggiustare il tiro su alcune mancanze comunicative dettate dell’accumularsi di eventi (e.g. abbiamo informato gli utenti iscritti alla presentazione del venerdì in ritardo, e ce ne scusiamo).

Un grazie particolare a Paolo De Gasperis, Marta Serpietri e Leonardo De Cosmo di Discienza per il supporto organizzativo e a Cattid per la location.

Detto questo, ci siamo sforzati di restituire quanto più possibile del materiale prodotto al workshop a tutti i nostri lettori. I progetti emersi sono stati tre (vedi video sopra / guarda il set sul flickr), e devo ammettere che il livello é molto alto per un workshop base. Tutti i codici dei progetti sono online sul nostro github. Non abbiamo usato particolari periferiche fatta eccezione dell’Arduino Wifi Shield, dell’Ethernet Shield,di un paio di Sensori di Alcohol di Parallax e di cinque FSR oltre ovviamente ad un roverino facilmente reperibile online.

I prossimi workshop dell’#arduinotour sono a Cava De’ Tirreni il prossimo 20-21 ottobre, a Matera il 17-18 Novembre e saranno tenuti da Mirco Piccin e da me: ci divertiremo!

Chi fa un salto?

Workshop on “Physical and Wearable Computing”: projects and outcomes

Last July 23-27 2012, the workshop on “Physical and Wearable Computing”, organized by SUPSI within the summer school in “Digital Fabrication and Interaction Design”, has took place involving about 20 participants. This workshop has proved to be a very good approach to introduce future makers to the concepts of digital fabrication, prototyping and design of interactive objects.
On the workshop’s homepage, several prototypes and artifacts manufactured during the workshop are presented. Among them, it’s worth to mention Poetry Zoo, a set of laser-cut and RFID-equipped animals that generate poetries, The Sound of a Line, where simple melodies can be performed by using a ball with conductive ink in combination with a special glove, and Superfluo Shoes, a pair of shoes that react based on movement.
The complete list of projects developed during the workshop can be found on its official home page, while a personal view of this experience by Zoe Romano, who has taught at the summer school together with Massimo Banzi, can be found here.

[Via: homepage of the workshop and Zoe Romano's blog]

Help bring maker culture and hacker spaces to Iraq.

A friend of mine is doing a KickStarter project to run a livestream conference and a temporary hackerspace in Baghad this fall. Bilal Ghalib (of GEMSI) has been working to bring maker culture and hacker spaces to the Middle East, for example by organizing a temporary maker space at the Maker Faire Cairo in 2011.

Here are some details of the workshops they’re organizing:

  • Riwaya wa Bidaya (Oct 5): A livestream conference to share stories of everyday superheroes in Baghdad who take initiative to solve problems. We are inviting submissions until Sept 22 [apply here!] – top stories will be illustrated by a professional graphic comic book artist and published in Arabic and English.
  • ‘Amal wa Amal (Oct 18-19): In collaboration with TEDxBaghdad, we are setting up a temporary community hackerspace to share local tools and solutions. We hope this will provide an inspiration for an ongoing community and hackerspace to develop in Baghdad.

Please help support the KickStarter project.

Castelao Barcamp Vigo 2012

Desde BricoGeek nos llega la noticia de la celebración de una nueva Barcamp, esta vez en Vigo. La reunión perfecta para cacharrear y debatir entre amigos sobre temas como el Open Hardware, Arduino o impresoras 3D entre otros muchos, y puede que con alguna que otra sorpresa.


Unas jornadas DIY muy interesantes que tendrán lugar en las instalaciones del CFP Daniel Castelao de Vigo en las que Alejandro Taracido presentará a su mítico robot ORUGAS con las últimas novedades añadidas.


Sin duda, un evento al que no se debe faltar!


Planning preliminar (sujeto a cambios):

  • Introducción al Open Harwdare
  • Orugas: Robot explorador basado en Arduino
  • Impresión 3D DIY. Crea objetos en tu casa
  • Workshop BricoGeek
  • Taller: DIY Soldadura SMD por refusión
  • Taller: Medidas PWM analógicas
  • Presentación proyecto RACE
  • Raspberry PI como servidor FTP de contenidos

Enlaces:

VIA | BricoGeek

Arduino Workshop a Roma 29-30 Sept 2012 [Arduino Tour]

Ecco il primo di una serie di workshop che Officine Arduino organizzerà in Italia. Quale luogo migliore da cui iniziare se non la capitale? Abbiamo parlato / immaginato / organizzato con molte persone in questi mesi – da Trieste in giù – ed il buon Alex Giordano lo ha già ribattezzato come il “Tour di Arduino“. Ci accontentiamo di portare workshop dove non sono mai stati, e quindi al Sud, nelle isole. Vogliamo rispondere alle decine di mail di utenti che hanon chiesto e chiedono un workshop a casa loro.

Oggi ci accontentiamo di annunciare questo workshop, che non sarebbe stato possibile senza l’appoggio di Cattid- Centro di Ricerca sulla Comunicazione e la Tecnologia dell’Università la “Sapienza” di Roma e gli amici di DiScienza, una associazione italiana di cui abbiamo parlato spesso, organizzatori dell’annuale Arduino Day che si tiene ogni anno proprio a Roma.

Una talk pubblica su Arduino e l’Educazione, con la spiegazione di vari progetti e possibilità di fare domande e networking é prevista in venerdì 28 settembre in luogo da definirsi. Qualora foste interessati iscrivetevi qui.

Abbiamo anche cercato di venire incontro ad alcune problematiche che sorgono quando si organizzano eventi in giro. Cosa succede se non avvengono vicino a te? Proprio per questo lanciamo un servizio abbastanza rudimentale: un form in cui potete dire dove siete e noi, una volta raggiunto un certo numero di persone vi informiamo in anticipo sulle date e i posti.

Ovviamente non volevamo escludere gli utenti del vivace forum italiano, ai quali offriamo di partecipare gratuitamente alla parte di realizzazione dei progetti della domenica. Per ovvie ragioni abbiamo dovuto limitare il numero di fruitori di questo servizio (che testiamo proprio in questa occasione) al numero di 5 persone. E’ molto importante supportare piccole realtà (non tanto piccole nel caso di Roma, ovviamente) di Smanettoni Arduinici Urbani (i famosi SAU).

Dubbi, domande, perplessità? visitate la pagina del workshop o scrivete a d.gomba(at)arduino.cc

Digital artist Julien Bayle [Interview]

Julien Bayle is a digital artist and technology developer, and his work is an excellent starting point for anyone interested in the DIY man-machine interfaces.

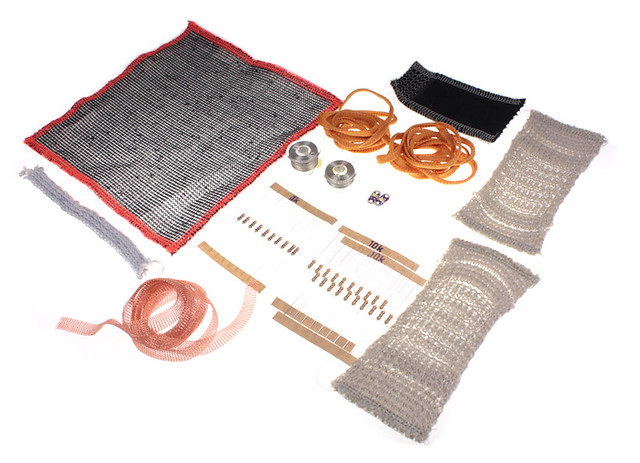
Back in 2008, Julien created a clone of the Monome, a control surface consisting in a matrix of leds and buttons whose functioning is defined by software.  It was called Bonome and RGB leds were used, instead of  monochromatic leds of the standard model.  Here are the instructions to build it.

Some time later, inspired by the DIY controller used by Monolake, Julien decided to build its own Protodeck to control Ableton Live.

Recently I stumbled upon his post titled “Arduino is the Power” and I discovered that Julien has started writing a book about the Arduino platform. So I thought that regular readers of the Arduino Blog would welcome an interview with this interesting guy. And here it is!

Andrea Reali: Tell us something about you.

Julien Bayle: I’m Julien Bayle from France. I’m a digital artist and technology evangelist. I’m inside computers world since my dad bought us a Commodore 64, around 1982.
I’m working with music softwares since the first sound-trackers and I began to work with visuals too with my Amiga 500, using some first POV-like softwares.
I first began by working as an IT Security Architect by day, then I quit to be only what I am today and especially to be really free to continue my travel inside art & technology.
I’m providing courses & consulting & development around open-source technology like Arduino, java/processing but also & especially with Max6 graphical programming framework which is my speciality. Max6 is really an universe itself and we’d need more than one life to discover all features. As an Ableton Certified Trainer, I’m still teaching that a bit.
All technology always provides tools to achieve art. I guess my path comes from pure technology and goes to pure art.

AR: How did you get interested in the area you’re interested in?

JB: I always thought technology was only a tool to achieve projects, artistic or not.
Progressively, I understood that pure technology could be interesting itself too and I began to learn as a maniac but without forgetting about applying theory, illustrating each bit of knowledge.
Each time I learn something, I feel ideas coming in my head, possible applications appearing in front of my eyes like “wow this totally abstract Interrupt Service Routine is tricky but it can provide THE way to make this RGB Leds matrix driven only by that CPU with few outputs”
I achieved the protodeck like that, progressively learning & making at the same time, encountering some solid walls but finally finding my way breaking them!
We all need huge motivation to make things, especially today. Indeed, all seem integrated, already made, and you have to twist your mind to understand : “Yes, I can make by myself exactly what I need !”
Applying theory, having fun, making things, helps to keep the motivation very high and helps to achieve totally crazy projects! People thought you were insane at the beginning and the same people think you are a guru, at the end.

AR: Describe one of your projects.

JB: The Musée de la Buzine in Marseille is a central point of the Mediterranean cinema. Early 2011, I worked on this project both as a software designer & an hardware developer.
The permanent exhibition is based on 7 rooms in which you can experience visuals, sounds contents.
The system is based on 24 computers and 1 server, everything being federated by a gigabit ethernet network.
There are also 7 touch screens, 10 video-projectors, 20 RFID readers, 7 arduino UNO & MEGA handling buttons and ultra-sonic sensors, and finally 2 multi channels sound systems. Yes, it is a huge installation.
Everything has been made using Max5 (also named Max/MSP before Max6)
Max/MSP is a graphical programming environment which means you can create softwares by connecting virtual boxes on your screen without typing one row of code, if you don’t like that. It is obviously totally possible to use JAVA, C++ and more inside of it.
Each system is based on the same model, in the museum. A kind of template I designed in order to provide similar features like OSC protocol communication system, RFID parsing routines for user language identification, jitter real time subtitling (subtitles on videos according to ID of RFID cards), especially.
The server is able to send command to all machines. This is a nice feature to be able to switch off all 24 computers in one click and to power on them using Wake On Lan too. Of course, everything is scheduled according to a calendar and is be automated.
Arduino takes a particularly important role in this global design.
Indeed, it adds new capabilities & skills to computers by giving them a way to feel our universe with sensors and to act on it too.
In this installation, Arduino are used on the simpler way.
They are reading buttons state. For instance, drawers contain secret switches: when you open a drawer, the switch is triggered and the reading loop circuit is opened too; the board detects that and send bytes to the computer via USB cable basically. The Max patch (= name of programs you make in Max) receives the bytes and act properly by triggering a video, a sound, both or lighting on something.
There is a nice machine installed there : a DMX / Ethernet router.
I can send special bytes over the network from my Max patch to this gear. The router then translates my messages into DMX pre-programmed sequences.
For instance, I wired an ultrasonic distance sensor, used as a presence detector. The Arduino check distance and when the distance is less than a particular value, it fires a specially byte to the computer. This one reacts by triggering a sound and a video on 2 video-projectors. It also sends another peculiar byte to the DMX Router and this one makes a very nice light sequences like fadin lights in different moody way in order to grant an immersive experience to users.

The presence of Arduino made this installation alive, by bringing computers to another level of interaction.
I enjoyed a lot in making this complex project and people seemed very satisfied by the result.

I have been asked to develop more installations like that and now I freely choose which offer to accept.

If you understood me correctly, you know I’ll choose only those with a really strong artistic matter & purpose

AR: What skills did you draw upon?

JB: This project involved a lot of different technology.
I programmed using:
– C with the Arduino IDE
– Max5, including javascript scripting and jitter openGL programming and MSP audio stuff too
I had to wire and solder a bit too, which was nice and made things more real, concrete, physical.
The main thing about this project is the fact I had to mix a lot of things together.
It was interesting to connect all these very open & efficient technologies.
Using open protocol like serial, OSC (Open Sound Control) was a very nice way to keep things simple and indeed, I wanted to keep things simple.
Designing huge projects doesn’t mean you have to raise the complexity.
Often, great & big projects are based on very simple bits.
My advice to readers: Keep it simple! Build some units, then connect them together progressively.
This is my credo when I’m teaching Arduino!

AR: When did you hear about Arduino, and when did you first start using it?

JB: I hear about Arduino as soon as I began to make my own hardwares (around 6 years ago)
It brought me into the hardware gear field.
I began by tweaking leds & buttons with the bonome, an RGB monome clone (http://julienbayle.net/bonome)
It was a nice project and I learned a lot about shift-registering, buttons matrices, LED matrices and especially RGB Leds.
Arduino is THE way to learn about electronic.
I also played a bit with MIDI & OSC protocol directly with Arduino board and I still have a couple of projects I’d like to make available a bit on the monome distribution model. These include a strange drone machine, a 8-bit synthesizer very raw and a little and led based sequencer but with a strong part including shuffling and random.
By diving in the Arduino world, you can easily learn the direct link between the code (software) and the wires (hardware)
The bootloader included in the chip provides a totally user friendly way to upload your C code from the IDE on your computer to the board.
It is useable out-of-the-box without following a 3 years University cycle !
I’ll spread the arduinoword around: it can easily make people learning about electronic and especially about making their own things.
Today we can follow the DIY way  easily because of people like Massimo Banzi, Tom Igoe and the whole community created by the Arduino Team.
They opened a road and gave people more motivation to design and build things themselves.

AR: Where can readers see your works, both past and present?

JB: I have 3 websites.
http://julienbayle.net is the main one. You can find there my blog, and all my communities connection like Soundcloud, Facebook and more.
http://protofuse.net is my music website which will be merged probably into http://julienbayle.net quite soon. Indeed, I’m known as protofuse on the IDM electronic scene.
http://designthemedia.com is my small company. I’m providing Ableton Live devices & max for live stuff.
I am currently writing a book on Arduino and this is the first official place where you see this news.
I’m writing for the very amazing publisher PACKT publishing and I’m really happy about that, enjoy writing, designing things and spreading the following words to the world as far as possible: “yes you can build your own machines without any big companies help !”

AR: What inspired you to make the thing you made?

JB: I’m both a technology-driven guy and a minimalism art admirer.

I guess you can find minimalism in everything I’m making, from the apparently totally complex stuff to the most easy one.
My work is a quest into minimalism & zen digital territories. My latest iOS application is a piece of work which can be felt like an artwork too.
I’m making a lot of ambient music and IDM music too and from the most syncopated rhythm to the most peaceful synthesize soundscape, I feel minimalism.
Artists like Autechre, Brian Eno, Pete Namlook, Aphex Twin, Arpanet, inspire me a lot.
I guess my whole design (sound design, music design, software & hardware design) is inspired by artists like them, but not only.
We definitively need more peace and more quietness in our world.
I’m just trying to find mine making my art and trying to bring my words to people too.


I wish a bright and peaceful future for Julien and I deeply thank him for the interview.


Wearable Fabric on the Arduino Store

We are happy to announce the first wearable kit on the Arduino Store . This kit has been made by Plug’n'Wear specifically for us. All fabrics in this kit are produced in Italy, and strongly related to a textile family business. If you want to get deeper into the story of this product have a look at Riccardo Marchesi presentation (still in Italian, soon to be traslated!) at World Wide Rome 2012.

Read over for Kit’s features

This kit features:

  1. 1x Circular Stretch Sensor Designed by Hannah Perner-Wilson, this circular knit stretch sensor works perfect when you need to detect tension in many projects.
  2. 2x Textile push button to make easy digital inputs in cloth, scarfs o bags.
  3. 2x Spools of Conductive thread, ready to be hooked over a sewing machine
  4. 2x Soft potentiometer kit will let you import analog data into your wearable project: this kit includes 1 meter of knitted conductive tape and a metal ring. Watch it in action (see video)
  5. 10x 1k ohm resistor
  6. 10x 10k ohm resistor
  7. 1x Textile perfboard is going to change the way you think of wearable circuits. You can sew or even solder components (SMD & through-hole) on this . It can be easily cut or sewn with a standard sewing machine. Washable. Size: 15 cm x 15 cm (6″ x 6″) / Pitch: 2.54 mm (0.1″)
  8. 1x Knitted Coated Copper Tape. Small conductive tape made of coated copper fine wire (112 micron). Flexible, easy to cut, sewable with a standard sewing machine, It can be easily welded ( The coating will melt and tape will be soldered). The surface of this tape has a good insulation thrughout its lenght. Resistance: 107 Ohm/m. Width: 9 mm (0.35″)
  9. 1x Analog Textile Press Button, working with a resistive principle (resistance goes down when you press it). It works as a bend sensor as well. By connecting more sensors together it is possible to make a matrix analog switch. Sensitive area 40mm x 40mm (1.57″x1.57″)
  10. 2x LilyPad LED Bright White A simple, very bright, 250mcd, white LED LilyPad

source: [arduino store]

[Interview] Dorotea Panzarella (Emmo)

Emmo is a ludic and interactive artifact for visually impaired children (age 4-6 y.) based on RFID technology. It is meant to motivate spatial exploration and helping children to develop the capability of creating mental topological maps.
The toy includes lighting and sounding elements for a treasure hunt, a space-related memory game. This activity is improving attention and acoustic capabilities.
The goal of the game is detecting each of the seven lighting elements according to the sound. The player is helped by this “magic wand”  (finder),

Emmo’s main colours are black and white (high chromatic contrast is important to let the childern discrminate colours); lights & sound are further aid, marking different phases of the game.
The command interface is pretty simple and visible. Buttons can be distinguished by colour and shape.
The toy elements are designed in order meet childern needs and  technology requirements.

We asked Dototea Panzarella to answer few questions regarding her project.

Q: Tell us about you and your background.

I was born  in Palermo on 21/04/1985 , in Cefalù, a charming Sicilian town overlooking the sea. I learned the words “project” and “creativity” since childhood, thanks to my dad, architect, and my mother, graduated from the Academy of Fine Arts. During childhood and adolescence I experienced different things:  artistic and rhythmic gymnastics, I learned to play keyboards and I worked in summer camps for children. Not yet having a clear idea about my future, after school, I enrolled at the Liceo Classico Mandralisca Cefalu. After high school, I registered for the Bachelor in Industrial Design at the University of Palermo and I had the opportunity to participate in the Erasmus program and attend the Hochschule fuer FHNW Design and Art in Aarau (CH). In 2008 I moved to Treviso, to follow the specialist degree course in product design of the IUAV University of Venice. Lately I collaborate occasionally with a design studio in Venice, which mainly designs consumer electronics.

(interaction) design is a challenge to me beacuse involves technical-scientific and humanistic-artistic elements: every project is a new discover!

Q: When did you start working on your project and how long did it take?

I started to work on “Emmo” at the end of August 2010 to end in April 2011: 8 months of work. The first 3 months were mainly research and analysis. In December 2010, I started to define the game’s playing features. From January onwards I have dealt with the choice of electronics need for the toy, the design of the artifact itself and eventually the realization of the prototype.
I saw many toys for the stimulation of hearing, the residual vision, touch. Emmo is thought to add something new.

Q: What inspired you to make the thing you made?

The interest in the project “Emmo” is the result of my interest in the world of childhood, science of learning and psychology of perception but also of my interest in electronics and interaction design.

It all started with a workshop of 2 years of specialization at the IUAV in which the teacher (and my future thesis supervisor) asked us to design interactive artifacts. We were also required to create a prototype using Arduino. Having found the theme of the workshop quite exciting I then wanted to continue on the same track with the thesis.In the spring of 2010 I went to Barcelona (Spain) to deepen my knowledge by participating in the 9th International Conference on Interaction Design and Children. I picked up many hints. The theme of low vision was one of many that appeared in the list that I compiled and I chose it because it would give me the ability to use light and sound as real therapeutic tools.

Q: How did you hear about Arduino and why you decided to use this hardware in your project?

I had already seen some Arduino projects of my friends and especially my roommate during the course of the Medienkunst FHNW.

In that circumstance I had appreciated the installations but had not yet grasped the potential of Arduino.  I’ve used in the creation of Emmo because I knew that in case of any difficulty I could find help on the web easily.


We are extremely pleased that the Arduino is used in such projects, and we are sure that the community will always give a strong support.

Many thanks to Dorotea for her kindness.


Introducing Maker – Michael Shiloh


photo by Scott Beale / Laughing Squid

Teach me to make” as simple as it sounds is a simple yet powerful effort on wordpress by a maker from USA. Apart from being a true maker, Michael Shiloh is an absolutely delightful and an approachable person to talk to. His sense of purpose in his work was very much apparent in my short, yet interesting conversation with him. Here are some widely and less known things about the teacher, student and entrepreneur.

Priya: What brought your interest in electronics? What is the very first project that you fondly remember completing till date?
Michael: Ever since I remember, I have been taking things apart and putting them back. The important thing is to pay attention to details while doing that. Like, where the screw fits, what part goes where, what are the names of the parts etc. even if one is not able to know the full functioning one should be able to call the parts by the name and know where they fit and what they do. Growing up at a time with limited resources, left only one option of harvesting old electronic parts. I suggest every aspiring-maker to do that!

(Gives a pause) As for the finishing part, I never finished a lot of projects, and I had a LOT of unfinished projects sitting around me in my room. But the important part was, that I caught hold of a lot of basics while making them. Not stopping, is important.

P: What drives your passion for Arduino and open source hardware?
M: 10 years back, I started a project called Teleo based on PIC which was on similar lines as an Arduino, just not with an IDE. Hence, a simple prototype for students to interact has always been my passion.

P: You talk about 3 methods of your teaching – contraption building, physical computing, and open source advocacy. What is Contraption building as defined by you?
M: Interesting question! Contraption, is an idea of a prototype in its raw un-polished form. It is the fastest way to check if what you assume in theory is in fact practical or not. I always encourage contraption as it makes understanding and explaining easier of the internal working mechanisms of an idea.

P: How is it different from Physical computing?
M: Contraption building, may or may not include electronics. It can be purely mechanical, say, just a few wheels, pulleys and a rubber band? Physical computing on the other hand needs an inclusion of electronics.

P: What do you think is the right approach to Advocate Open source hardware?
M: The right approach is to teach the concept of sharing knowledge, Eg: Pythagoras Theorem. Its a shared piece of knowledge which is applied everywhere, new theorems are proven using the age old theorem. The strength of Open source hardware is not only the product, but what people do using the product.

P: In all your teaching classes, What do you think is the biggest attraction for any individual towards Arduino?
M: (Laughs) I am yet to find a concept or topic where Arduino has not been used. Type on google, ‘The concept + Arduino’ and voila! You have an application. BE it gardening, space, music or photography, name your interest and there is a way to tinker with it using an Arduino.

P: We hear a lot about media art, as a concept these days. What is special about adding electronics to art?
M: Any Art installation with electronics is based on sensors and actuators. Arduino helps the artist to manipulate the idea in his head and give a more personal and interactive approach to a previously ‘look-but-don’t-touch’ art. Let me call it a more knowledgeable way of interacting?

P: Since you have taken so many workshops and visited so many hackerspaces, what are the few useful tips you might want to give to the maker at home?
M: The most important thing is, to have a space. Space defines purpose. The next is organizing the tools that you have. In my times, I used old shoe boxes with egg-cartons inside to separate the resistors, LEDs and potentiometers. Harvest old electronic items and know what they are used for, they might come of use later. A multimeter is a must have. So are tiny components like LEDs etc. To add intelligence a programing board would be useful, and arduino has a great community support for a maker even at the middle of the night!

Never get intimidated by others polished presentations. The more raw your circuit is, the better it is appreciated among the maker community. Do share the knowledge, including the success and including the failures.

P: What is your role as a part of Arduino?
M: Let me see… We can call it Community Liason. Ill take care of all the minor bugs, wishlist and major issues, bridging the gap between developers and the community.
P: Wow! That sounds exciting! On a separate note, what would be your Ideal birthday gift?
M: Since there is SO much to build and manage, that would be – time.

A full bios of Michael alongwith his latest work can be read here.