Posts with «arduino hacks» label

Arduino and FPGA Done Differently

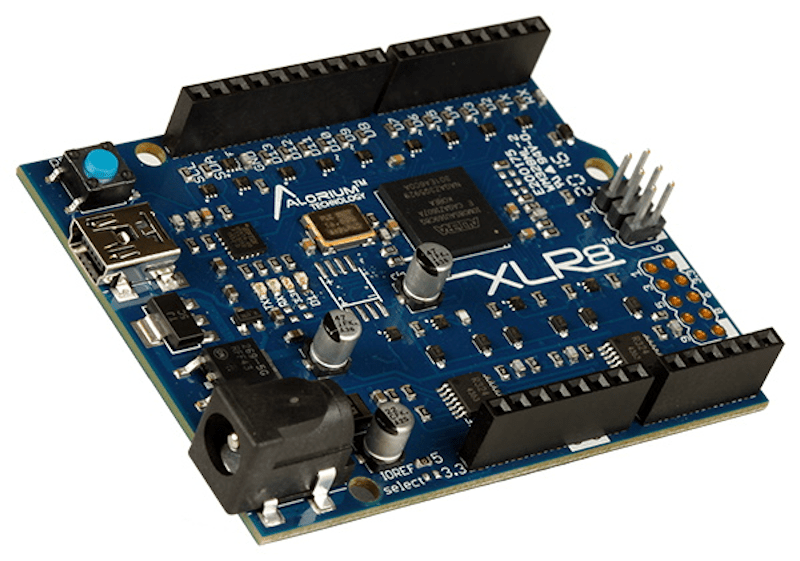
FPGA guru [Max Maxfield] recently took a look at the XLR8 (pronounced accelerate) board from a company called Alorium. On the surface, it looks like another Arduino UNO clone. But instead of a CPU, it contains an Intel MAX10 FPGA that runs a softcore

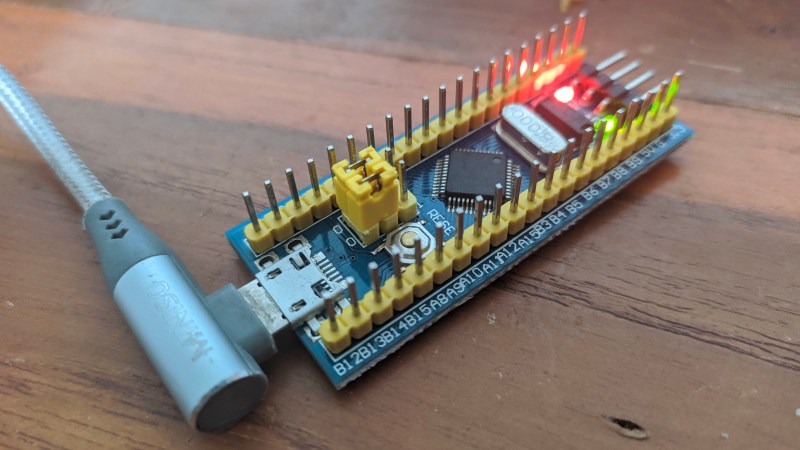
AVR processor. Of course, that’s only part of the story. If the board was just a mock Arduino using an FPGA, that’s not very interesting for practical purposes. However, by incorporating accelerator blocks or XBs, you can add FPGA modules to the soft CPU. [Max] shows an example that you can see in the video below where an FPGA block controls servos more easily than a standard Arduino. There’s also a version that looks like an Arduino Nano, but can clock much faster as well as use the XBs.

In addition to prebuilt XBs, there is a workflow to build your own if you are familiar with working with FPGAs. The products aren’t exactly new, but we enjoyed [Max’s] take on the product. We also appreciated the simple code examples showing exactly how you would convert a program to use the accelerated functions.

The idea isn’t new or original, of course. You might argue that Arduino’s official FPGA support should have worked like this. The comments on the post also talk about several similar boards from earlier that never gained much traction, including ZPUino.

We talked about the nano-like board a few years ago. We’ve seen projects with the ZPUino before, too.

Hack a Day 21 Mar 15:01

Negative Reinforcement: Drill Bits Edition

In theory, it’s fun to have a lot of toys tools around, but the sad reality is that it’s only as fun as the organization level applied. Take it from someone who finds organization itself thrilling: it really doesn’t matter how many bits and bobs you have, as long as there’s a place for everything and you put away your toys at the end of the day.

[Cranktown City] is always leaving drill bits lying around instead of putting them back in their bit set boxes. Since he responds well to yelling, he decided to build an intelligent drill bit storage system that berates him if he takes one out and doesn’t put it back within ten minutes.

But [Cranktown City] did much more than that. The system is housed in a really nice DIY stand that supports his new milling and drilling machine and has space to hold a certain type of ubiquitous red tool box beneath the drill bits drawer.

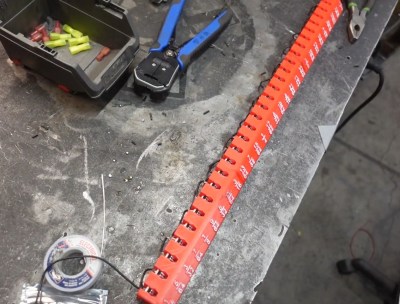
All the bits now sit in a 3D-printed index that fits the width of the drawer. [Cranktown City] tried to use daisy-chained pairs of screws as contacts behind each bit that could tell whether the bit was home or not, but too much resistance interfered with the signal. He ended up using a tiny limit switch behind each bit instead. If any bit is removed, the input signal from the index goes low, and this triggers the Arduino Nano to do two things: it lights up a strip of red LEDs behind the beautiful cut out letters on the drawer’s lip, and it starts counting upward. Every ten minutes that one or more bits are missing, the drawer complains and issues ad hominem attacks. Check out the demo and build video after the break, but not until you put your tools away. (Have you learned nothing?)

Okay, so how do you deal with thousands of jumbled drill bits? Calipers and a Python script oughta do it.

Planetary Escape (-Room in a Box)

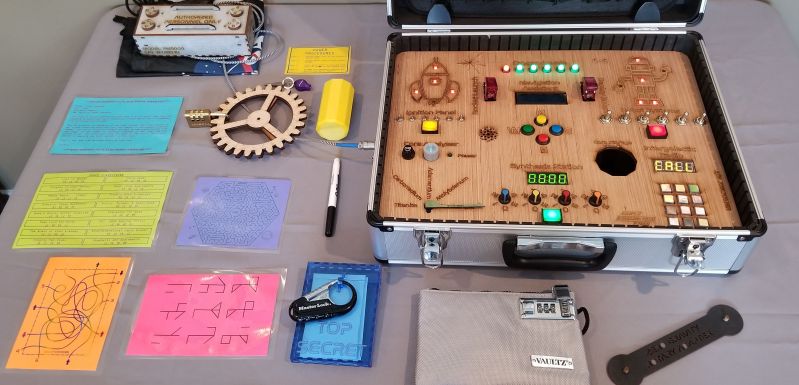
The trick to a fun escape room is layers. For [doktorinjh]’s Spacecase, you start with an enigmatic aluminum briefcase and a NASA drawstring backpack. A gamemaster reads the intro speech to set the mood, and you’re ready to start your escape from the planet. The first layer is the backpack with puzzles you need to solve to get into the briefcase. In there, you discover a hidden compartment and enough sci-fi references to put goofy smiles on our faces. We love to see tools reused as they are in one early puzzle, you use a UV LED to reveal a hidden message, but that light also illuminates puzzle clues later.

All the tech in Spacecase makes it a wonder of mixed media. The physical layer has laser engraved wood featuring the font from the 1975 NASA logo, buttons, knobs, LEDs, toggle switches, and a servo. Beneath the visible faceplate is an RGB sensor, audio player, speaker, and at the center is an Arduino MEGA. We’d love to get our hands on Spacecase for a game, and we’re inspired to pull out all the stops and build games with our personal touches. Maybe something with a mousetrap.

This isn’t the first escape room hardware we’ve seen and [doktorinjh] similarly made a bomb diffusing game.

Running 57 Threads At Once On The Arduino Uno

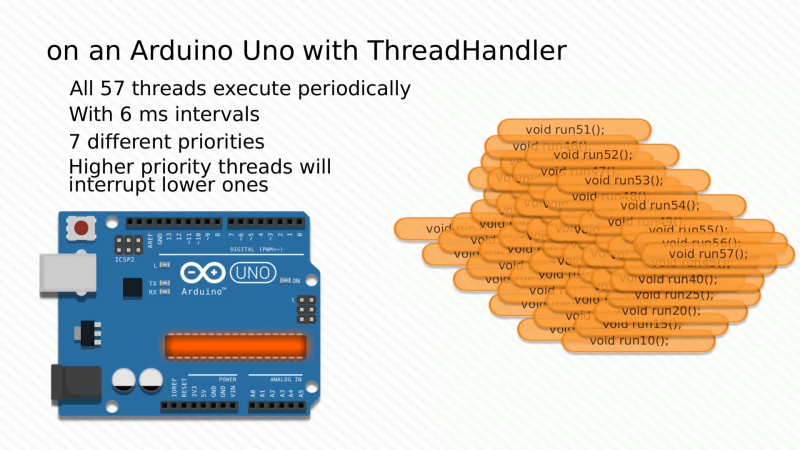
When one thinks of the Arduino Uno, one thinks of a capable 8-bit microcontroller platform that nonetheless doesn’t set the world alight with its performance. Unlike more modern parts like the ESP32, it has just a single core and no real multitasking abilities. But what if one wanted to run many threads on an Uno all at once? [Adam] whipped up some code to do just that.

Threads are useful for when you have multiple jobs that need to be done at the same time without interfering with each other. The magic of [Adam]’s ThreadHandler library is that it’s designed to run many threads and do so in real time, with priority management as well. On the Arduino Uno, certainly no speed demon, it can run up to 57 threads concurrently at 6ms intervals with a minumum timing error of 556 µs and a maximum of 952 µs. With a more reasonable number of 7 threads, the minimum error drops to just 120 µs.  Each thread comes with an estimated overhead of 1.3% CPU load and 26 bytes of RAM usage.

While we struggle to think of what we could do with more than a handful of threads on an Arduino Uno, we’re sure you might have some ideas – sound off in the comments. ThreadHandler is available for your perusal here, and runs on SAMD21 boards as well as any AVR-based boards that are compatible with TimerOne. We’ve seen other work in the same space before, such as ChibiOS for the Arduino platform. Video after the break.

Supersized Weather Station Uses Antique Analog Meters

For most of us, getting weather information is as trivial as unlocking a smartphone or turning on a computer and pointing an app or browser at one’s weather site of choice. This is all well and good, but it lacks a certain panache that old weather stations had with their analog dials and stained wood cases. The weather station that [BuildComics] created marries both this antique aesthetic with modern weather data availability, and then dials it up a notch for this enormous analog weather station build.

The weather station uses 16 discrete dials, each modified with a different label for the specific type of data displayed. Some of them needed new glass, and others also needed coils to be modified to be driven with a lower current than they were designed as well, since each would be driven by one of two Arduinos in this project. Each are tied to a microcontroller output via a potentiometer which controls the needle’s position for the wildly different designs of meter. The microcontrollers themselves get weather information via the internet, which allows for about as up-to-date information about the weather as one could gather first-hand.

The amount of customization of these old meters is impressive, and what’s even more impressive is the project’s final weight. [BuildComics] reports that it took two people just to lift it onto the wall mount, which is not surprising given the amount of iron in some of these old analog meters. And, although not as common in the real world anymore, these old antique meters have plenty of repurposed uses beyond weather stations as well.

Eyesight Guardian Polices Your Poor Pupils

Don’t know about you, but over the last year or so, we have gone from spending ten or twelve hours a day at this computer to upwards of sixteen or eighteen. Fortunately there’s a window behind the monitor for taking those 20/20/20 breaks that are supposed to prevent eye strain, but it’s so hard to remember (and boring) to do it. And nobody needs yet another thing to remember in the name of self-care.

[Daniel Hingston] certainly agrees. As you’ll see in the delightful video after the break, [Daniel] has made a game out of the whole process of stopping every twenty minutes to spend twenty seconds looking at a point that’s at least twenty feet away. Once the break is over, [Daniel] uses the dual-purpose start button to acknowledge having looked away for 20 seconds. The device is meant to clip onto the corner of any monitor, and [Daniel] has provided several sizes of the bridge piece so that everyone can find their fit.

The Guardian’s guts are pretty simple — an Arduino Pro Mini runs the stop watch and a TFT display to show the graphics that live on an SD card. This is a great way to preserve your eyesight by gamifying something we all know we should be doing. It might be nice to add a break timer that counts up to 25 or thereabouts so you have time to stand up and come back. If you press the button too soon, it scolds you and you have to start your eye break over.

Need some more self-care lately? Our own [Jenny List] has your back in these interesting times.

Tired of Popcorn? Roast Coffee Instead

We’ve seen a lot of coffee roaster builds over the years. [Ben Eagan] started his with a hot-air popcorn maker. If you think it is as simple as putting beans in place of the popcorn, think again. You need to have good control of the heat, and that requires some temperature monitoring and a controller — in this case, an Arduino. [Ben’s] video below shows how it all goes together.

With the Arduino and the power supply strapped to the sides, it looks a bit like something out of a bad post-apocalypse movie. But it looks like it gets the job done.

In addition to the Arduino, a thermocouple measures the temperature and that takes a little circuitry in the form of a MAX31855. There’s also a relay to turn the heater on and off. There are other ways to control AC power, of course, and if a relay offends your sensibilities you can always opt for a solid state one.

The only other wrinkle was the addition of an extra power supply so the fan could operate without the heater. There might have been some other ways to manage that, but power supplies are cheap enough and at least the strapped on power supply counterbalances the strapped on Arduino on the other side of the popper.

We’ve seen popcorn poppers used like this before, of course. Thermocouples are a great way to measure high temperatures, but there are lots of other ways to measure that particular quantity.

Motor-Driven Movement Modernizes POV Toy

Just as we are driven today to watch gifs that get better with every loop, people 100+ years ago entertained themselves with various persistence of vision toys that used the power of optical illusions to make still images come to life. [jollifactory] recently recreated one of the first POV devices — the phenakistoscope — into a toy for our times.

The original phenakistoscopes were simple, but the effect they achieved was utterly amazing. Essentially a picture disk with a handle, the user would hold the handle with one hand and spin the disk with the other while looking in a mirror through slits in the disk. Unlike the phenakistoscopes of yore that could only be viewed by one person at a time, this one allows for group watching.

Here’s how it works: an Arduino Nano spins a BLDC motor from an old CD-ROM drive, and two strips of strobing LEDs provide the shutter effect needed to make the pictures look like a moving image.The motor speed is both variable and reversible so the animations can run in both directions.

To make the disks themselves, [jollifactory] printed some original phenakistiscopic artwork and adhered each one to a CD that conveniently snaps onto the motor spindle. Not all of the artwork looks good with a big hole in the middle, so [jollifactory] created a reusable base disk with an anti-slip mat on top to spin those.

If you just want to watch the thing in action, check out the first video below that is all demonstration. There be strobing lights ahead, so consider yourself warned. The second and third videos show [jollifactory] soldering up the custom PCB and building the acrylic stand.

There are plenty of modern ways to build old-fashioned POV toys, from all-digital to all-printable.

Dynamic Macro Keyboard Controls All the Things

Keyboard shortcuts are great. Even so, a person can only be expected to remember so many shortcuts and hit them accurately while giving a presentation over Zoom. [Sebastian] needed a good set of of shortcuts for OBS and decided to make a macro keyboard to help out. By the time he was finished, [Sebastian] had macro’d all the things and built a beautiful and smart peripheral that anyone with a pulse would likely love to have gracing their desk.

The design started with OBS, but this slick little keyboard turned into a system-wide assistant. It assigns the eight keys dynamically based on the program that has focus, and even updates the icon to show changes like the microphone status.

This is done with a Python script on the PC that monitors the running programs and updates the macro keeb accordingly using a serial protocol that [Sebastian] wrote. Thanks to the flexibility of this design, [Sebastian] can even use it to control the office light over MQTT and make the CO2 monitor send a color-coded warning to the jog wheel when there’s trouble in the air.

This project is wide open with fabulous documentation, and [Sebastian] is eager to see what improvements and alternative enclosure materials people come up with. Be sure to check out the walk-through/build video after the break.

Inspired to make your own, but want to start smaller? There are plenty to admire around here.

Coding A Dynamic Menu For Character LCDs on Arduino

These days, there’s a huge variety of screens on the market for use with microcontrollers. OLEDs and graphic LCDs abound, while e-ink devices tempt the user with their clean look and low energy consumption. However, for many purposes, the humble HD44780 character LCD does the job just fine. If you’re using such a device, you might want to implement a simple menu system, and in that case, [MyHomeThings] has you covered.

The menu code is simple to modify and implement. It allows the user to define a certain number of menu items, along with button labels and functions to be executed with button presses. By default, it’s set up to work with  left and right function buttons, with up and down buttons to toggle through the menu’s various entries. This suits the commonly available Arduino shields which combine a 16×2 character LCD with a set of four tactile buttons in a cross formation. However, modifying the code to use an alternate button scheme would be simple for those eager to tweak things to their liking.

For the absolute beginner to programming, it’s a great way to put together a simple interface for your microcontroller projects. It’s the sort of thing you might use if you’d built a do-everything Arduino handheld device, as we’ve seen built before. If you find text menus too archaic for your purposes, though, be sure to sound off with your favourite solutions in the comments.

Hack a Day 18 Feb 16:30