Codebender: An online Arduino IDE

Because everything is moving to a web app, [Vasilis Georgitzikis], a.k.a. [tzikis] developed codebender, a cloud-based Arduino IDE replete with built-in libraries, documentation, and the ability to upload your code to an Arduino from a browser.
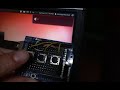
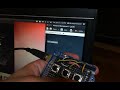
To compile an Arduino sketch, codebender uses clang a wonderful compiler that will give you extremely descriptive warnings on terrible code. Like any good IDE, there’s built-in highlighting and documentation, and a small bit of Java allows you to upload your code and monitor the serial port right in the browser.
One of the more interesting innovations is codebender’s (upcoming) use of a TFTP bootloader. With this and an Ethernet shield, it’s easy to upload code to any Internet-connected Arduino, whether it’s on your desk or halfway across the world. We can see that being very useful for a data logger or even a UAV balloon, and can’t wait to see it in action.
Filed under: arduino hacks