Posts with «yún» label

Arduino Tour goes to London: 21st of September – Workshop on #Iot

Next 21st of September Arduino Tour is finally landing in London for a one-day workshop, starting at 10am at The Maker Works London, UK. (max. 18 people).

This edition of the official Arduino workshop is focused on the world of the Internet of Things and will allow participants to experiment with a botanical kit including an Arduino YÚN, plants and sensors. The workshop teaches you how to turn your plants and virtually any object into connected, responsive elements using Arduino YÚN.

Arduino YÚN is the combination of a classic Arduino Leonardo and a small Linux computer, able to connect to a network or Internet via Ethernet or WiFi. Arduino boards are able to read inputs – light on a sensor, a finger on a button, or even a Twitter message – and turn it into an output – activating a motor, turning on an LED, publishing something online.

Check the program and book your participation >>

Node.js on the Arduino Yún

Tom Igoe some days ago wrote an interesting post about Arduino Yún on his blog.  We post it here as it could be useful to the Arduino Community.

————————–

Recently, Federico Fissore added node.js to the package repository for the Arduino Yún. Here’s how you get node to communicate with the Arduino processor on the Yún via the Bridge library.

To do this, you’ll need an Arduino Yún, a microSD card, a microUSB cable and a wifi connection. You should be familiar with the basics of the Arduino Yún and node.js in order to get the most out of this post.

All of the code for this post can be found on my GitHub repository.

First you’ll need to install node on the Yún. Make sure you’ve upgraded to the current Yún software image and have connected to the internet via wifi. Then ssh into your Yún, or connect to the command line interface using the the YunSerialTerminal sketch, and issue the following commands:


$ opkg update
$ opkg install node

That’s it. Now you have node.js onboard. You can check that it’s okay by checking the version:

$ node -v

You should get the version number in reply.

Once you’ve got that working, you’ll undoubtedly want to communicate with the Yún’s Arduino processor from node. You can do this using the Bridge library. On a microSD drive, make a directory for your node scripts. I called mine /arduino/node. Then insert it into your Yún. For reference, its path from the command line is /mnt/sda1/arduino/node.

Note: The Yún automatically treats the microSD card’s /arduino/www/ directory as a public web directory. Anything you put in there will be served out as static HTML. So you may not want to put your node scripts in this directory, so they’re not visible via the browser. That’s why I created a node directory at the same level as the www directory, but outside it.

Read the complete post at this link>>

Arduino Blog 07 Jul 18:20

Internet of things with Arduino Yún and Yaler

Explore this tutorial  demonstrating how the Arduino Yún can be controlled from anywhere with any internet connected web browser. The solution is provided by Bo Peterson using the Yaler service which means that the Yún can be reached from any network without knowing the IP-address, and without any port forwarding on the router where the Yún is connected.

A common problem in home automation and internet of things applications is that it is difficult to reach devices connected behind wifi routers from the outside. There are different approaches to overcome this problem:

  • Port forwarding and static ip addresses. This solution requires the user of the connected device to know how to configure a router and have access to router administration which is not always possible. A Yun tutorial with port forwarding is found here.
  • Polling is a technique where the connected device at regular intervals checks with an external server if the device should take action. This solution requires no configuration of the router but it creates extra network traffic and response delays.
  • A third way is to use WebSockets which is a way of providing real time full-duplex communication over TCP. Spacebrew is a good open source toolkit for connected devices using WebSockets. Autobahn is another infrastructure that can be used.
  • Reverse HTTP is the solution that will be used in this tutorial. We will use Yaler which is an open source relay infrastructure that gives access to connected devices with very little configuration.

Follow the tutorial and get the code at this link.

Arduino Blog 28 Jun 19:06
arduino  arduino yún  iot  yaler  yún  

An interactive coin jar saving for a good cause

At the end of May, Massimo Banzi and Giorgio Olivero (Todo) spent some days at the Copenhagen Institute of Interaction Design to teach a class called Connected Objects. The class goal was to envision, design and implement interactive objects that are open and connected, whose design and behaviour can be used to sense, read and affect the domestic landscape or other shared environments.

One of the team of students (Arun Mota, Hsiang-Lin Yang, Yashodeep Gholap) worked on Arduino Yún to create an energy redistribution service that allows people to save money and in parallel donate towards energy distribution projects in deprived areas of the world:

LightUp is an interactive fundraising coin jar that firstly encourages personal savings and then also allows people to contribute a part of their savings towards the cause. The system allows them to track in real-time exactly how many units of electricity they helped generate. Another visible reward is the jar lights up for 10 minutes each time they drop a coin.

To avail the service of LightUp, a user merely needs to register through an online platform. Every registered user is then provided with a physical jar to make savings on periodical basis. Users can save coins in these jars. Every time a coin is dropped in it, as a response the jar lights up for 10 minutes.

The drop of a coin each time also triggers a parallel transaction where a certain sum of money is transferred from the user’s account to LightUp’s Account. While registering, LightUp will also create a personal PayPal account for its users. This PayPal account is linked to the merchant PayPal account of LightUp. The user gets to decide the unit of money that can be debited each time while registering.

Every time users put coins in the LightUp jar, they will also receive immediate feedbacks such as SMS, email or facebook notification as per user’s preferences. These feedbacks will inform users on how their donation is being used for specific social projects and how they have helped make a real difference.


Arduino Blog 25 Jun 19:41

Internet of Everything – Flip the Switch and Get Going

Our friends at Temboo are releasing more cool stuff for your Internet of Everything. Here’s some news from their blog.

———————————-

Now you can connect even more Arduinos with the power of Temboo by simply flipping our IoT Mode on. This new feature opens up a whole new world of possibilities for the Internet of Things.

What is IoT mode, you ask?

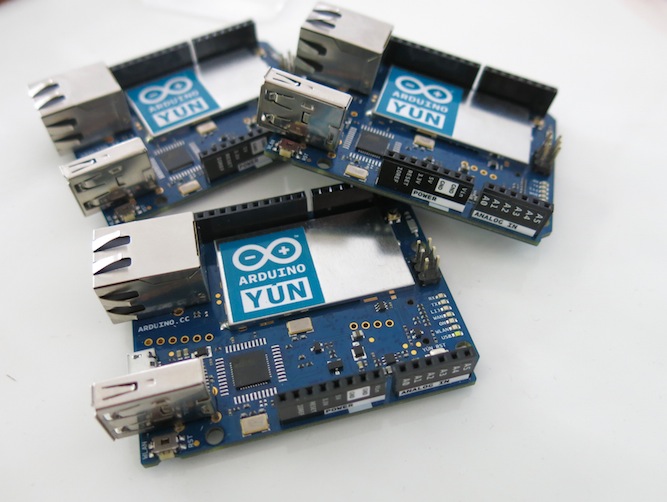
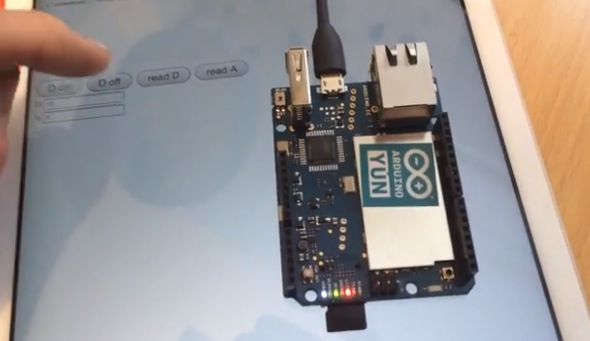
It’s a new way to access our 2,000+ Choreos on any of your Arduino or Arduino-compatible boards. By just hitting a switch at the top right of any Choreo page, you “got the power” to call that Choreo with a sketch tailored specifically for the device you pick from our drop down menu. Previously, this feature was only available for the Yún, but now it is open to the larger Arduino family. All you have to do is select the type of shield your board uses and the code will generate accordingly.

So how do I begin using this amazing IoT feature?

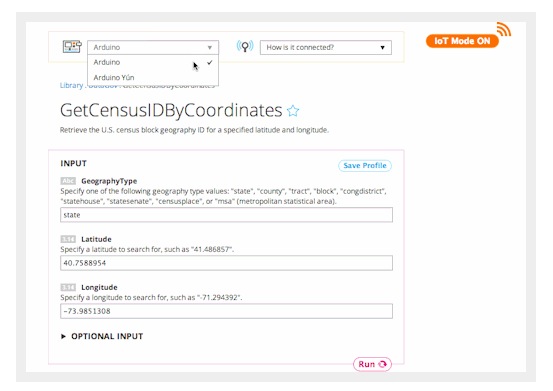
Select a Choreo from our vast Library and turn on IoT Mode. In the example below, we chose the Data.gov API and the GetCensusIdByCoordinates Choreo. Data.gov is a cool way to access APIs from a number of US governmet agencies and to query government datasets, including the US Census!

The “Arduino” option encompasses compatible boards that lack the Yún’s built-in wifi capabilities, but can connect to the internet with a shield. Fill out your shield’s specifics when the popup appears and save for future use. Run your Choreo and scroll down to retrieve the code for the sketch, ready to be pasted into your Arduino IDE. You can even plug this into a sketch generated by our nifty Device Coder to start mixing and matching!

We are thrilled just thinking of all of the possibilities this unlocks for the Internet of Things. We want to hear all about what you cook up with this new capability, so if you are working on an interesting project, reach out to us at hey@temboo.com!

Find out more on their blog!

Arduino Blog 17 Jun 14:00
arduino  iot  temboo  yún  

A REST API for Arduino and the CC3000 WiFi Chip

Marco Schwarz is an electrical engineer and passionate about home automation. He wrote us some weeks ago to present his work on the Arduino Yún:

I was recently playing with the Arduino Yún for a whole set of new projects, and I discovered a sketch that implements a REST API for the Arduino Yún. We’ll see in more details what a REST API is, but for now let’s say it allows to standardise the communication between your Arduino and the external world via WiFi or Ethernet, and develop complex applications without having to modify your Arduino sketch every time.

So I told myself: why not create one REST API for the CC3000 WiFi chip ? That’s exactly what I did as a weekend project, and I wanted to share it with you. If you want to directly jump to the project files, go over to the GitHub repository of the project.

Keep reading on his blog or watch the video below:

Controlling lights and sensors with Arduino Yún, Node js server and firmata

Arduino user Cinezaster sent us a project using Node js server on the Arduino Yún to control the lights, heating and some other sensors in the office of Appsaloon, the company where he’s doing an internship.

They already use Node.js for a lot of things and some of them are pretty cool with it.
That’s how they did it:


First of all you need to expand your flash, because there is not enough flash (16 MB) on the Arduino Yún. Sounds reasonable right? Not when you got the Yún for the first time in your hands. Luckily someone wrote this tutorial.

To start with you need to be on the same network to reach the Arduino .
Open your terminal

ssh root@arduino.local

It will ask for a password, which will by default be: ‘arduino’:

Now you can install Node.js on the Yún type :

opkg update
opkg install node

When the install is finished verify it by :

 node -v

It should give you something like this v0.10.28 (it may vary in the future)

Next you have to install the node-serialport package. This is necessary because the Atheros AR9331 needs to communicate with the ATmega32u4.

opkg update
opkg install node-serialport

After this you will need firmata for Node.js. This will control the inputs and outputs of the ATmega32u4.

Normally you would install firmata like this:

npm install firmata

But because the Arduino Yún does not have enough RAM this is ‘not possible’.

Keep reading it on their blog and fork it on Github!

Arduino Blog 03 Jun 19:33

See you at Maker Faire Bay Area! 17th and 18th of May

Today and tomorrow you visit us at the Arduino booth (#204) right next to Atmel booth (#205) and have a look at our cool demos. You’ll find all the new boards: Arduino TRE Development Edition and Arduino ZERO, Arduino Yún together with Temboo and the freshly baked Arduino at Heart littleBits Module!

Massimo Banzi keynote is scheduled at 4.00PM and Michael Shiloh’s Getting Started with Arduino talks are waiting for you 2 times a day.

We are looking forward to see you all and we give a big “thank you”  to all our volunteers who are supporting us this weekend, talking with hundreds of people visiting our booth and showing their passion for Arduino!


Time to Expand your Yún disk space and install Node.js

Following the new Yún image, we are happy to announce two new features of the Arduino Yún.

  • The first feature is a tutorial we’ve written that allows you to use a micro SD card as a replacement for the Yún’s internal flash memory. Using this, you can expand your Yún’s free disk space from the original 7 Megabytes to the Gigabytes of your SD card.

Having more disk space allows you to make more complex projects, like activating webcams and saving pictures taken with it. In addition, by using an external SD card you avoid using the internal flash memory, thus extending the life of your Yún.

To upgrade your Yún to gain these features, follow the steps of the tutorial and report back to the Arduino Yún forum if you have any issues or questions.

  • The second new feature is the availability of Node.js as an installable package. In order to install Node.js on your Yún, use the Arduino IDE to upload the YúnSerialTerminal example or access your Yún via SSH.

Be sure your Yún has access to the internet, then type the following commands:

opkg update
opkg install node

And voilà! You’ve got Node.js on your Yún.

Try it out with the following command: 

node -e “console.log(‘Hello Yún’)”

If you are a Node.js fan, you probably want to use your favourite modules. Unfortunately, not every Node.js module is “pure javascript”, so some modules won’t work on the Yún. We are solving this by preparing packages for the most common native Node.js modules: we have already prepared node-serialport (opkg install node-serialport) and noble is on the way. If you miss your favourite one and want it added to the list, please consider joining us in developing the Yún.

Arduino Blog 06 May 11:46

Upgrading the OpenWrt-Yun image on the Yún

Today we released the upgraded version of the OpenWrt-Yun image on the Arduino Yún.
This version includes all the latest and greatest from stable OpenWrt, the latest (Python) Bridge (with a php contribution and fixes to the file module), we also added Mailbox support to REST api and other fixes to some open issues.

The new image contains also the fix to the well known Heartbleed bug, a big security issue that impacted on almost all websites of the world.

If you own an Arduino Yún we suggest you to follow the link and read the procedure to update the board.
You’ll need to download the zip file from the download page. Remember that updating the OpenWrt-Yun image will cause the loss of all files and configurations you previously saved on the flash memory of the Yún.
Enjoy!

Arduino Blog 23 Apr 10:00
arduino  hearbleed  openwrt  python  yún