Gray Eldritch (AKA The Technomanc3r) has been working on a robotic hand for some time now, and has settled (so far) on a design with three independent servo-actuated fingers and a thumb. He’s also implemented a wrist assembly to rotate it back and forth, with an Arduino Uno hidden inside for an entirely self-contained gripper unit.
Each of the three fingers is controlled by a single MG996R servo, as is the wrist, while the thumb adds a second SG90 servo to allow it to move on two axes. The fingers are modular, so they can be swapped out as needed, and you even change the thumb position for ambidextrous operation.
It remains to be seen what Eldritch plans to do with the gripper, but it looks brilliant by itself in the video below.
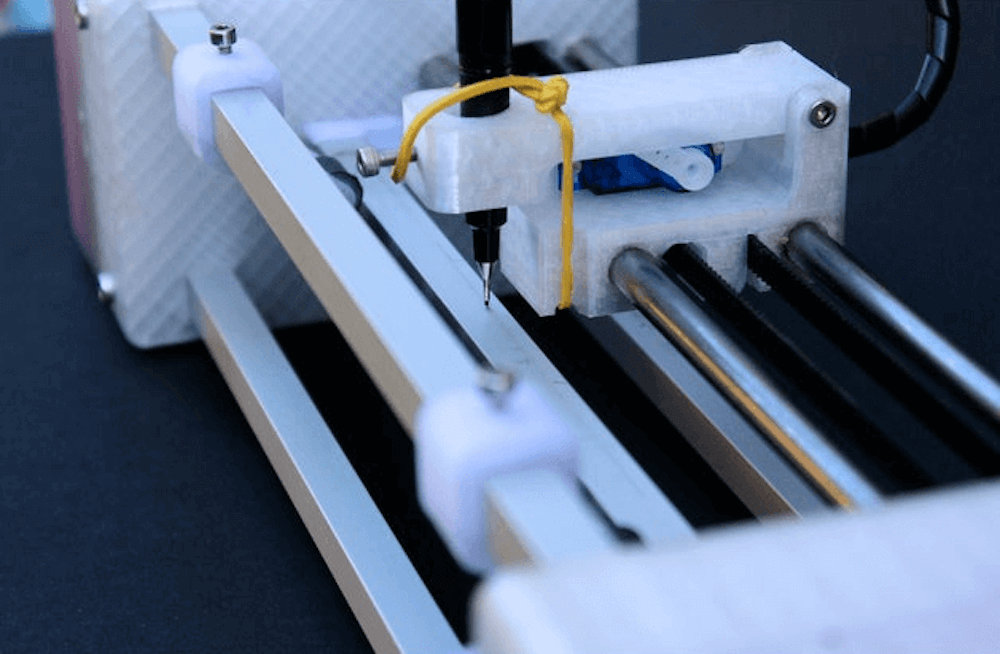
While computer printers are readily available, if you’d like a plotting device that drags a pen, marker, or whatever you need across paper to create images, your options are more limited. To fill this gap, studioprogettiperduti has come up with the d.i.d, or Deep Ink Diver.
This scalable pen plotter uses a frame made out of 3D-printed parts, as well as aluminum extrusion, which could be lengthened to support the size of paper that you need. A timing belt pulls the writing carriage back and forth, while a roller advances the paper.
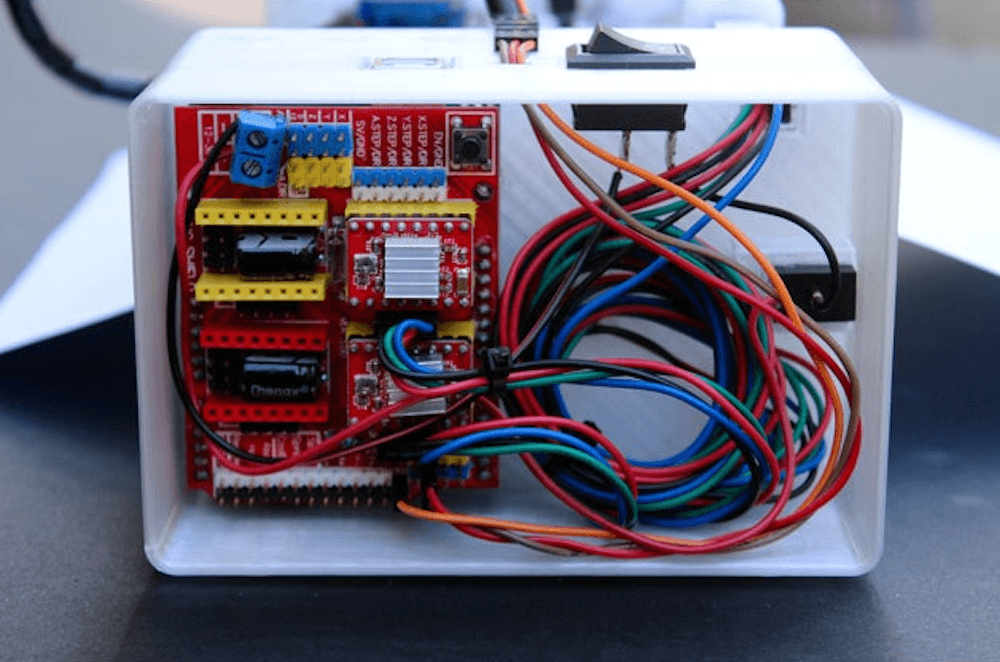
Control is handled by an Arduino Uno and a CNC shield, with a version of grbl that accommodates a servo used to lift the pen.
The materials and electronics used for the plotter are all standard and easy to source. The main frame is made of aluminum extrusion and 3D-printed connections. The motors are all standard NEMA 17 stepper motors and a single SG-90 servo motor. Everything is driven by a cheap Arduino Uno control board that handles the transition from g-code to movement. Furthermore, the software used to create G-code, Inkscape, is open source as well.
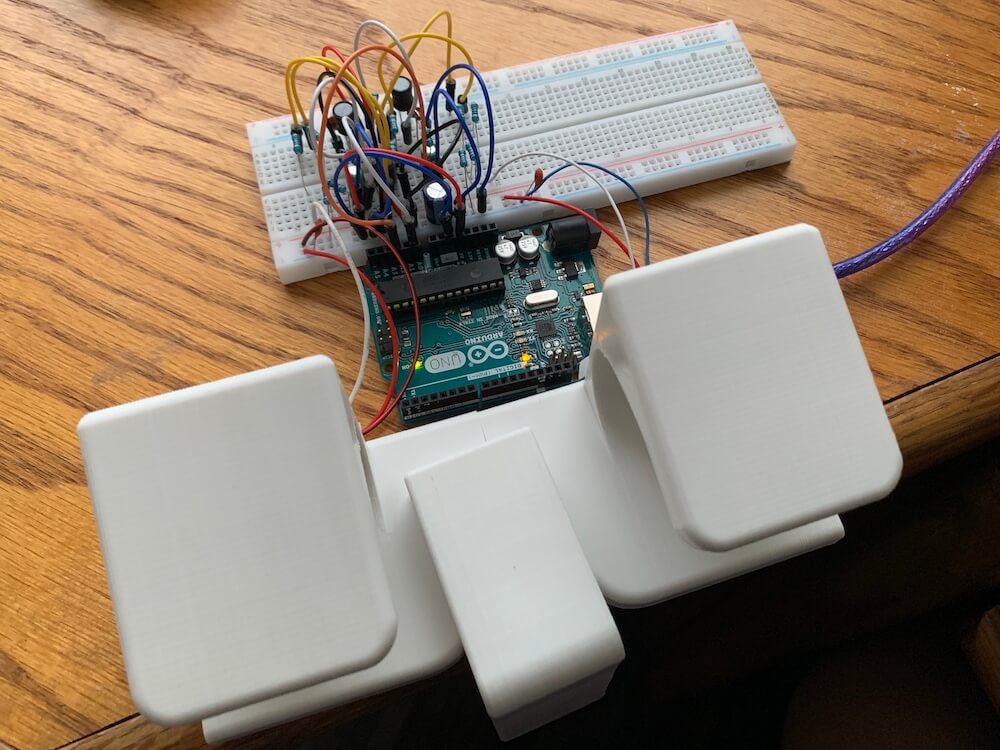
When you need a distraction, or perhaps even now, you may turn to tapping on your desk. While a good way to keep your hands active, or pass a few uninteresting seconds, if you want to get serious with your finger drumming, then the “Arduino USB Drum” by creator colonelwatch may be just the thing.
The 3D-printable device hooks onto the edge of the table, and reads taps on its pads with a pair of strain gauges. Signals are amplified and passed along to an Arduino Uno—including tap intensity—which sends MIDI data to a computer via serial.
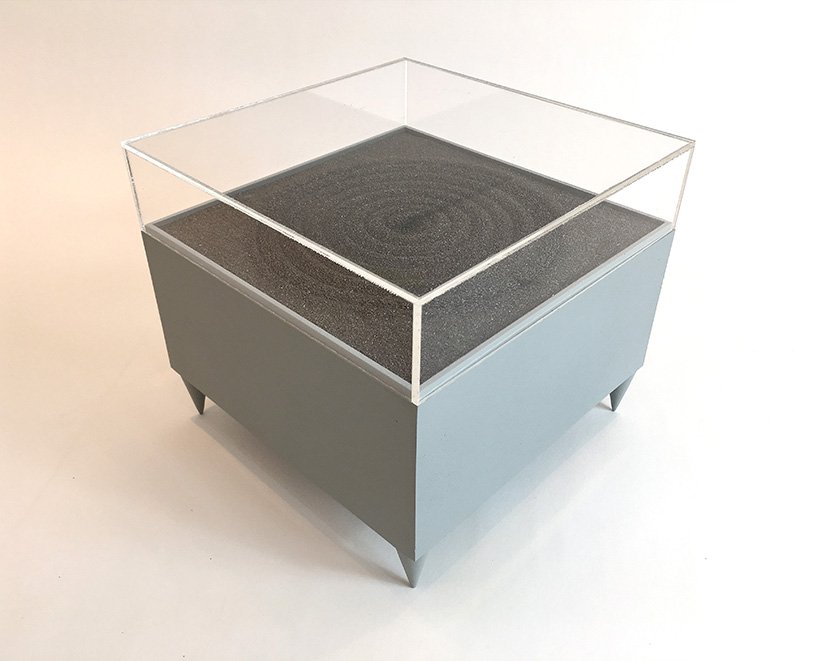
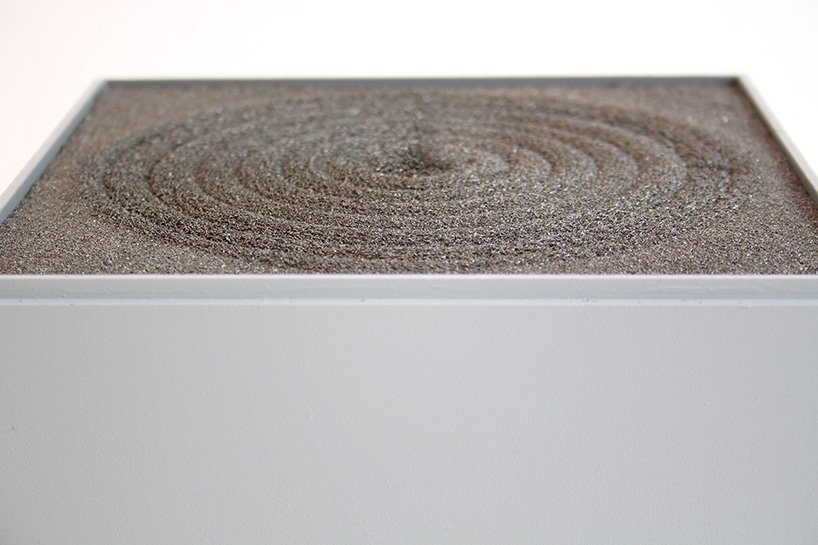
Artist Jo Fairfax has created automated drawing machines inspired by carefully manicured Japanese rock gardens, AKA zen gardens. The mesmerizing artwork uses magnets and motors that move underneath a bed of iron filings, generating soothing shapes as viewers come near via motion sensor.
An Arduino Uno is utilized for the device, or rather devices, and you can see a square “magnet garden” in the first video below, automatically producing a circular pattern. A (non-square) rectangular garden sketches a sort of snake/wave pattern in the second clip.
The build is reminiscent of sand drawing machines that rotate a metal marble through magnetic force, but does away with a visible source of movement as the filings react directly to the magnetic field as it’s applied.
An Arduino Uno is programmed to set off a mechanism with integrated magnets below the platform of iron filings. each time a viewer approaches the machine, it starts to ‘draw’ and agitate the black particles, moving them around the platforms. Slowly the drawings become three dimensional and the sense of the magnets’ tracing becomes visible.
The charged iron filings create varying geometric clusters that shape the zen gardens. The drawing machines reveal the forces acting on them, imitating grass and sand that react to the natural force of the wind. the gesture of the viewer’s movement that activates the machine coupled with the magnetic power makes the artwork become a dialogue of forces… elegant and subtle, just like a zen garden.
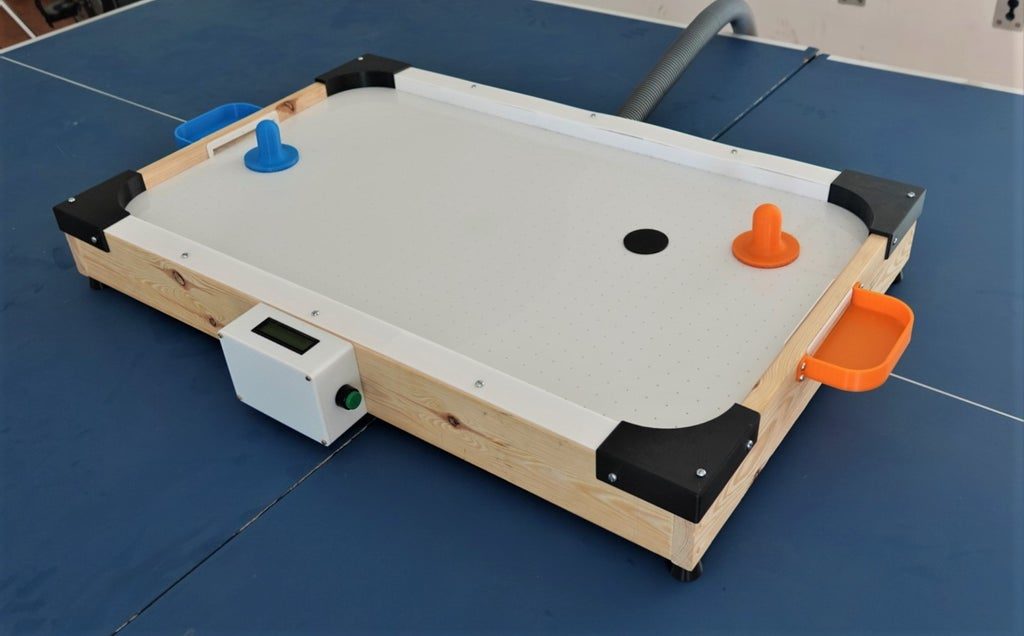
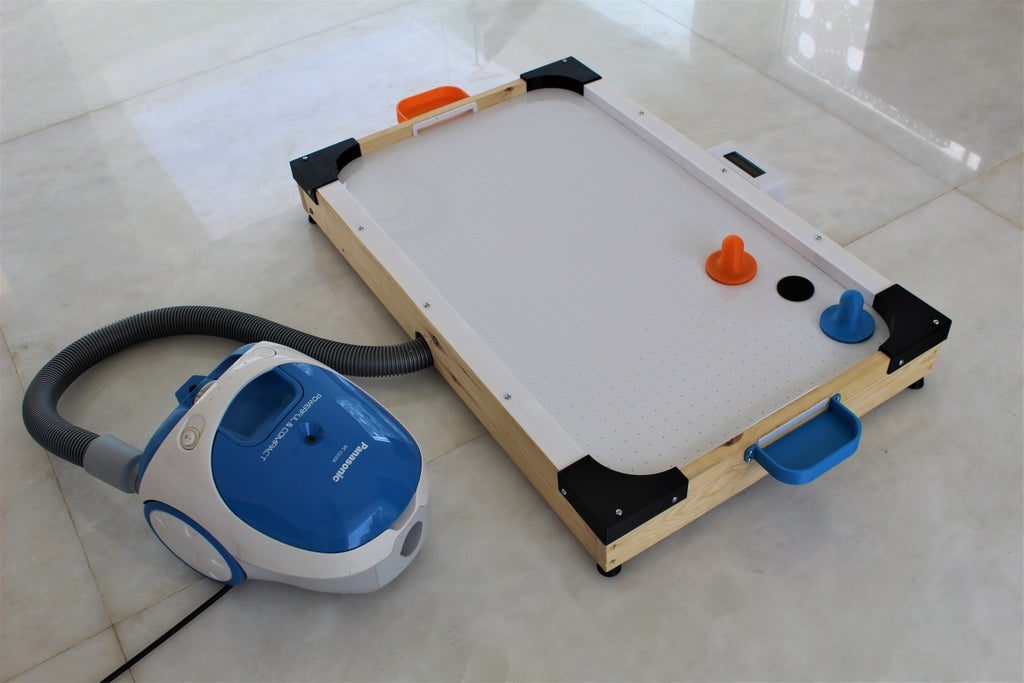
Cleverly, the scaled-down game table uses a household vacuum cleaner blower attachment to provide air pressure, sending little jets of air through a grid of laser-cut holes on the acrylic playing surface.
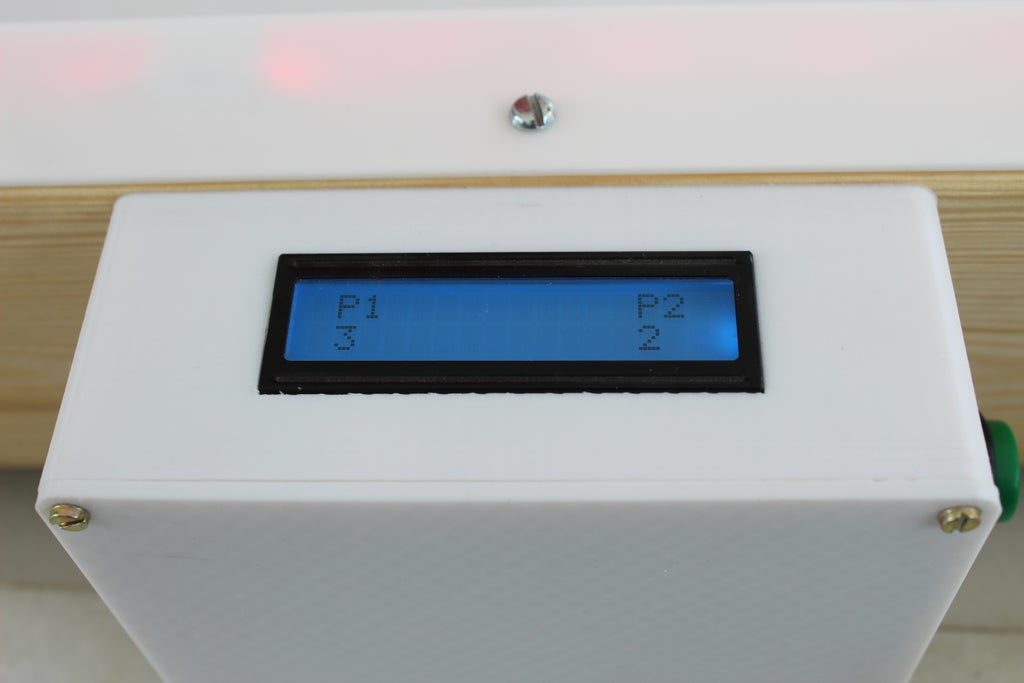
LED lights embedded in the sides add a bit more excitement to the build, and points are tallied with an Arduino Uno-based LCD score display. A pair of buttons are used to register a points for either player, hopefully eliminating arguments over who is ahead as the game progresses!
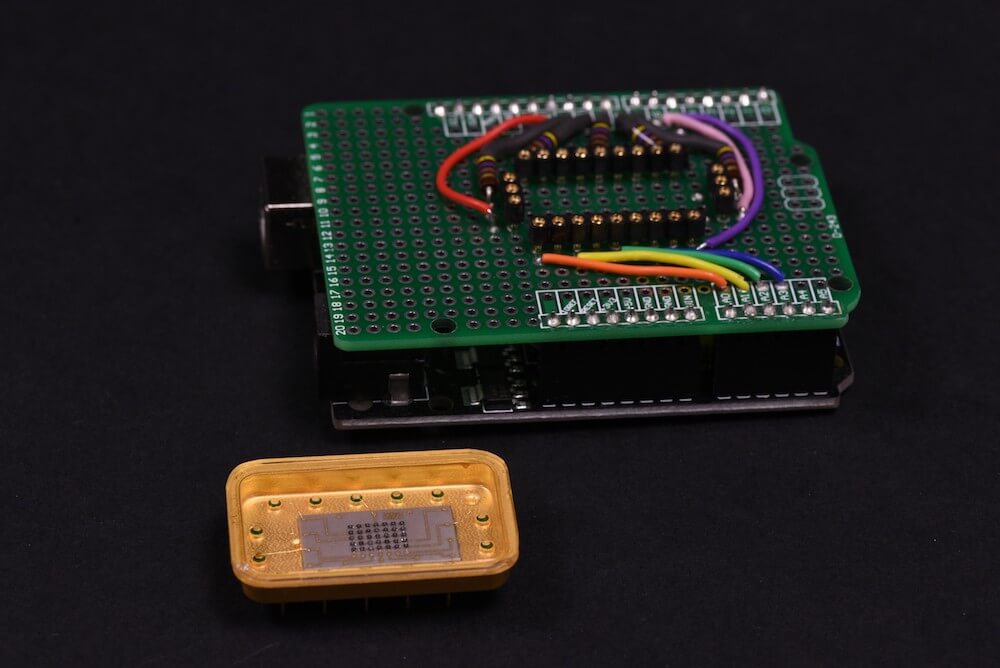
Patrick Hickey has been collecting retro LED indicators and displays for decades, and his rarest item is an HP 5082-7002—a 5×7 dot matrix LED display in a beautiful gold and (possibly) sapphire enclosure. This device is so rare, in fact, that he believes it to be a prototype, somehow relegated to eBay for gold salvage.
Hickey wasn’t able to find any reference to the unit—much less a datasheet—even after extensive research. Instead, he went to work reverse engineering the HP 5082-7002 following the tracks of the PCB to work out how the rows and columns are connected.
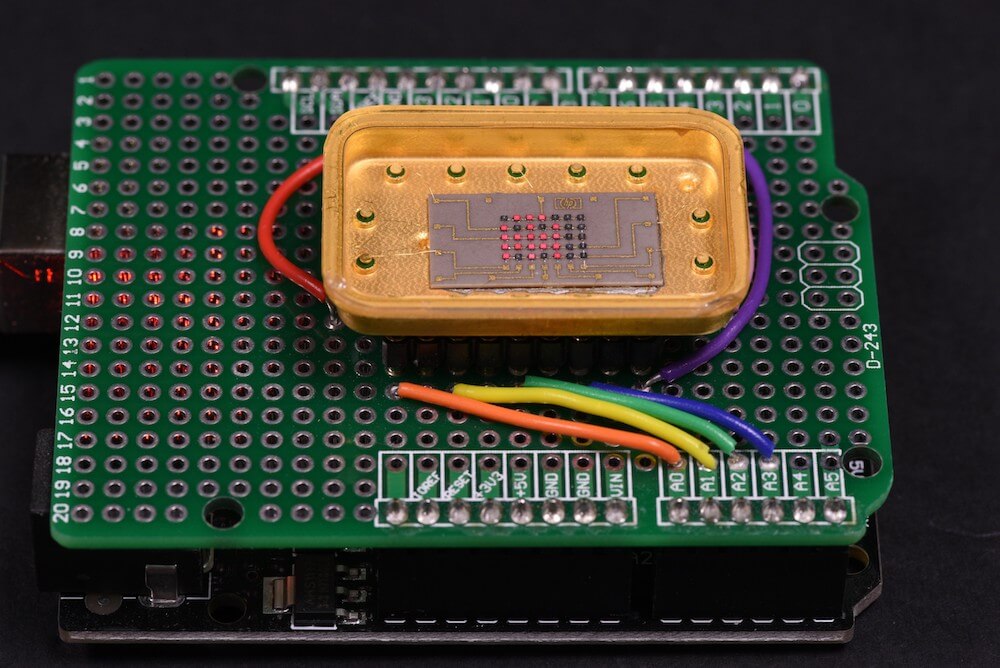
He then designed a test shield for an Arduino Uno with sockets on which the mystery device could sit. With this piece of hardware built, he can now create simple pictures and animated sprites on it using pulsed Arduino outputs.
I followed the tracks to work out which pins are connected rows and columns, and set out to build a test shield for an Arduino Uno. I decided to drive them as “rows” of 5. The max output of Arduino I/O pins is rated at 40mA, so in theory, I could simultaneously power up to 5 LEDs in parallel at 8mA using 1 pin. In practice, using strobe/multiplexing, the duty cycle is much less: 1/7 or 1/5 depending if you drive by rows (7) or columns (5) respectively. The 5 current limiting series resistors are 470 Ohms (¼ Watt). My preference is to use carbon composition resistors (e.g. Allen Bradley). I love the “retro look” of them and I think they compliment the vintage LEDs.
I had already written Arduino code for testing some TIL-305 matrix displays, so it was relatively simple to transpose the pins in my sketch for this configuration. The test code permits animations of up to 150 different alphanumeric characters/symbols, and (of course) some animated sprites inspired by retro video games.
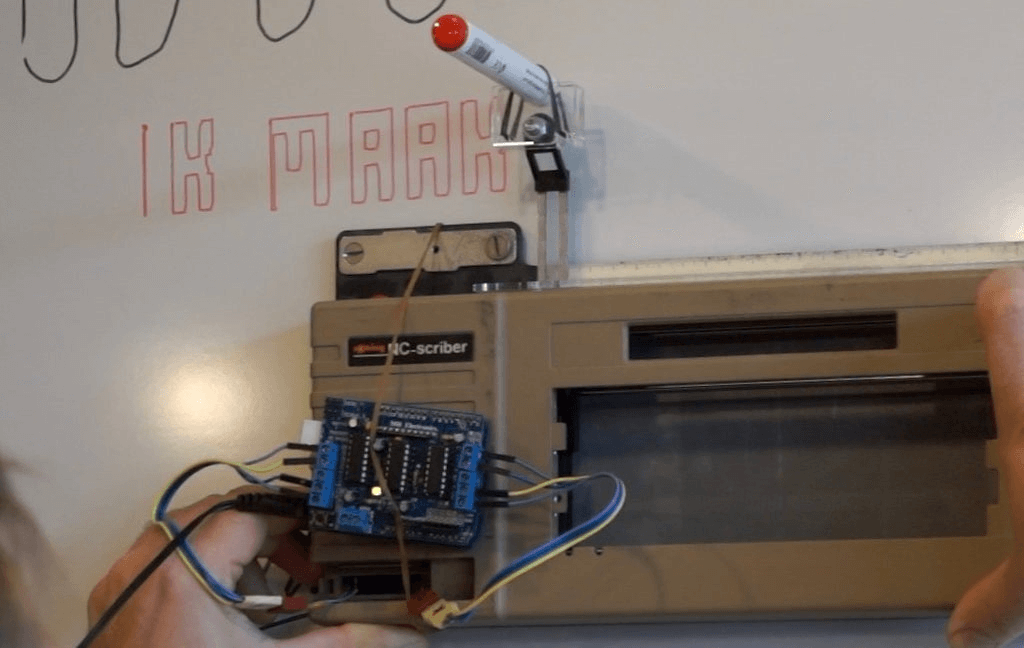
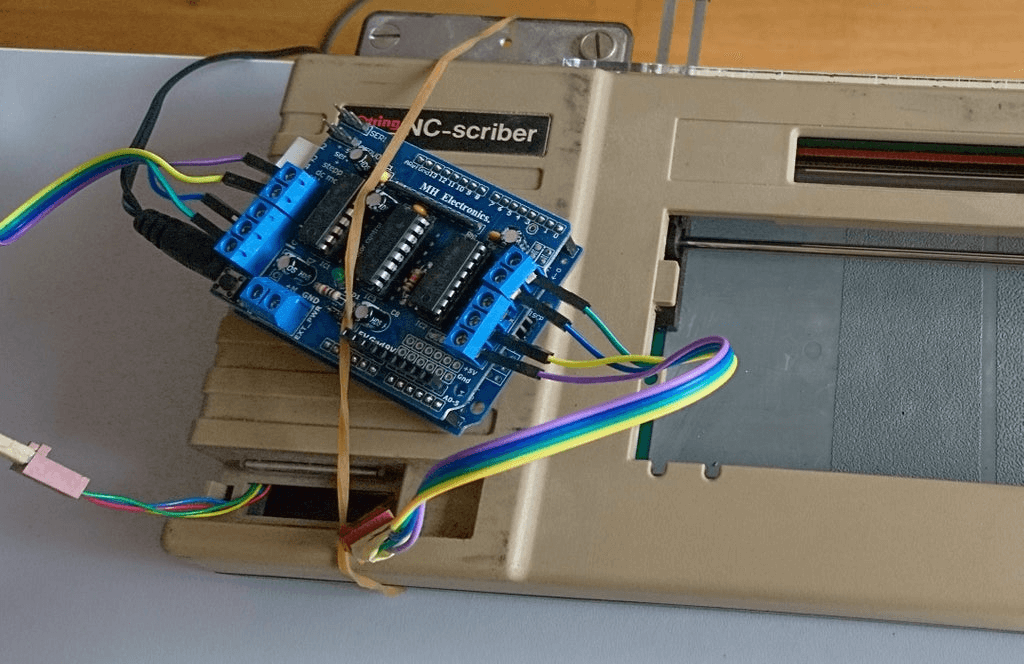
Writing on a whiteboard isn’t an easy task for many people, including instructor ‘Kenyer,’ whose lettering can be on display for a semester or more. Rather than accept his imperfect penmanship, he modified a 1980s-era Rotring NC-Scriber—originally meant for mechanical drawing use—to do this for him.
His project runs on an Arduino Uno and motor shield, along with custom mount for erasable markers. Phrases are programmed via the setup section of the sketch, but he hopes to implement the device’s keyboard for control with the help of a different motor driver in the future.
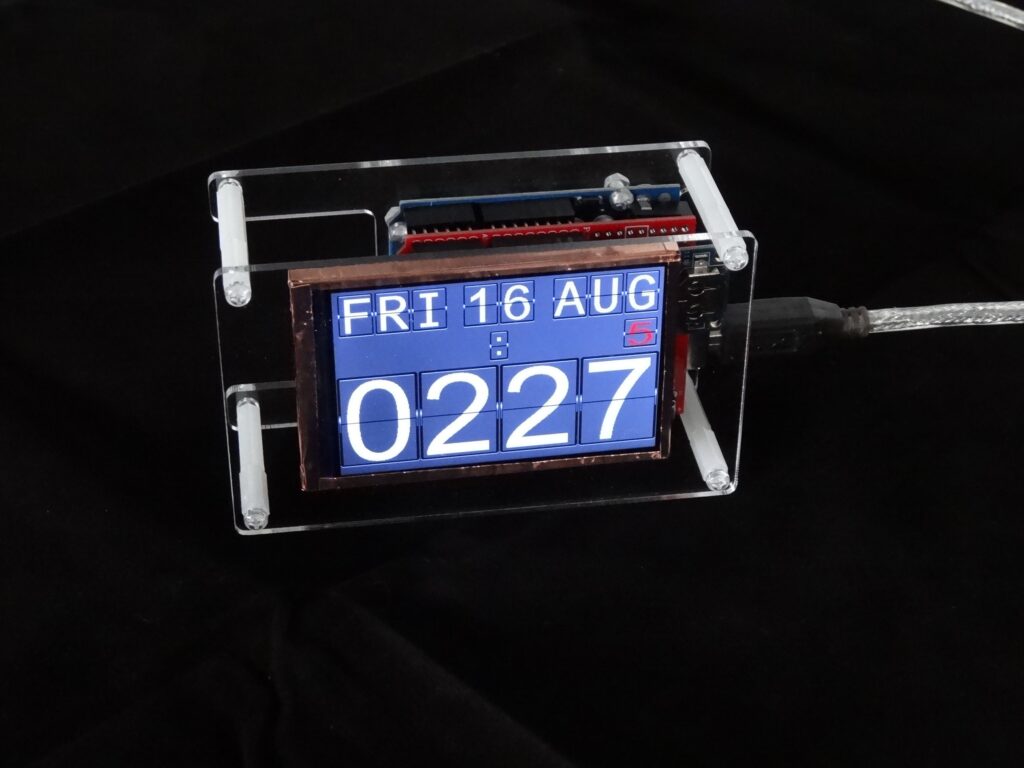
Although flip clocks may be extremely interesting electromechanical devices, with rolling flaps to show what time it is, they’re also fairly complicated if you want to build one yourself. Mark Wilson, however, took a different approach with his project, simulating the output on a 320×240 LCD display.
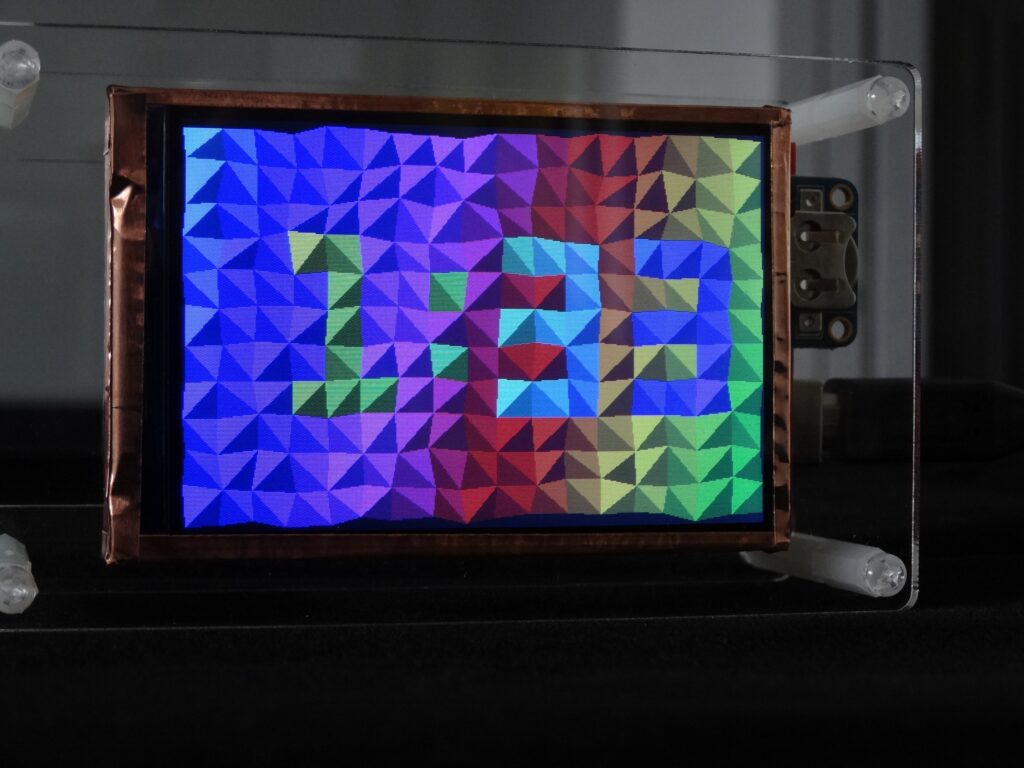
The clock is powered by an Arduino Uno and a DS3231 RTC module, allowing it to show the time, date, a blinking colon, and even the days until the trash/recycling needs to be put out. Alternate screens are available as well, including a Pong clock, triangle clock, and cube clock, which can be individually selected or set to randomly cycle if you so desire.
For its housing, Wilson chose a minimal acrylic/standoff design that seems to suit it well, and you can see it in action in the short demo clip below.
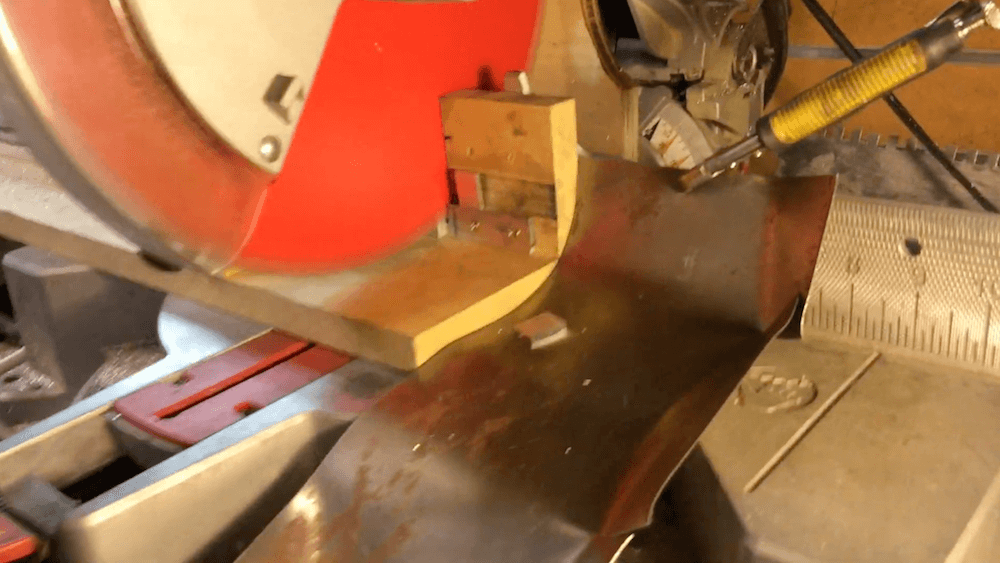
YouTuber “Absorber Of Light” needed to cut thousands of tiny aluminum pieces with a chop saw, and after paying someone to do this for him, decided to instead automate the process.
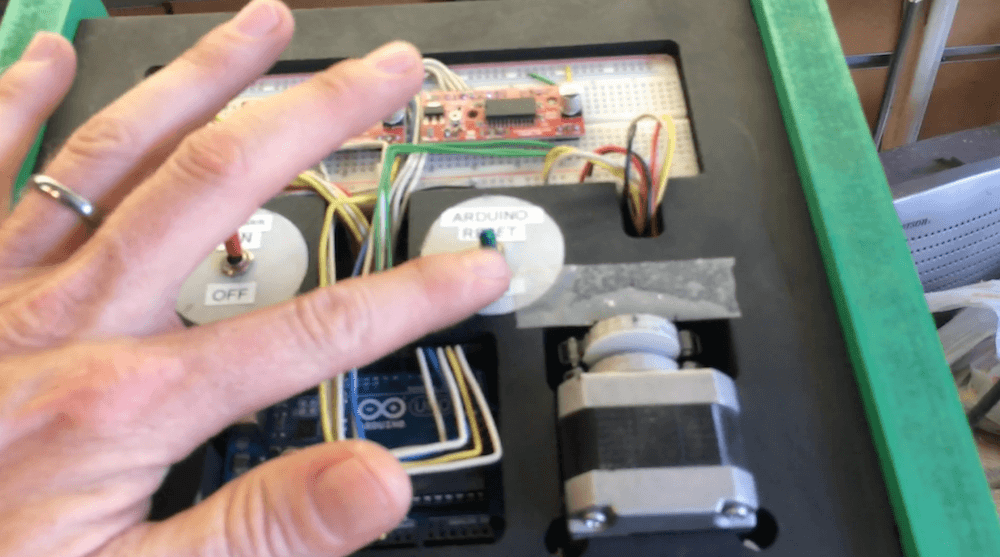
His system is controlled by an Arduino Uno, and moves strips of aluminum under the saw using stepper motor and threaded rod assembly—a sort of very simple CNC. Once in position, a second stepper activates a linear actuator via a physical H-bridge relay setup with cams and microswitches. This actuator pushes the saw into the aluminum strip, cutting it to an impressive ±.002 in, or ~.05 mm tolerance.
You can see it in action in the video below and find the project’s code in the description.
Cutting thousands of these small pieces of aluminum with the help of an Arduino and a couple of stepper motors. They will eventually become brackets to fasten computer monitors to metal enclosures.
The brackets measure .750″ x .547″ x .125″, tolerance is quite decent at + or – .002″ I tried to keep the code as simple as possible because I’m not much of a programmer and didn’t want to spend too much time on it. The loop is triggered by the Arduino reset button. The linear actuator is controlled by an H-bridge with 4 simple switches activated by one of the steppers.
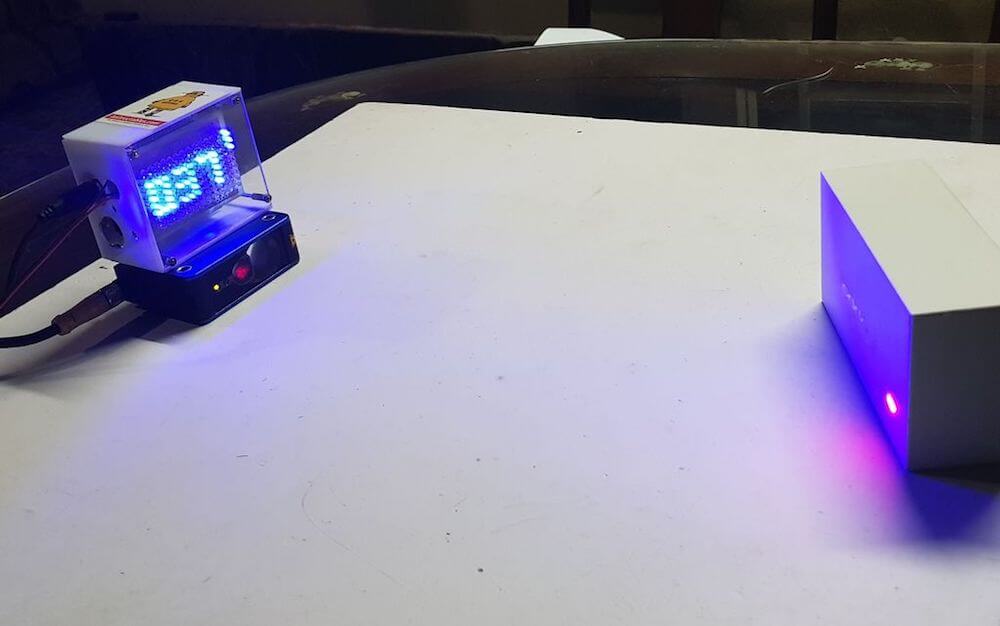
After obtaining an industrial distance sensor, TUENHIDIY decided to use it as the basis for an interesting visual indicator.
The device communicates with an Arduino Uno via an RS-485 module, and outputs distance values in the form of a 9 x 14 pixel display made out of discreet LEDs soldered onto an LoL Shield.
As shown in the video be low, it does a good job of sensing how far an object is from it on a table, and the 126 LEDs provide a nice brilliant display.
Code for the build can be found on GitHub if you’d like to make something similar. Seeing as though the sensor used here will set you back close to $1,000, you may want to also consider alternatives like an HC-SR04 ultrasonic module instead!