Posts with «uno» label

Create the ultimate Christmas jumper with Arduino

We’ve seen plenty of Arduino-equipped holiday sweaters over the years, but none as teched-out as this one. Last Christmas, UK-based Makerspace fizzPOP and electronics retailer Maplin teamed up to create quite the fun and festive jumper.

The aptly named “Ultimate Christmas Jumper” features an Uno, a Mega, an Adafruit FLORA, four 8×8 LED panels, some NeoPixels, a portable 10,000mAh power bank, as well as a pair of electret microphone amplifiers that enable it to react to sounds.

A sewn-on, 3D-printed fireplace holds the display, which as you can see in the video below, flashes a series of holiday images ranging from Santa, to Rudolph, to season’s greetings.

Want to wear one to your next party? Lucky for you, fizzPOP and Maplin have put together a video tutorial to help get you started!

Stage Bench is an Arduino-based live controller table

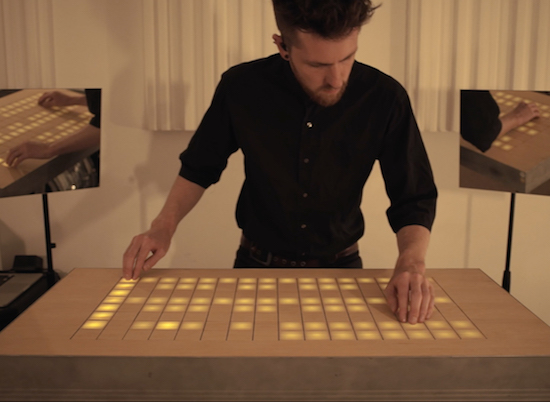
Manuel Lukas, a student at the University of Applied Science Mainz, and Sascha Lukas, a student at Cologne University of Music, together make up the German pop band Wyoming. As part of an interdisciplinary project, the duo decided to combine their love for both design and music into one live MIDI controller that’s bigger than commonly available commercial devices, but due to its size, more comprehensible for the audience.

The result? A DJ table, dubbed “Stage Bench,” that doubles as an instrument.

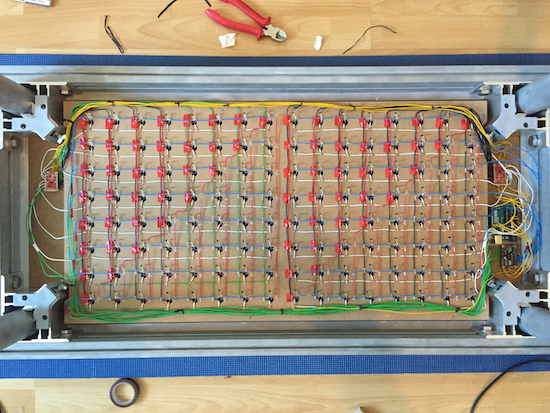
Stage Bench is based on an Arduino Uno which interacts with two matrices, a 128-LED matrix and a 128-button matrix, via a pair of shields. The connection to the computer is managed by serial communication and corresponds with a self-programmed patch in Max/MSP, which also sends MIDI data to any preferred DAW to play instruments or samplers.

Check out Stage Bench in Wyoming’s music video below!

Build an Arduino-powered, voice-activated clock

Using the MOVI voice recognizer and synthesizer Arduino shield, this DIY clock can respond to your querries.

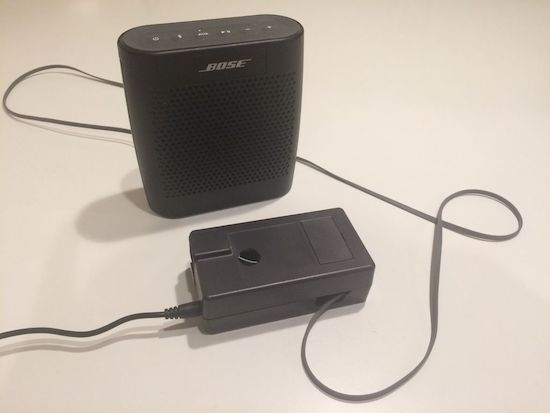
We’re all familiar with the various brands of voice assistants, but most of them require Internet access in order to do anything useful. This project, however, employs the MOVI shield by itself to respond to a user’s request for the time or date, and can even set a timer or initiate a countdown. The clock replies back in a nice robotic tone with the piece of information the user was asking for.

The voice-activated clock also features an Arduino Uno, an RTC module, a speaker that plugs into the MOVI’s headphone jack, and a power supply. Although an interesting build as is, much more functionality could be added to the system, allowing for a custom device to suit your needs!

You can learn more about the project on its page here!

Make Etch A Sketch doodles on a VGA screen

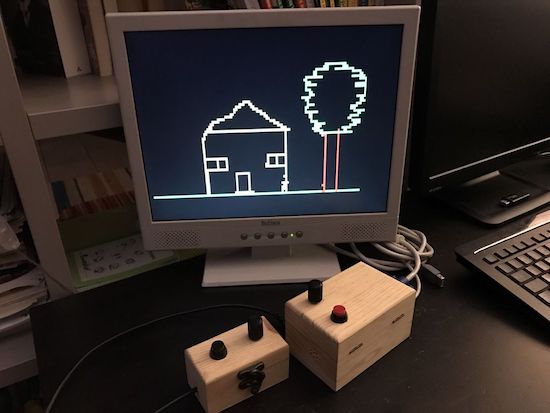
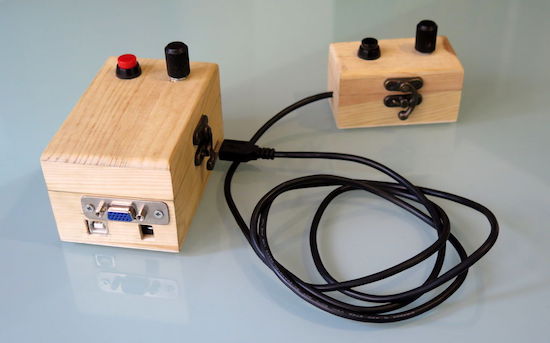
After building a Pong game using an Arduino Uno and a VGA monitor, Rob Cai realized this same setup could be used to make Etch A Sketch-style drawings.

Control is surprisingly “Pong-compatible” with two boxes, each with a potentiometer and a button. One knob moves the cursor horizontally and the other vertically. Unlike an actual Etch A Sketch from your childhood, one button chooses the line color, while the other resets the screen (instead of shaking).

His system takes advantage of Sandro Maffiodo’s VGAx library, meaning it doesn’t need much more than a sacrificial VGA cable to draw a low-resolution picture on the display.

You can check out Cai’s Etch A Sketch on Instructables, where you’ll also find the project in its Pong form.

An Arduino round word clock

After considering building a square word clock, Maker Roald Hendriks and his sister came up with something a bit more unique!

Clocks, being decorative, useful and easily hackable, have been targets for creative types, likely from when they were first invented. You’d think maybe all ideas for new clocks have been exhausted. Fortunately, human ingenuity never seems to run dry, and this latest device tells time using Arduino Uno-controlled LEDs.

Outer numbers on the modified IKEA PUGG wall clock illuminate to indicate the hour, while words on the inside represent the minutes. These minutes are literally spelled out in Dutch phrases reveal the particular time, but if you don’t speak the language, the position of the LEDs should give you some clue as to what is going on.

You can read more about the project on its website, and watch a demo below!

Adding an “extra sense” with rangefinders

Using ultrasonic sensors attached to a person’s arm, researchers have found a way to let you “feel” distant objects.

The concept of this project is surprisingly simple, but as shown in the test video below, seems to work quite well. Using an Arduino Uno to coordinate everything, when rangefinders see a nearby object, like a wall, the system triggers the corresponding vibrators. This allows someone to sense what is nearby without seeing or touching it.

An obvious use case for something like this would be to help visually-impaired people navigate. Perhaps it could also serve in an application where you need to pay attention to something you can’t quite see, sort of like how an animal’s whiskers warn them of danger before contact is made.

The idea is to have a set of rangefinders in armbands that point outwards around your body. Each armband also has vibrators in that vibrate against your skin at an increasing frequency as the range from each sensor gets smaller. The left armband covers your left-side surroundings, and the right your right-side.

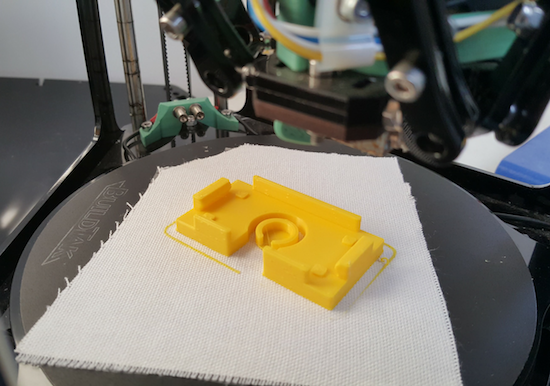
You can see more details on this sensor assembly on RepRap Ltd’s page, including how its case was printed directly on fabric!

This wireless game controller looks like a rug

Cut in the shape of a gamepad, this controller sits on the floor for kids to enjoy!

Maker Jegatheesan Soundarapandian had gotten bored with computer games, and decided he, or rather his daughter, needed a new way to interact with the PC. What he came up with was a controller covered in cloth, with switches embedded between this covering and a wooden base.

Switches were made out of CDs and aluminum foil, which could be a good technique for others experimenting with unique interface devices. Control is accomplished with an Arduino Uno that communicates with a PC via a Bluetooth module.

Ready to play games and run apps by foot? Check out the project’s page on Instructables!

This Arduino machine will judge how sick your ollies are

In skateboarding, the ollie is a fundamental trick used to leap onto, over or off obstacles, or over gaps of unfriendly terrain such as grass or stairs. But how do you know just how sick your ollie actually was? Josh Sheldon has a solution.

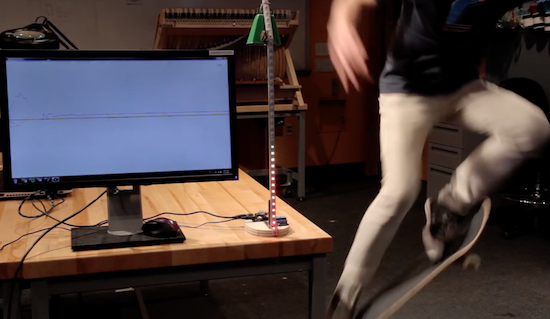
The Maker has built a device that judges the sickness of your ollie and visualizes your score, rewarding the best ones with the chiming of a cowbell. Sheldon describes the project as something “like one of those hammer games at carnivals, but instead of trying to hit that thing with a hammer as hard as you can, the goal is to land the sickest ollie.”

The aptly named Sick Ollie Machine consists of two parts: a stand with LEDs and the skateboard itself. Underneath the board is an Arduino Uno, a 9V battery, and an accelerometer. The stand is equipped with another Arduino, a relay, and an RGB LED strip that goes up mast, as well as a solenoid on top. When the relay closes, the solenoid hits the bell. Both units also contain a wireless transmitter, allowing them to communicate with one another.

Watch Sheldon discuss his project in more detail below!


An Arduino tachometer for your older vehicle

Unlike most cars today, deepsyx’s old Opel Astra did not have a tachometer. So what’s a Maker to do? Build your own, of course.

To accomplish this, deepsyx used an Arduino Uno along with a few LEDs. The first LED turns on at 4000 RPM, while the others light up with every 500 RPM increment. At 5800 RPM, however, all the LEDs flash as a warning. There’s even a serial output of the RPM value, so logging real-time data can be a possible enhancement down the road.

I started by cutting a 5cm x 1.5cm piece of an old credit cart, drilled 4 holes in it, painted it black and glued 4 LED diodes to it. Then I soldered 220ohm resistors to each positive LED pin and used a common ground. I connected them to an Arduino via 5 x 30cm jumpers and hid the Arduino in a hole under the wheel. I connected the Arduino data pin via voltage divider to the signal pin of the coil and used an old phone charger to power the Arduino. In order to work, I shared the phone charger and Arduino’s grounds.

Intrigued? You can read more about this project on deepsyx’sGitHub page and over on Hackaday.


Building a “laser sky” effect generator with Arduino

Bouncing a laser off of a spinning mirror creates an amazing effect with smoke and fog, but YouTuber “Normal Universe” made it even better with an Arduino.

This video starts out by introducing the concept of “laser sky,” which seems like a fun idea. There is, however, a chance that the mirrors wouldn’t spin, potentially pointing a laser continuously at a bystander, possibly damaging his or her eyes. To prevent this, the YouTuber added a photoresistor and LED to sense the spinning mirrors, then programmed an Arduino Uno to cut off the laser if it’s stopped for whatever reason.

Normal Universe goes on to explain the electronic concept behind it as well as the Arduino code involved, so even if this effect isn’t your cup of tea, the photoresistor/voltage divider setup could still be quite useful.

You can find a detailed breakdown of the project in the video below!