Posts with «uno» label

Control a tracked robot with your mind (or joystick)

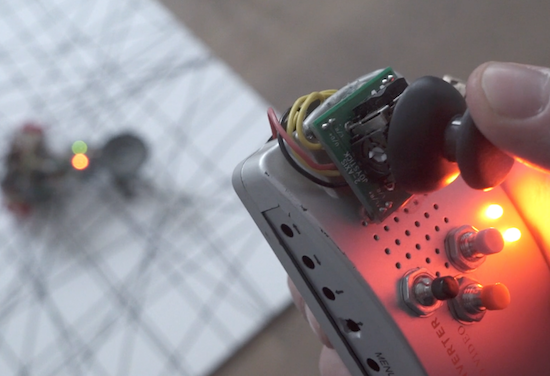
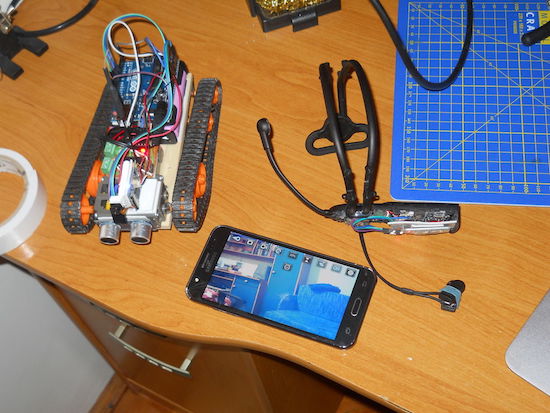
Whether you choose to control this vehicle with your mind or a joystick, the camera mounted on it will give you a new view of the world.

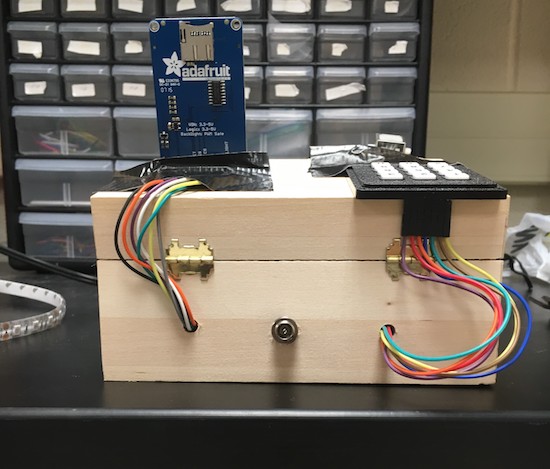
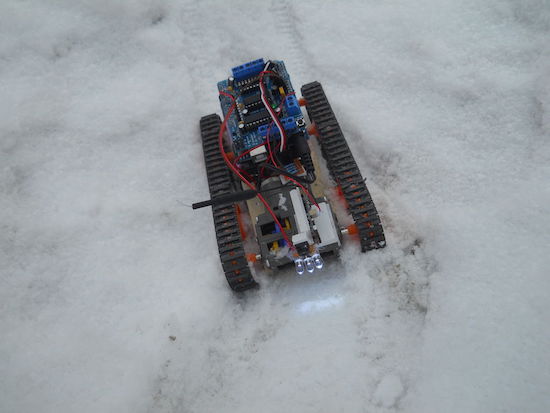
Maker “Imetomi” was inspired to create a tracked robot after he was able to salvage a camera off of a cheap drone. This became the basis of his FPV setup, which he fitted onto a little tracked vehicle. Although this would have been enough for most people, in addition to building a joystick-based controller, he also made it work with a brainwave headset.

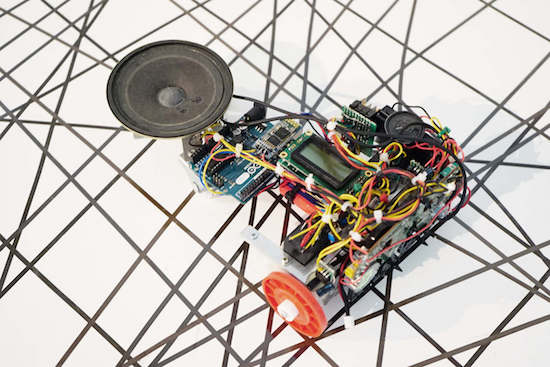
Imetomi now has something that he can drive around virtually, spying on passersby, as long as it stays within the VR transmitter’s 50-meter range. Be sure to check out the video below, where the small bot shows of its impressive all-terrain capabilities, and read his Instructables write-up here.


An Arduino-powered automatic guitar footswitch

If remembering to hit your foot pedal at the right time during shows is a challenge, this device will take care of it for you.

As creator Franco Molina points out, there’s a lot to worry about when playing guitar in front of an audience. Actually playing is one thing, but you have to pay attention to the crowd, move around on stage, make sure you don’t have any wardrobe malfunctions, and… hit a footswitch to change between clean and distorted channels when appropriate.

Molina’s device may not be able to help you with everything on that list, but by listing to a specially encoded ‘click track’ from a computer or MP3 player, it can automatically switch amplifier modes when appropriate. It does this by using an Arduino Uno along with an amp to listen to the track, then switch a relay to simulate a footswitch.

If you’d like to build your own, check out Molina’s Instructables project page!

Scare away unwanted guests with an eye-moving portrait

There are certainly many ways to generate an old-looking portrait with moving eyes, but this method from Sonic Robots is simple and seems quite effective. The basic formula is to buy a Victorian-like frame, get a picture of a loved/hated/random person (preferably tweaked to resemble an antique oil painting), then put a strip of paper with eyes printed on it behind the person’s eye sockets.

This eyeball strip is pulled by a servo via a fishing line, and importantly, a rubber band keeps tension on it from the other side. This allows it to quickly snap back into place, creating an effect where the eyes randomly move then stay in place for a while, hopefully causing someone to question his or her sanity.

Since everything is Arduino Uno-based, this could be expanded to include sensors for eye control, or even lighting effects as desired.

You can find more details on the project on SonicRobots.com and its code on GitHub.

Cozy Coupe toy car retrofitted with Arduino

Using an Arduino Uno along with an Adafruit Wave Shield, Brent Chapman added more features to the Little Tikes Cozy Coupe including a push-to-start ignition and a sound system.

Although Chapman notes that the Coupe comes with some onboard entertainment options, he thought “his client” deserved something a bit more high-tech. This meant that he retrofitted the classic toy with several pushbuttons that allow him to select a fun song to play and replaced the key with a giant arcade button. He also 3D-printed a replacement hood for the car to cover the electronics, since the original was modified to fit them inside.

Per the second video on the project’s page, his little client seems to be hesitant at first, but eventually starts happily car-dancing along to Mickey Mouse Clubhouse’s  “Hot Dog Dance” tune that parents will probably be familiar with.

You can see the entire build, including videos and code, here or follow Chapman on Twitter to see what he’s up to next!

The Cozy Coupe gets a much needed upgrade thanks to @arduino and the wave shield from @adafruithttps://t.co/9Y4UE5Z4Vu #ArduinoMonday pic.twitter.com/U1xWwQF9Bx

— Brent Chapman (@brentmore) January 9, 2017

Arduino car alarm honks for help!

Sure, if you’re going to get a new ride, a model from the twenty-teens would be nice, but for hacking purposes, the simplicity of an older cars makes modification fairly simple. It also makes hot-wiring easy, and as they don’t generally have an alarm system, these vehicles are often targets for theft.

After his friend’s VW Beetle was stolen, Instructables user Ben Schroeder (aka “Pantopush”) decided that he needed to protect his 1966 Bug. So, as any Maker would do, he took matters into his own hands with a GPS-enabled Arduino Uno in a locked glove compartment.

Now, unless the unit is turned off, if it detects that the car is moving, it uses a relay to switch the horn on. Simple, effective (hopefully), and could be expanded to flash the lights or even text the owner with the location of the car.

Need a low-cost anti-theft system of your own? You can find the full writeup on Schroeder’s project page.

Measure a magnet’s strength with this DIY Gauss Meter

You may know that a neodymium magnet is more powerful than something you usually find on a refrigerator, but by how much?

Most people, even those willing to harvest magnets from disk drives, accept that some magnets are stronger than others. This, however, wasn’t quite good enough for Anthony Garofalo, who instead converted a prototype voltmeter he made using an Arduino Uno and a tiny OLED display into something that displays the magnetic, or Gauss level. It also shows whether it’s observing the north or south pole of the magnet, which certainly could be useful in some situations.

Though full documentation isn’t available right now, Garofalo says that he’ll make it available once he repackages everything in a smaller format with an enclosure. If you’d like to see more of his work, including the voltmeter he based this off of, be sure to check out his Instructables page and some other neat stuff on his YouTube channel!

Hack your Teddy Ruxpin with Alexa, Arduino and Raspberry Pi

If you had a Teddy Ruxpin in the ’80s and ’90s, you probably remember inserting special tapes and hearing him read stories to you. Whether you loved or hated the little bear, it was hard to forget his weirdly moving mouth and eyes. Today though, with small and cheap development boards readily available, this mechanical system is just begging for a retrofit.

In this project, hacker “Tinkernut” employed an Arduino to sense the intensity of a sound input, and in turn used it to allow Ruxpin to lip sync to any audio source. This could be a song, story, or even output from a virtual assistant.

He chose the latter option, and after installing Alexa on a Raspberry Pi, used the two boards in tandem to control the retro toy. With this setup, he can ask it such questions as “how tall is the empire state building?” and have it answer back with audio and a semi-synced bear mouth.

Have an old Ruxpin lying around? Give new life to it by following Tinkernut’s instructions here.

A four-factor lockbox

If you really don’t want someone messing with your valuables, a programmable box may be just what you need!

Locking mechanisms generally work using one method—a key, for example—to keep them secure, or perhaps two in certain circumstances. This box, designed as a final project for an electrical and computer engineering class at Cornell, instead makes the user go through four steps to get to the “treasures” inside.

Once the user has input the correct code, set potentiometers to the correct position, knocked on the box in the correct sequence, and finally scanned his or her fingerprint, a solenoid unlatches the box’s. It seems like a great project for an ECE class. On the other hand, the unit is wooden, so if you did forget the authentication procedure, it wouldn’t be too hard to manufacture a literal back door!

A cool idea nevertheless, and certainly something that could help protect your snacks or other items from a sneaky roommate. You can see more about this lockbox on the Cornell-hosted project page.

Dad builds an Arduino Hot Wheels drag strip for son

If you want to eliminate arguments about which toy car is fastest, we’ve got just the project for you.

When one’s kid has a birthday, most people go to the store and buy a gift. Phil Tucker instead decided to build something unique for his two-year-old, an automated Hot Wheels drag strip with an electronic start gate and timer. Like many other gravity race setups, when released, the cars roll to the bottom of a slope.

Tucker’s design, however, releases the cars automatically using a servo and hinge at the press of a button. It then detects the winner using infrared LEDs and light dependent resistors, displaying the results on a miniature marquee. The entire system is controlled by an Arduino Uno.

You can find more on this DIY drag strip here, and see it in action below!

This robot is a cool new way to use cassette tapes!

Though tape players persisted in vehicles for much longer than needed, cassettes are pretty much an obsolete format. That doesn’t mean they can’t be useful, as this project by Moscow-based media artist ::vtol:: shows.

His interactive robot, dubbed “pzr-10,” traverses a canvas littered with unwound tape, while two heads read the data off of it. Using an Arduino Uno, this data is then transmitted to the built-in loudspeaker and played aloud. Audio can be looped and processed in various ways, giving the user a unique audio experience!

A customized remote operates the robot. The controller is equipped with an Arduino Nano and a joystick that guides pzr-10, while buttons manipulate the sound.

You can read more about the robotic installation on ::vtol::’s page.


Arduino Blog 16 Dec 22:14