Posts with «uno» label

Dual Arduinos bring this Tauren cosplay to life

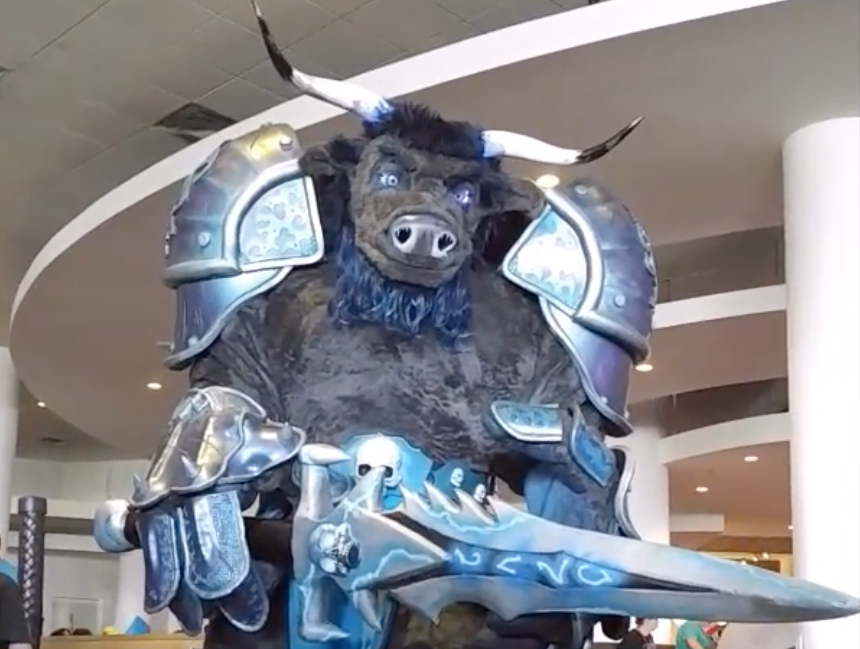
It takes a lot to win best of show at a Comic Con, but Jason Caulfield’s Tauren Frost Death Knight named “Akulva” was more than up to the task. This beautifully detailed beast, his third try at this sort of costume, not only looks good but features backlit eyes that blink automatically, as well as a voice-changing circuit to allow Caulfield to speak in this creature’s deep tone.

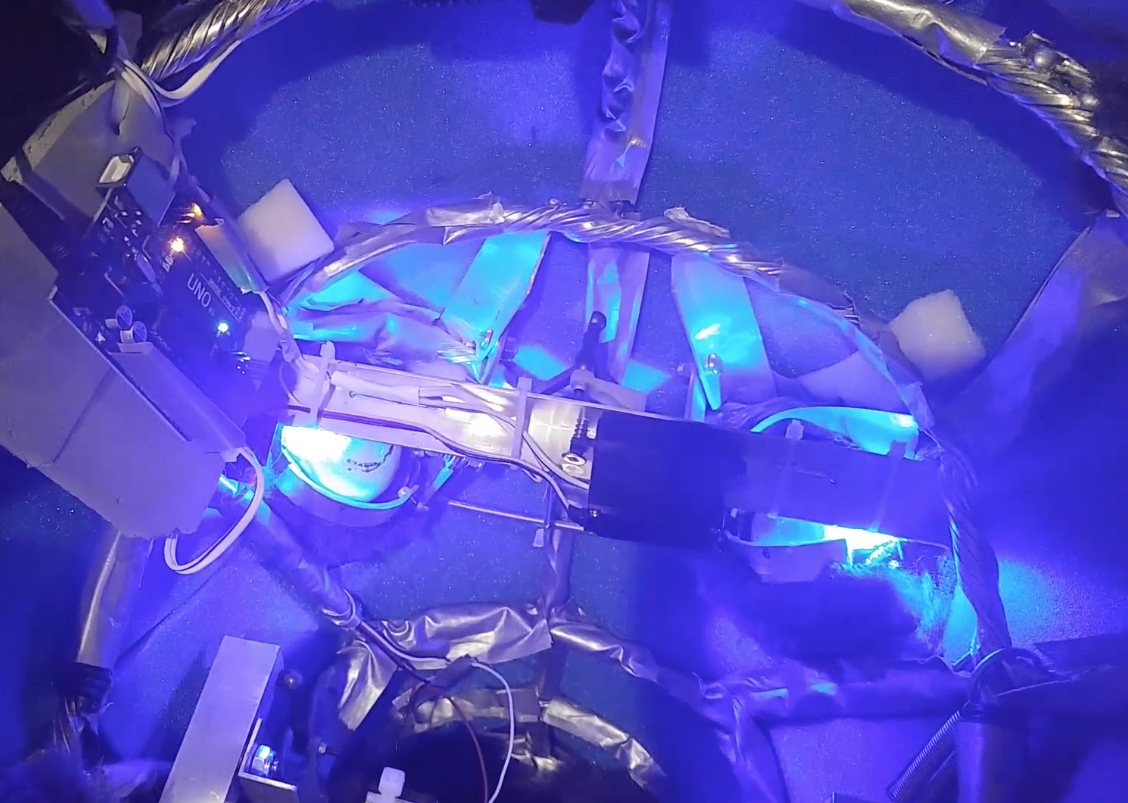
The 8.5-foot-tall beast is equipped with a pair of Arduino Uno boards–one to control the eye blinking and another that uses an Adafruit Wave Shield to handle voice modulation. In addition, there’s a PicoTalk servo controller, which syncs the audio to the motor movement of the mouth.

Check out the videos below for more on this impressive cosplay build!

Portal fan recreates a sentry turret using an Arduino

Steven Gioiosa recently signed up for a “Makecourse” class at the University of South Florida, where he was required to build something that featured both an Arduino and a 3D-printed part. As a fan of Portal, and especially the sentry turrets in the game, it was an easy decision to construct one of these devices for himself.

Gioiosa’s turret recreation is based on an Arduino Uno connected to an HC-SR04 ultrasonic sensor, and features motion-activated lasers that move back and forth, along with audio feedback, depending on how far away the human target is. The project also involves a bunch of servos: one to open the arms out, another to pitch them up and down, and two more to move each arm left and right.

You can see Gioiosa’s sentry turret in action below, and find more details on his Instructables write-up here.

ExoArm: An Arduino-powered assistive exoskeleton arm

Whether to enhance one’s abilities or to compensate for a loss of strength due to a variety of reasons, the idea of a robotic exoskeleton is an exciting prospect. As seen here, Kristjan Berce, not content to let well-funded labs have all the fun, decided to make his own prototype assistive arm using simple hand tools to manufacture a bracing system over his left arm.

Control for the device, which is called “ExoArm,” is accomplished with an Arduino Uno that powers a windshield wiper motor via a driver board. As set up now, it extends via sensor input, and contracts with the push of a button.

Though it can be seen helping him lift a bicycle at the end of both of his videos, figuring out how to balance any load on the system with his actual muscle’s input is a challenge he’s still working on, but hopes to solve this issue using a strain gauge.

Total cost of ExoArm? $100. You can follow along with Berce’s progress on the project’s log here.

An Arduino-based doorbell/messaging system for your lab

If you work in a lab, the last thing you want is someone barging in when you’re about to complete your latest experiment or build, disturbing all of your hard work. You could use a paper note, or perhaps lock the doors, but if you’d like to inform potential disruptors of what you’re doing and give them a way to signal you, this system looks very useful.

The device, which is installed in a psychology lab’s door, uses an Arduino Uno to display an LED for “Experiment In Progress” or “Clear,” and has a backlit LCD screen below for more explanation. The screen’s backlight powers up via a sonar sensor if someone approaches, and messages can be updated over Bluetooth.

Finally, if you’d like to get the person inside’s attention, it even a doorbell feature that blinks a light and optionally beeps. For more info on the project, check out its creator’s Imgur set or Reddit post.

Maker builds a touchless tattoo machine switch with Arduino

You can switch a tattoo machine on and off with a foot pedal, but this can be an issue when it’s time to pack it up with other gear that needs to be kept ultra-clean. To address this problem, YouTuber “Wildman Tech” made an Arduino-powered device in the shape of a beautiful wooden pyramid to control a tattoo gun with the wave of one’s hand.

Electronics-wise, the setup is fairly simple. An Arduino Uno detects the tattoo artist’s gestures via a distance sensor, and signals the machine with an on or off output.

This project uses an Arduino Uno, a distance sensor module, and an FET driver transistor module. They both take their power from the Arduino main board. The distance sensor output is fed into pin 2 on the Arduino and the FET driver input is taken from pin 9.

You can see more of Wildman Tech’s touchless switch, including its code, in the video below!

A fidget spinning robot!

Fidget spinners are currently very popular, and if you get one you’ll certainly want to spin and spin, maybe thinking you’ll never put it down. Unfortunately, like Nikodem Bartnik, you’ll eventually get bored with this device. Perhaps setting it aside forever. However, as Bartnik puts it, “Spinner has to be spinned,” so he came up with a robotic device to do this for him.

The resulting robot consists of two small servos, along with two 3D-printed linkages, attached to a piece of wood. A spinner is also affixed to the same piece of wood with a bolt, which is spun by the servos under Arduino Uno control.

Check out Bartnik’s Instructables write-up to see how it was done, along with the code and STL files needed to create your own!

Experience the Internet through a modified rotary phone

A winner in this year’s Core77 Design Awards, the “Internet Phone” allows one to access websites with the nostalgic interface of a rotary phone.

In order to “get to” a certain page, one must look up a website’s IP address in a physical phonebook Internet directory and dial the necessary digits using the rotary. It then reads the website to the user via one of four different token-selected modes, including an “incognito” setting, which reads the site in a sort of computerized whisper.

The phone uses an Arduino for control, and was developed as part of a physical computer course taught by Dario Buzzini, Ankitt Modi, and… none other than Massimo Banzi. The device was put on display at the Copenhagen Institute of Interaction Design and the Langelinie Harbor, also in Copenhagen to amused and astonished responses.

Each step in the user experience is comparable to the process that a browser takes when retrieving a website. Looking up the IP addresses in a phone book is similar to how a browser gets an IP address from DNS (Domain Name System) directories. Dialing the twelve digits and waiting for the phone to retrieve the HTML content mimic how a browser requests data from servers. The voice-to-speech reading of the website is comparable to how a browser translates HTML and CSS code into human understandable content.

You can read more about this project, which “leverages existing telephone behaviors to demystify the invisible workings of the Internet,” on Core77 here.

Grandfather builds a backyard railroad with Arduino

If you want to truly impress your grandkids, and perhaps entertain yourself at the same time, there are many things you could do. Building a 1/4-size railroad, however, has to be close to the top of the list. This well-constructed model was inspired by a 1965 Popular Mechanics article, and includes a beautifully-painted engine, a 275-foot-long wooden track, and an engine house for storage and maintenance.

The engine is powered by two 24V 350W DC motors, which are controlled by an onboard potentiometer or remote signal, via an Arduino Uno. As an added bonus, the tracks have a designated crossing area for his lawn mower, along with a fully functioning warning signal using ultrasonic sensors and another Arduino.

You can see more of this amazing backyard railroad on Imgur and on its project log here.

A Paris-inspired, Arduino-powered binary clock

The La Fabrique DIY team has been working on a unique clock modeled after buildings seen along the Seine River in Paris. The “City Clock” is different from the others in that instead of a dial or decimal numbers, windows light up in a binary format, displaying the time in a binary sequence.

Electronics-wise, the clock can be made with an Arduino Uno, involving a fairly simple circuit with individual LEDs and resistors, as seen on this Imgur set. Also shown there is the Kickstarter version of the circuit, which amounts to a sort of gigantic shield that an Arduino Nano is plugged into.

With the City Clock, you calculate the time by adding every digit vertically. The first floor equals one, second equals two, third equals four, and the top equals eight. Using this system, it’s possible to create every digit from zero to nine by adding one number to another.

These clocks are available in various kit forms, including just the electronics or frame if you’d like a head start crafting something truly your own!

A ‘little helper’ for cutting square tubing

YouTuber “HomoFaciens” had quite a bit of square tubing to cut for his latest CNC router. As he’s known for combining simple tools with creative uses of electronic components, he came up with a jig that helps him precisely position his cuts.

This device works using an encoder made out of paper, tape, and a nail sharpened on both ends. Two IR emitter/receiver pairs send pulses to an Arduino Uno, which displays this number on an LCD screen. The machine is calibrated by measuring a known length of tubing verses the number of pulses for an actual distance measurement. Once set up, not only can the digital ruler be used to properly cut tubing, but can be put on a drill press for accurate hole placement!

Interested in building your own ‘little helper?’ Read more about the project on HomoFaciens’ page here, and see it in action below!

Arduino Blog 27 May 21:43